阅读视图

发现新文章,点击刷新页面。
✇Tomshardware

Dell Pro 5 Webcam 2K Review: So you can look good in office

Just because you're in the office doesn't mean you might not still need to be on camera — so I guess it's not too surprising that some of the best webcams are made specifically for the office. Or that Dell is the one to make them.

Dell's new office-oriented 2K webcam, the Dell Pro 5 (WB526), is a small, lightweight webcam that records video at 2K QHD / 30fps, 1080p / 30fps, and 720p / 60 and 30fps. It sports a Sony sensor and has a 78-degree field of view, 2x digital zoom, and an autofocus lens with a maximum aperture of f/2.0. As for its "office-friendly" features, it's compatible with Windows Hello, and it has an "anti-theft interface" and comes with a lockable cable that you can attach to a loop on the non-detachable USB-C cable. It also has some intelligent features, such as smart auto-exposure, AI auto-framing, and face tracking, as well as a built-in omnidirectional microphone that doesn't sound quite as terrible as most built-in webcam mics. It's available now for $119.99, though it's currently on sale for $114.99.

Design

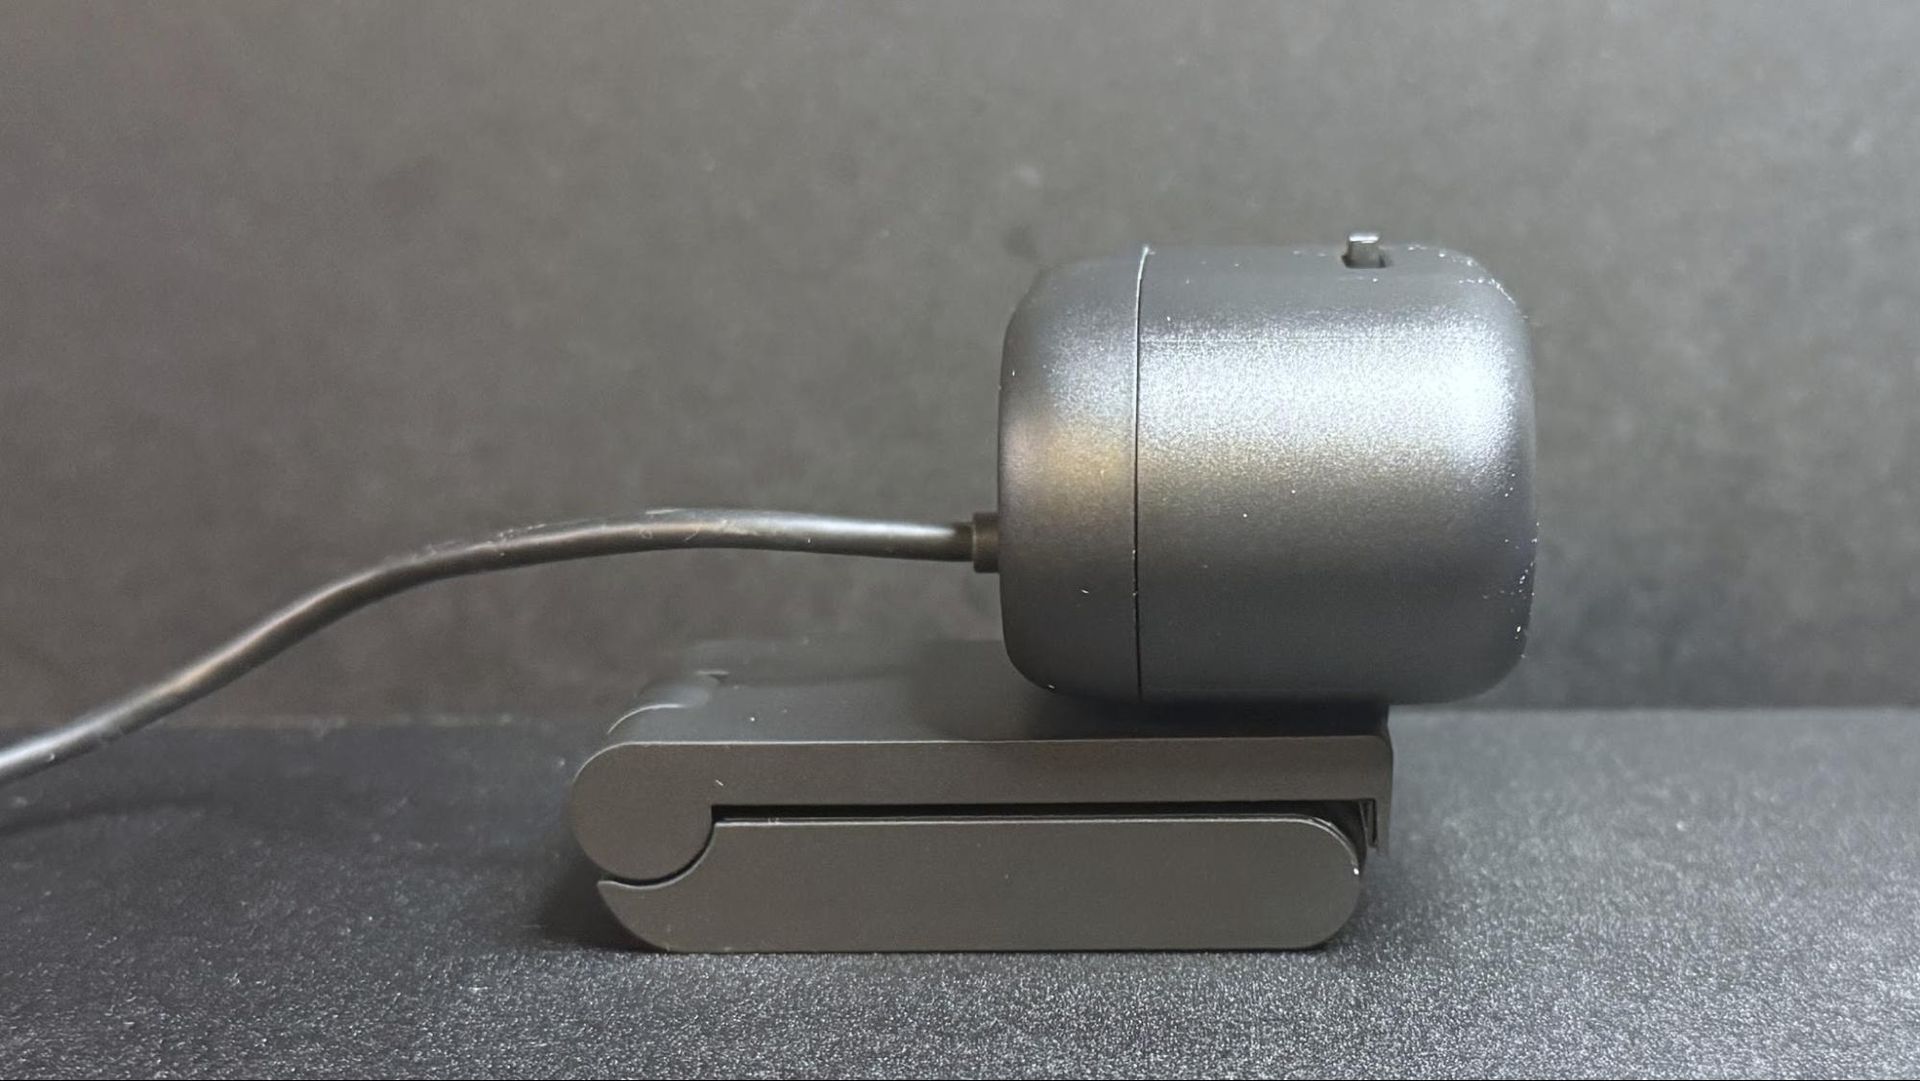
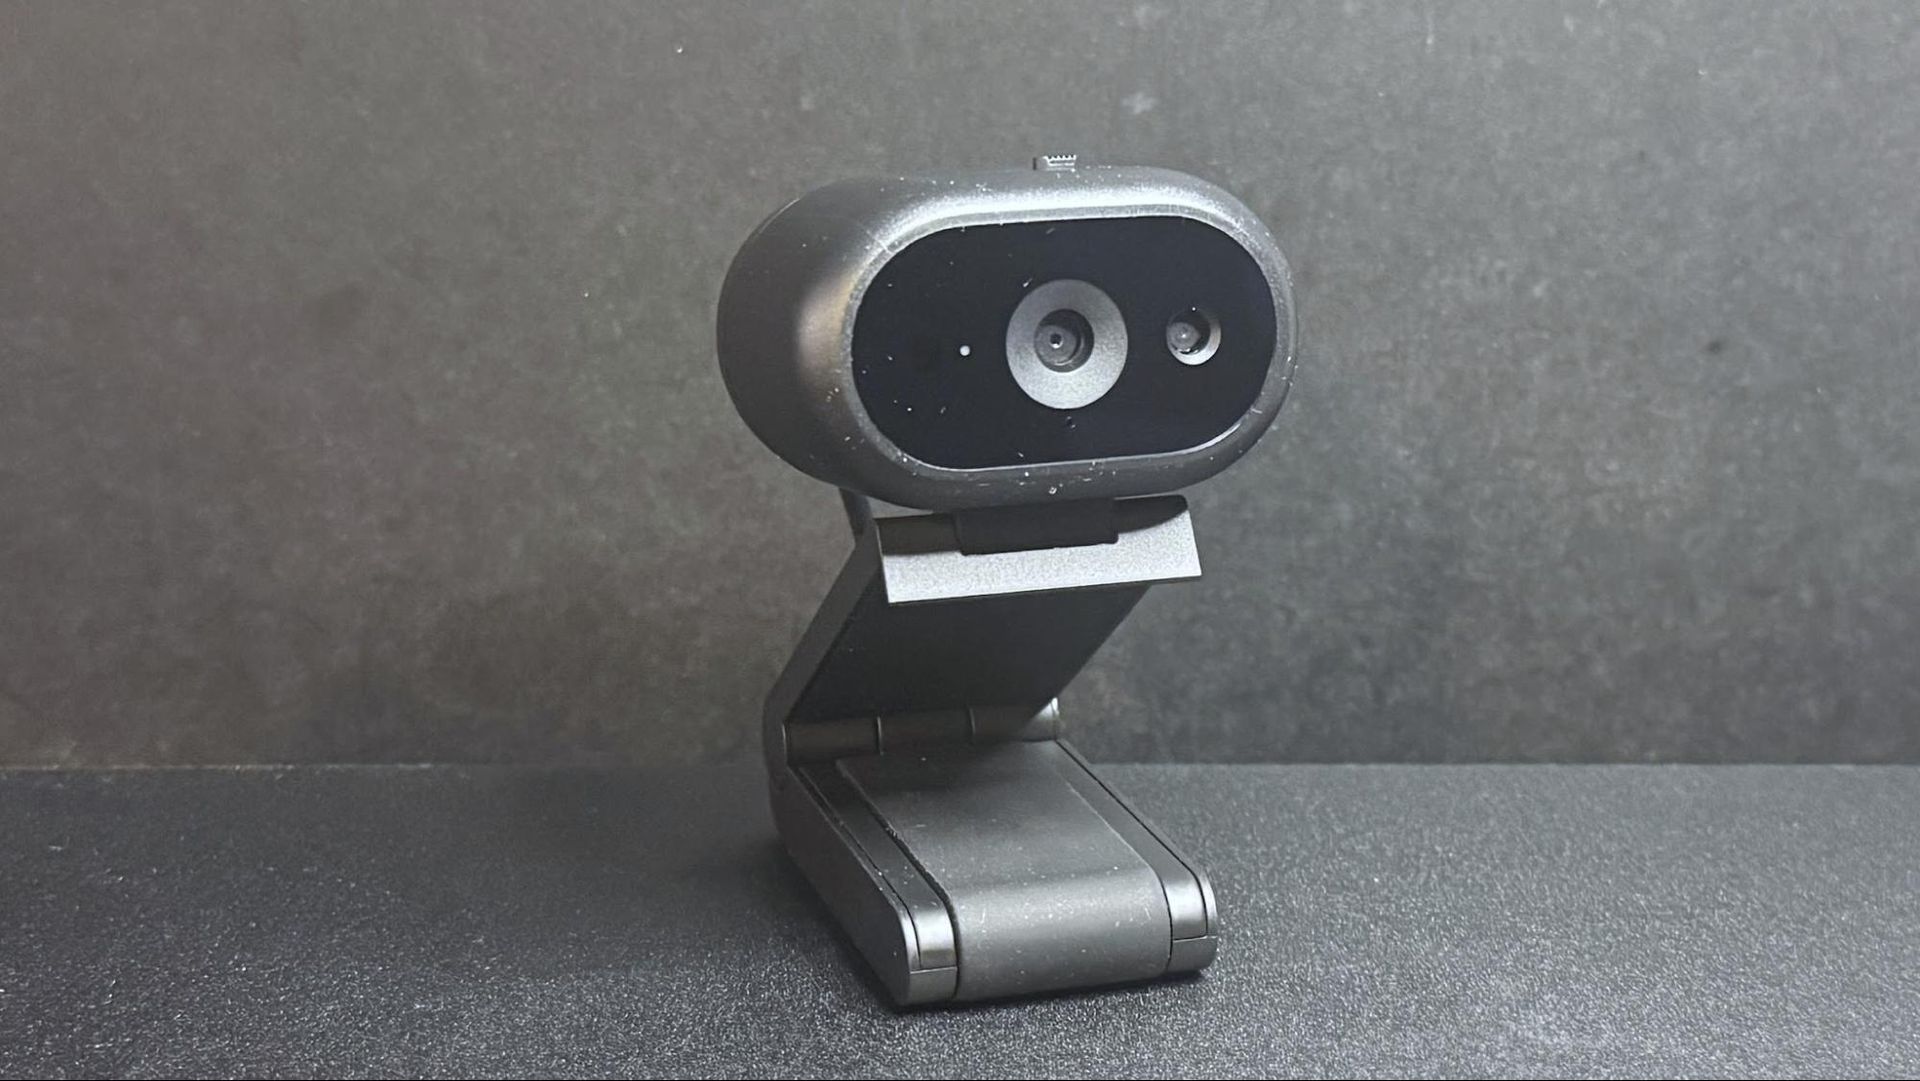
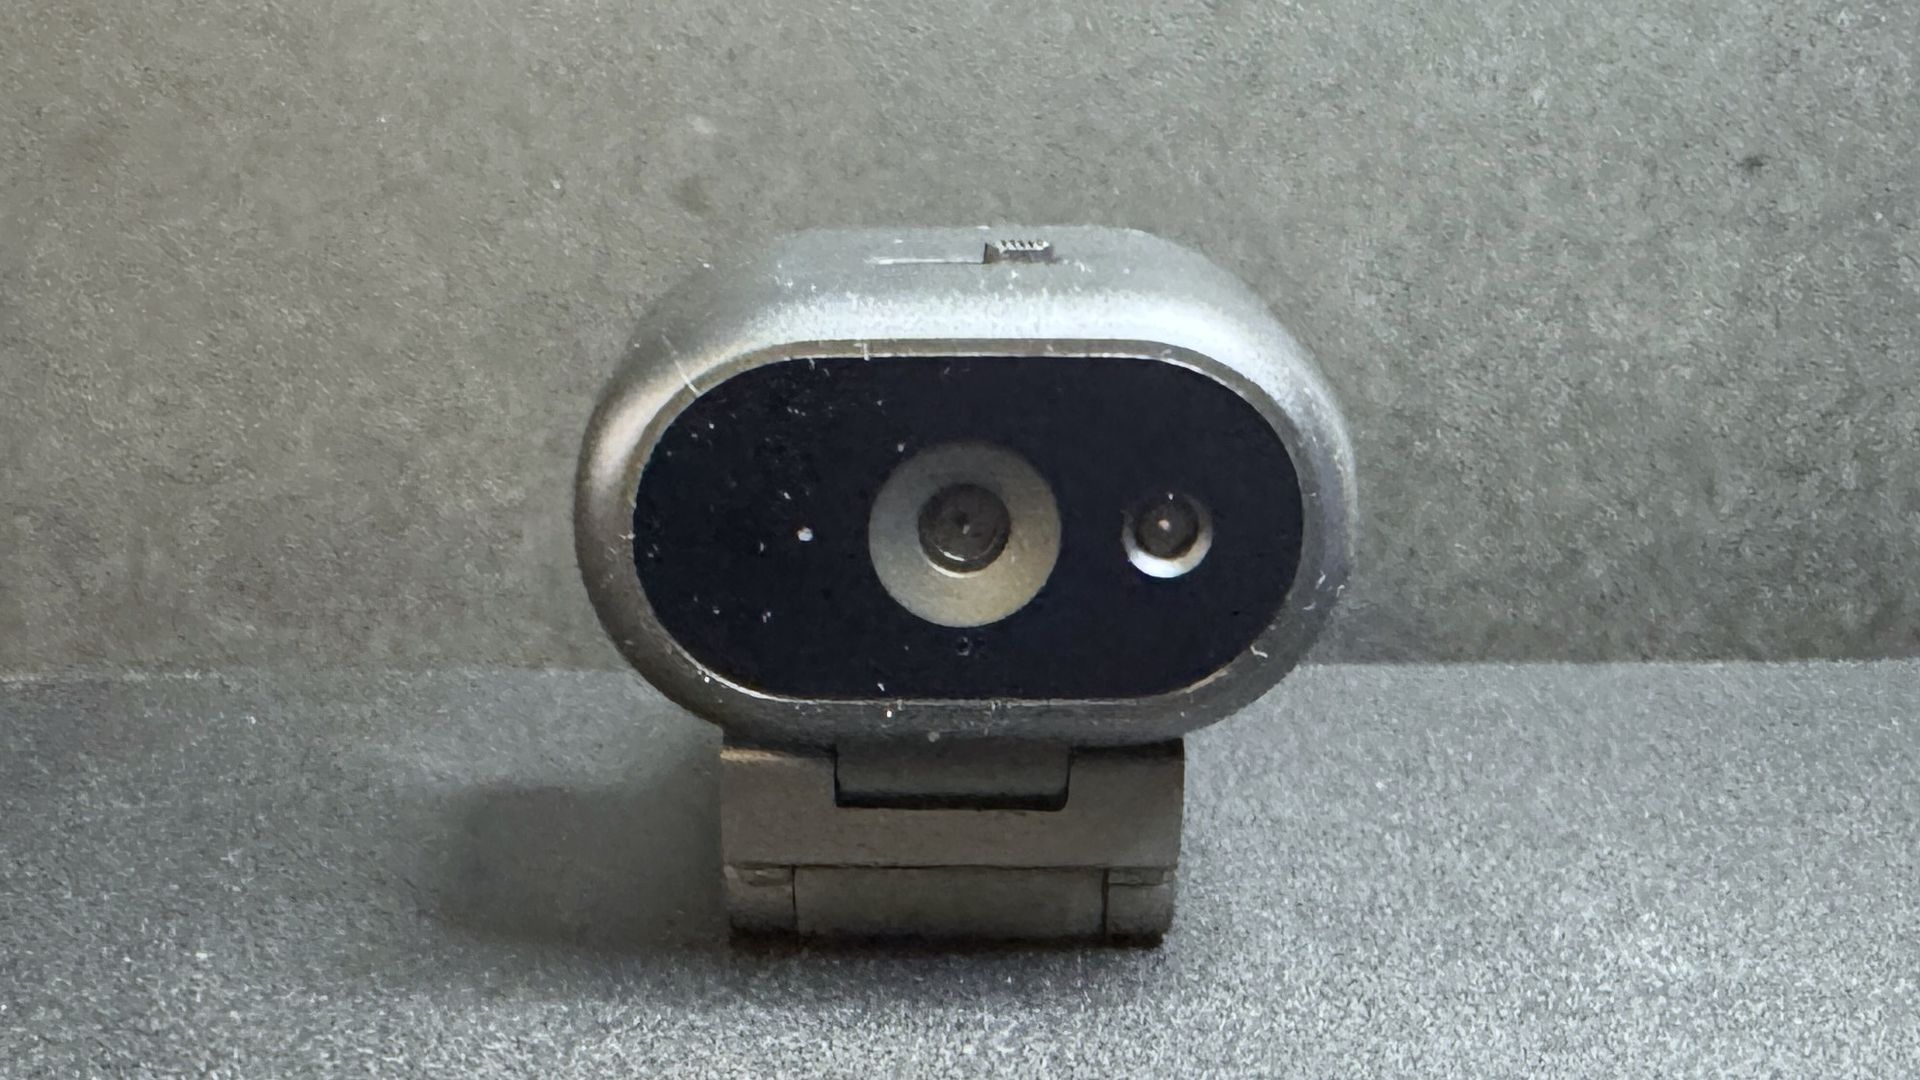
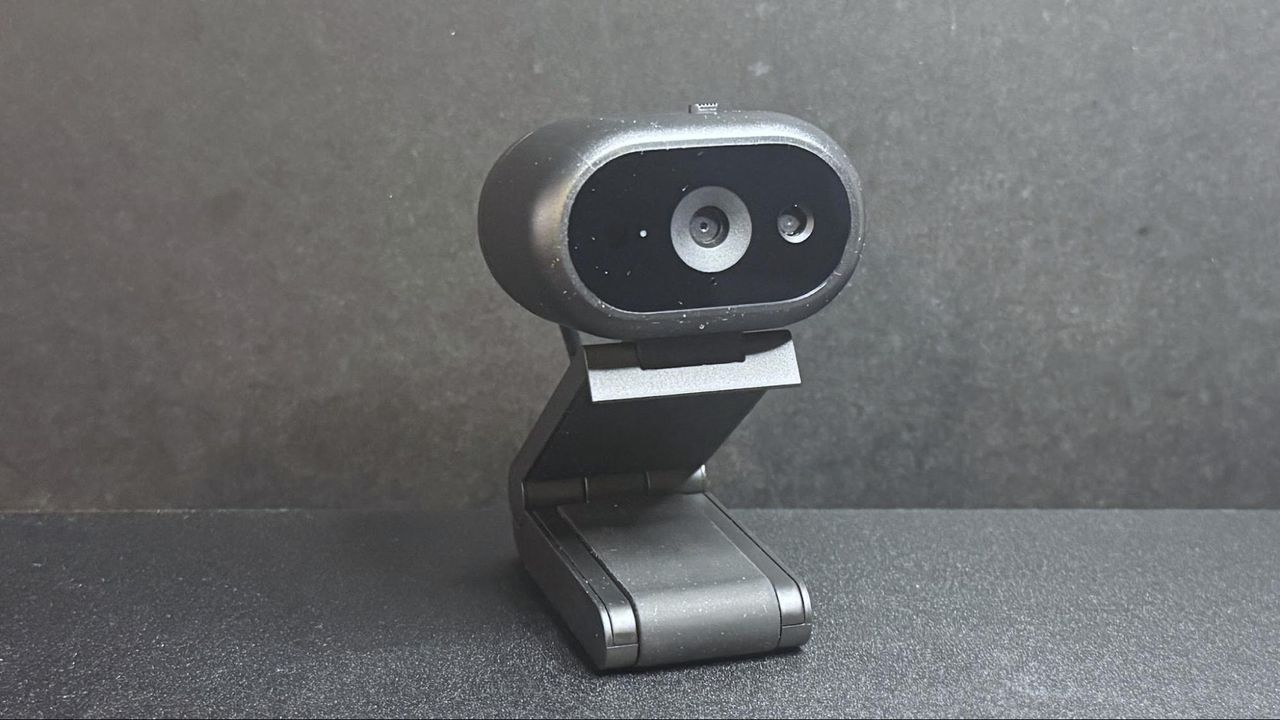
The Dell Pro 5 webcam is a small oval-shaped webcam with a non-detachable USB-C cable (which comes with a built-in USB-A adapter. It has a lightweight black plastic body, measuring about 2.28 inches (57.9mm) wide by 1.7 inches (43.18mm) deep, and is 1.4 inches (35.56mm) high. It's a fairly small webcam — not quite as small as the YoloLiv YoloCam S3, but close. It also has a physical lens shutter, which you can open and close via a small switch on top of the device. It's not the most elegantly implemented lens shutter we've ever seen, but it does the job perfectly well.
Dell Pro 5 Webcam 2K
Tom's Hardware
Dell Pro 5 Webcam 2K
Tom's Hardware
Dell Pro 5 Webcam 2K
Tom's Hardware
Dell Pro 5 Webcam 2K
Tom's Hardware

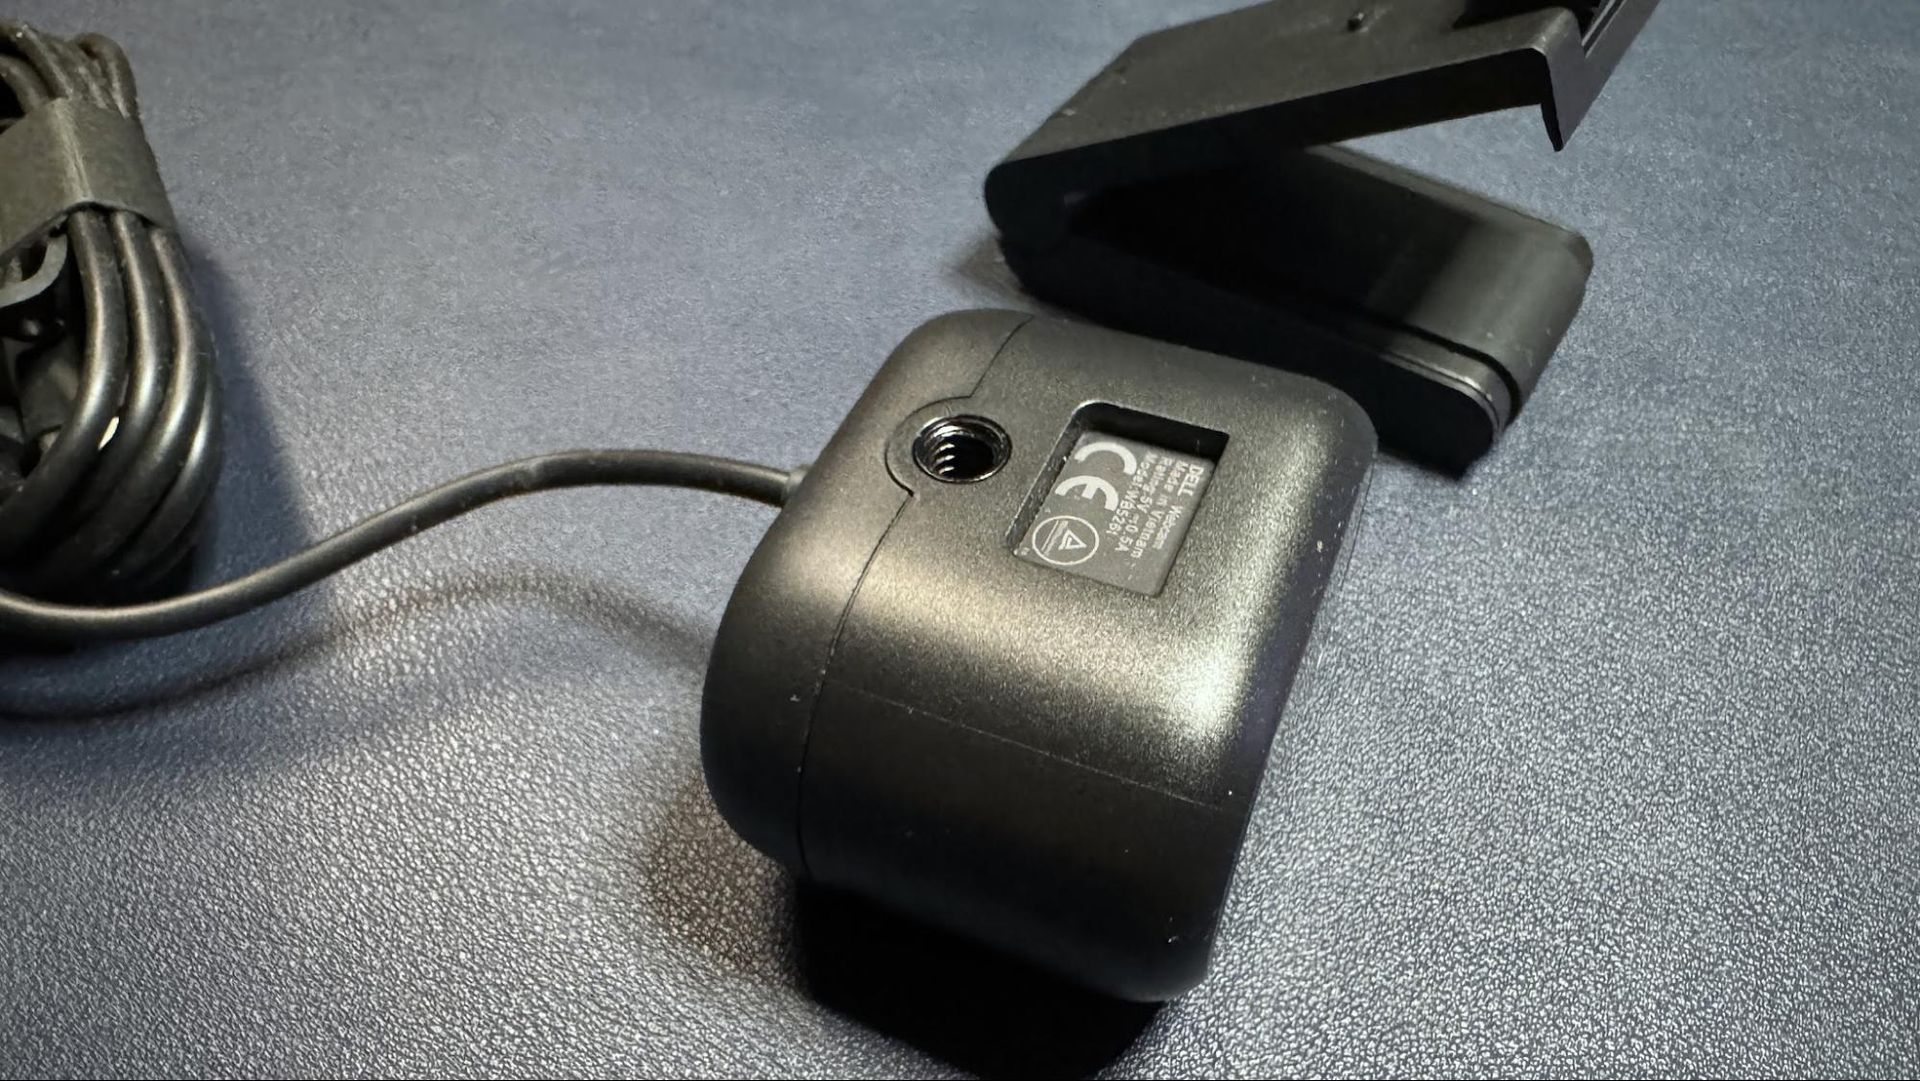
Like many lower-cost webcams, its cable is not detachable — it's a 5-foot (1.5m) rubber USB-C cable with a built-in USB-C to USB-A converter attached to one end. It's not a particularly thick cable, but it's stiff enough (and the webcam is lightweight enough) that it does influence the webcam's position, and bumping it can cause the webcam to accidentally move and mess up your framing.
Dell Pro 5 Webcam 2K
Tom's Hardware
Dell Pro 5 Webcam 2K
Tom's Hardware

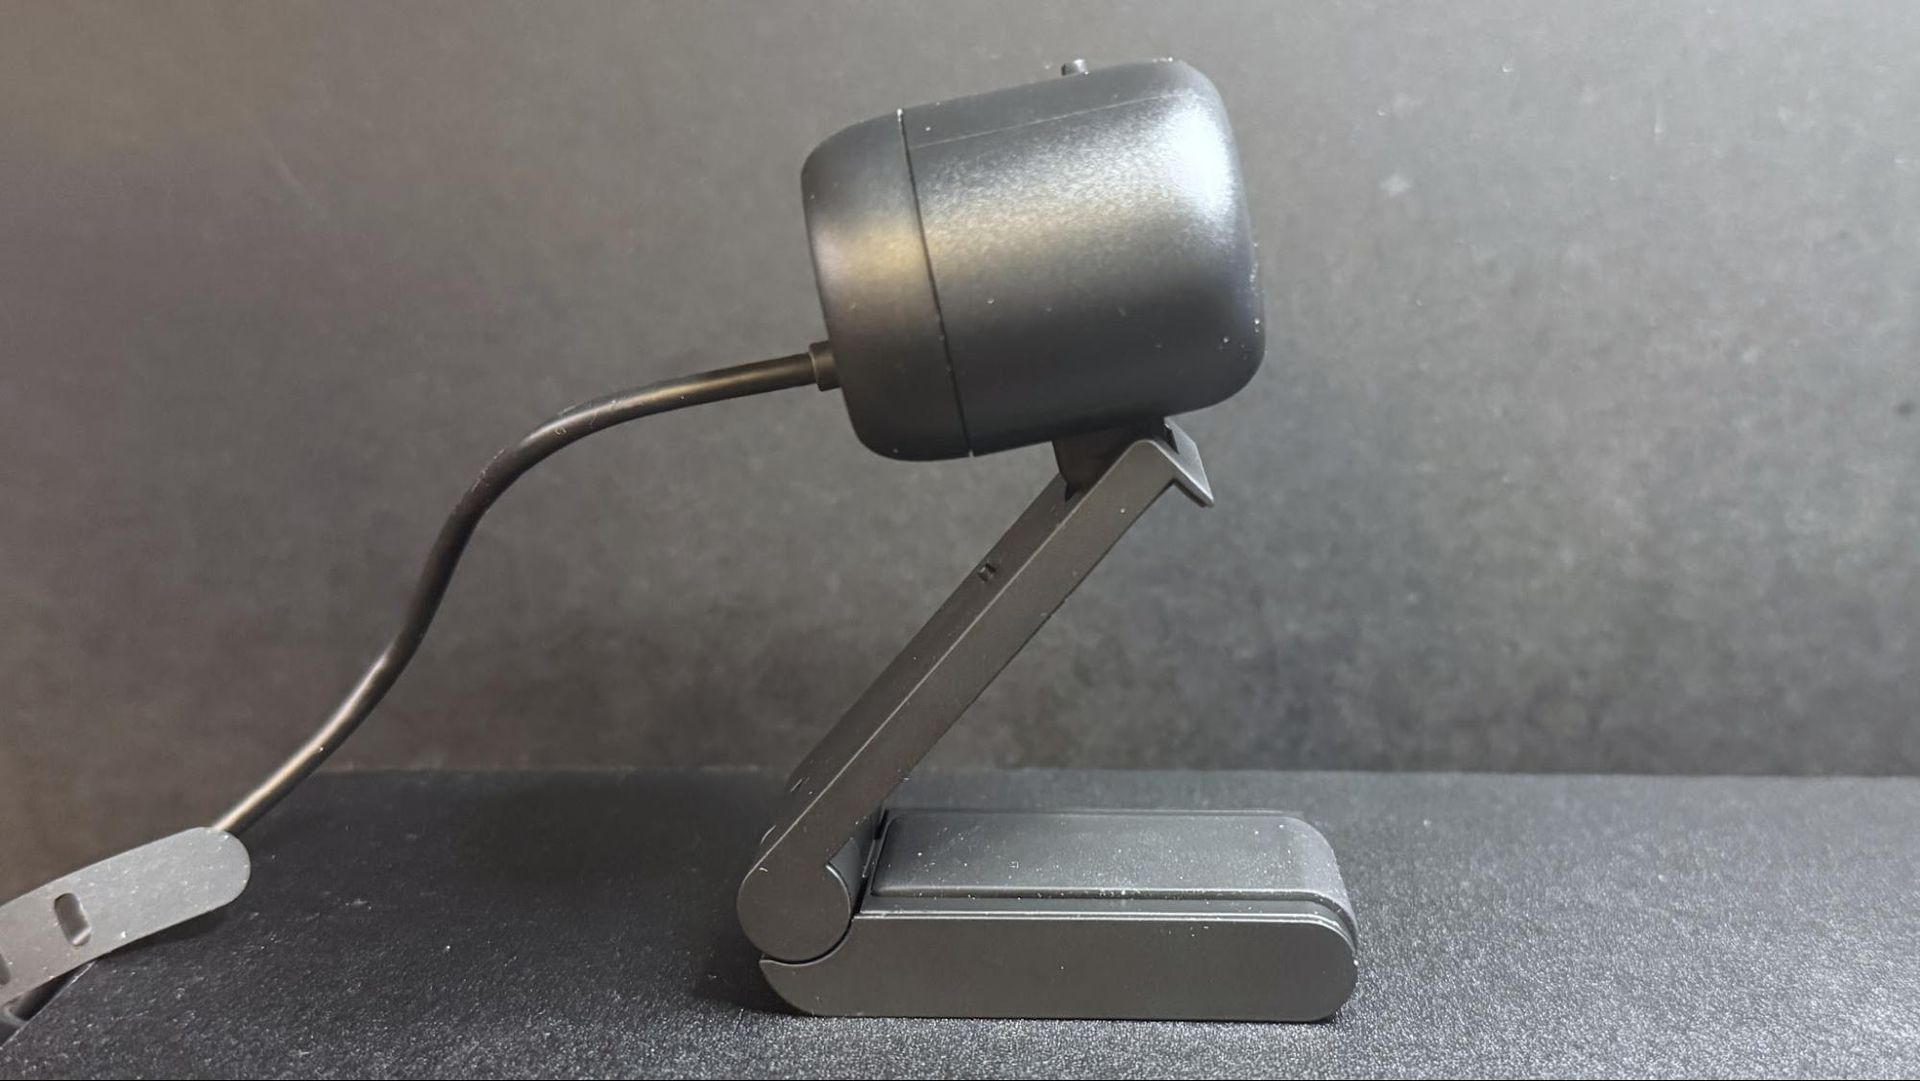
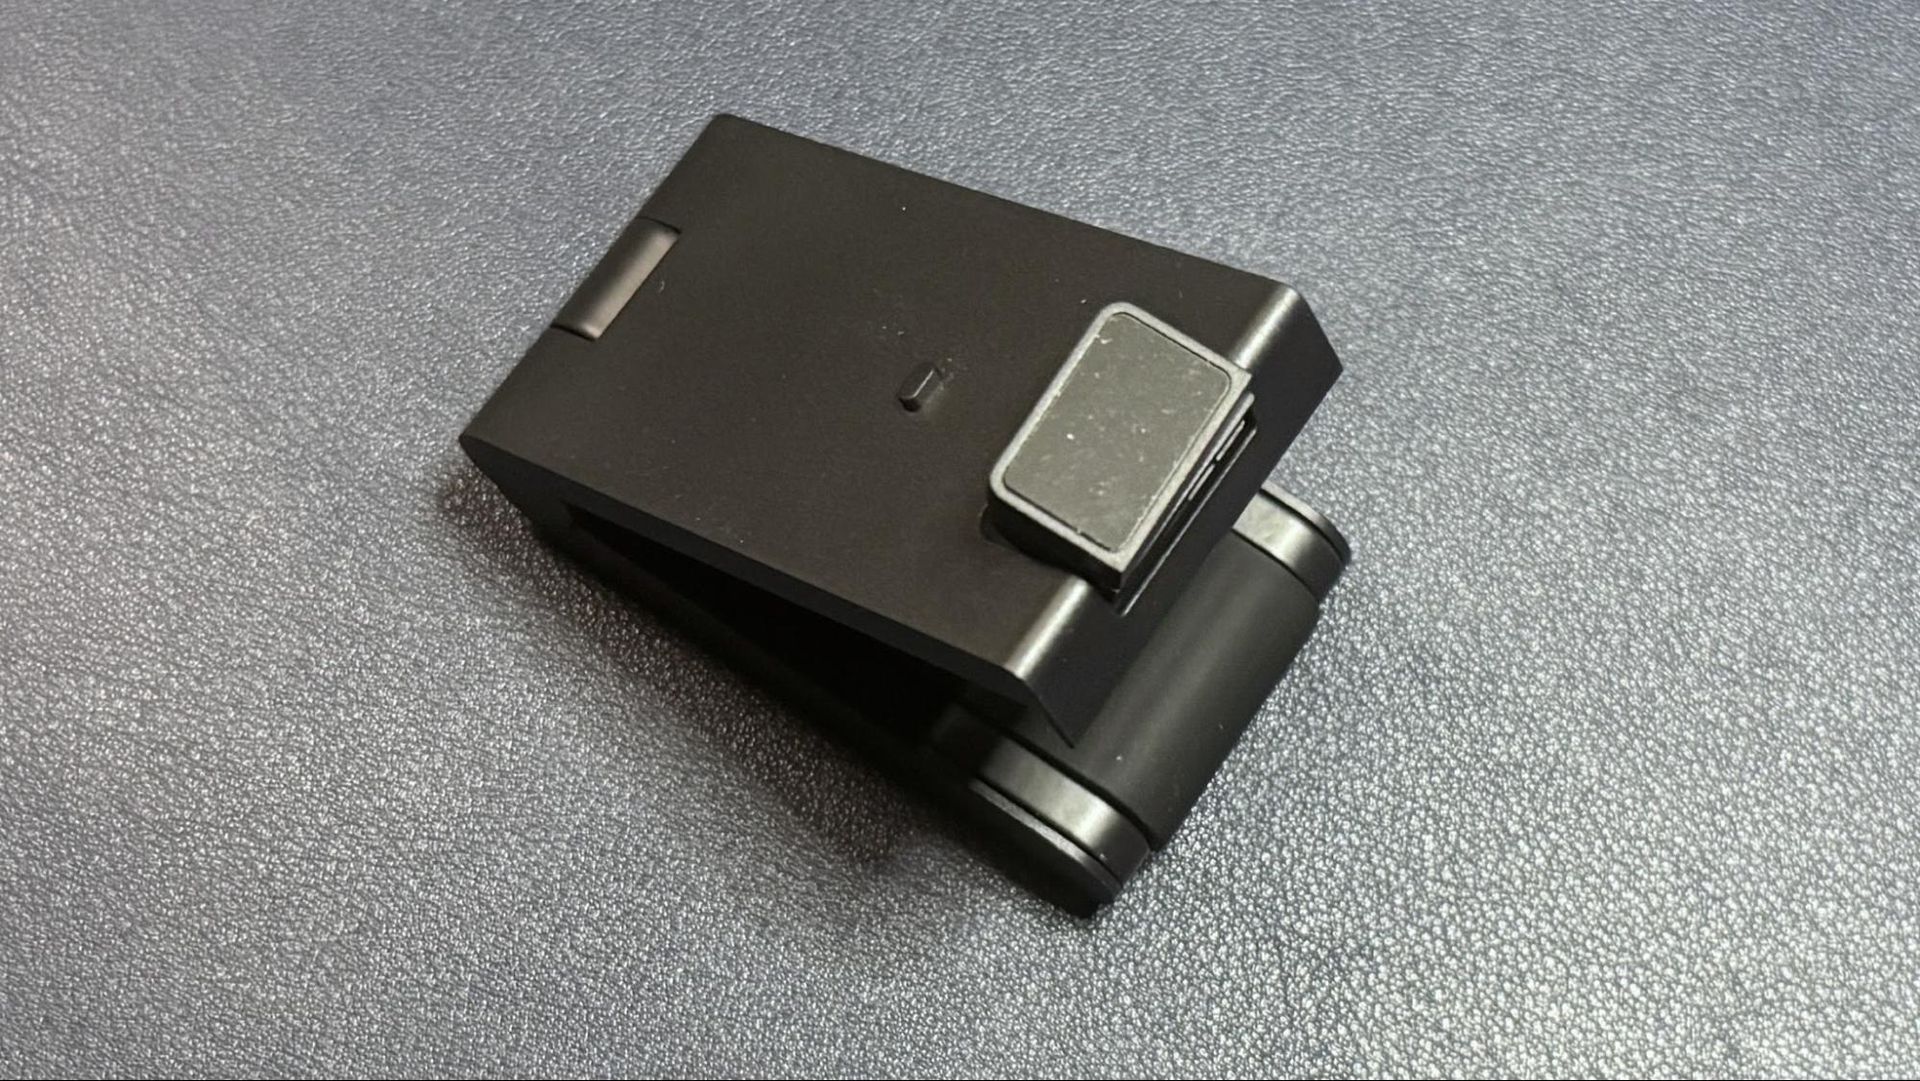
The Dell Pro 5 comes with a sturdy detachable monitor mount that attaches to the bottom of the webcam via a strong magnet. (The webcam also has a standard tripod mounting point, should you want to use it with a different camera mount.) The mount is surprisingly hefty — it weighs about 4.7 ounces (133g), which is nearly twice the weight of the webcam itself, which weighs around 2.57 ounces (73g). It's a pretty standard monitor clip mount, with a lip that goes over the edge of your monitor and an adjustable, rubber-coated "foot" that sits on the back of your monitor to hold the webcam in place.

The mount allows you to tilt the webcam forward up to 90 degrees, which will probably be useful for the webcam's document-reading feature. It also allows you to swivel the webcam almost 90 degrees in either direction, so it's actually pretty flexible for a mount included with a more budget-friendly webcam. It does not have a tripod mounting point on the bottom, however, so you won't be able to take advantage of this flexibility away from your PC.
Dell Pro 5 Webcam 2K

(Image credit: Tom's Hardware)

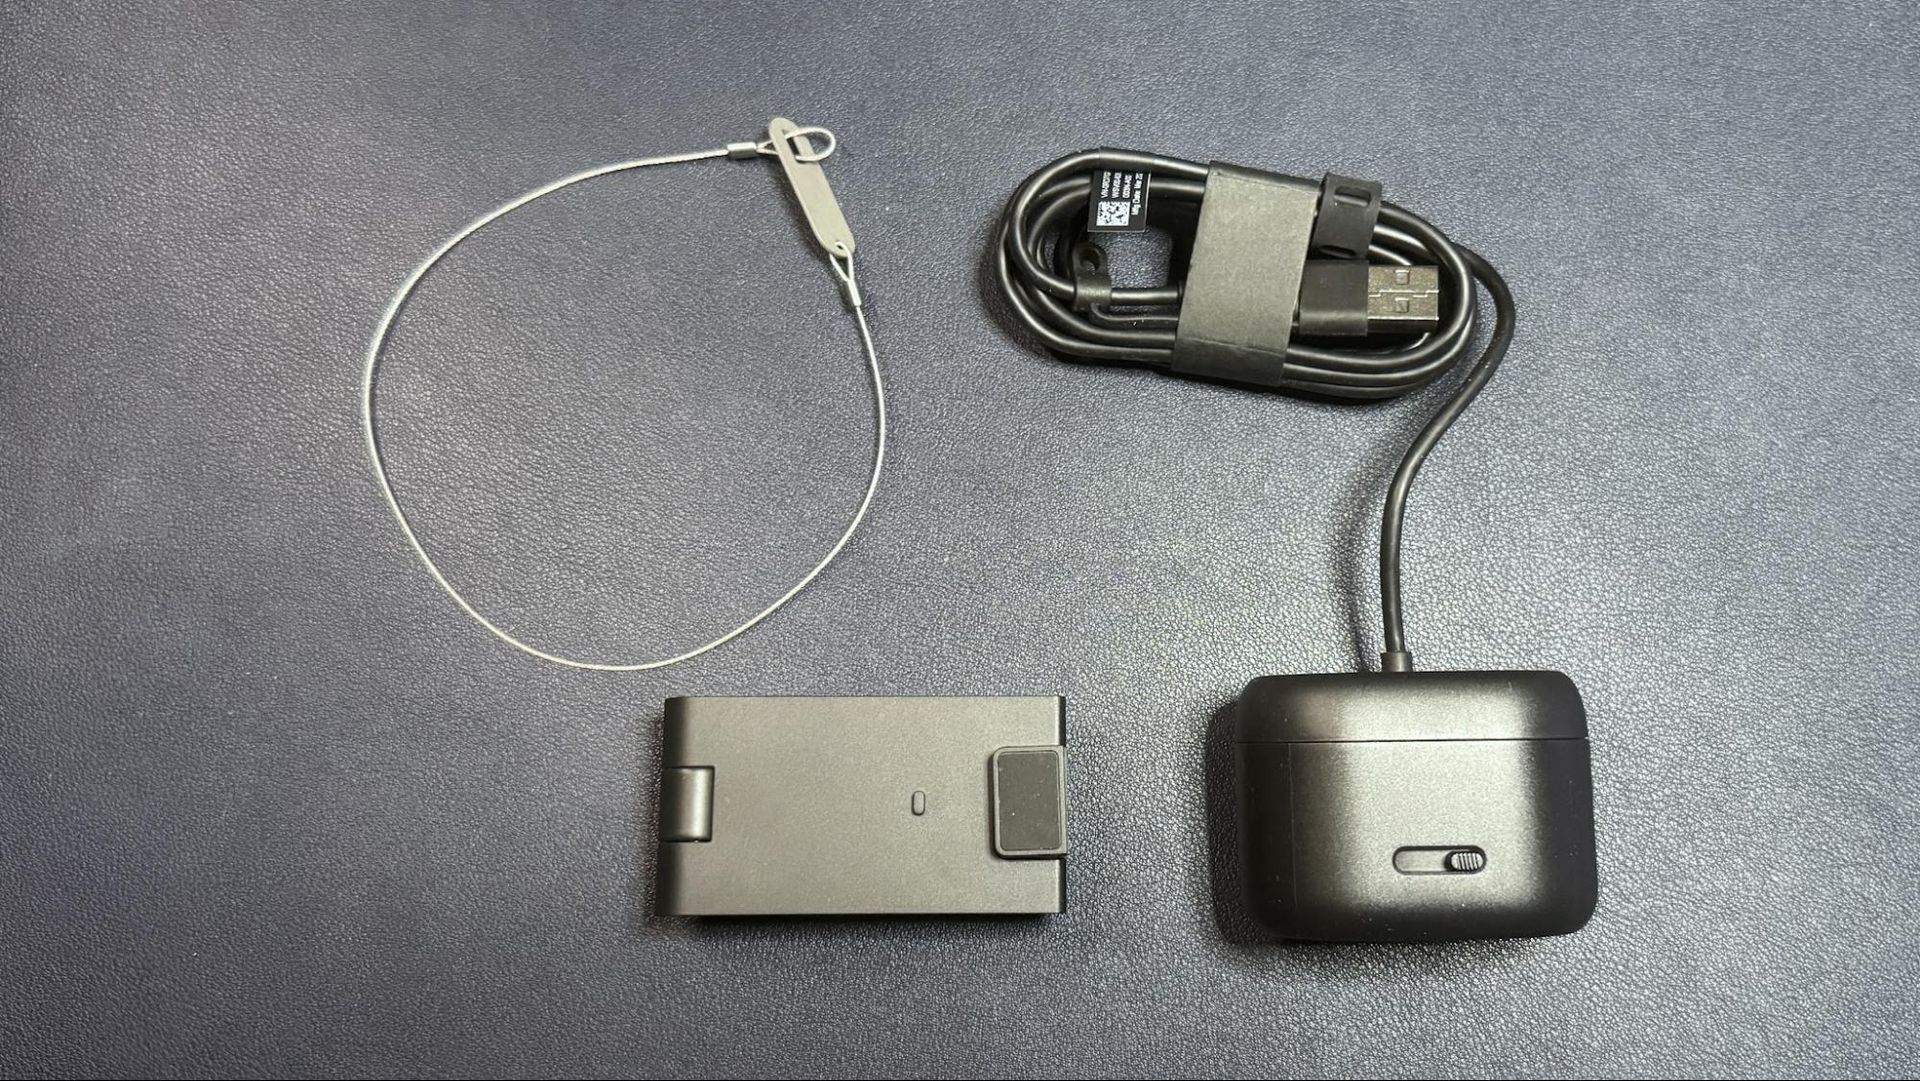
In the box, the Dell Pro 5 comes with its detachable monitor mount and a locking mechanism for those of you who work in insecure office environments (or, I suppose, for those who might travel and work from co-working spaces, I guess). The locking mechanism is designed to slide through a loop on the cable.

Specs

Resolution FPS

2K QHD / 30fps; 1080p / 30fps; 720p / 60fps, 30fps

Diagonal Field of View

78, 65

Zoom

2x digital

Autofocus

Yes

HDR

Yes

Microphone

Omni-directional

Connection

Wired (USB-C)

Mount

Universal clip

Dimensions

2.28 x 1.7 x 1.4" / 57.9 x 43.18 x 35.56mm

Weight

7.41oz / 210g (with mount)

Software

Dell Display and Peripheral Manager

Special Features

Lock

MSRP / Price at Time of Review

$119.99 / $114.99

Release Date

June 2026

Well-lit Performance

The Dell Pro 5 is a 2K webcam that outputs video in 2K UHD at 30fps — it's not 4K, but it should give you more detail and better image quality than a standard full HD 1080p webcam, even if most streaming and video conferencing services limit your outgoing stream to 1080p or lower.

For our well-lit performance test, I tested the Dell Pro 5 webcam in a fully-lit setting. From the front, I have two professional lights (a ring light on the right side and a key light on the left side), as well as four monitors (three 27-inch monitors and one 34-inch widescreen monitor), plus ambient lighting from various peripherals, including my desk. Behind me, there are two desk lamps, and overhead I have an arching floor lamp. There is no uncontrolled light in my home office, and it's a pretty bright scenario. (All of my test photos are taken with Windows' native camera app for consistency, but please note that test photos are mainly for illustrative purposes and the conclusions drawn are based on extensive testing.)


Dell Pro 5 Webcam 2K
Dell Pro 5Tom's Hardware
Dell Pro 5 Webcam 2K
Dell Pro (WB5023)Tom's Hardware
Dell Pro 5 Webcam 2K
Elgato NeoTom's Hardware

The Dell Pro 5 performed pretty well in our well-lit scenario, though the color balancing seemed to wash me out slightly and the picture wasn't quite as crisp as I would have liked. That said, this is exactly the kind of picture I look for in an office-oriented webcam — bright and evenly-lit, if a little flat, for a more "professional" appearance (and so it can do things like read text and scan documents). It's not the most cinematic, dramatic, or flattering image from a webcam, but it should work very well in a professional setting.

Low-Light Performance

For our low-light test, I turned off all of the lights in my home office except for one 27-inch monitor, on which I had a window open with Google's homepage (mostly white) filling half the screen and the Windows 11 Camera app filling the other half. This is basically a completely dark scenario with only my (admittedly, relatively large) monitor for lighting.


Dell Pro 5 Webcam 2K
Dell Pro 5Tom's Hardware
Dell Pro 5 Webcam 2K
Dell Pro Webcam (WB5023)Tom's Hardware
Dell Pro 5 Webcam 2K
Elgato NeoTom's Hardware

The Dell Pro 5 performed about as well as I expected in this scenario — it was able to pick up more detail in the dark than most 1080p webcams, though its low-light performance is far from what I'd call "good." This was more noticeable in moving video, however, as the video was extremely grainy with large artifacts (this photo actually makes it look much better than it was). The Dell Pro 5 does have HDR, but this didn't seem to make a significant difference in the low-light picture quality.

By comparison, the Dell Pro (WB5023) webcam did a better job with balancing light in the low-light scenario, though it picked up the same amount of detail. The Elgato Neo, which is a budget 1080p webcam, did a much better job of balancing light in this scenario, but its picture was also extremely grainy.

Overexposed Performance

For our overexposed performance test, I turned off most of the lights in front of me (save for one 27-inch monitor) and left the lights behind and above me turned on. This is actually one of the most likely scenarios for webcam users, as offices tend to be generally well-lit environments, but without dedicated camera-focused lighting aimed at the user.


Dell Pro 5 Webcam 2K
Dell Pro 5Tom's Hardware
Dell Pro 5 Webcam 2K
Dell Pro Webcam (WB5023)Tom's Hardware
Dell Pro 5 Webcam 2K
Elgato NeoTom's Hardware

The Dell Pro 5 performed adequately in our overexposed performance test: it managed to balance light fairly well (every webcam struggles with this), but its auto color balancing was definitely off. Both the Dell Pro (WB5023) and the Elgato Neo did a much better job with color balancing in the overexposed scenario, especially with the default settings.

Features and Software

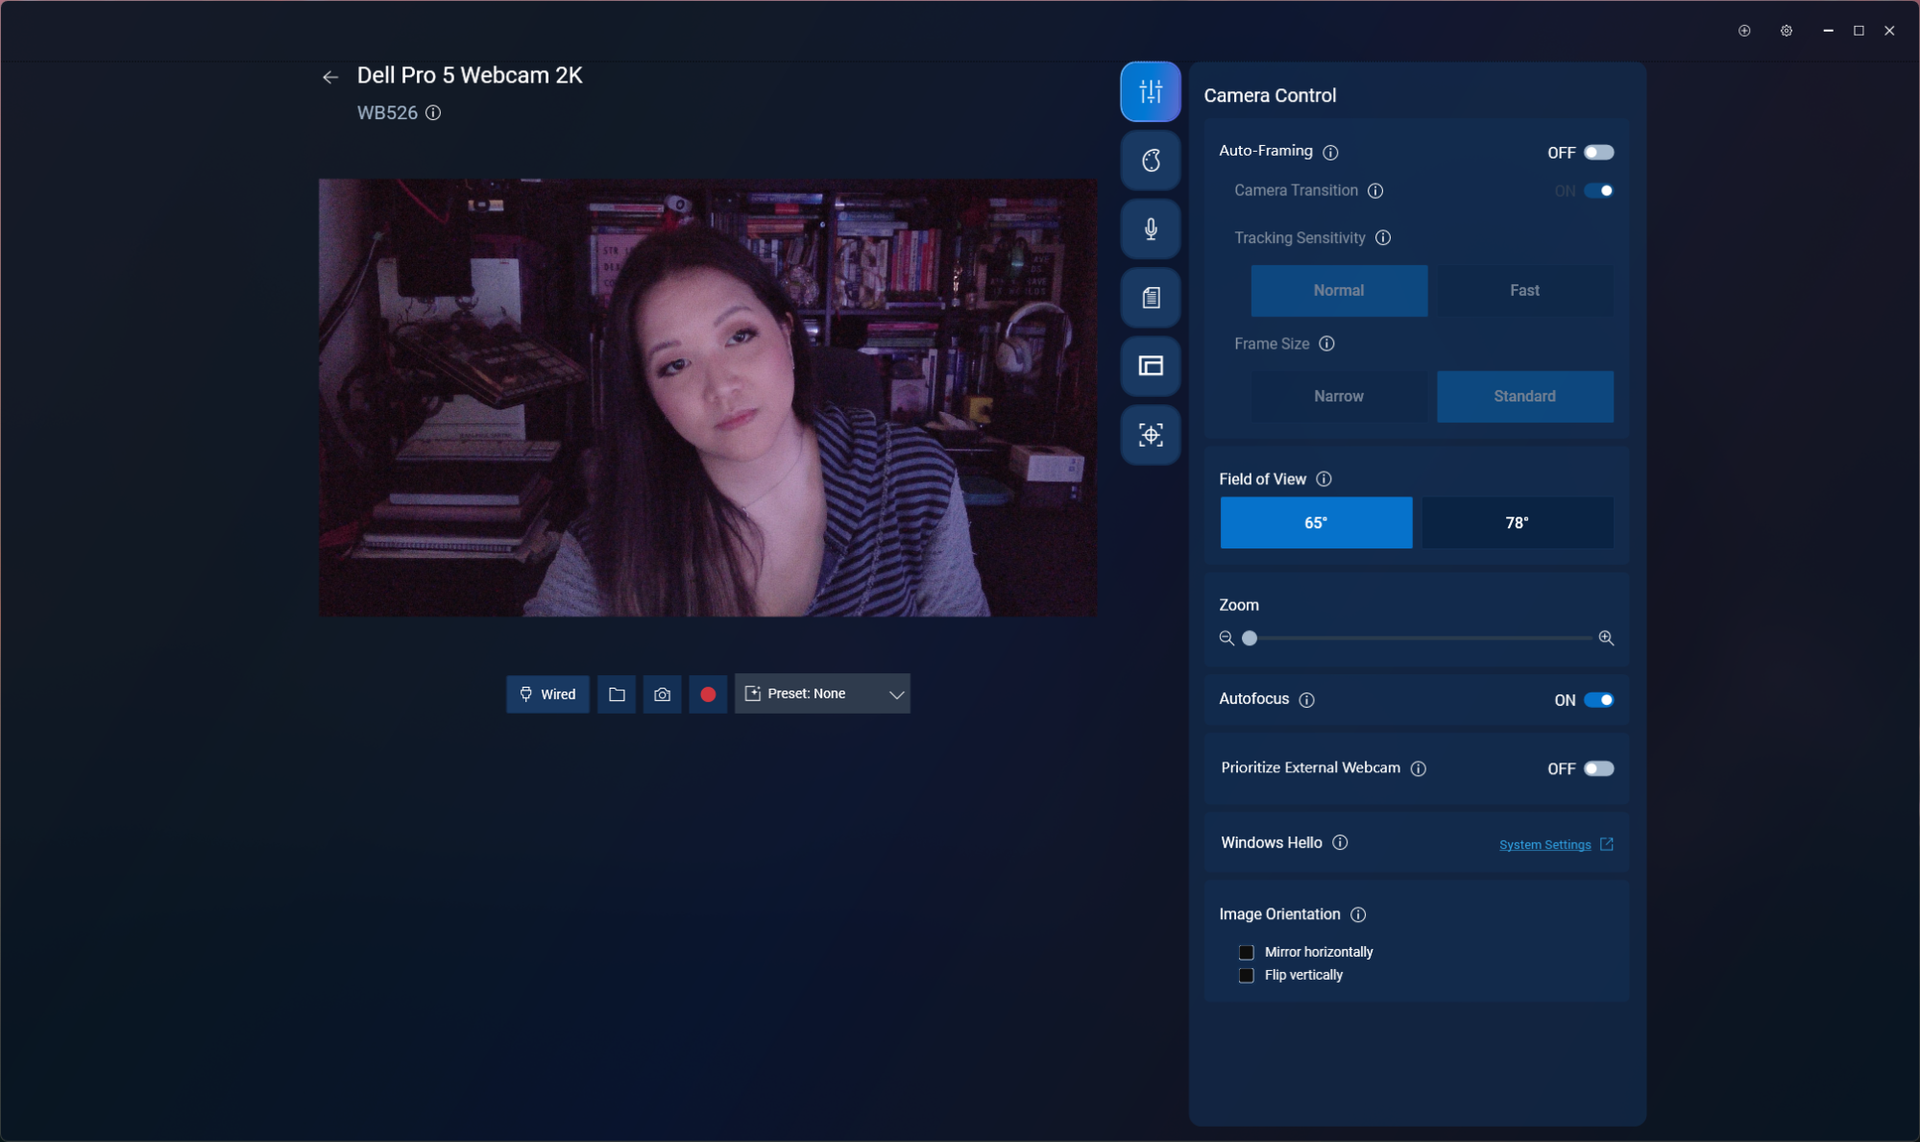
The Dell Pro 5 is configurable via Dell Display and Peripheral Manager, which lets you adjust the webcam's image settings and toggle on various features such as face tracking, HDR, and auto exposure. You can also set up features such as gesture control and Windows Hello from this app, as well as Document View, which can be configured to automatically turn on when you tilt the camera down at least 60 degrees and show a rectangular document.
Dell Pro 5 Webcam 2K

(Image credit: Tom's Hardware)

While the Dell Display and Peripheral Manager does have a lot of settings you can adjust, including brightness, sharpness, contrast, saturation, and vibrance, I found that adjusting the settings didn't actually seem to do much for the picture. Turning the saturation down to 0%, for example, gave me a slightly desaturated image — not a completely black-and-white one. I also found it frustrating that there was no way (at least as far as I could see) to minimize the app to your system tray.

The Dell Pro 5 has a built-in omni-directional microphone for when you have absolutely no choice other than to use your webcam's built-in mic. The mic wasn't the worst I've heard on a webcam — it managed to pick up my voice pretty clearly, and didn't make me sound like I was yelling through an underwater tunnel — but it wasn't great, either. It should work fine if you've got nothing else on hand to speak into, but it's not a microphone I'd recommend.

Bottom Line

The Dell Pro 5 webcam is definitely designed for office use — and for an office-oriented webcam, it's not bad. But if you're looking for something easy to use and cheap enough that your coworkers aren't going to try to steal it, I'd probably recommend the Elgato Neo over the Dell Pro 5 — after all, the Elgato Neo retails for $60 and can currently be found for about half that, which means the Dell Pro 5 is more than four times as expensive.

The Dell Pro 5's 2K resolution might come in handy if you're the type of person who's constantly showing documents over video calls, but Razer's Kiyo X also has a 2K resolution and retails for $100 (and can currently be found on sale for around $75). The Dell Pro 5 isn't a bad webcam, but you don't need to pay $120 for similar quality.
✇Tomshardware

Thrustmaster Airbus Add-On Grip with AVA Joystick Base Review: A First-Class Flight Experience

作者 Dan Mateescu

The past few years have been an exciting time for flight simulation hardware. Established brands and newcomers alike have introduced a wide range of new products, making it easier and more affordable than ever to build a capable home cockpit.

Thrustmaster has long been one of the leading names in flight simulation hardware. Its HOTAS Warthog has been a staple in home cockpits since its release, earning a reputation for its robust construction. In 2024, Thrustmaster introduced the AVA Joystick Base, bringing several notable improvements over the Warthog base. Until recently, however, there wasn't a dedicated Airbus grip compatible with the AVA base.

In this review, we'll be taking a look at the recently released Thrustmaster Airbus Add-On Grip paired with the AVA Joystick Base. We will put both the grip and the base to the test using the Fenix A320 in Microsoft Flight Simulator 2024.

Inside the Box

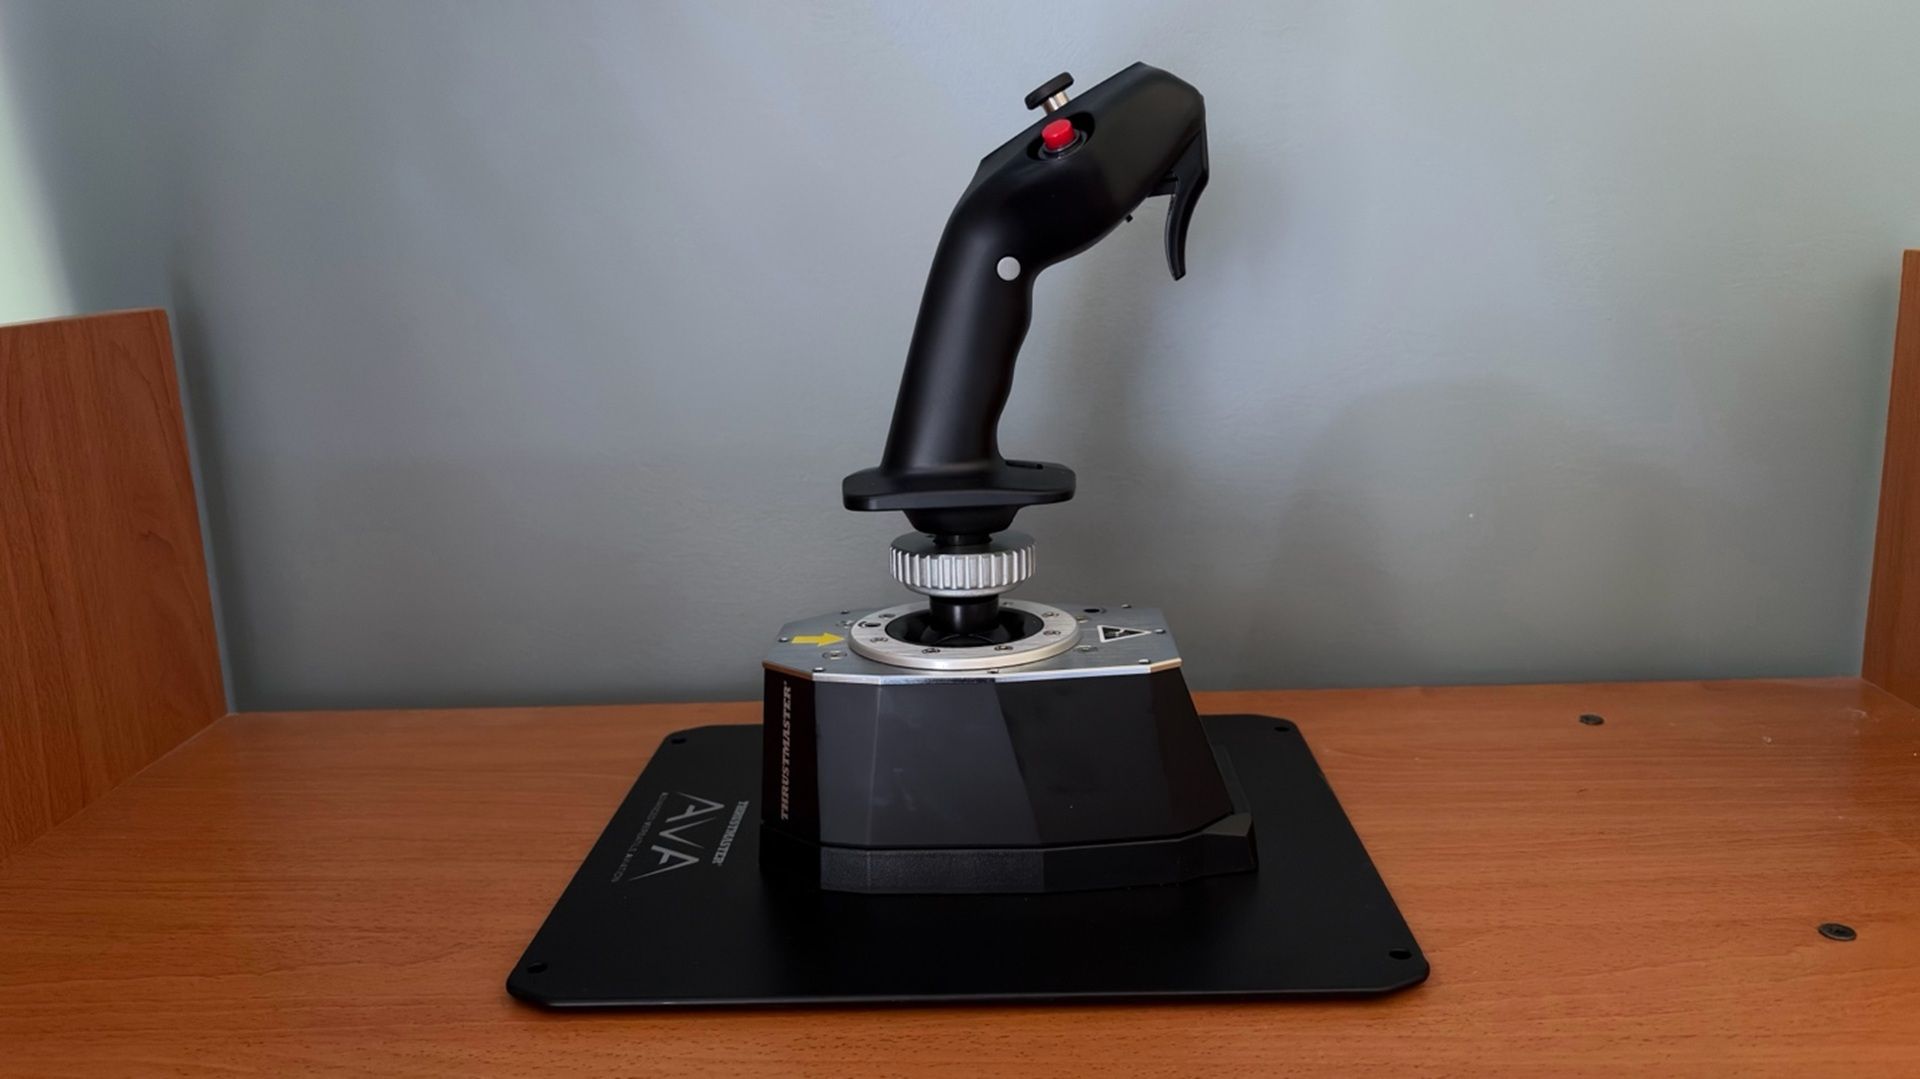
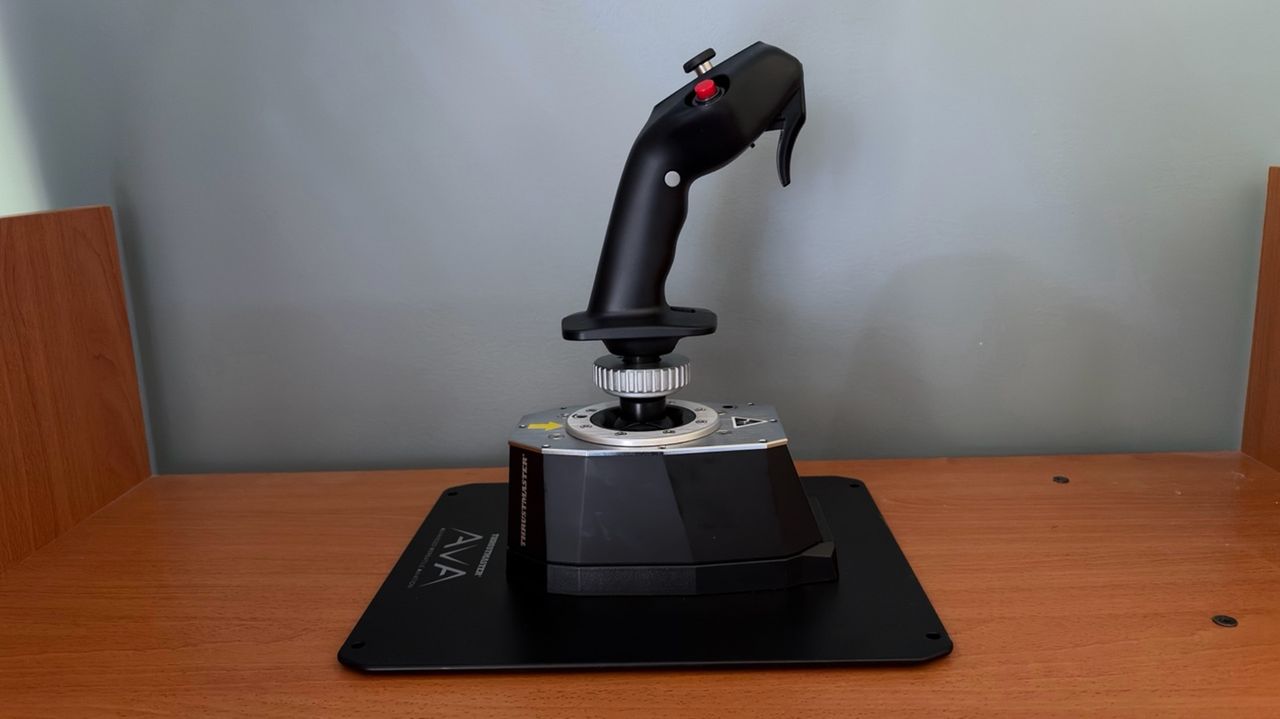
Thrustmaster Airbus Add-On Grip with AVA Joystick Base
Tom's Hardware
Thrustmaster Airbus Add-On Grip with AVA Joystick Base
Tom's Hardware

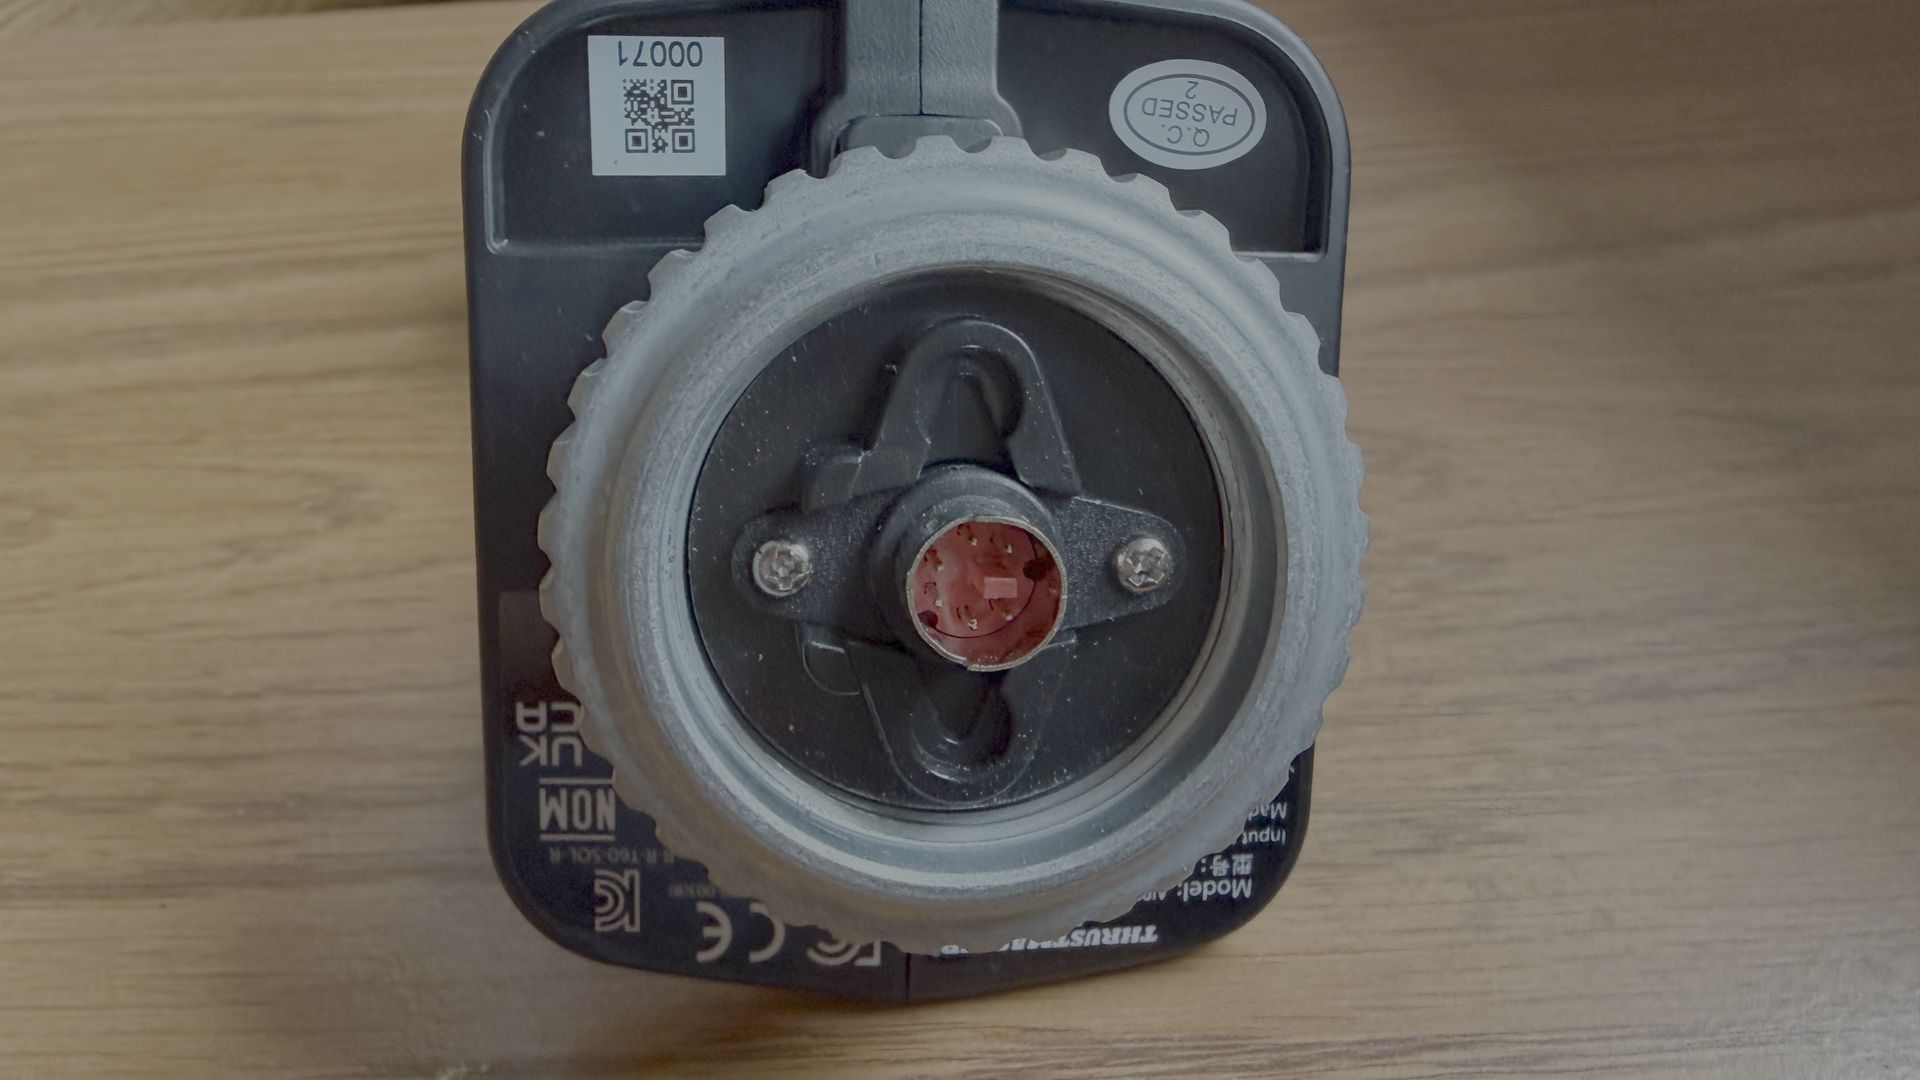
The Airbus Add-on Grip contains the grip itself, the A400M module, and a button cover.

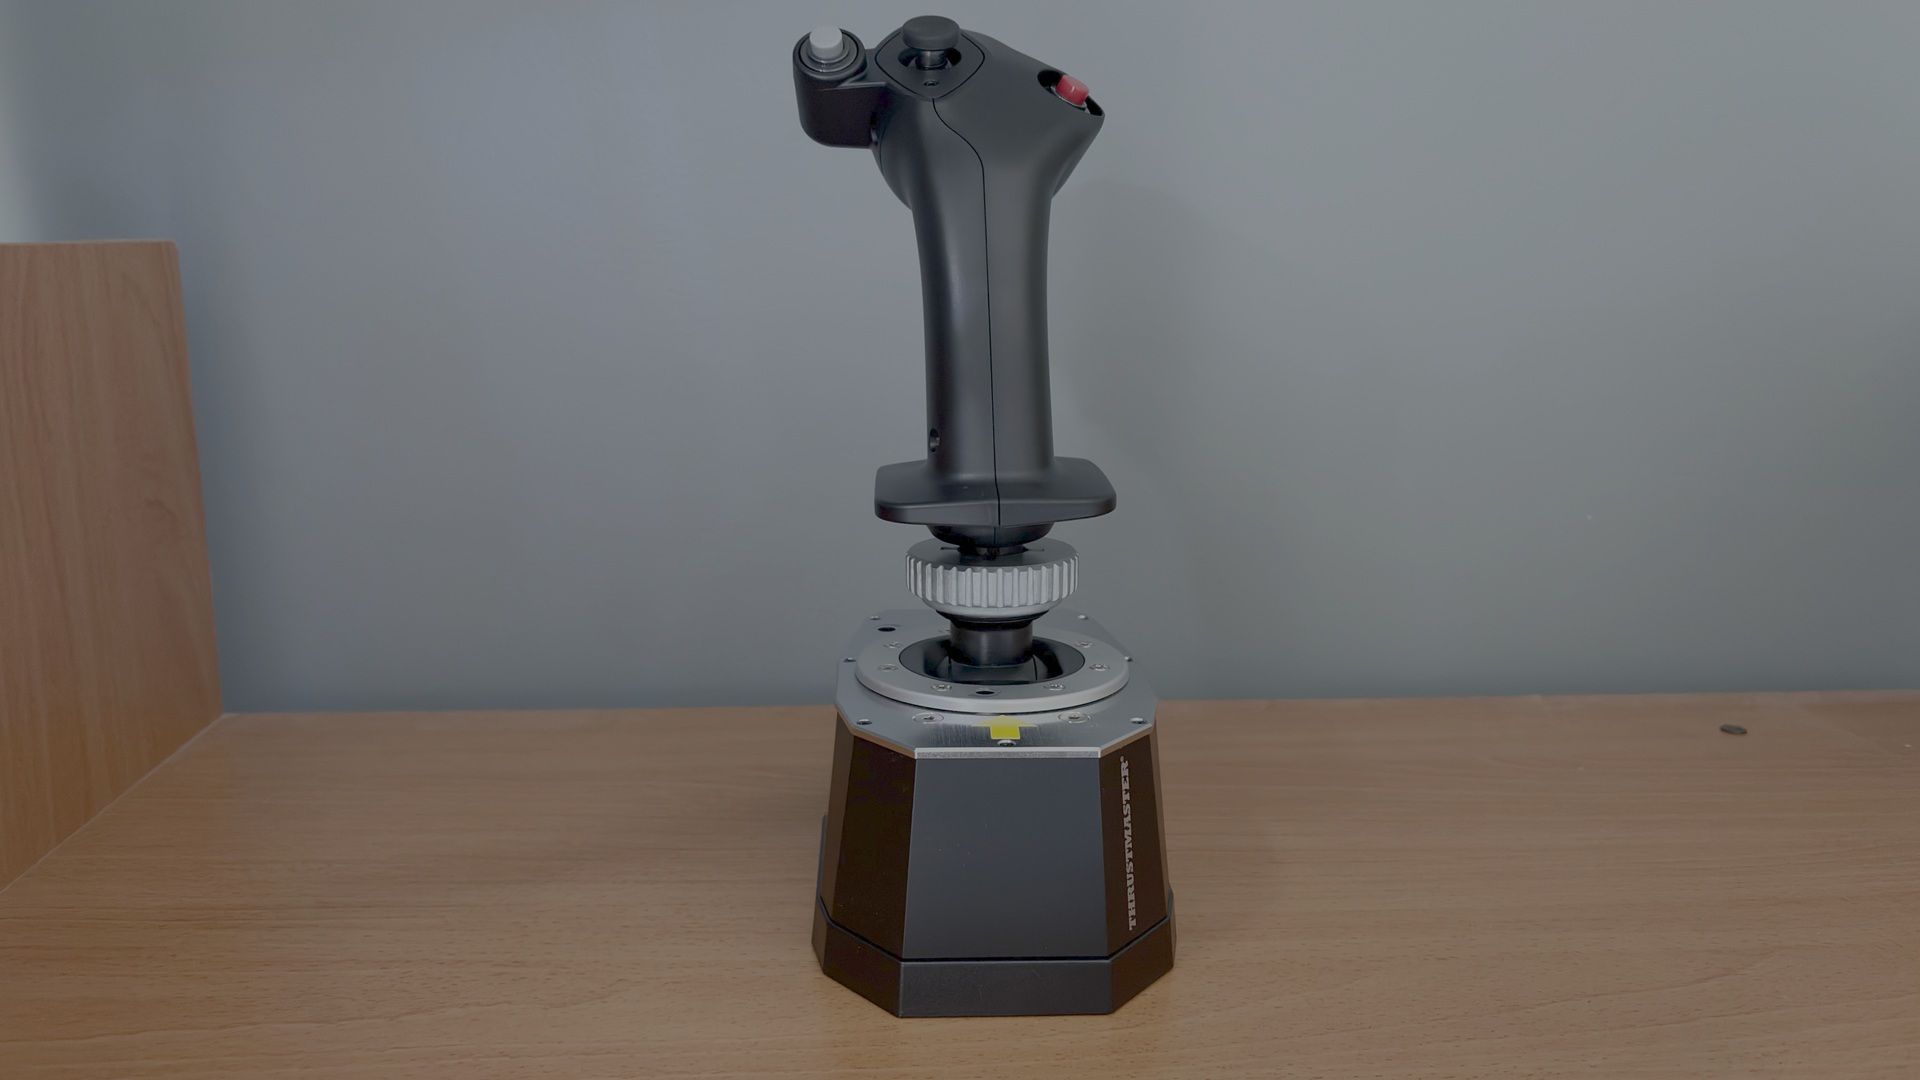
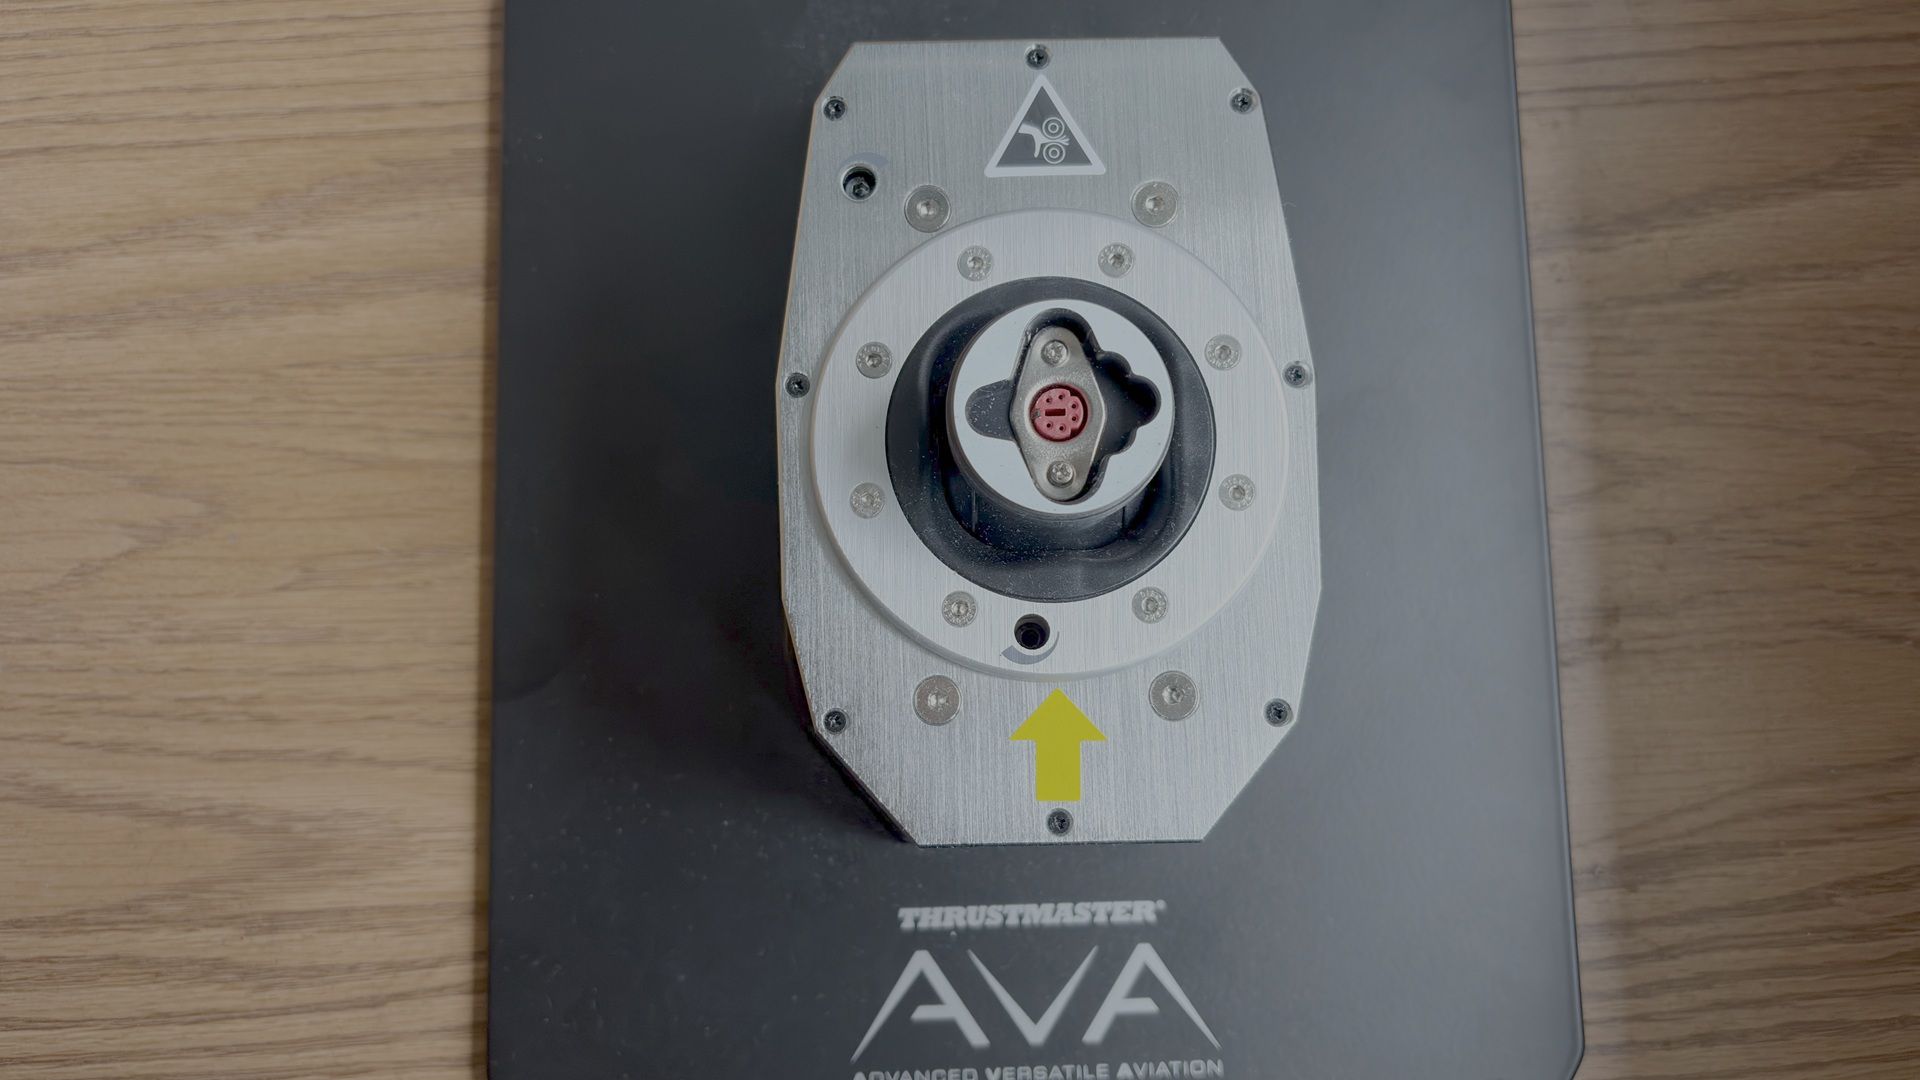
The AVA Base contains the joystick base, two sets of two cams (Aero and Jet), three sets of two springs (Soft, Medium, and Strong), three masks (Small, Medium, and XL), two Allen keys, and one detachable USB-C cable.

  • Airbus Add-on Grip Dimensions: 3.1 inches / 78 mm wide, 3.3 inches / 83 mm deep, 7.7 inches / 195 mm tall. Weight: 0.4 lb / 203 g.
  • AVA Base Dimensions: 4.3 inches / 108 mm wide, 6.7 inches / 170 mm deep, 2.8 inches / 72 mm tall. Weight: 2.4 lb / 1,069 g.

Thrustmaster also sent us an AVA Base Plate for easier desktop mounting, along with AVA Dual Pitch Cam. The Dual Pitch Cam contains two FBW (fly-by-wire) cams which are meant to simulate the sensation of a fly-by-wire aircraft.

All of these products are sold separately.

Airbus Add-on Grip Specs

Z-Axis

Twist axis with mechanical lock

Sensor Technology

Hall Effect

Physical Layouts

Dual mode: A300 series, A400M

Platform Compatibility

Windows 10/11 – MSFS, X-Plane

Base Compatibility

AVA Base, Sol-R, Warthog MKII

Construction

Plastic

Software

Thrustmaster T.A.R.G.E.T

Dimensions (LxWxH)

3.1 x 3.3 x 7.7 inches / 78 x 83 x 195 mm

Weight

0.4lbs / 203g

MSRP

$129.99

Release Date

July 2026

AVA Base Specs

Sensor Technology

Hall Effect

Connectivity

Wired connection via detachable USB-C to

USB-A cable

Platform Compatibility

Windows 10/11 – MSFS, X-Plane

Customization

Modifiable axis curves (cams), resistance (springs),

deflection travel (masks), and damping

Construction

Plastic outer shell

Metal top plate

Software

Thrustmaster T.A.R.G.E.T

Dimensions (LxWxH)

4.3 x 6.7 x 2.8 inches / 108 x 170 x 72 mm

Weight

2.4lbs / 1,069g

MSRP

$299.99

Release Date

May 2024

Customization

Thrustmaster Airbus Add-On Grip with AVA Joystick Base

(Image credit: Tom's Hardware)

One of the primary goals of the AVA Base is to provide a high degree of customization, allowing users to tailor the joystick to their preferred flying experience. The interchangeable cams let you adjust the axis curve, different springs allow you to fine-tune resistance, and the various deflection masks can be used to limit the range of travel.

The user manual includes recommended configurations for different types of aircraft. Since we’re testing the Airbus Add-On Grip, we’ll configure the AVA Base for an airliner-style feel. According to the manual, this involves using the Jet Cam with the Medium spring. However, as mentioned earlier, Thrustmaster also provided us with a pair of FBW cams that are designed to deliver an even more authentic experience by simulating the control feel of a fly-by-wire aircraft, such as those in the Airbus A3XX family.

The AVA Base also comes with T.A.R.G.E.T (Thrustmaster Advanced pRogramming Graphical EdiTor), which is an application that allows you to further tune the feel of the axes and access advanced profiles created by the Thrustmaster community.

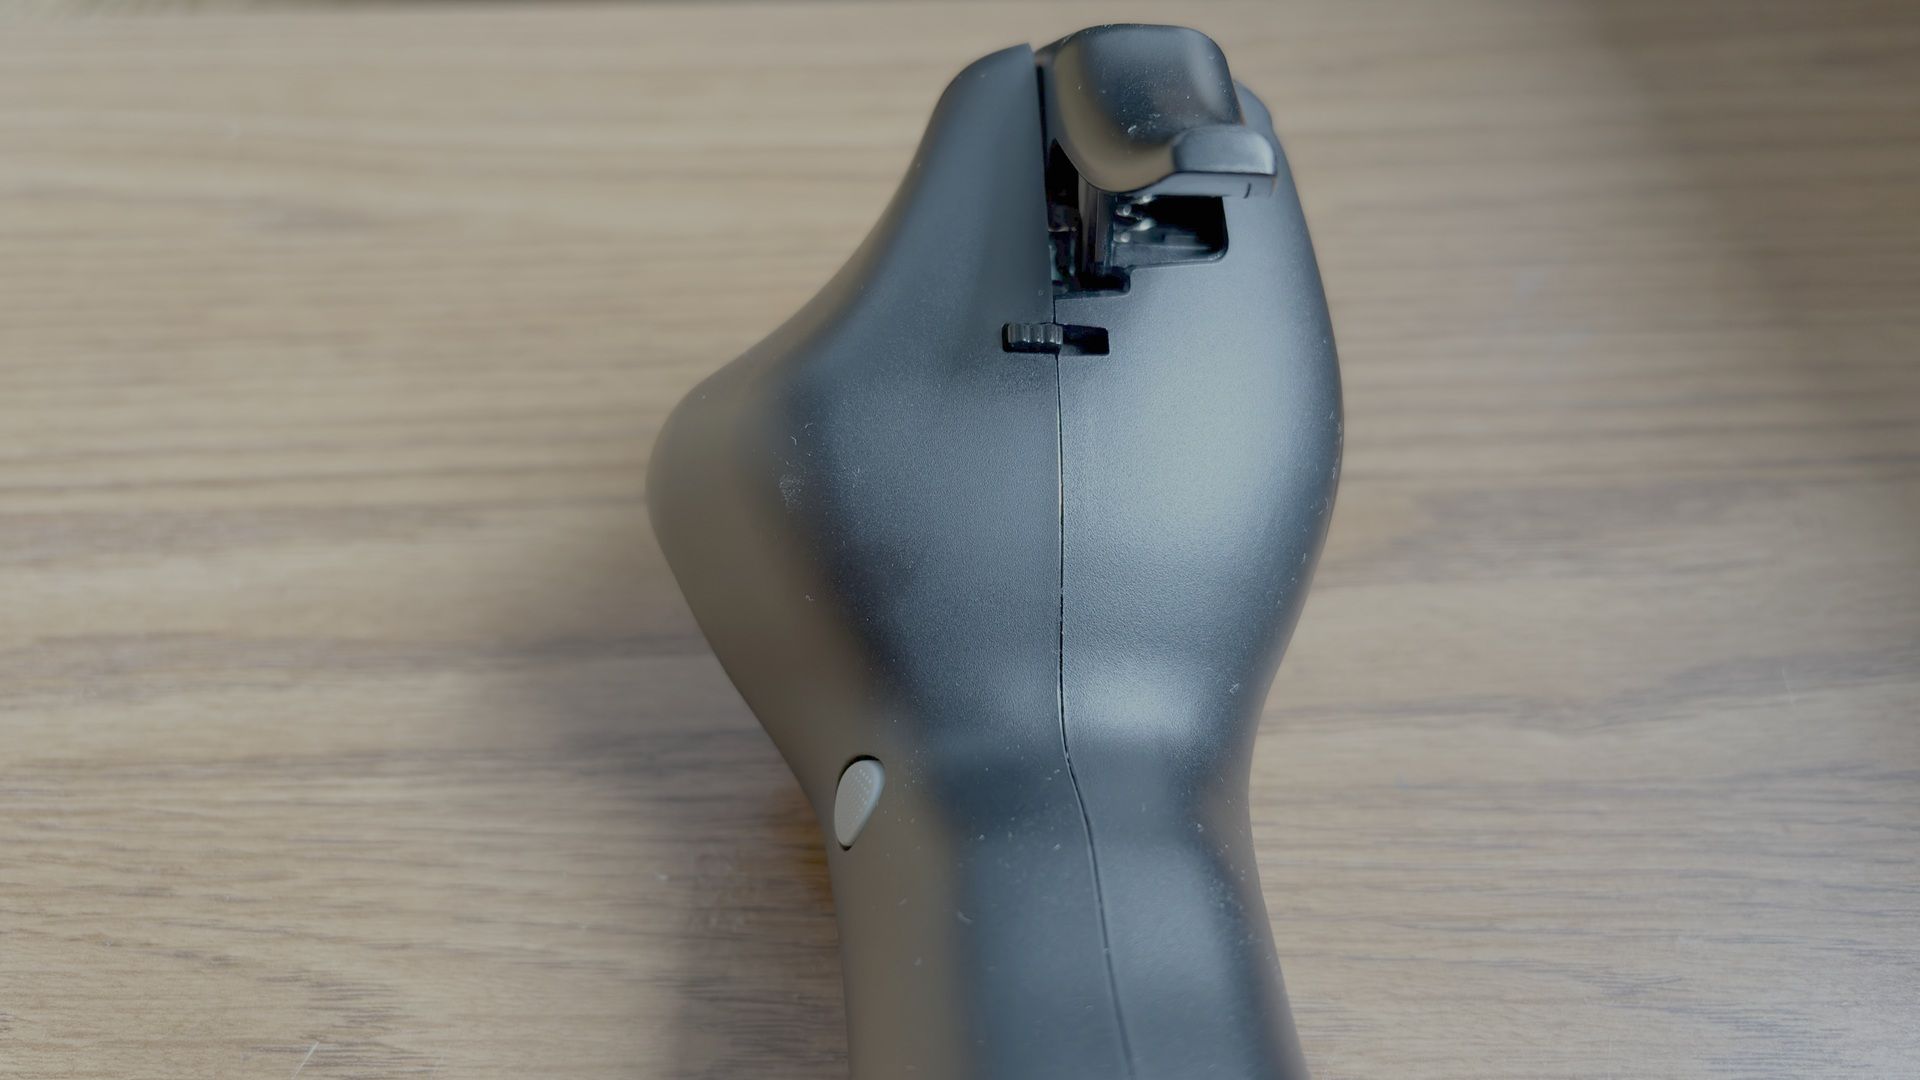
Like the AVA Base, the Airbus Add-On Grip also offers several customization options. For example, it includes a module and button cover that transform the grip from an A3XX sidestick into an A400M sidestick. Additionally, the Z-axis can be locked out using an integrated mechanical lock, preventing unintended twist inputs.

Overall, customizing the base and the grip was very straightforward.

Build Quality

Thrustmaster Airbus Add-On Grip with AVA Joystick Base
Tom's Hardware
Thrustmaster Airbus Add-On Grip with AVA Joystick Base
Tom's Hardware
Thrustmaster Airbus Add-On Grip with AVA Joystick Base
Tom's Hardware

The AVA Base has a premium feel, with a high-quality plastic outer shell complemented by a metal top plate. The are only two drawbacks. On its own, the base is not stable enough to handle larger stick inputs. We therefore recommend pairing it with the optional AVA Base Plate, which significantly improves stability. Additionally, the base does not include enough damping out of the box, causing the stick to wobble if you move it with a finger. This is not noticeable during normal flight, but stronger damping would have been a welcome inclusion. Thrustmaster offers additional dampers, which are sold separately, that address this issue.
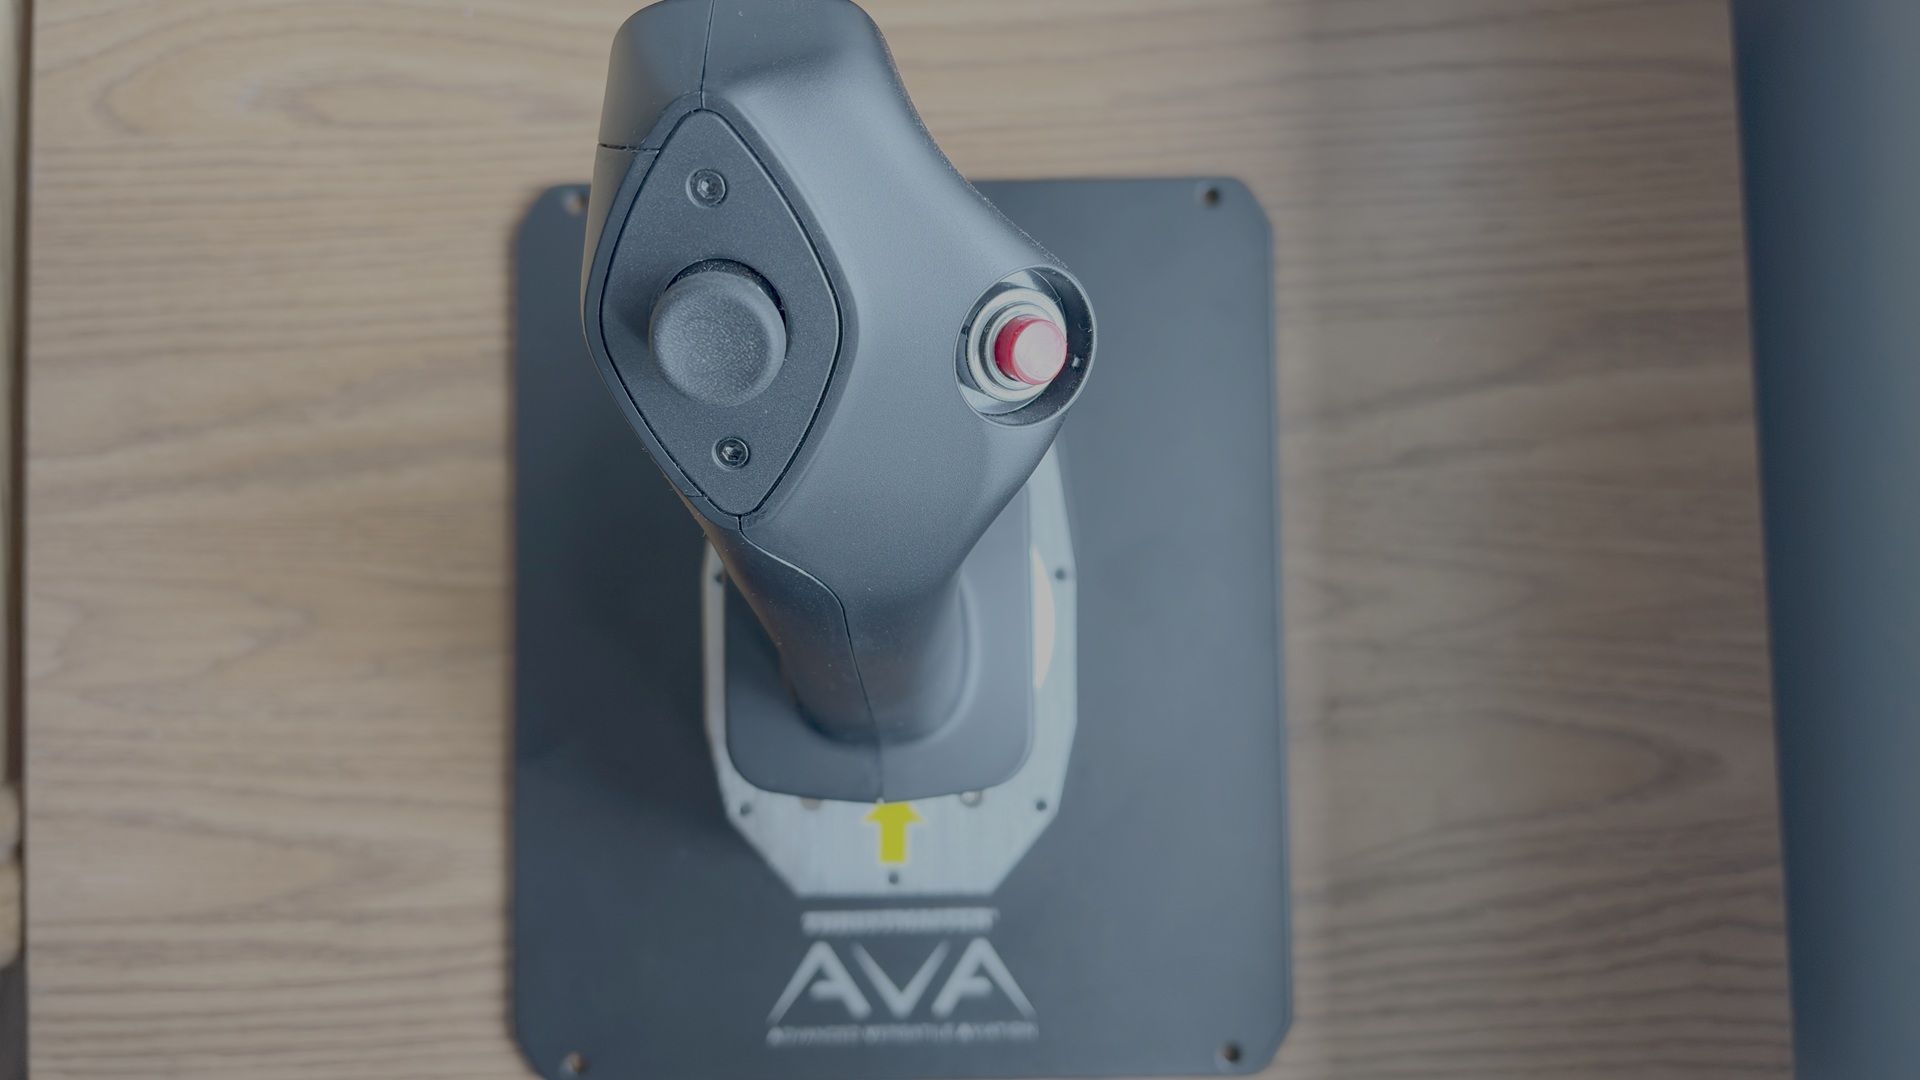
The Airbus Add-On Grip is designed as a 1:1 replica of the Airbus A3XX sidestick, closely matching the shape and ergonomics of its real-world counterpart. In its standard airliner configuration, it features the signature red autopilot disconnect button. It also includes an interchangeable module and removable button cover, allowing it to be converted into an A400M-style sidestick.

Both the AVA Base and Airbus Add-On Grip use Hall effect sensors with 16-bit precision. The base employs them on the X and Y axes, while the grip uses them for the twist (Z) axis and integrated mini-stick.

How Does it Feel?

The first thing that stood out was how much more authentic the AVA Base felt compared to the Thrustmaster Warthog. Unlike the Warthog, there is no noticeable center detent as you pass through the neutral position. Resistance increases progressively as the stick moves farther from center, resulting in smoother and more natural control inputs.

Compared to the Thrustmaster TCA Airbus Sidestick, the AVA Base also has less overall travel on both the X and Y axes, with a progressively increasing resistance rather than the TCA's more linear feel. Based on previous experience with an A320 simulator, this behavior closely matches the feel of the real Airbus sidestick, making the controls feel more authentic.

The Hall effect technology and 16-bit precision of the AVA Base also allow the user to make very fine and precise inputs. In normal conditions, that is exactly how one would fly an Airbus - using small, deliberate sidestick movements.

The Airbus Add-On Grip captures the look and feel of the real Airbus sidestick, with ergonomics that make it feel instantly familiar to anyone who has flown or used an Airbus simulator.

Microsoft Flight Simulator 2024 Testing

We tested the AVA Base and Airbus Add-On Grip in Microsoft Flight Simulator 2024 using the Fenix A320. While there are several Airbus aircraft available for MSFS 2024, we chose the Fenix because it offers one of the most accurate flight models and flight dynamics for an Airbus plane in the sim, making it the best platform for evaluating Airbus flight controls.

We also tested with a pair of FBW cams designed to replicate the feel of an Airbus fly-by-wire sidestick. However, based on our experience with an A320 simulator, we found that the standard Jet cams included with the AVA Base felt more authentic. The FBW cams introduced a more noticeable center detent, whereas the Jet cams provided a smoother transition through center, more closely matching the feel of a real Airbus sidestick.

We tested the base and stick in three difference scenarios:

  1. Basic maneuvering. Flying at 5,000 feet, we performed gentle turns and pitch changes to evaluate the precision of the base during small, accurate control inputs.
  2. Turbulent approach. We performed an approach into Las Vegas under hot, windy conditions with strong updrafts and downdrafts. This scenario required larger, more frequent control inputs to assess the resistance and how the base handles turbulence and rapid corrections.
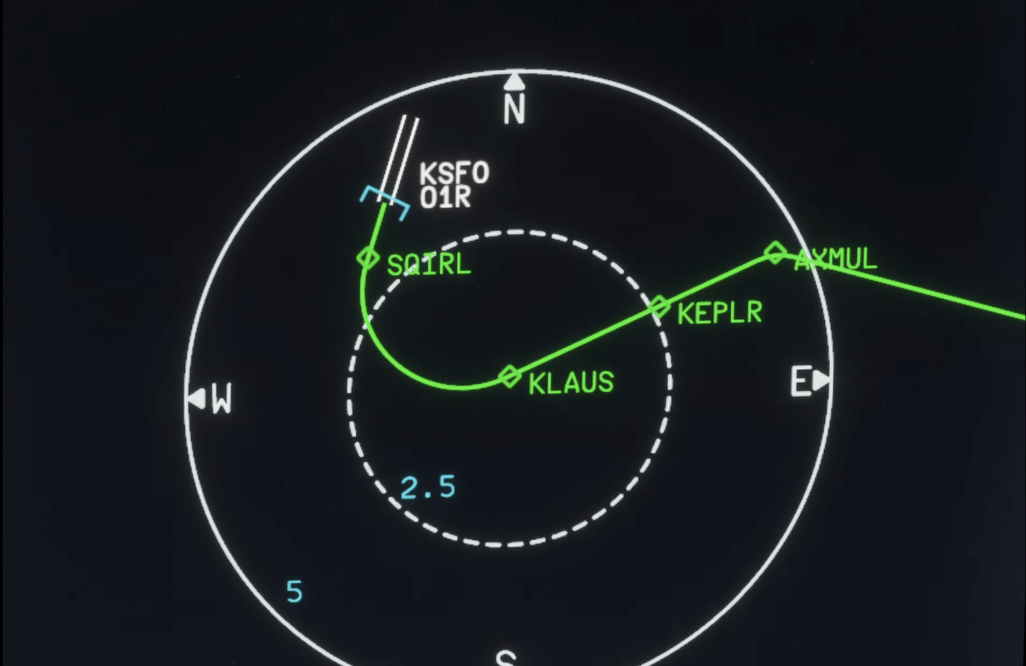
  3. Curved approach. Finally, we flew the RNAV Visual approach to Runway 1R at San Francisco International Airport. This approach is available in MSFS 2024 if you use the Navigraph database, but it is missing the RF leg between the waypoints KLAUS and SQIRL, so we added it to the navigation database of the Fenix A320 ourselves. The procedure features a sweeping right-hand arc that continues until roughly one mile from the runway threshold, requiring the aircraft to remain in a turn at very low altitude. The approach demands precise tracking of the flight path while also requiring a smooth, accurate transition to the runway centerline after the final waypoint. This scenario tested both the precision and responsiveness of the AVA Base.

Basic Maneuvering

While flying at 5,000 feet, we were impressed by the AVA Base’s precision when making small adjustments to both pitch and roll. Compared to the Warthog and TCA Airbus Sidestick, the AVA Base allowed for significantly finer roll inputs, making it easier to make small corrections and maintain a precise flight path.

When controlling vertical speed through pitch adjustments, we were able to consistently achieve the desired climb or descent rate within approximately 100 feet per minute, demonstrating the level of control possible with the high-resolution sensors.

Turbulent Approach

Landing in Las Vegas during the summer can be a challenging experience. The combination of extreme heat, strong winds, and thermals along the approach path can create significant turbulence, resulting in a much less stable approach. Microsoft Flight Simulator 2024 is able to replicate these conditions through its Live Weather system. While it is important to avoid overcorrecting and creating pilot-induced oscillations, these conditions require more frequent and sometimes larger control inputs than a typical approach.

The AVA Base handled this turbulent approach very well. The conditions forced us to make slightly larger inputs, so we felt the progressive resistance of the base as we moved further from center, which felt authentic. We were also able to make very quick corrections to counter the turbulence and keep the aircraft on the published approach path.

Curved Approach

Thrustmaster Airbus

(Image credit: Tom's Hardware)

During the RNAV Visual approach to Runway 1R at San Francisco International Airport, we were able to precisely track the sweeping right-hand arc all the way to the final waypoint, SQIRL. Once established at SQIRL, the AVA Base’s responsiveness allowed us to smoothly align with the runway centerline.

Other products, including the Warthog and TCA Airbus Sidestick, produced more noticeable jerky movements during this approach, which is likely due to lower precision around the neutral position.

Overall Thoughts

After putting the AVA Base and Airbus Add-On Grip through extensive testing, we came away extremely impressed with the experience. As competitors have continued to close the gap with Thrustmaster Warthog — and even surpass it — the AVA Base represents a return to the level of quality and refinement we have come to expect from the brand.

The AVA Base delivered exceptional precision, smooth control, and an authentic Airbus-like feel across a variety of challenging flight scenarios. The addition of the recently released Airbus Add-On Grip finally allows users to pair this high-end base with a dedicated airline-style sidestick, making it a compelling option for anyone who regularly flies Airbus aircraft.

The biggest obstacle is the price. The level of engineering and build quality comes at a premium, which may put the AVA Base and Airbus Add-On Grip out of reach for many users. However, for those looking for a high-quality Airbus stick and willing to invest in a premium setup, the Thrustmaster AVA Base paired with the Airbus Add-On Grip is a compelling option.

✇Tomshardware

Libernovo Omni Pro Review: Cooler than you think

Libernovo is still basically brand new to the gaming chairs market — the company just released its first chair a little over a year ago. But the original Libernovo Omni was impressive: lightweight, dynamically ergonomic, and comfortable enough to supplant my ride-or-die Herman Miller Aeron for several months. Now Libernovo is branching out (sort of), with variations on its original Omni. There's a cheaper, less-techy version (the Omni SE), a fancier version with a built-in fan (the Omni Pro), and a sturdier version for people who are between 5 feet 10 inches and 6 feet 7 inches, weighing up to 399 pounds (181kg).

We're taking a look at the Libernovo Omni Pro, which is the more premium version of this already fairly pricey chair. It's got a few upgrades from the original Omni, including a reinforced aluminum alloy base and more durable fabric, as well as a built-in seat ventilation fan that works... surprisingly well, considering it doesn't blow air toward you but rather draws it away from you. As the fanciest Omni variation, the Omni Pro is, of course, pricier than the original Omni, but not by too much — its retail price is listed at $1,299, but that seems to be permanently discounted to $1,109. That's for just the chair itself; Libernovo also sells it bundled with a corresponding StepSync footrest for $1,183 (MSRP: $1,497), and with an extra battery for $1,247 (MSRP: $1,596).

Assembly

The Omni Pro does require some assembly: It's more complicated to assemble than most gaming chairs, as it has some electronics built-in. But it's also easier to assemble than most gaming chairs, as it's fairly lightweight and none of the pieces are oversized or unwieldy.

Libernovo Omni Pro
Tom's Hardware
Libernovo Omni Pro
Tom's Hardware
Libernovo Omni Pro
Tom's Hardware

The chair comes with everything you need to assemble it, including work gloves (not really necessary, but a nice touch, I suppose), a hex screwdriver, and hardware packaged in individually-labeled bags. The instructions are printed on a giant box insert, which is fairly easy to follow (though I still felt like the illustrations could have been explained slightly better). The chair also comes with a separate user manual and a setup manual to help you calibrate the chair for the first time.

Libernovo Omni Pro

(Image credit: Tom's Hardware)

The chair took me about 20 minutes to put together on my own.

Design and Construction

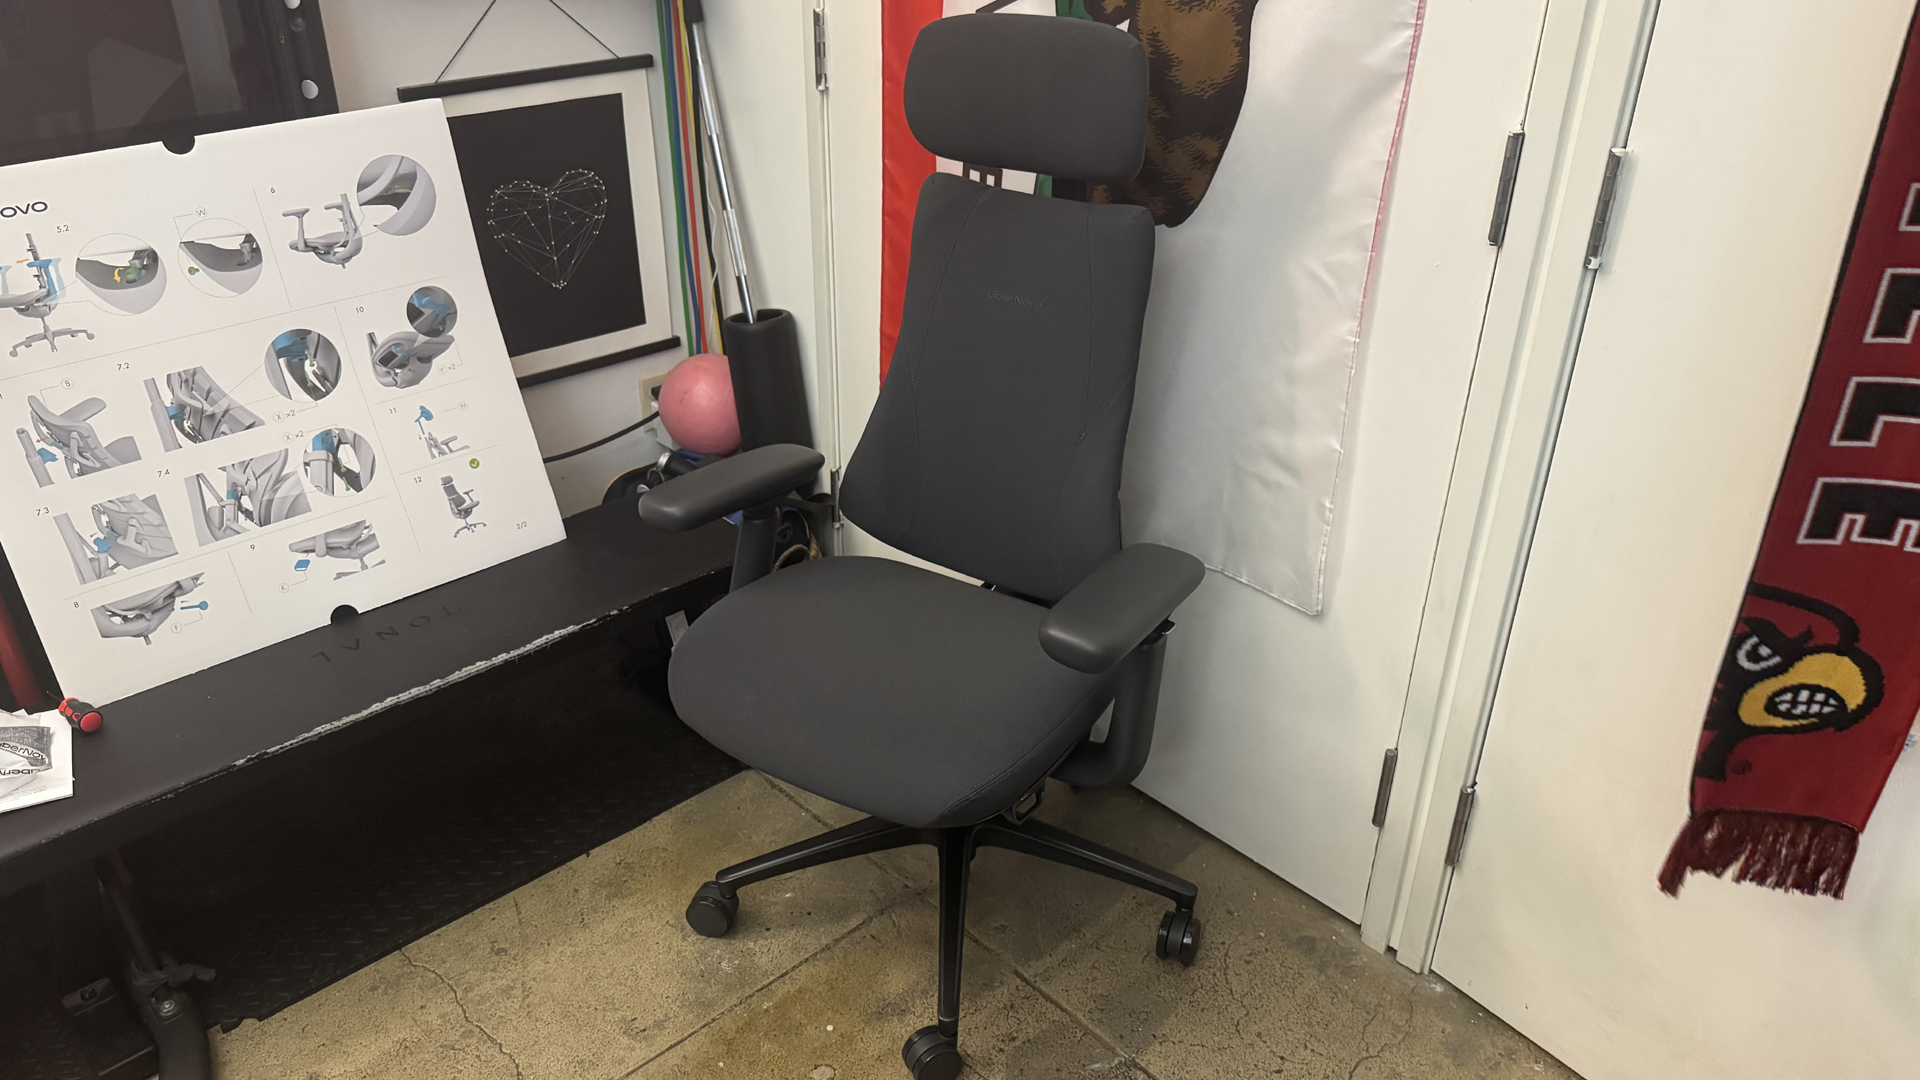
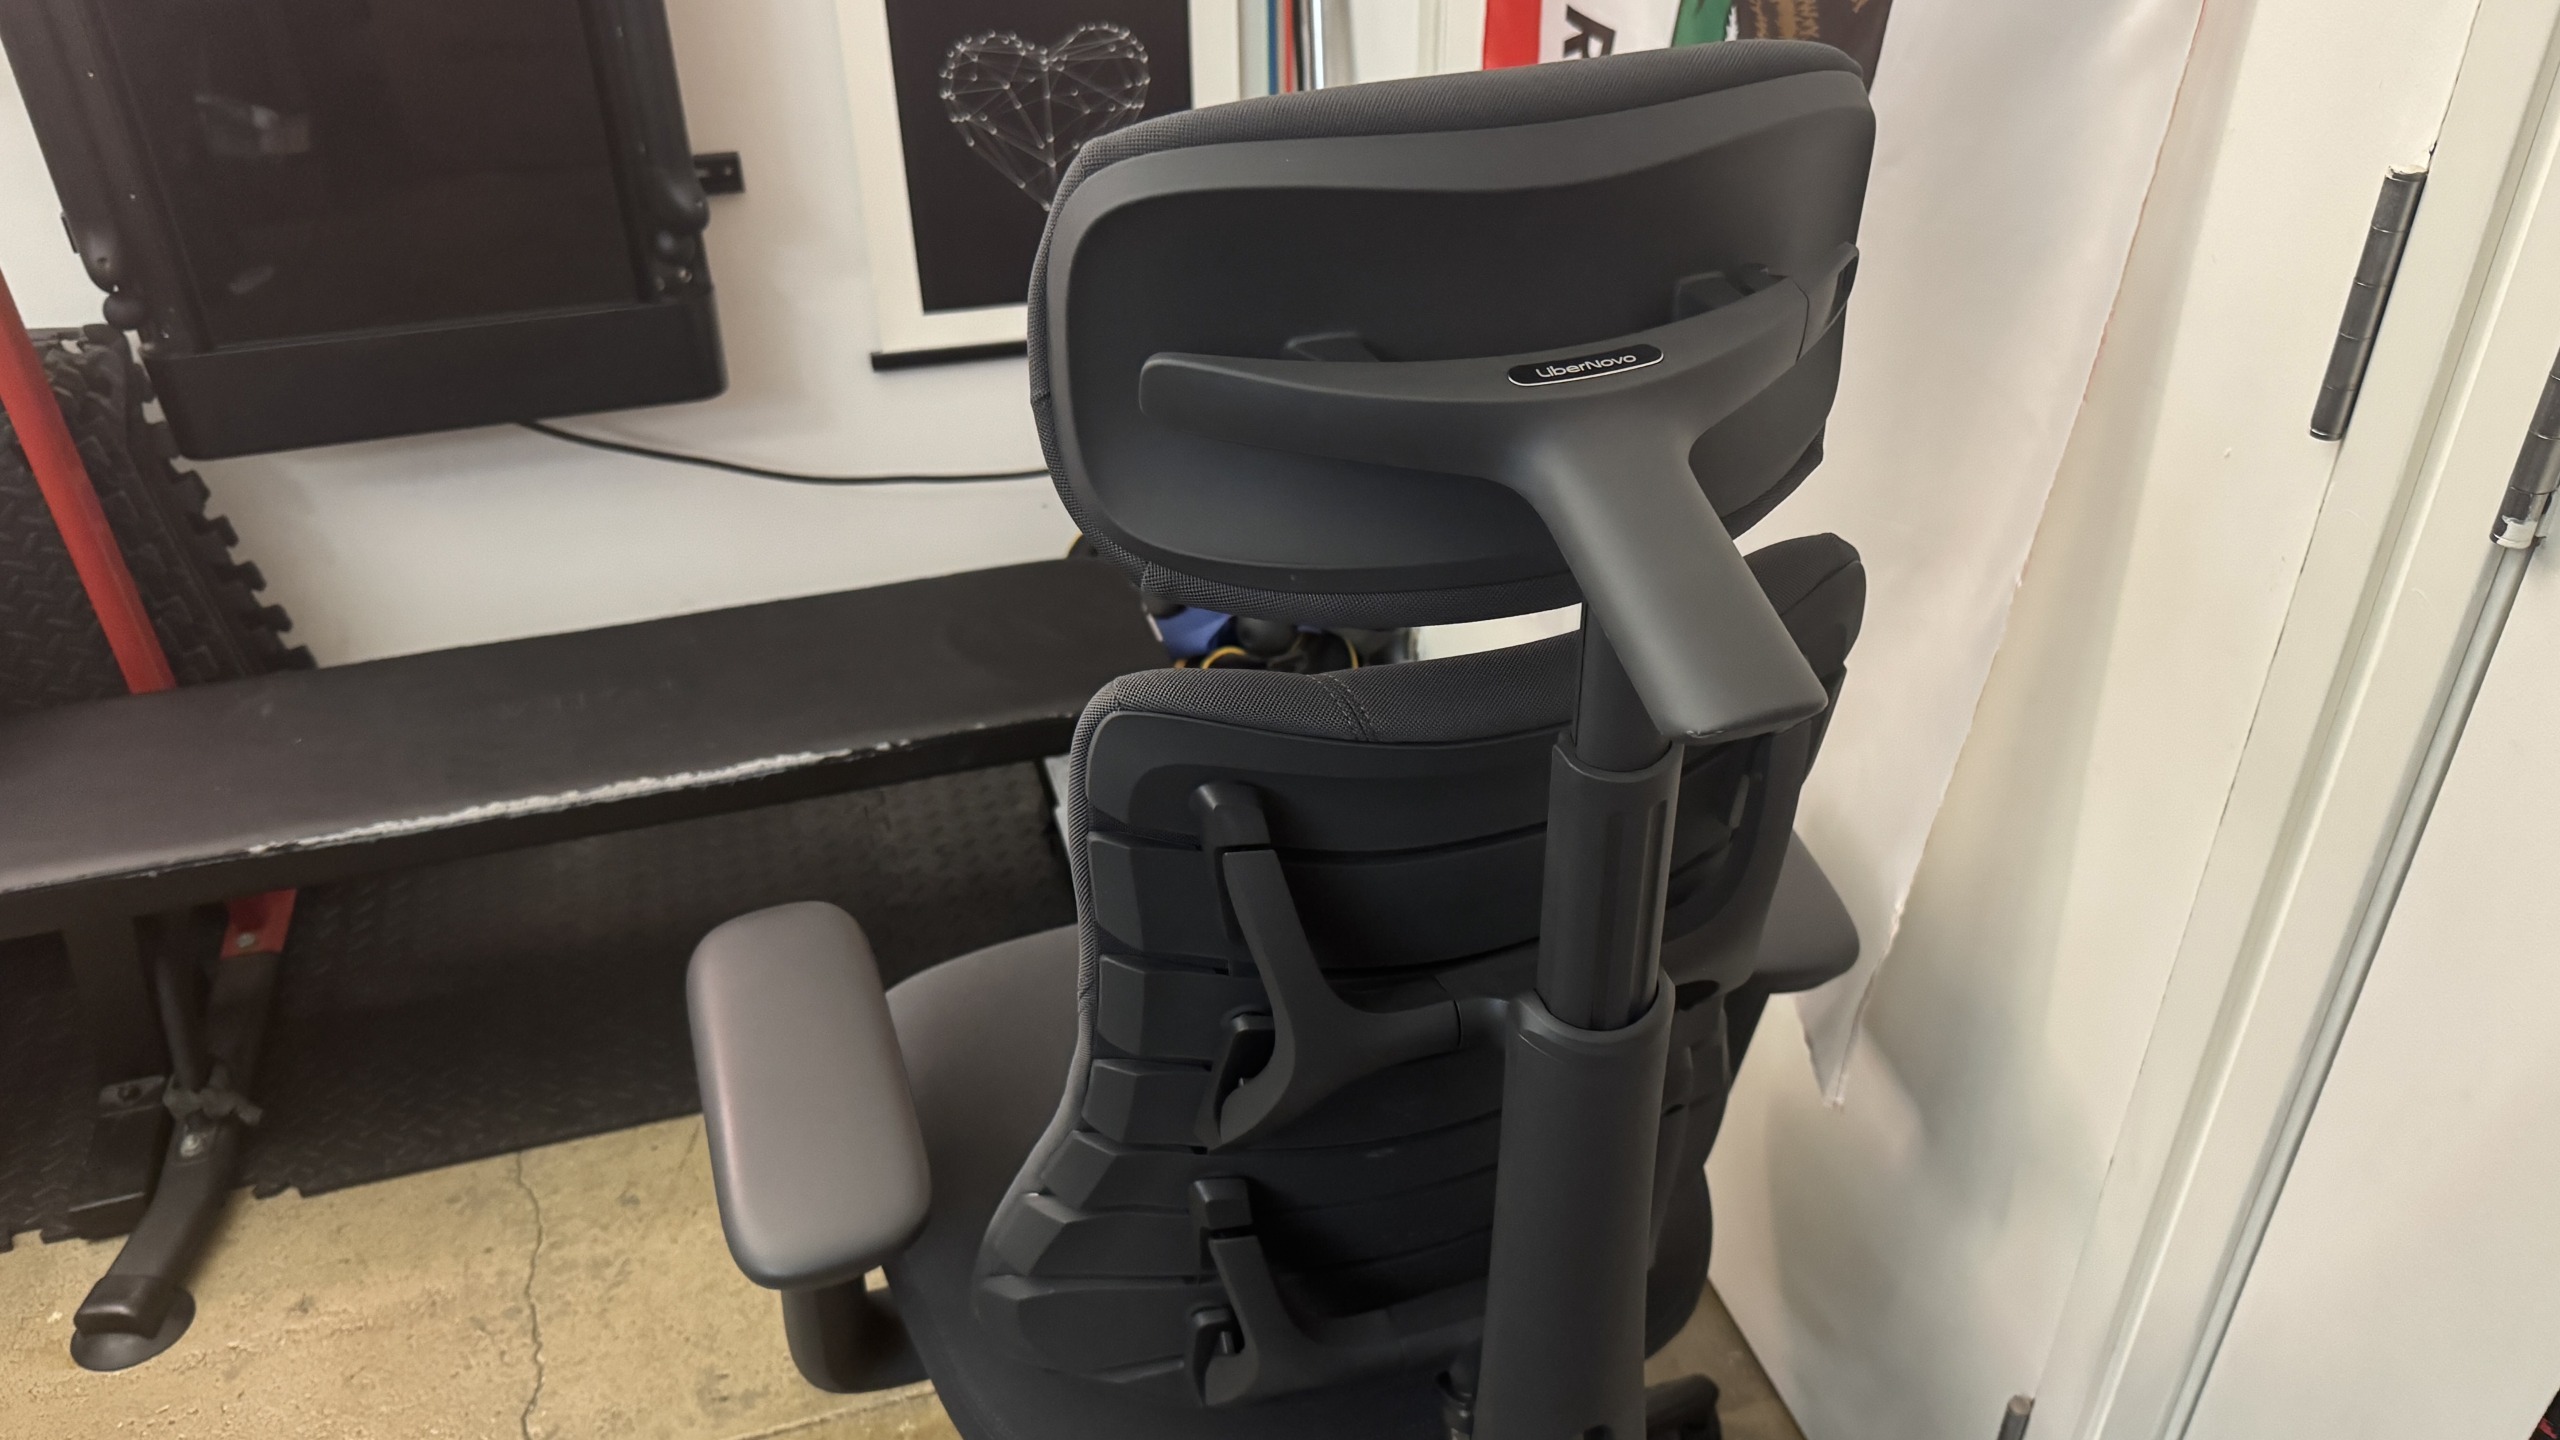
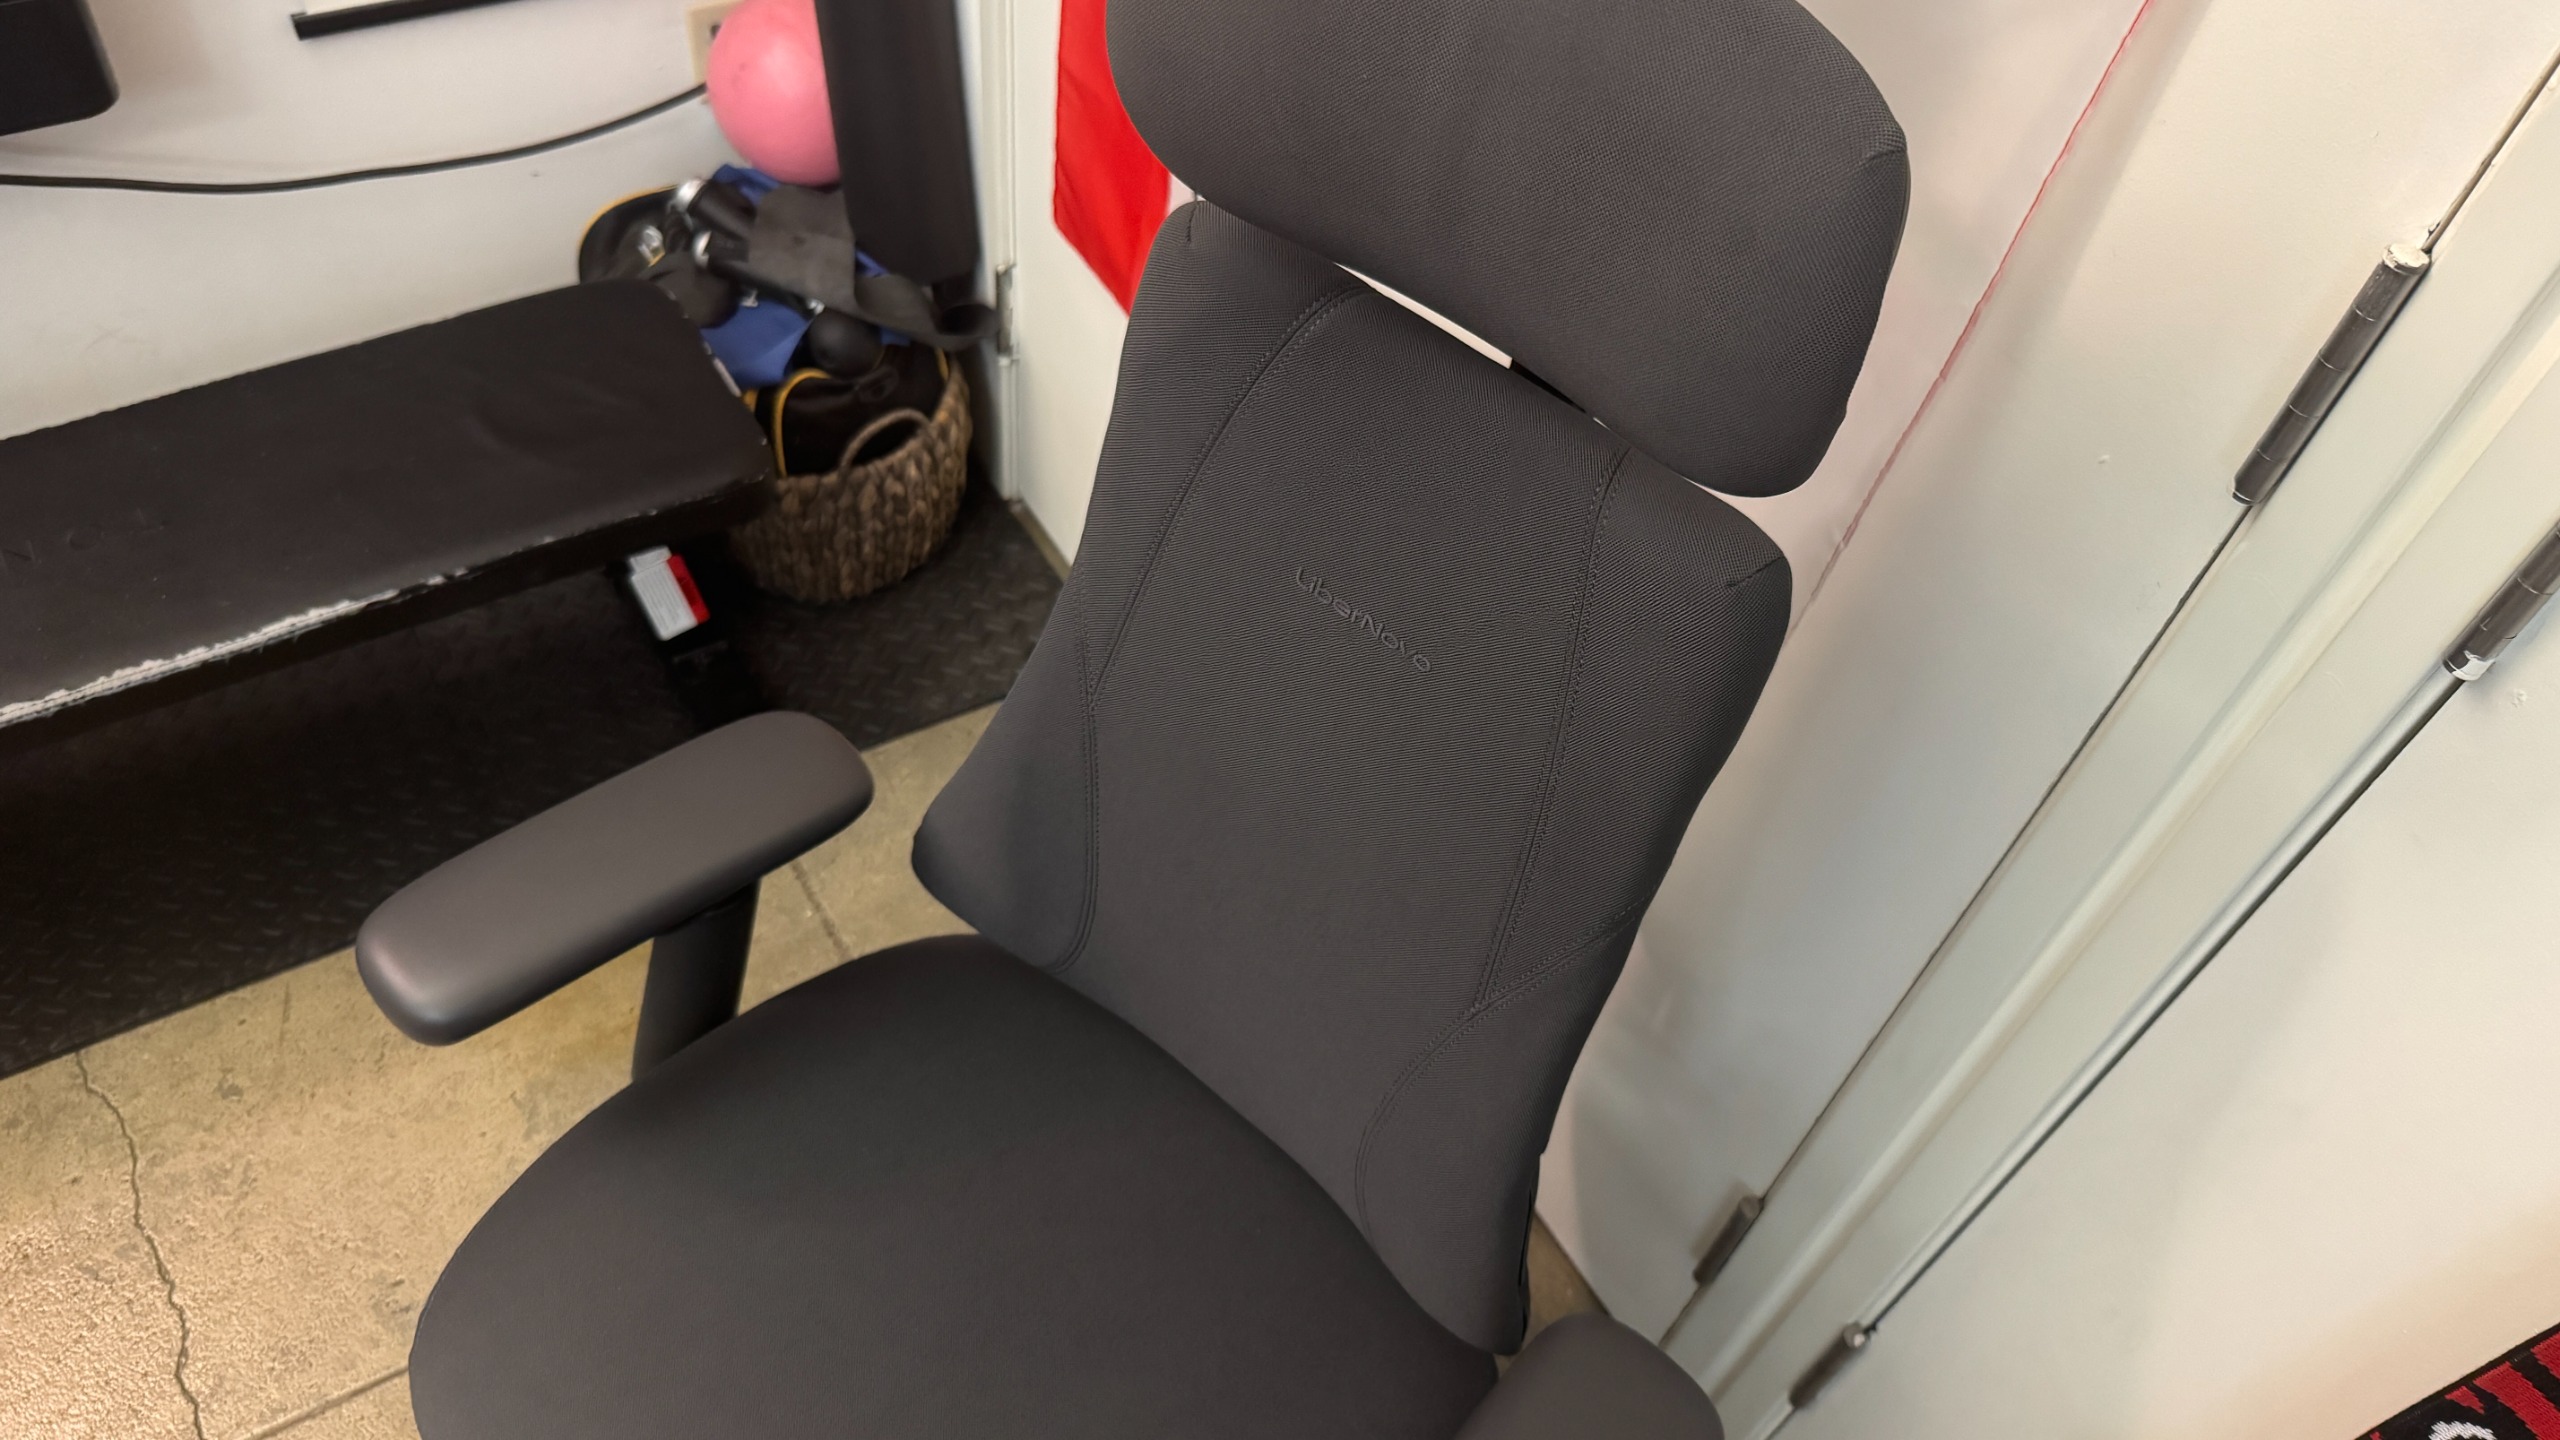
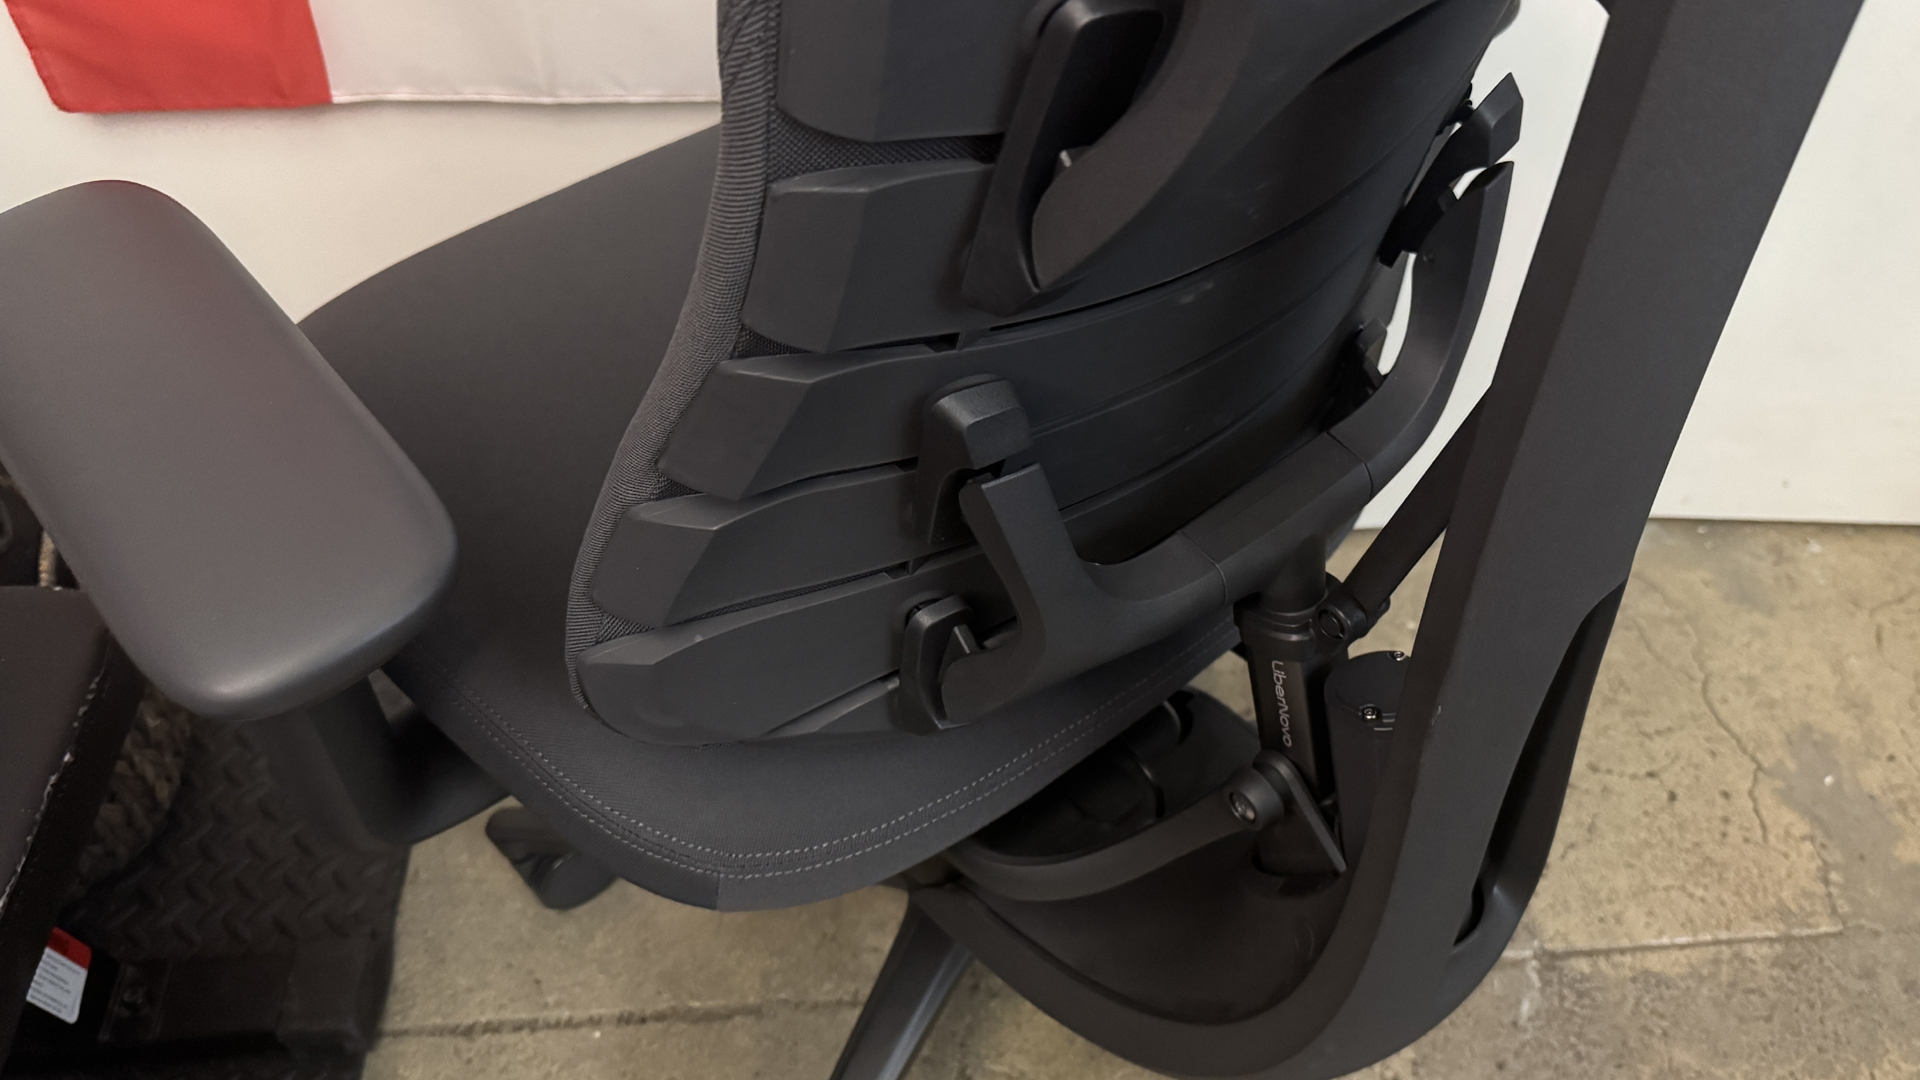
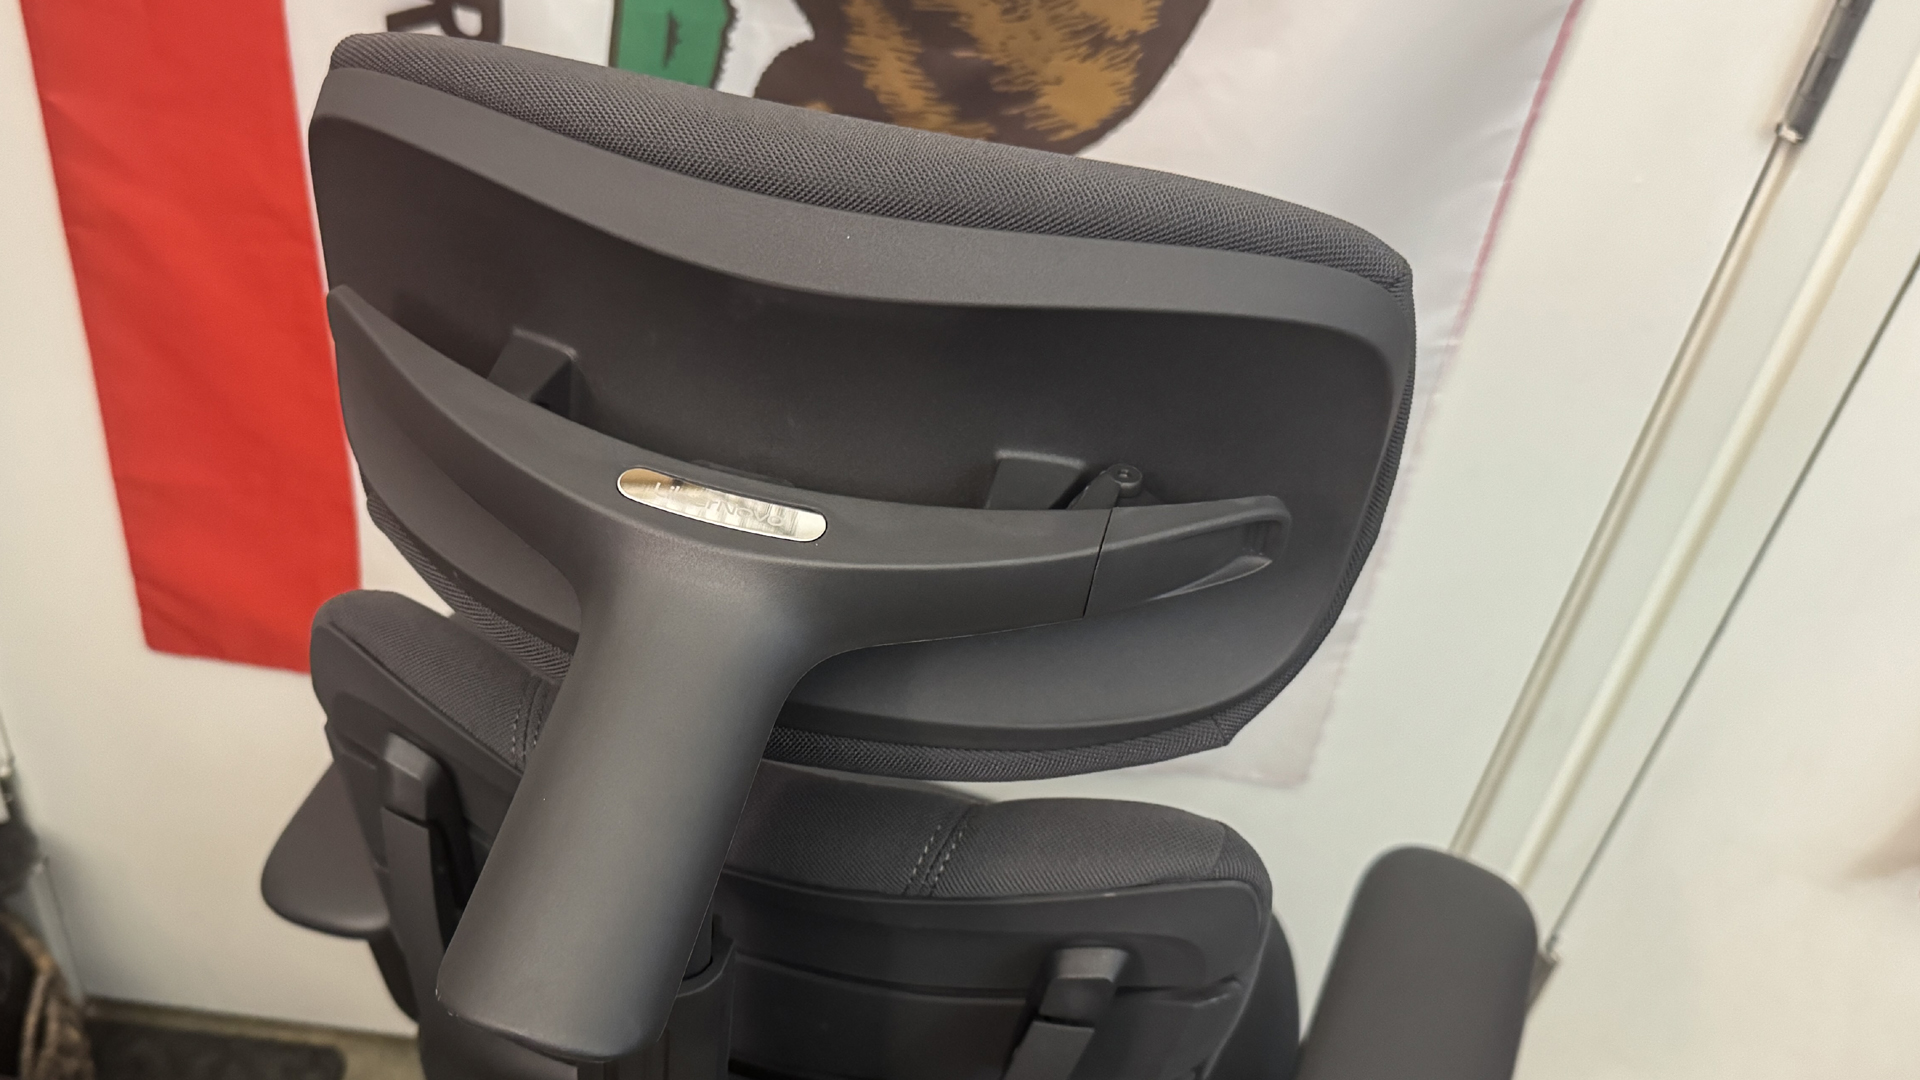
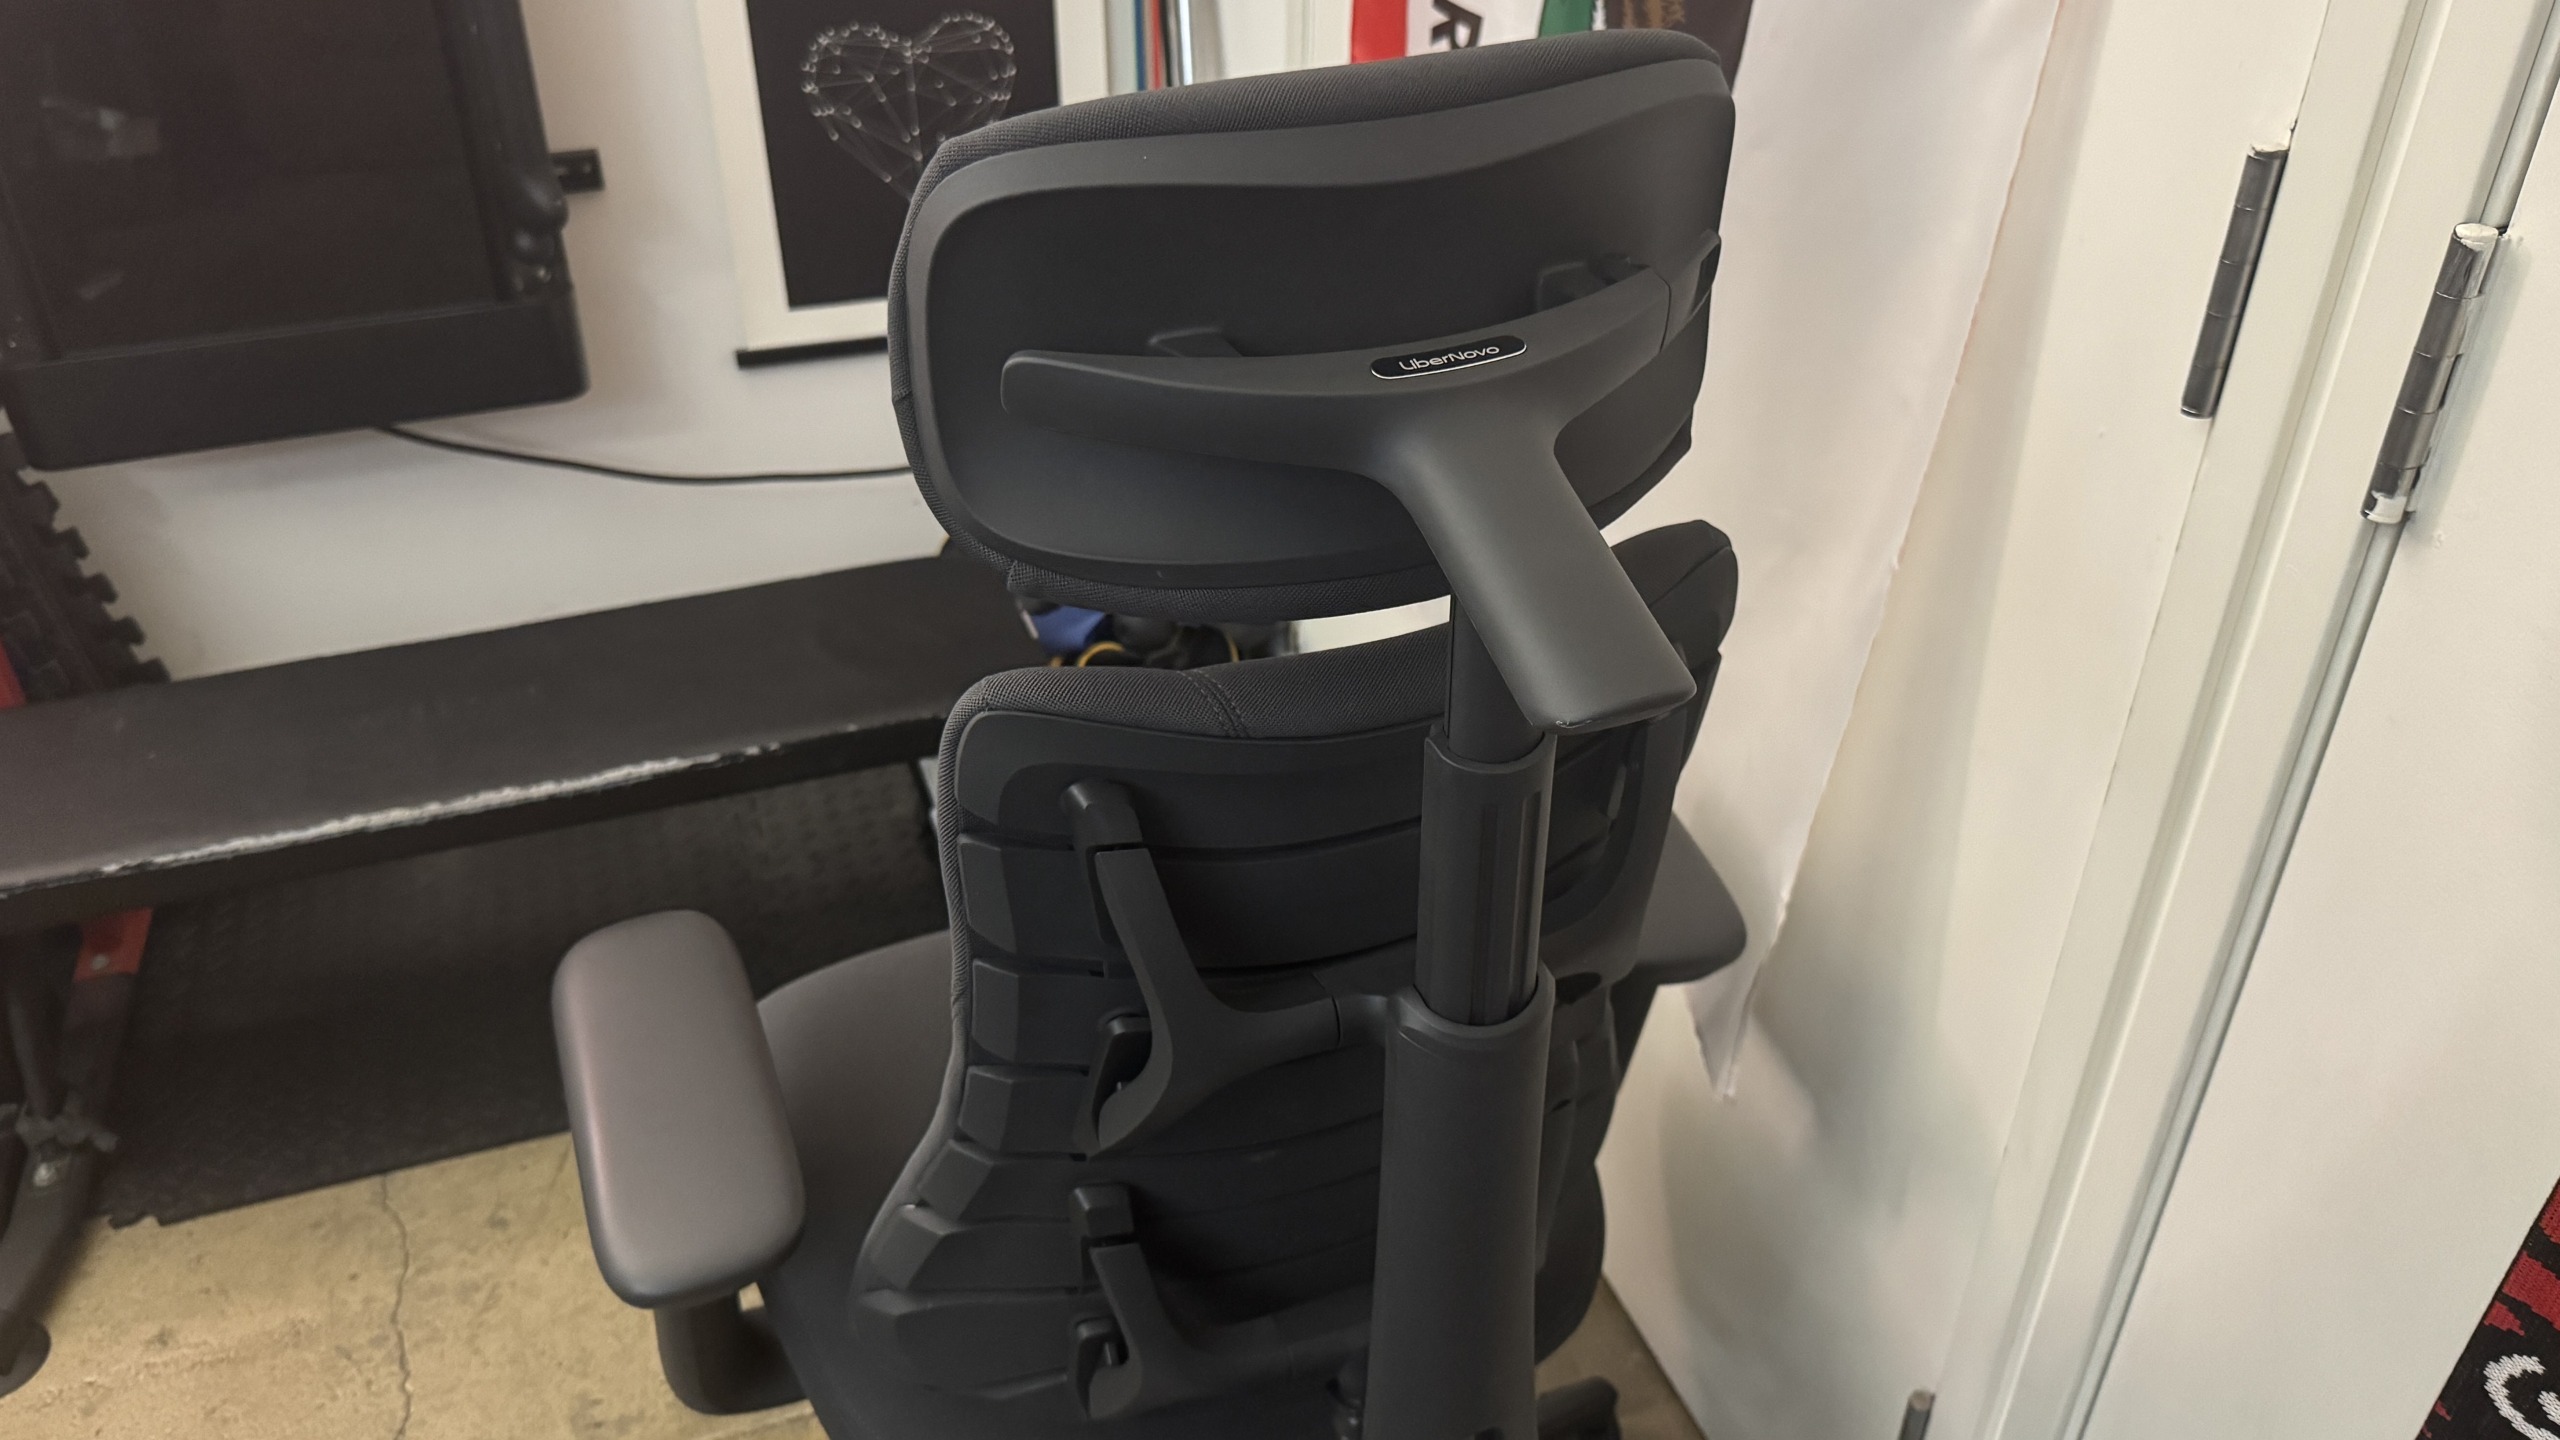
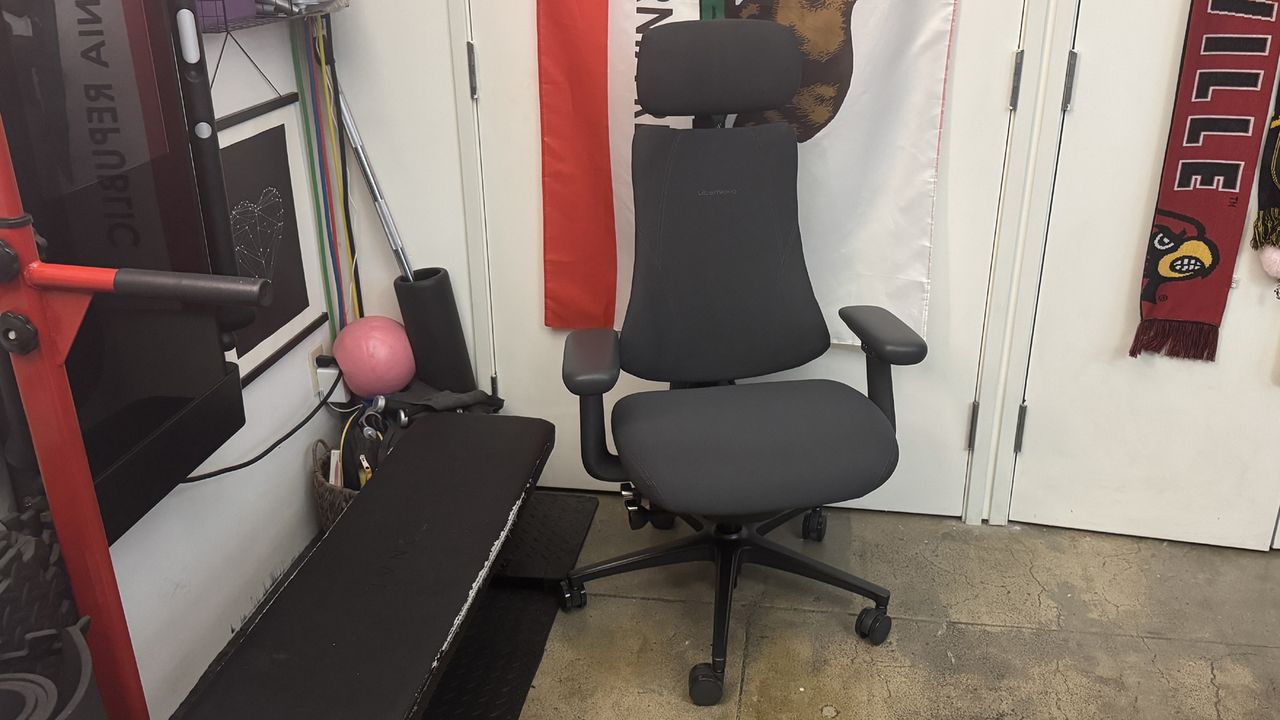
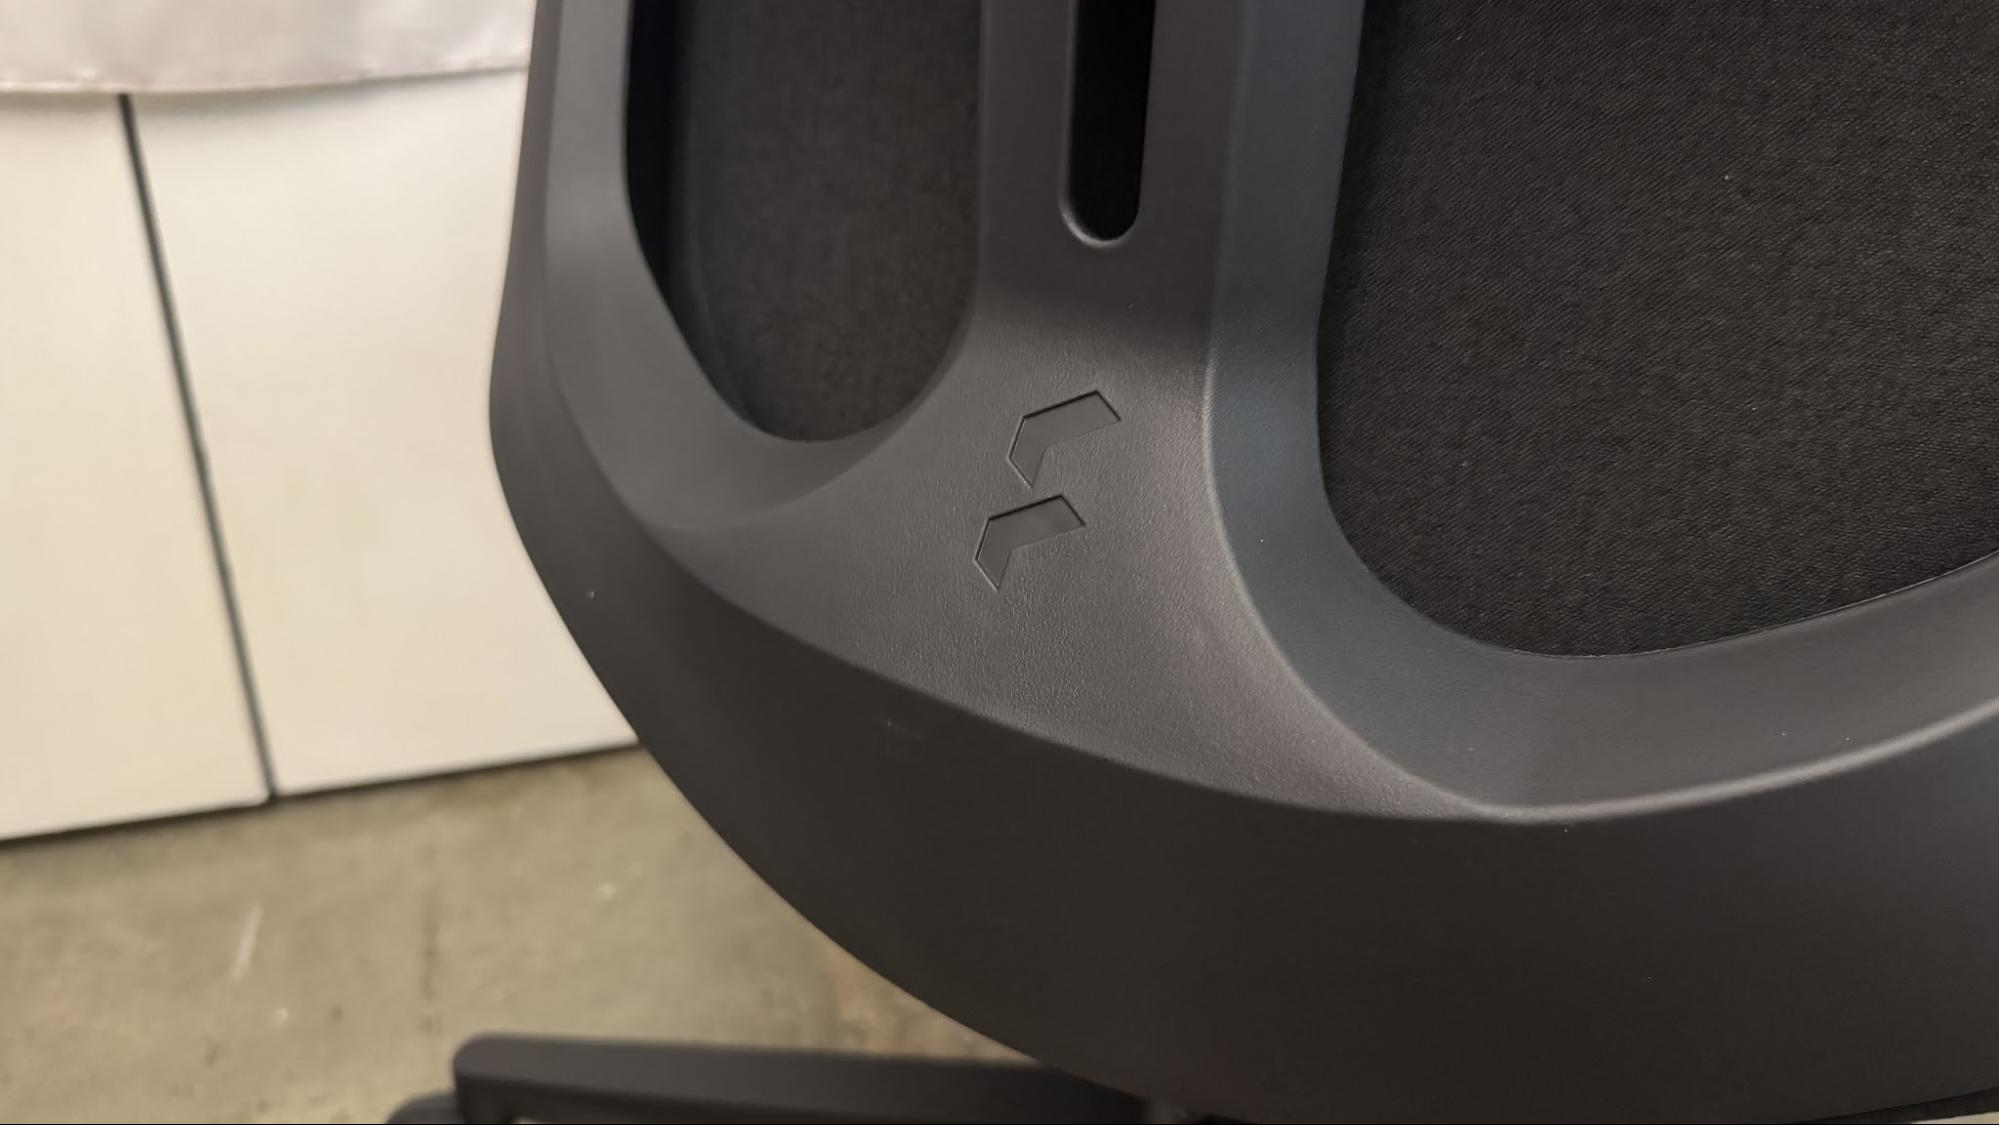
The Omni Pro looks very similar to the regular Libernovo Omni — it's a compact, lightweight office chair with an articulated backrest that's designed to move with your body as you move and shift your weight in the chair. It's a pretty compact chair, relatively speaking, but it does have a “spine” that holds the backrest together, as well as a headrest that can be moved forward/backward, and so it takes up more space (at least, behind you) than you initially expect.

Libernovo Omni Pro

(Image credit: Tom's Hardware)

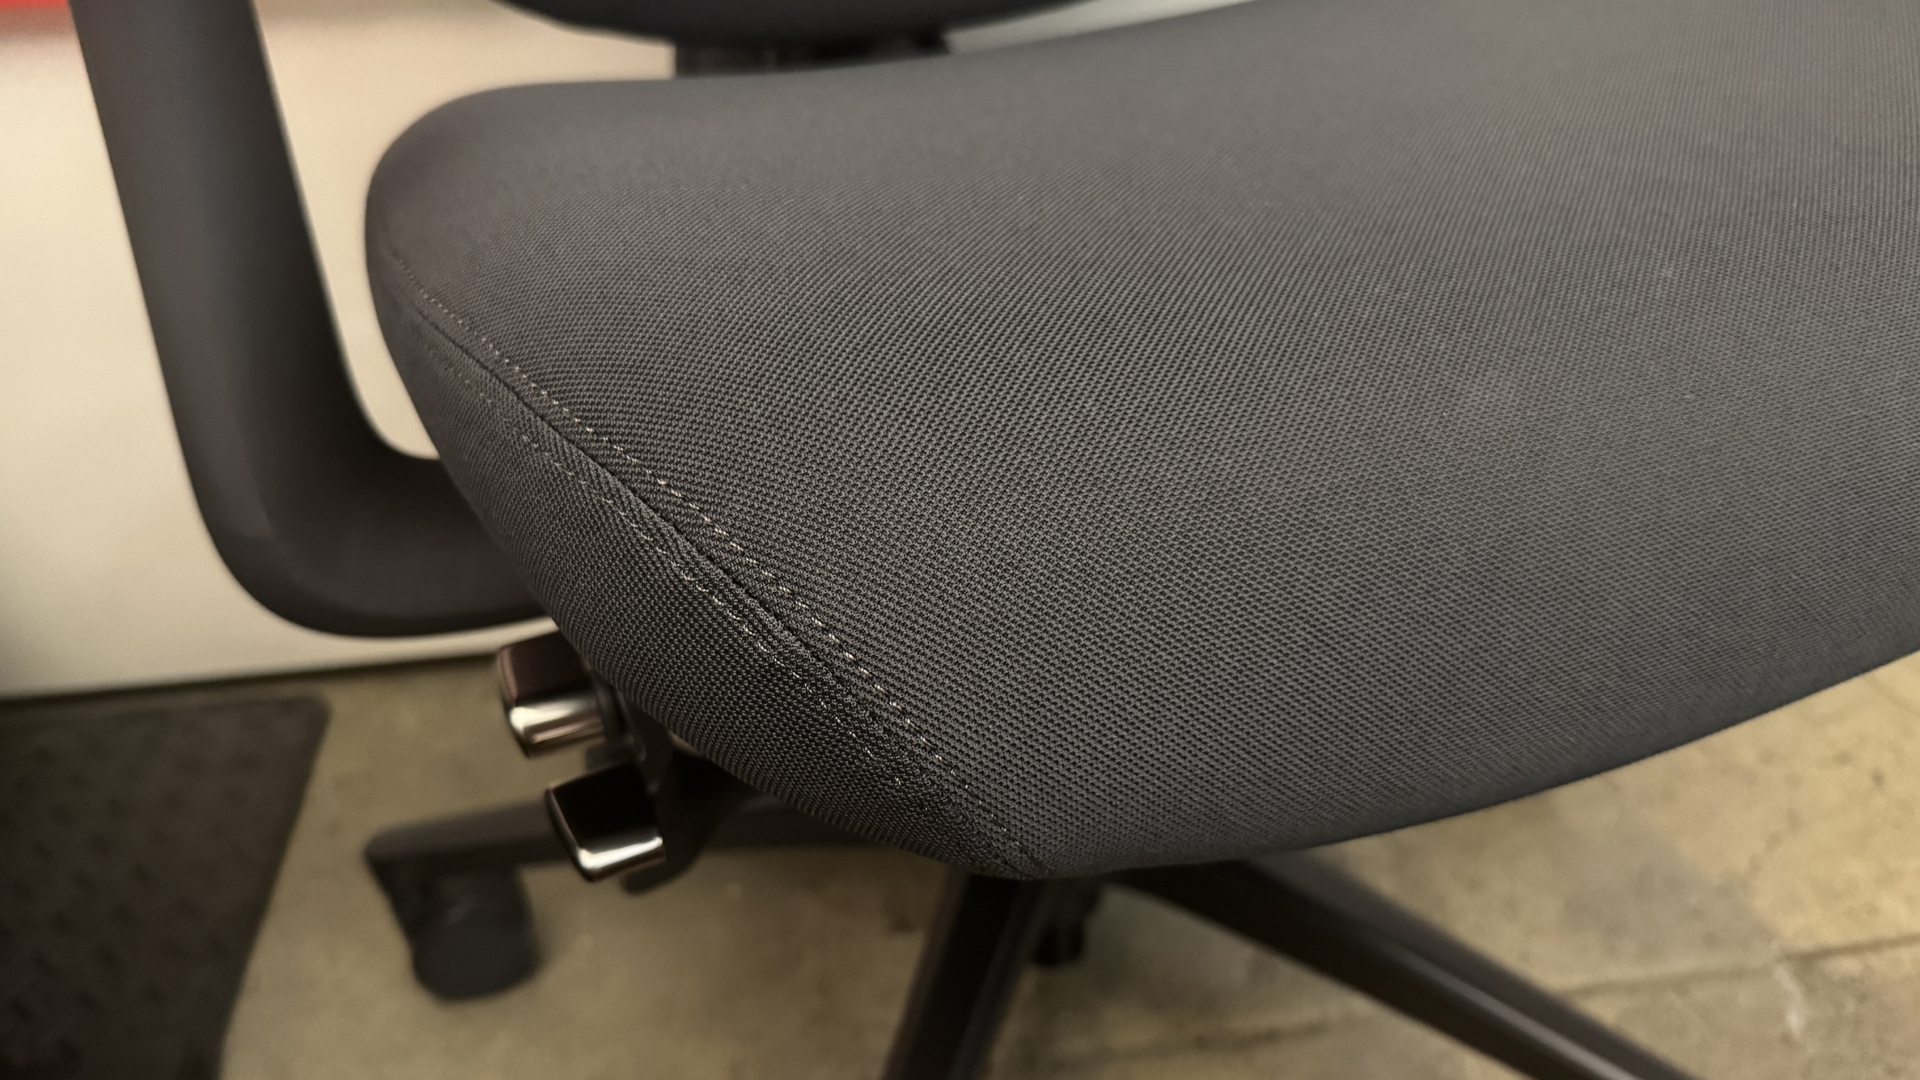
The Omni Pro comes in two colors, graphite (dark gray) and glacier (light gray, almost white). Our review unit came in graphite, with dark gray upholstery, a dark gray frame, a black wheelbase, and silver (plastic) accent buttons / knobs. The Omni Pro features new fabric upholstery — Gabriel Atlantic fabric, which is more durable and (I guess) breathable than that of the original Omni. The fabric does look and feel more durable and premium, but it's slightly more abrasive than the original fabric. It didn't cause me any real discomfort, but I also didn't sit on it for very long with bare skin.

Libernovo Omni Pro
Tom's Hardware
Libernovo Omni Pro
Tom's Hardware
Libernovo Omni Pro
Tom's Hardware

The upholstery and the wheelbase — which is made of hefty aluminum alloy — are the main noticeable design differences between the Omni Pro and the original Omni. The aluminum wheelbase does add some weight to the chair, bringing its total weight up to 55.8 pounds (25.31kg), which is heavier than the original Omni's weight of 48 pounds (21.77kg) — but still isn't particularly heavy for a chair, let alone a gaming chair.

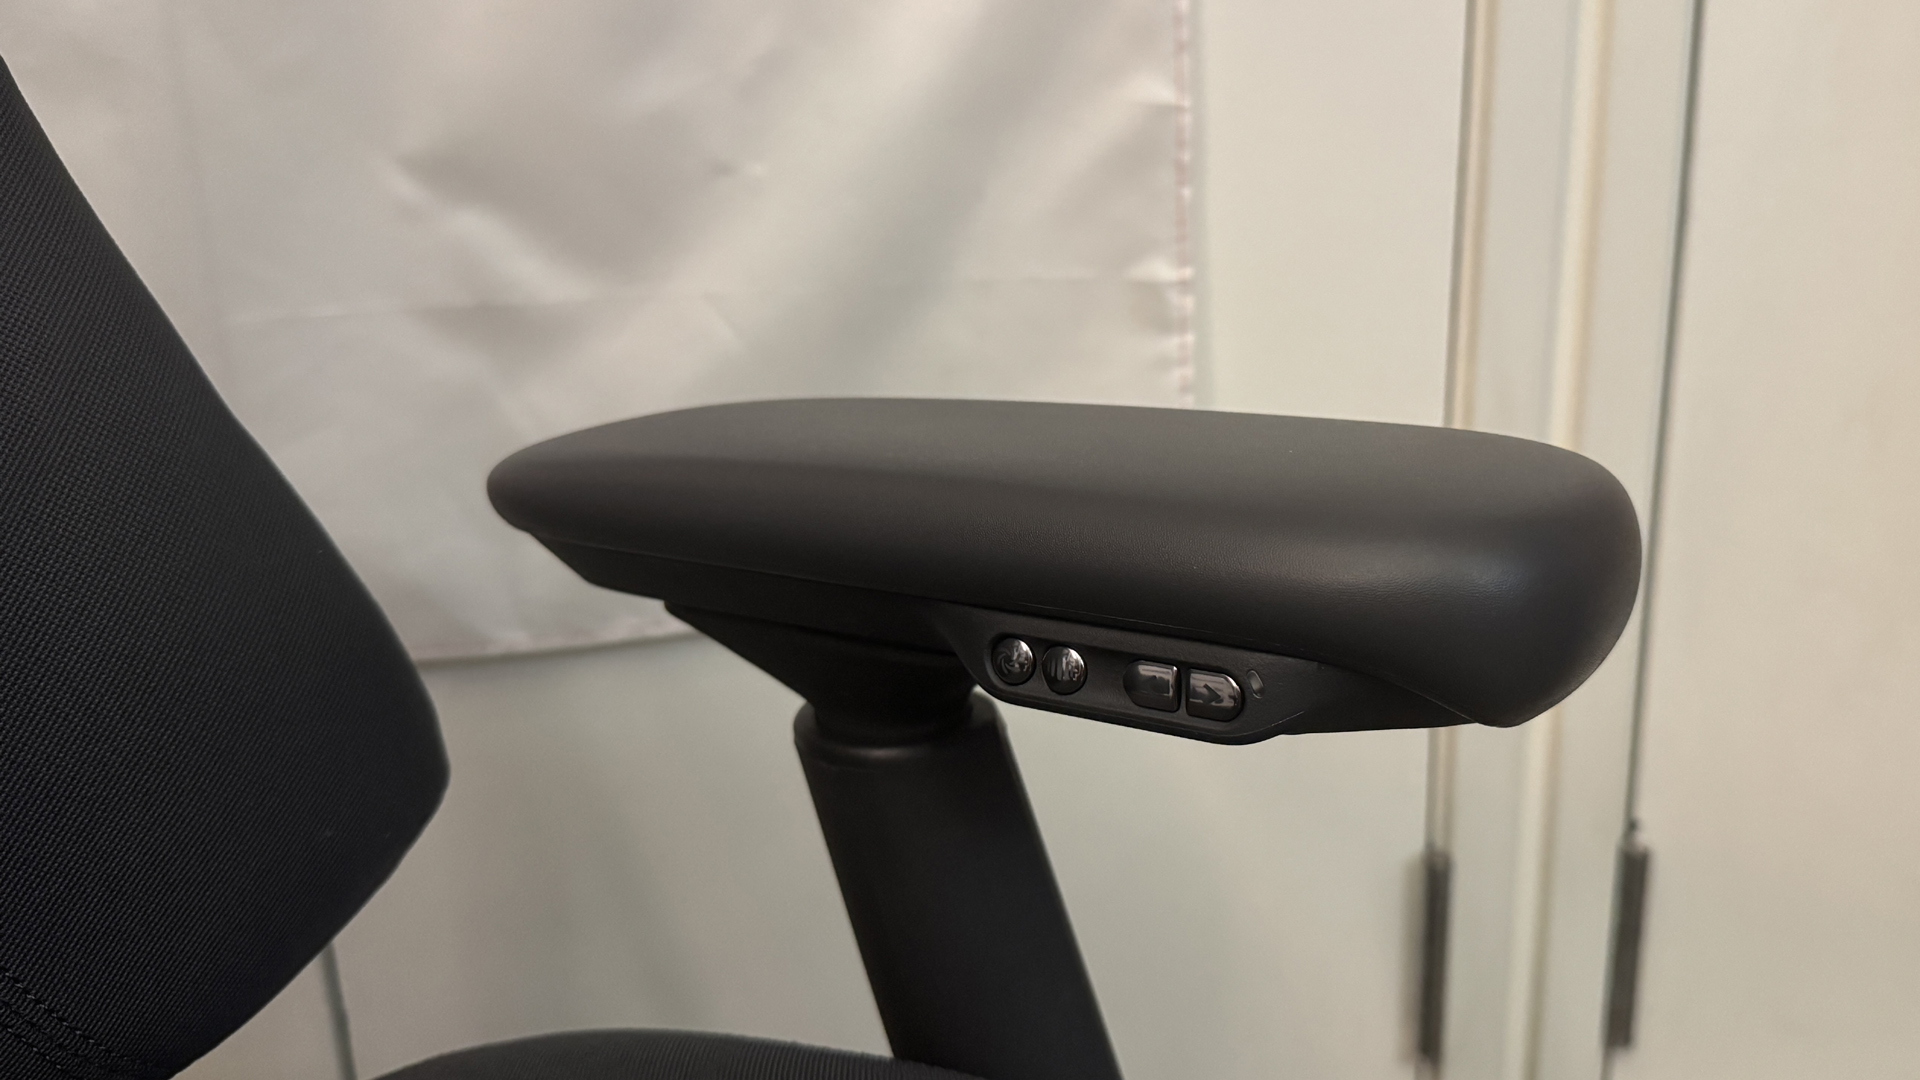
The Omni Pro also has an extra button under its left armrest, to control the underseat ventilation fan (tapping the button toggles through the fan's settings — slow, fast, and off).

Specs

Upholstery

Gabriel Atlantic Fabric

Total Height (with base)

47.83 - 52.17 inches / 121.49 - 132.51 cm

Floor to Seat Height

19.09 - 23.43 inches / 48.49 - 59.51 cm

Armrest Adjustments

4D

Recline

105 - 160 degrees

Backrest Length

21.26 inches / 54 cm

Backrest Width (Shoulder Level)

13.5 inches / 34.29 cm

Seating Area Width (Point of Contact)

17.72 inches / 45 cm

Seating Area Width (total)

21.46 inches / 54.5 cm

Seating Area Depth

17.72 inches / 45 cm or 18.9 inches / 48 cm

Armrest Width

3.94 inches / 10 cm

Armrest Height

7 - 10.25 inches / 17.78 - 26.04 cm

Max Recommended Weight

300lbs / 136kg

Weight

55.8lbs / 25.31kg

Warranty

6 years (frame); 2 years (electronics)

MSRP / Price at Time of Review

$1,299 / $1,109

Release Date

June 2026

Comfort and Adjustments

The Libernovo Omni Pro is a surprisingly comfortable chair — just like the original Omni — thanks to its dynamic, ergonomic articulated backrest and various adjustments. It's more of an office chair than it is a gaming chair, but it does offer a full 160-degree recline — though it's an active recline, meaning you need to be sitting in the chair for it to happen (as opposed to many gaming chairs, which are similar to car seats).

Libernovo Omni Pro
Tom's Hardware
Libernovo Omni Pro
Tom's Hardware

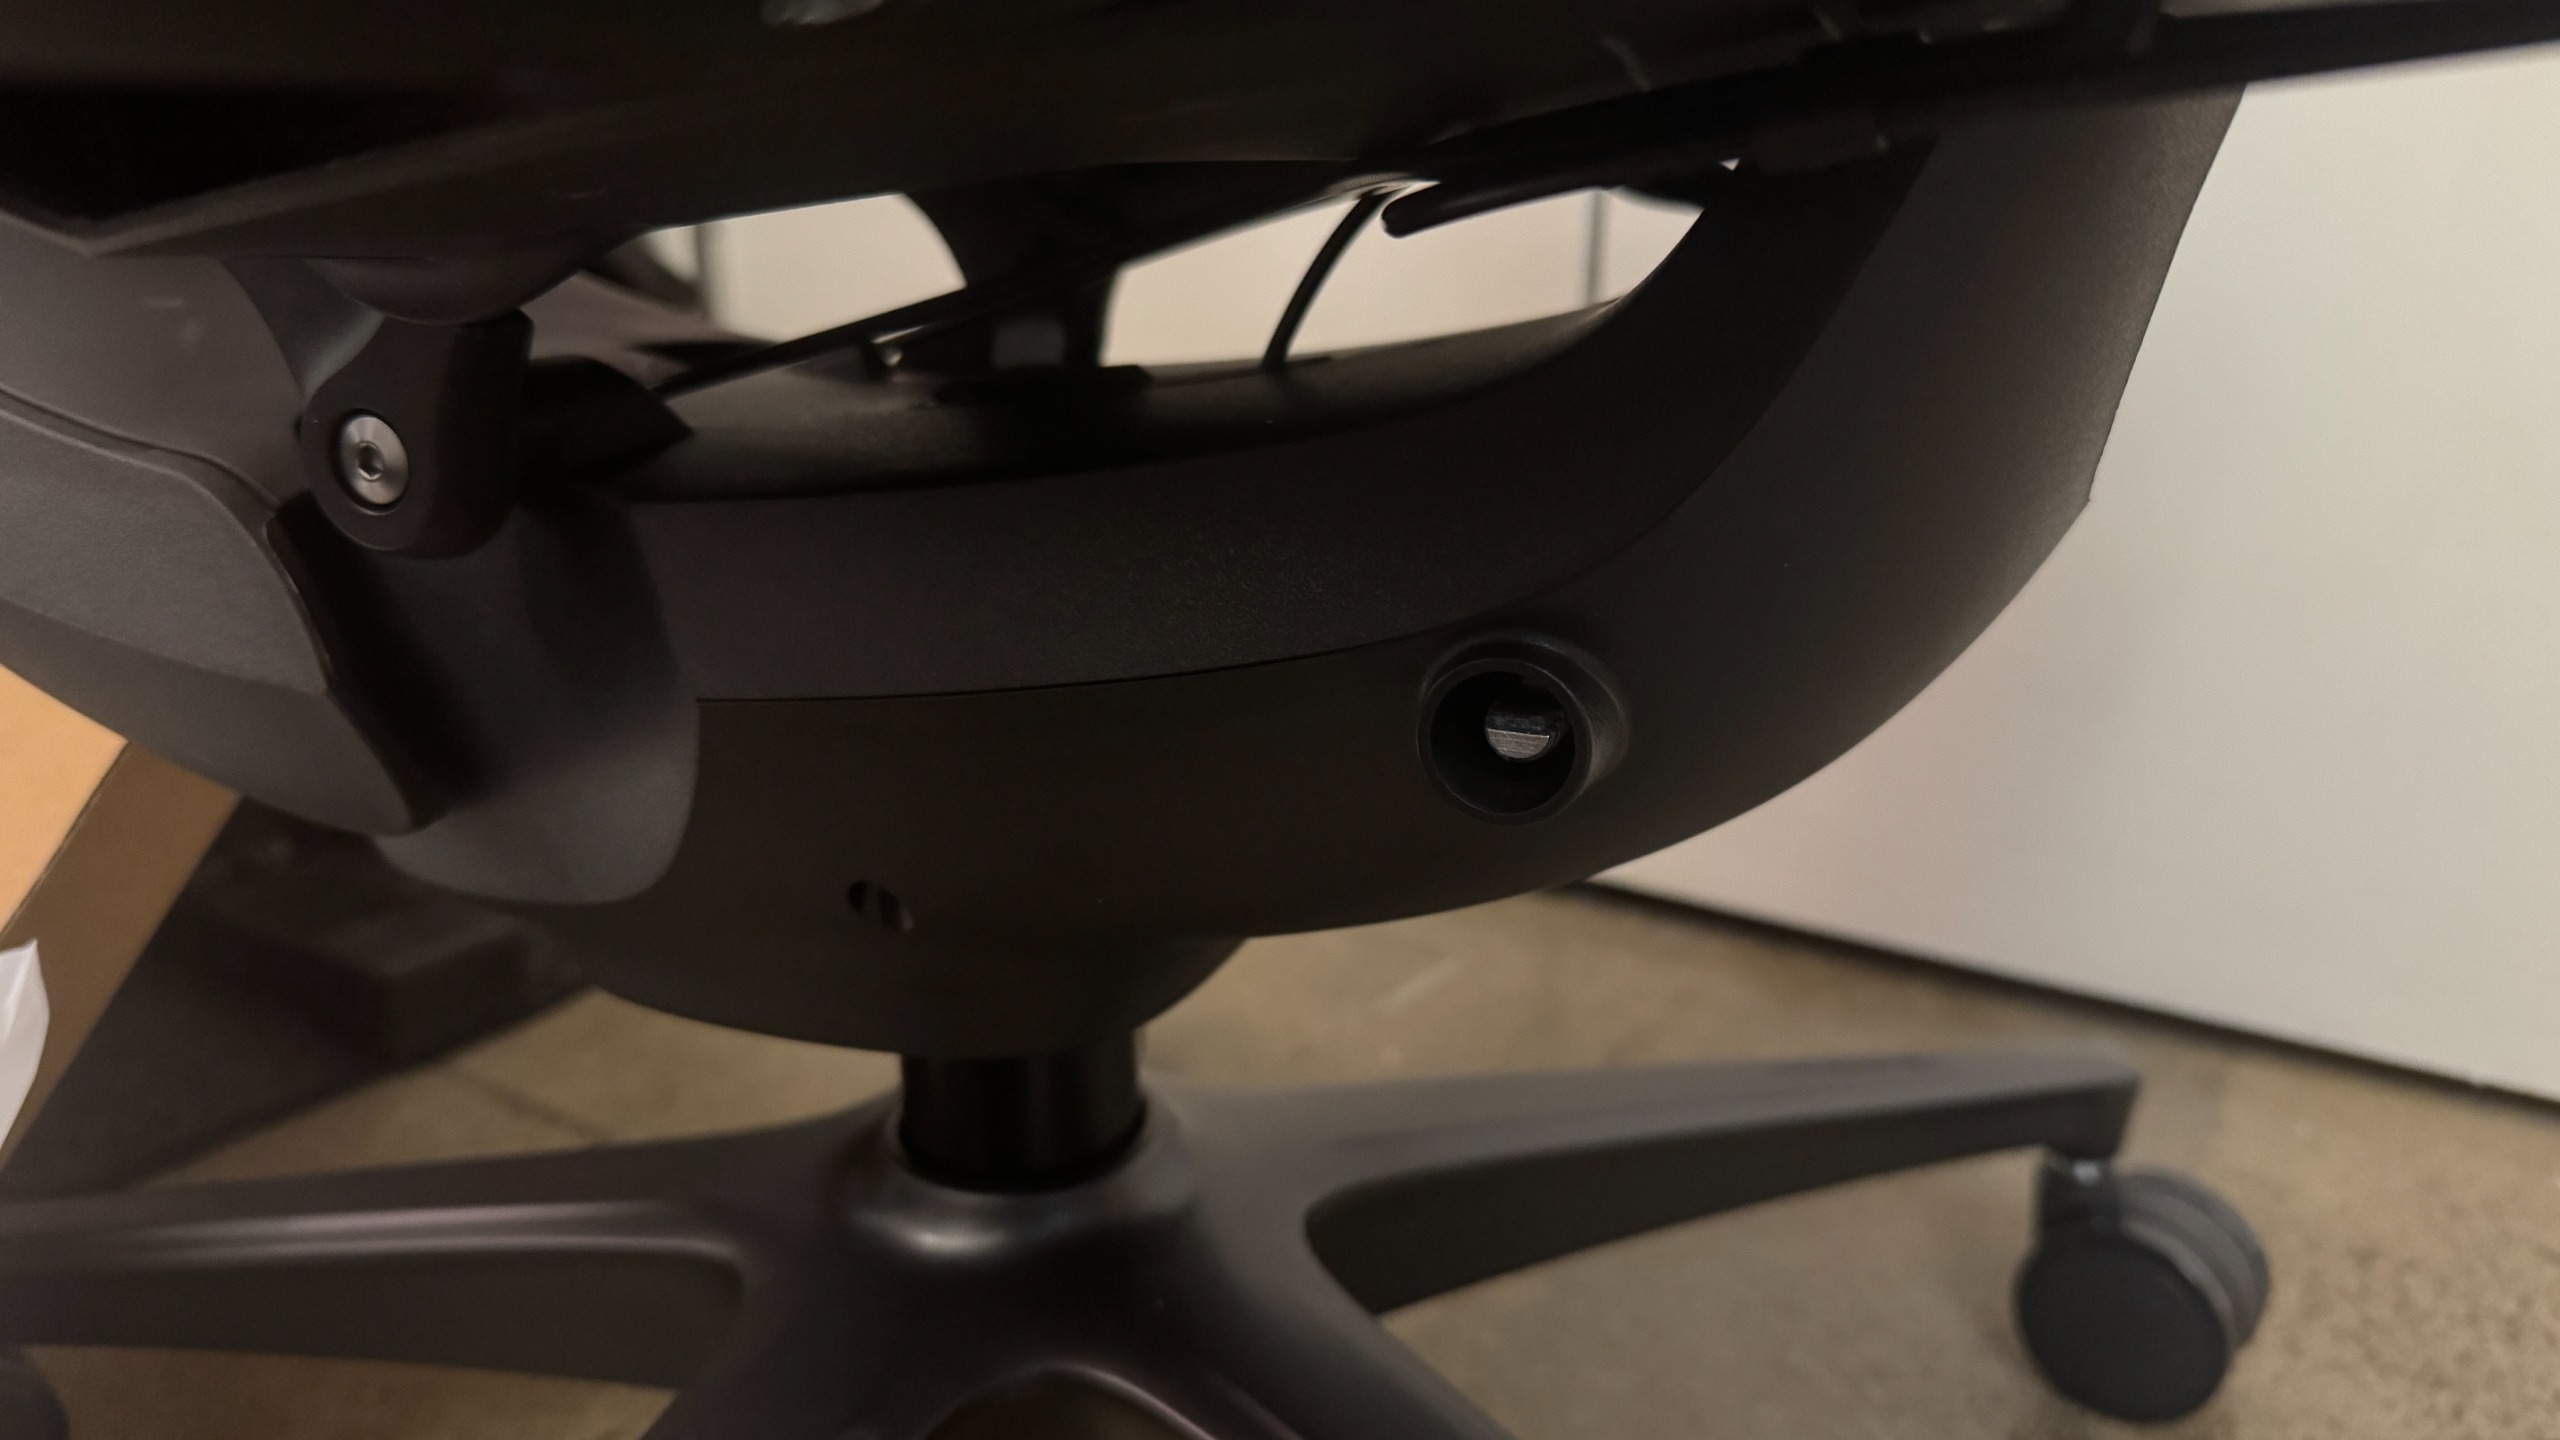
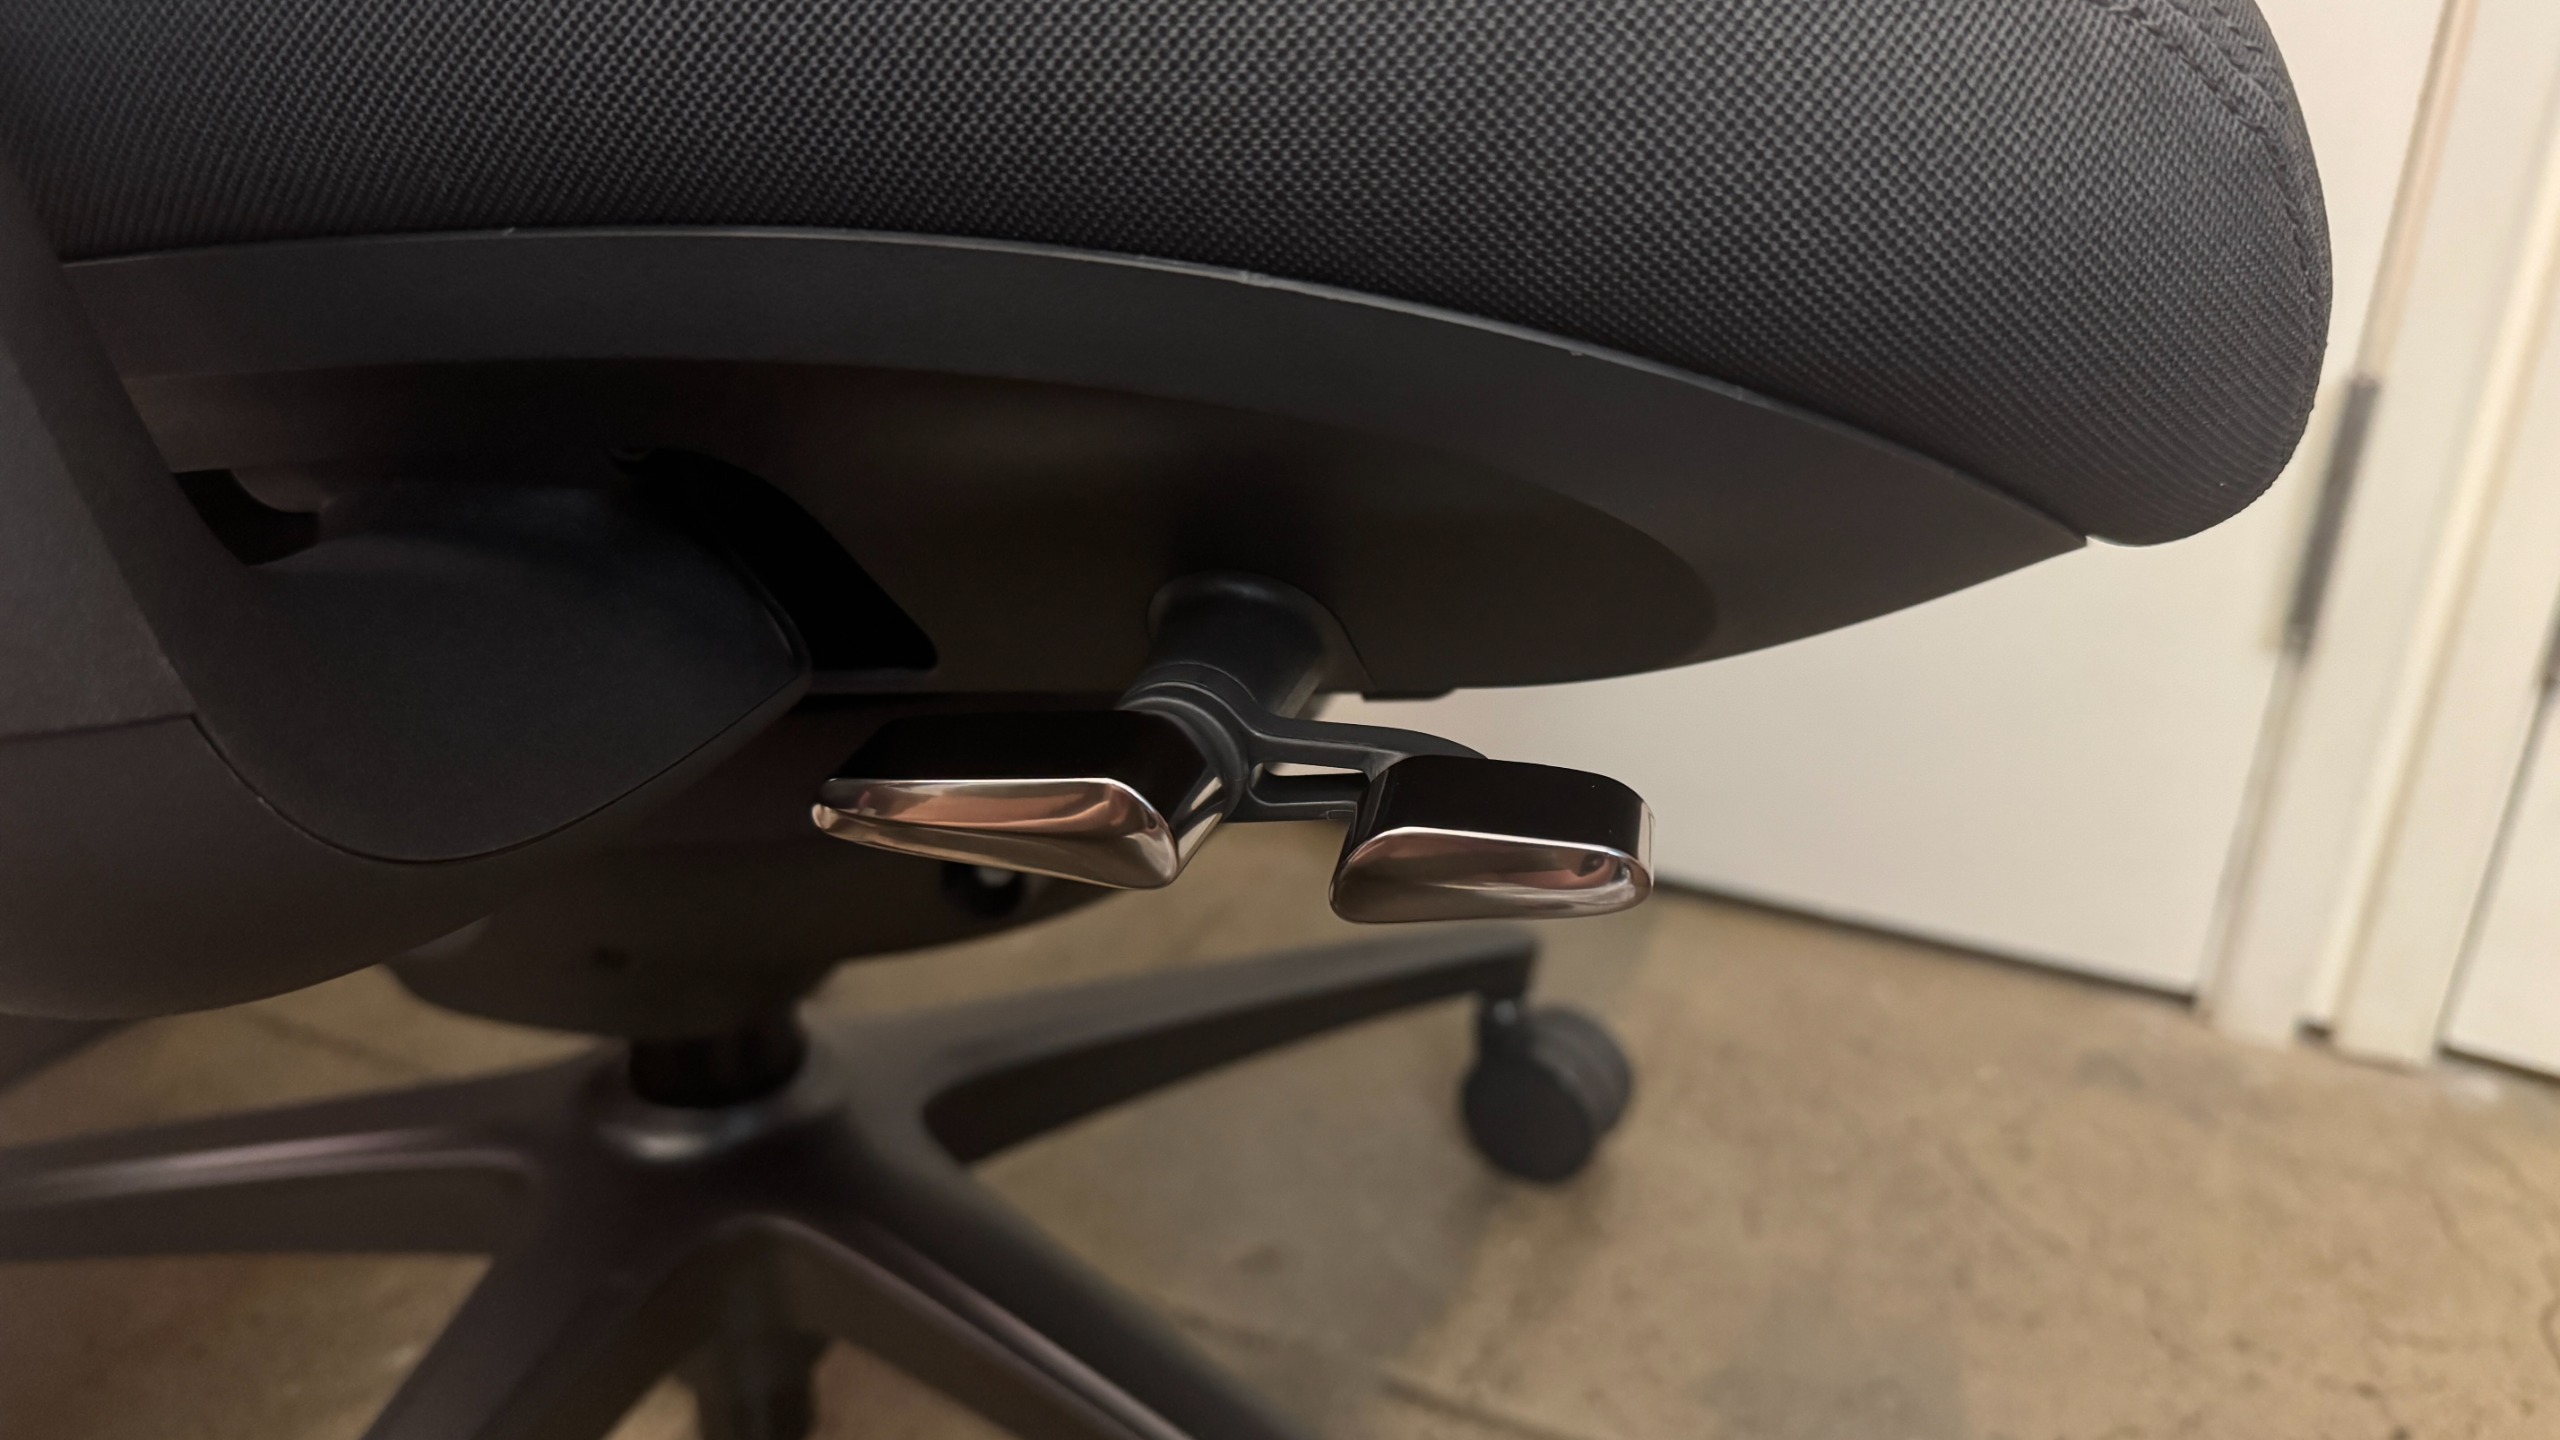
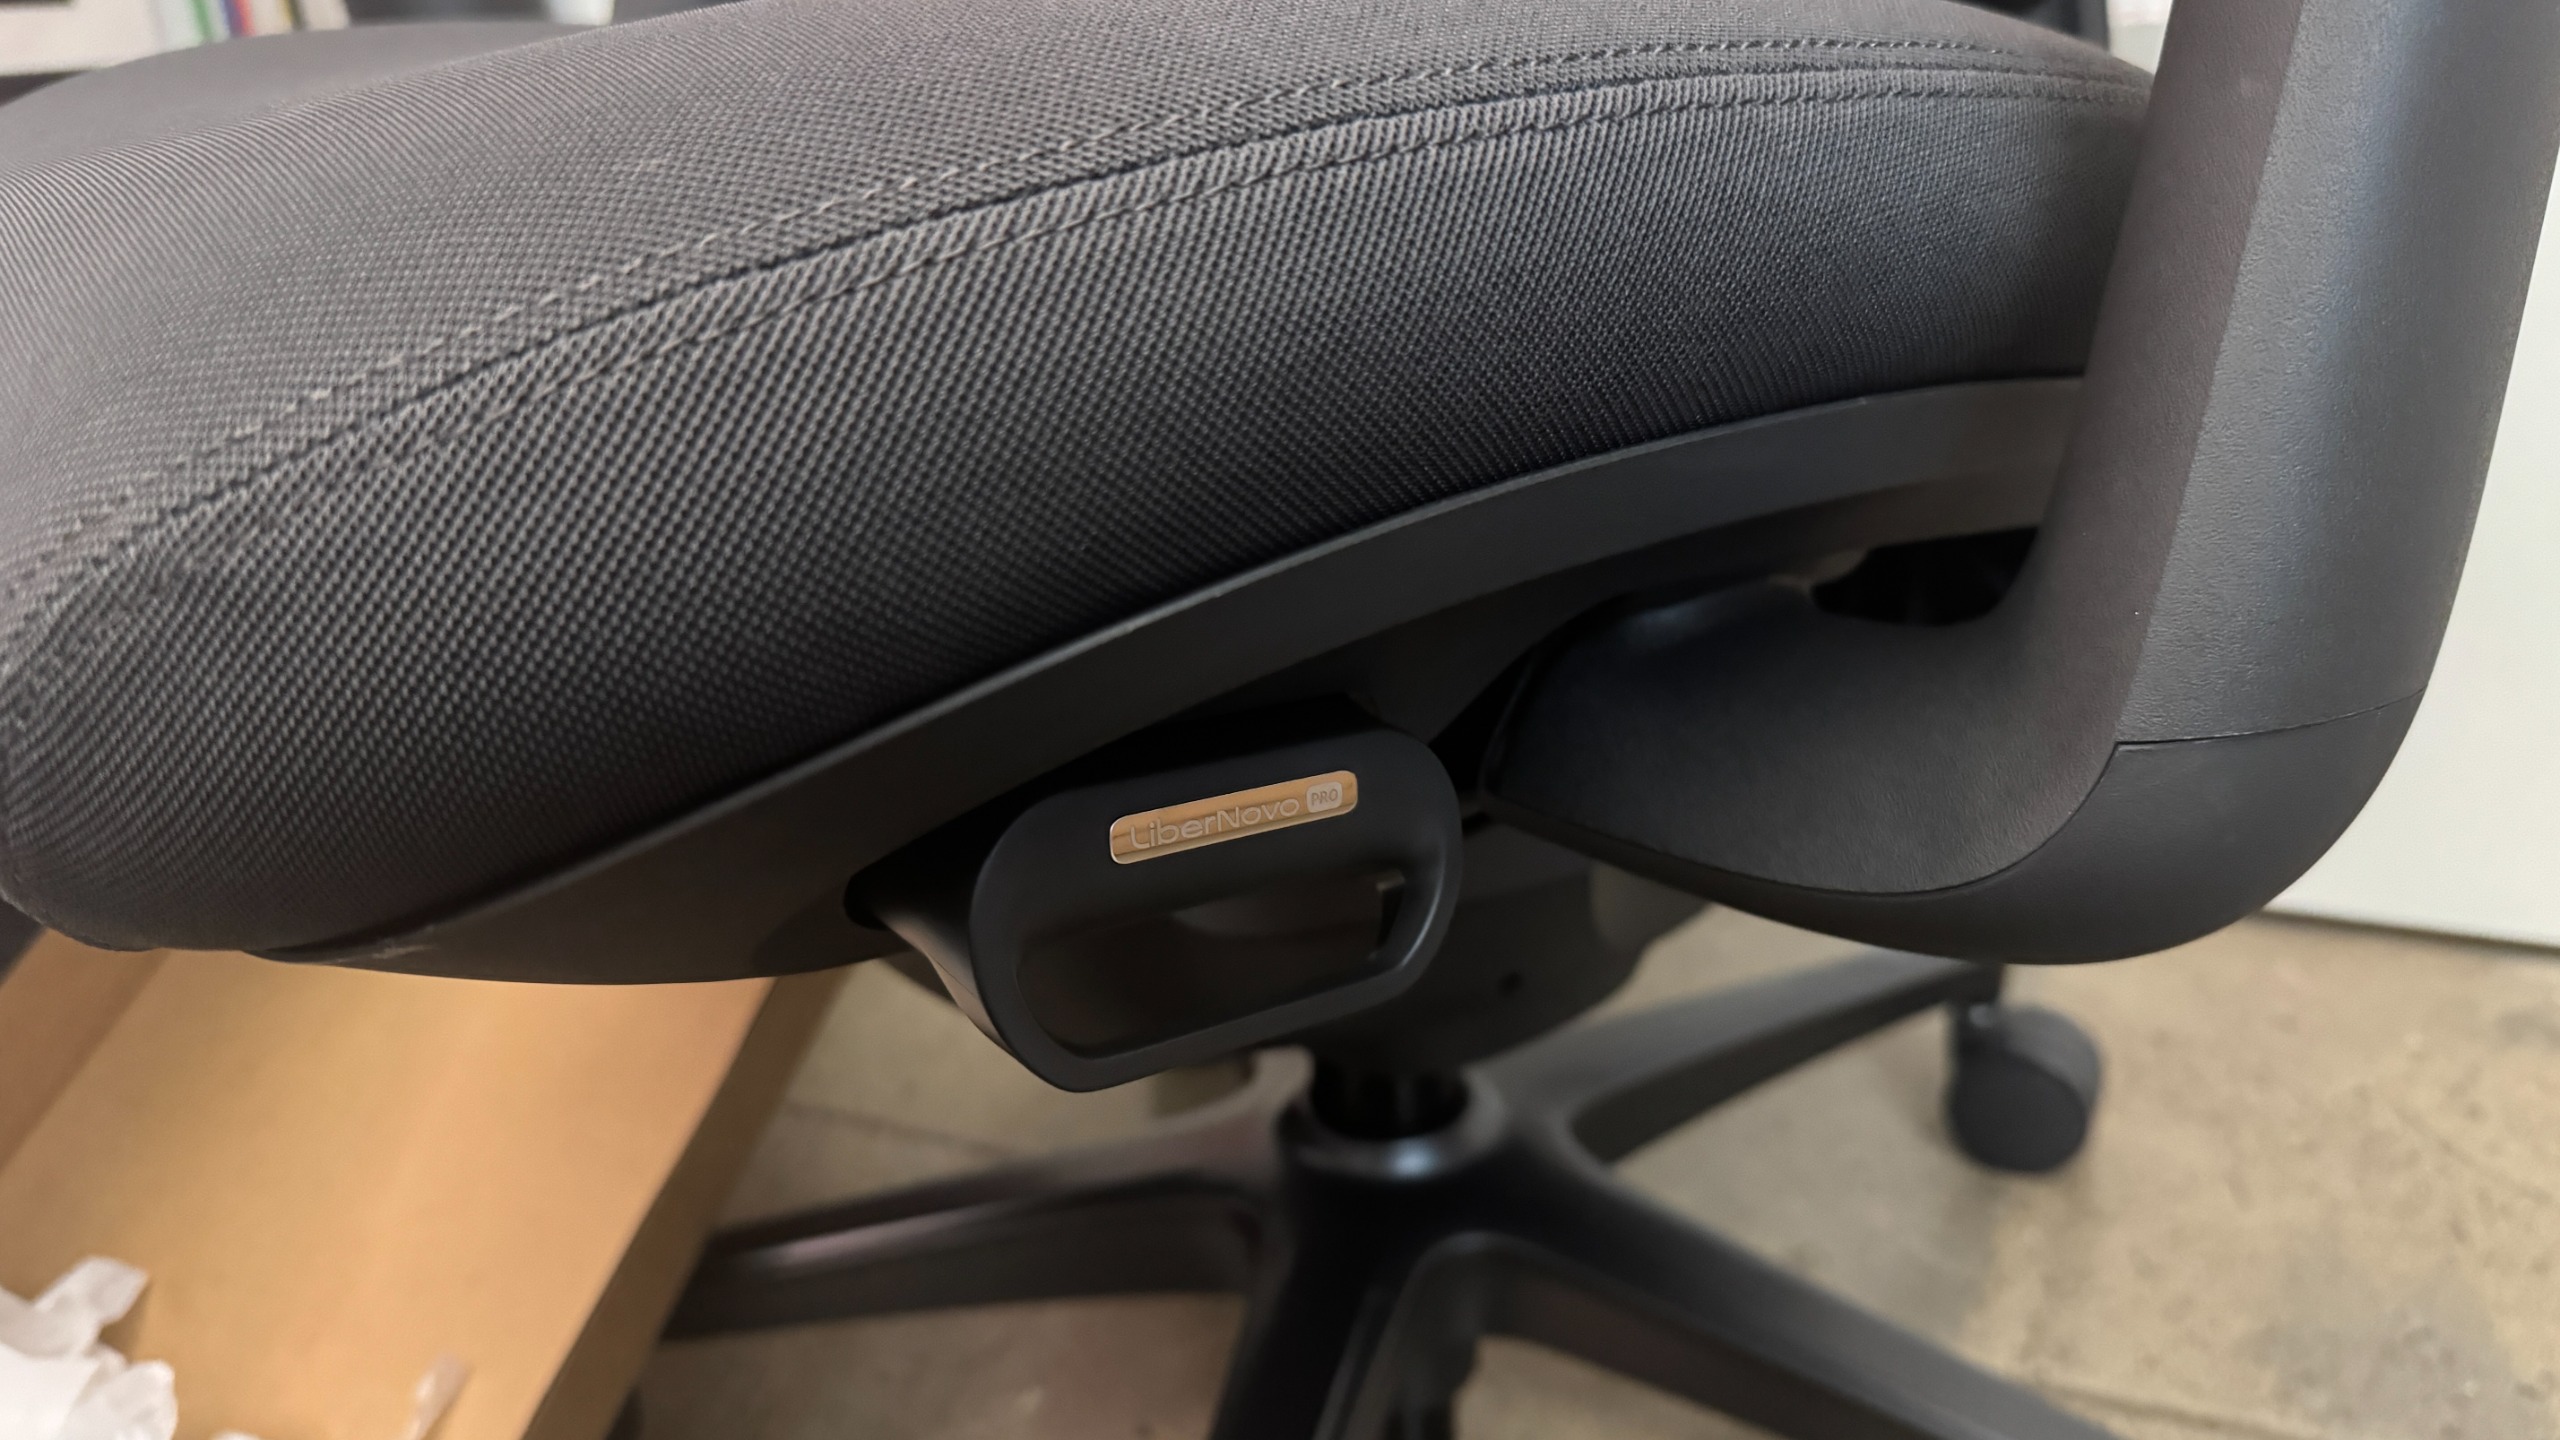
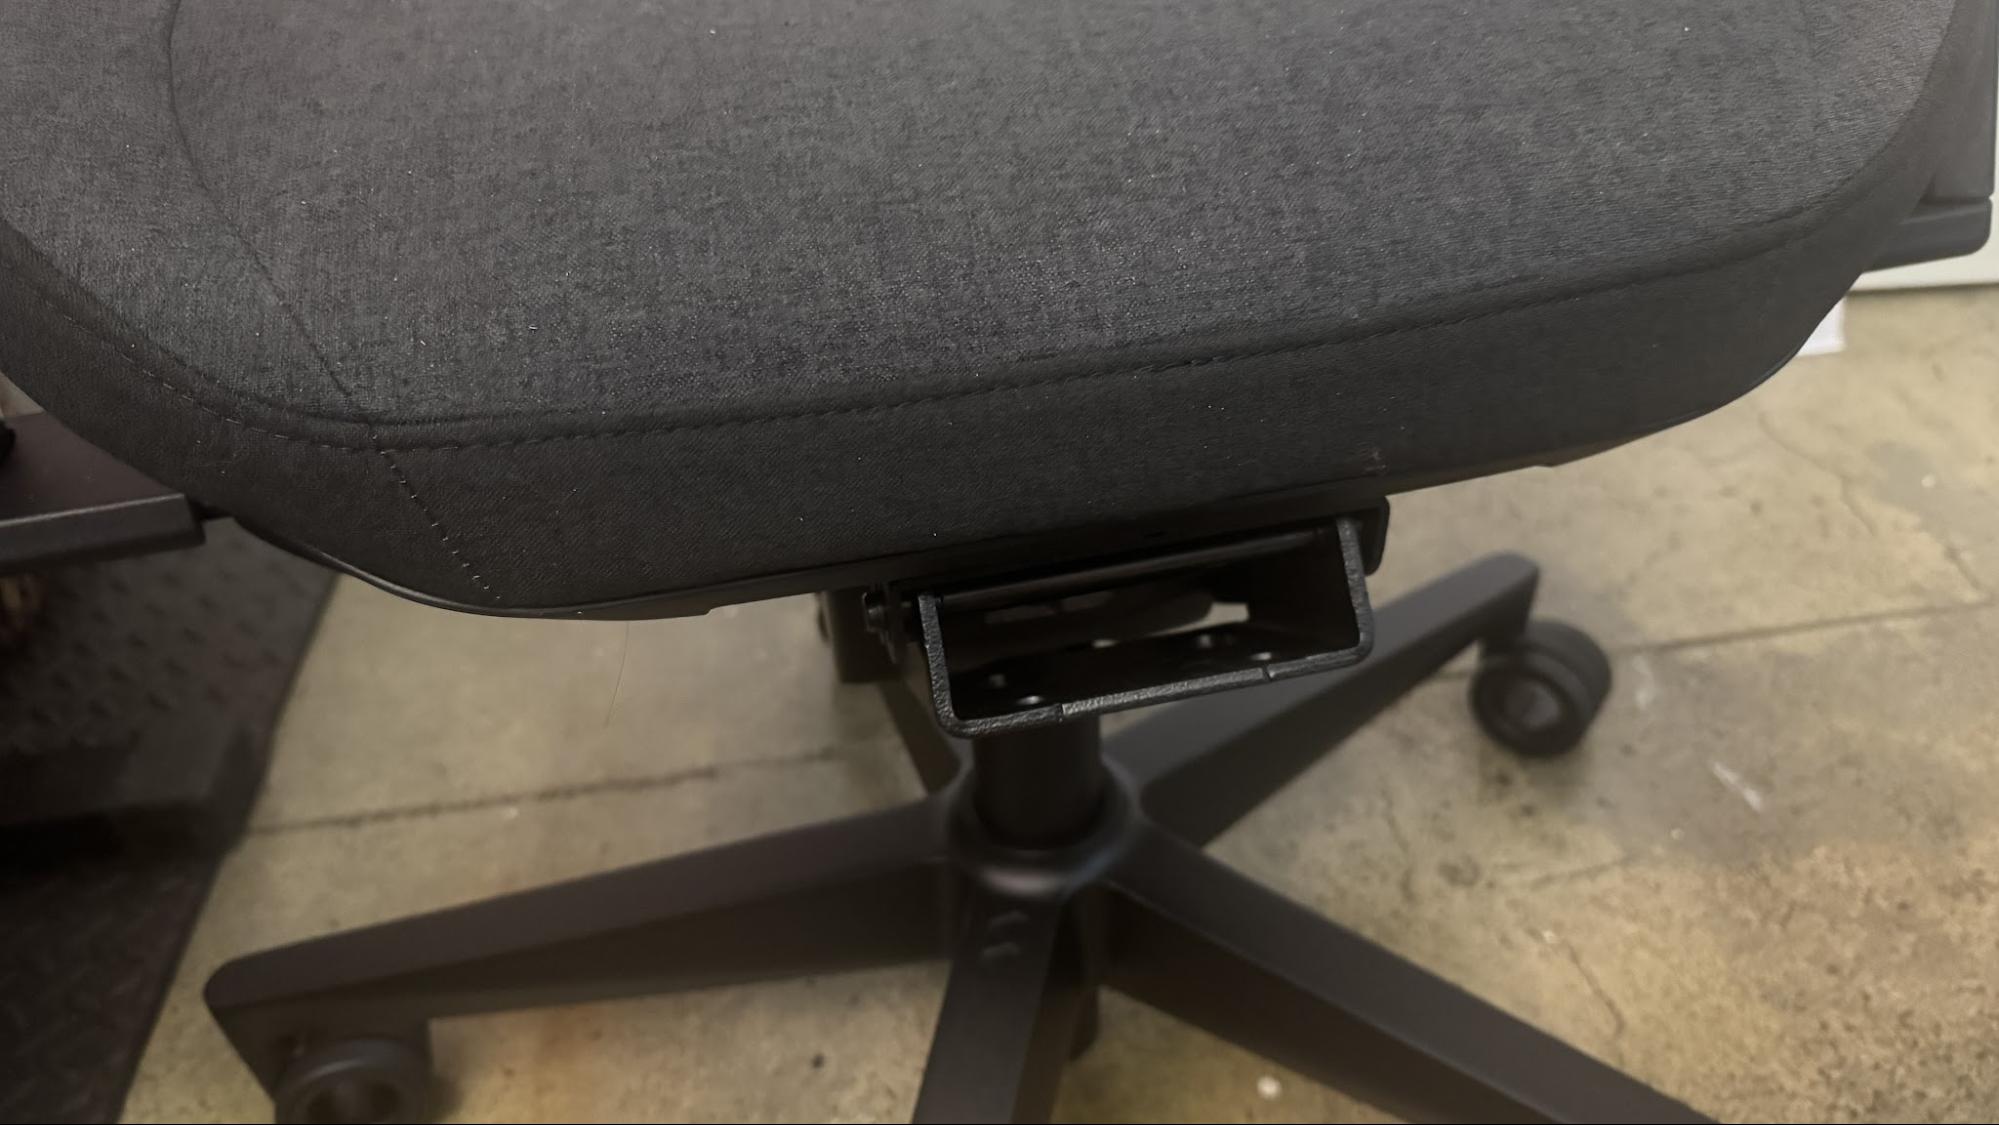
The Omni Pro's adjustment levers are mainly located under the seat on the right side. There's a dual lever / switch that controls chair height and recline position — pulling up on the front side of the lever lets you adjust height, while pulling up on the back side of the lever locks the maximum recline. While the original Omni had four recline positions, the Omni Pro has five — and believe it or not, this makes a big difference. Whatever fifth position they added is the position I wanted on the original Omni, I guess (the recline positions lock at 105, 115, 125, 135, and 160 degrees).

Libernovo Omni Pro

(Image credit: Tom's Hardware)

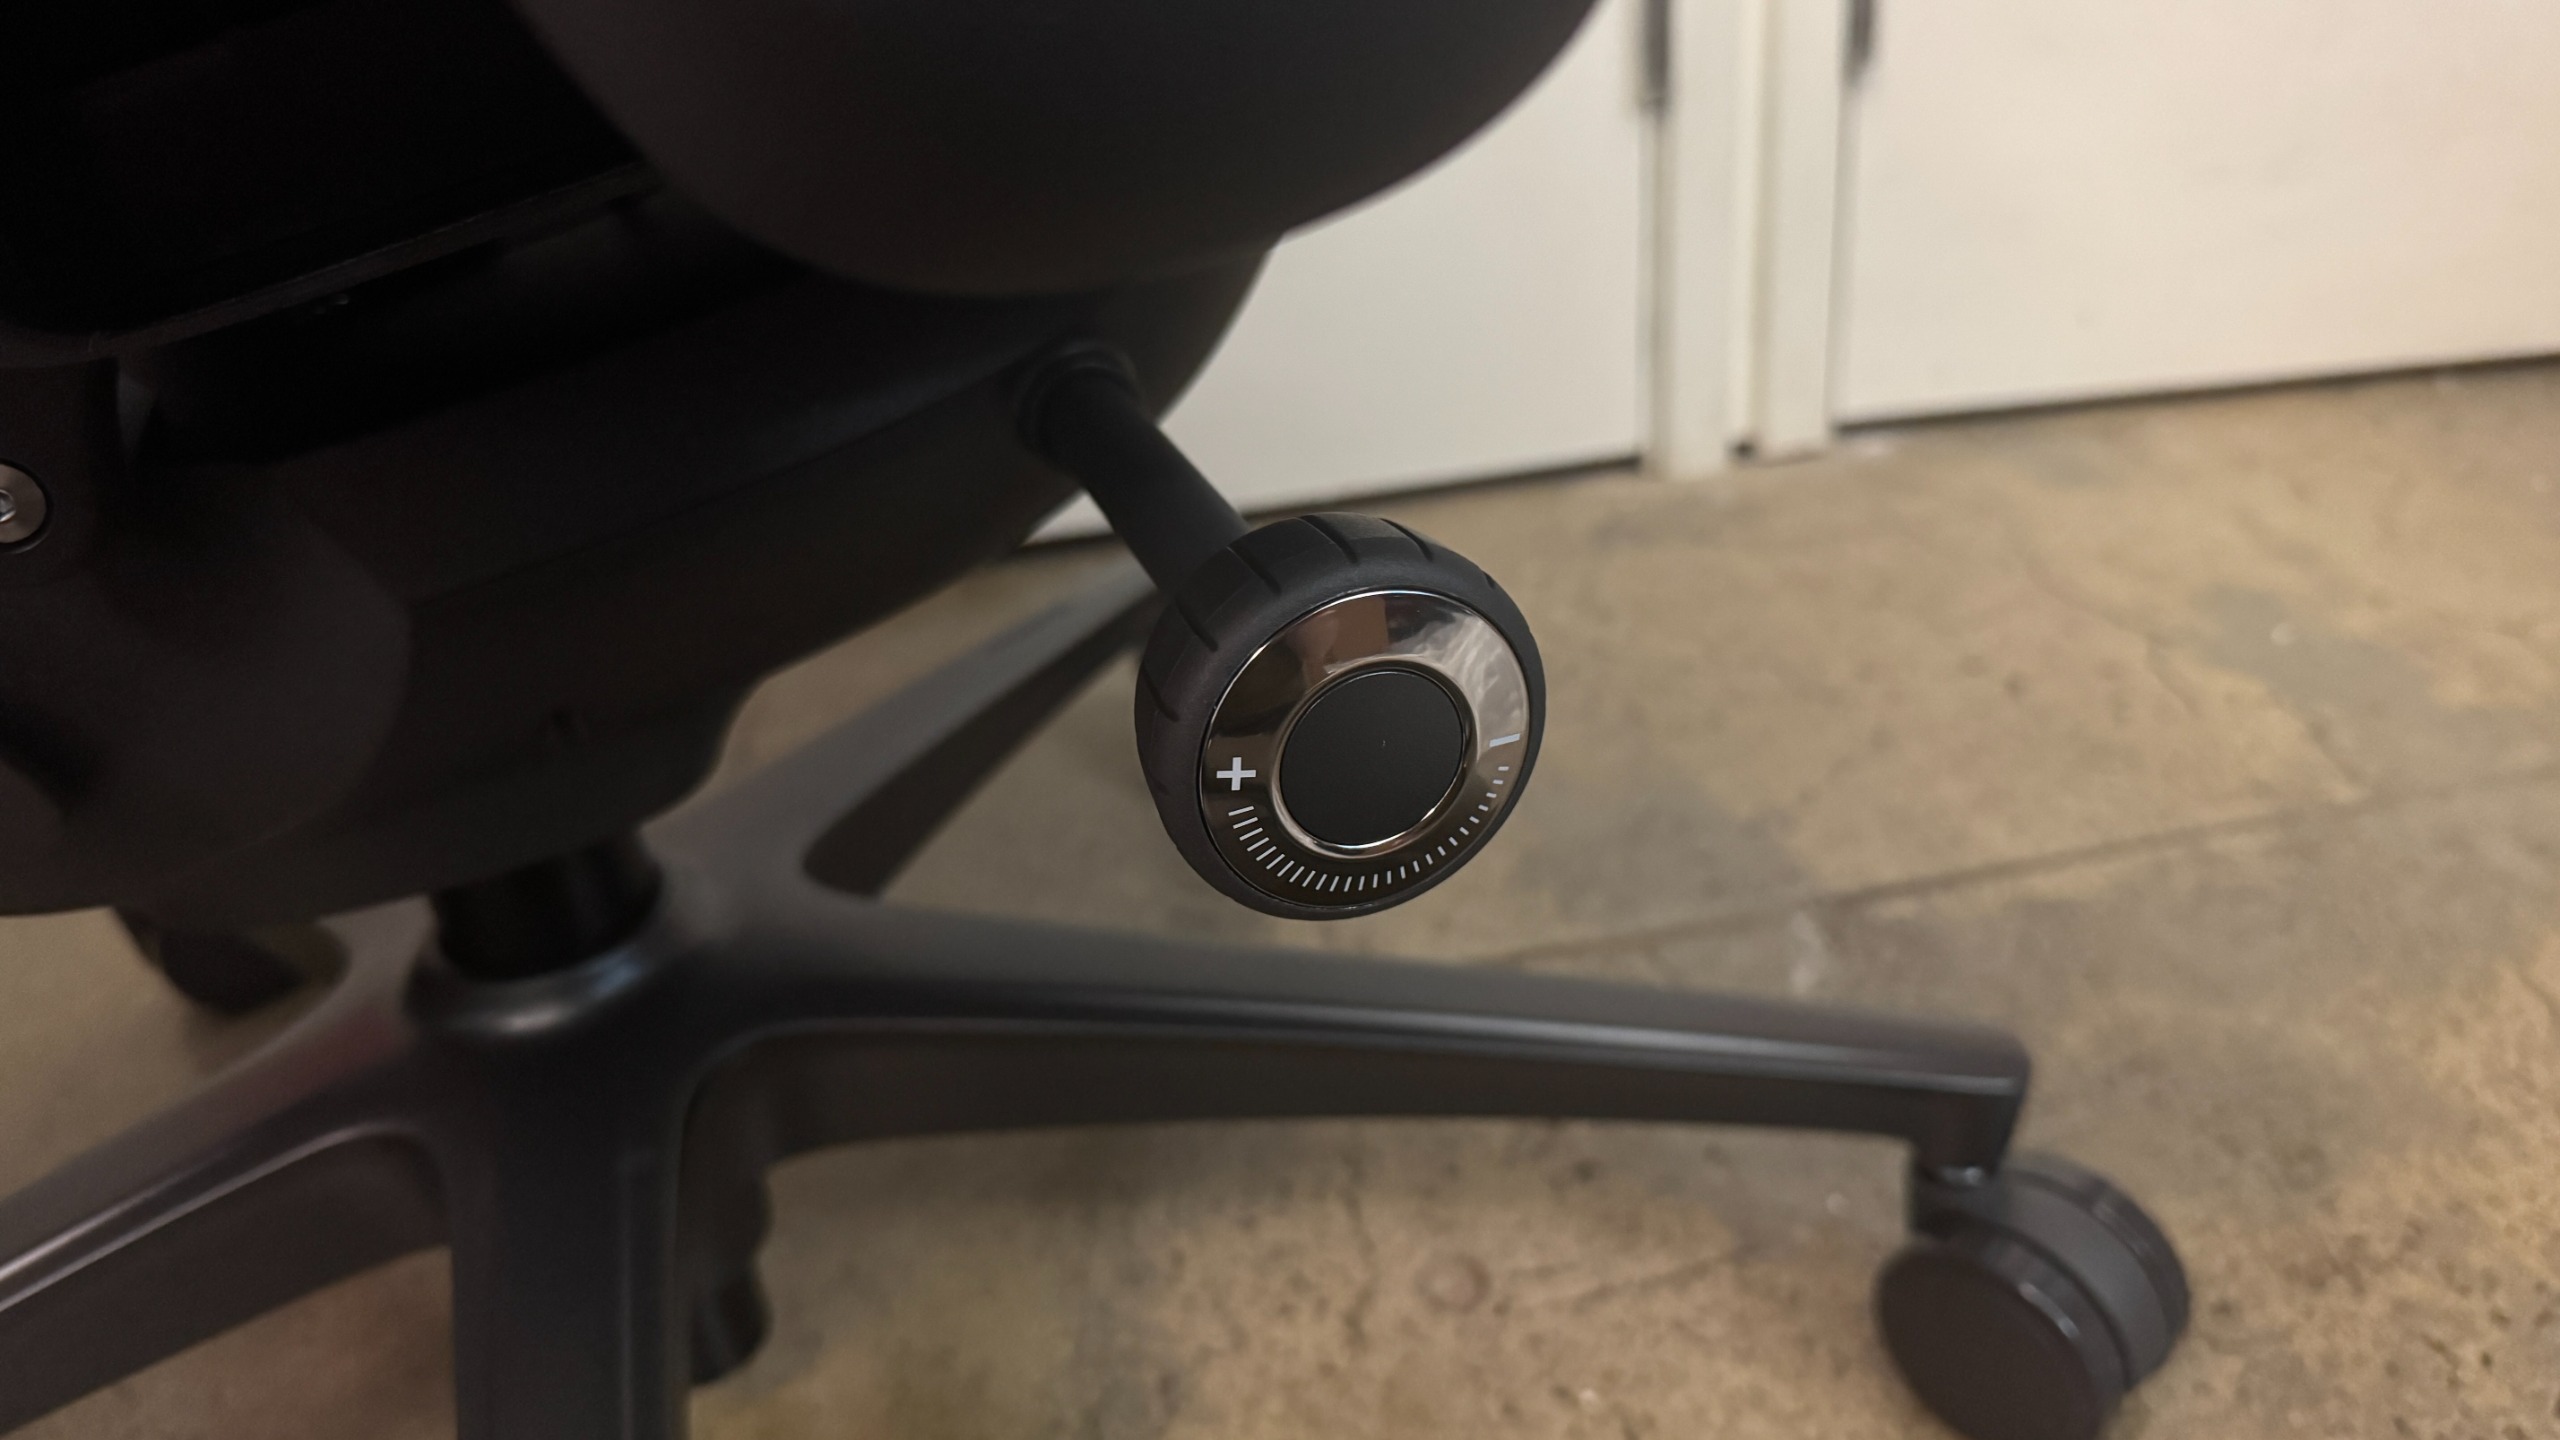
Under the dual lever / switch, there's a knob that controls tilt tension, which is how much tension you'll feel when you recline. Turning the knob clockwise increases tension and turning it counter-clockwise decreases it. There seems to be a pretty wide range of tilt for this chair, so you may need to turn it several times to get the tension to your liking.

Libernovo Omni Pro

(Image credit: Tom's Hardware)

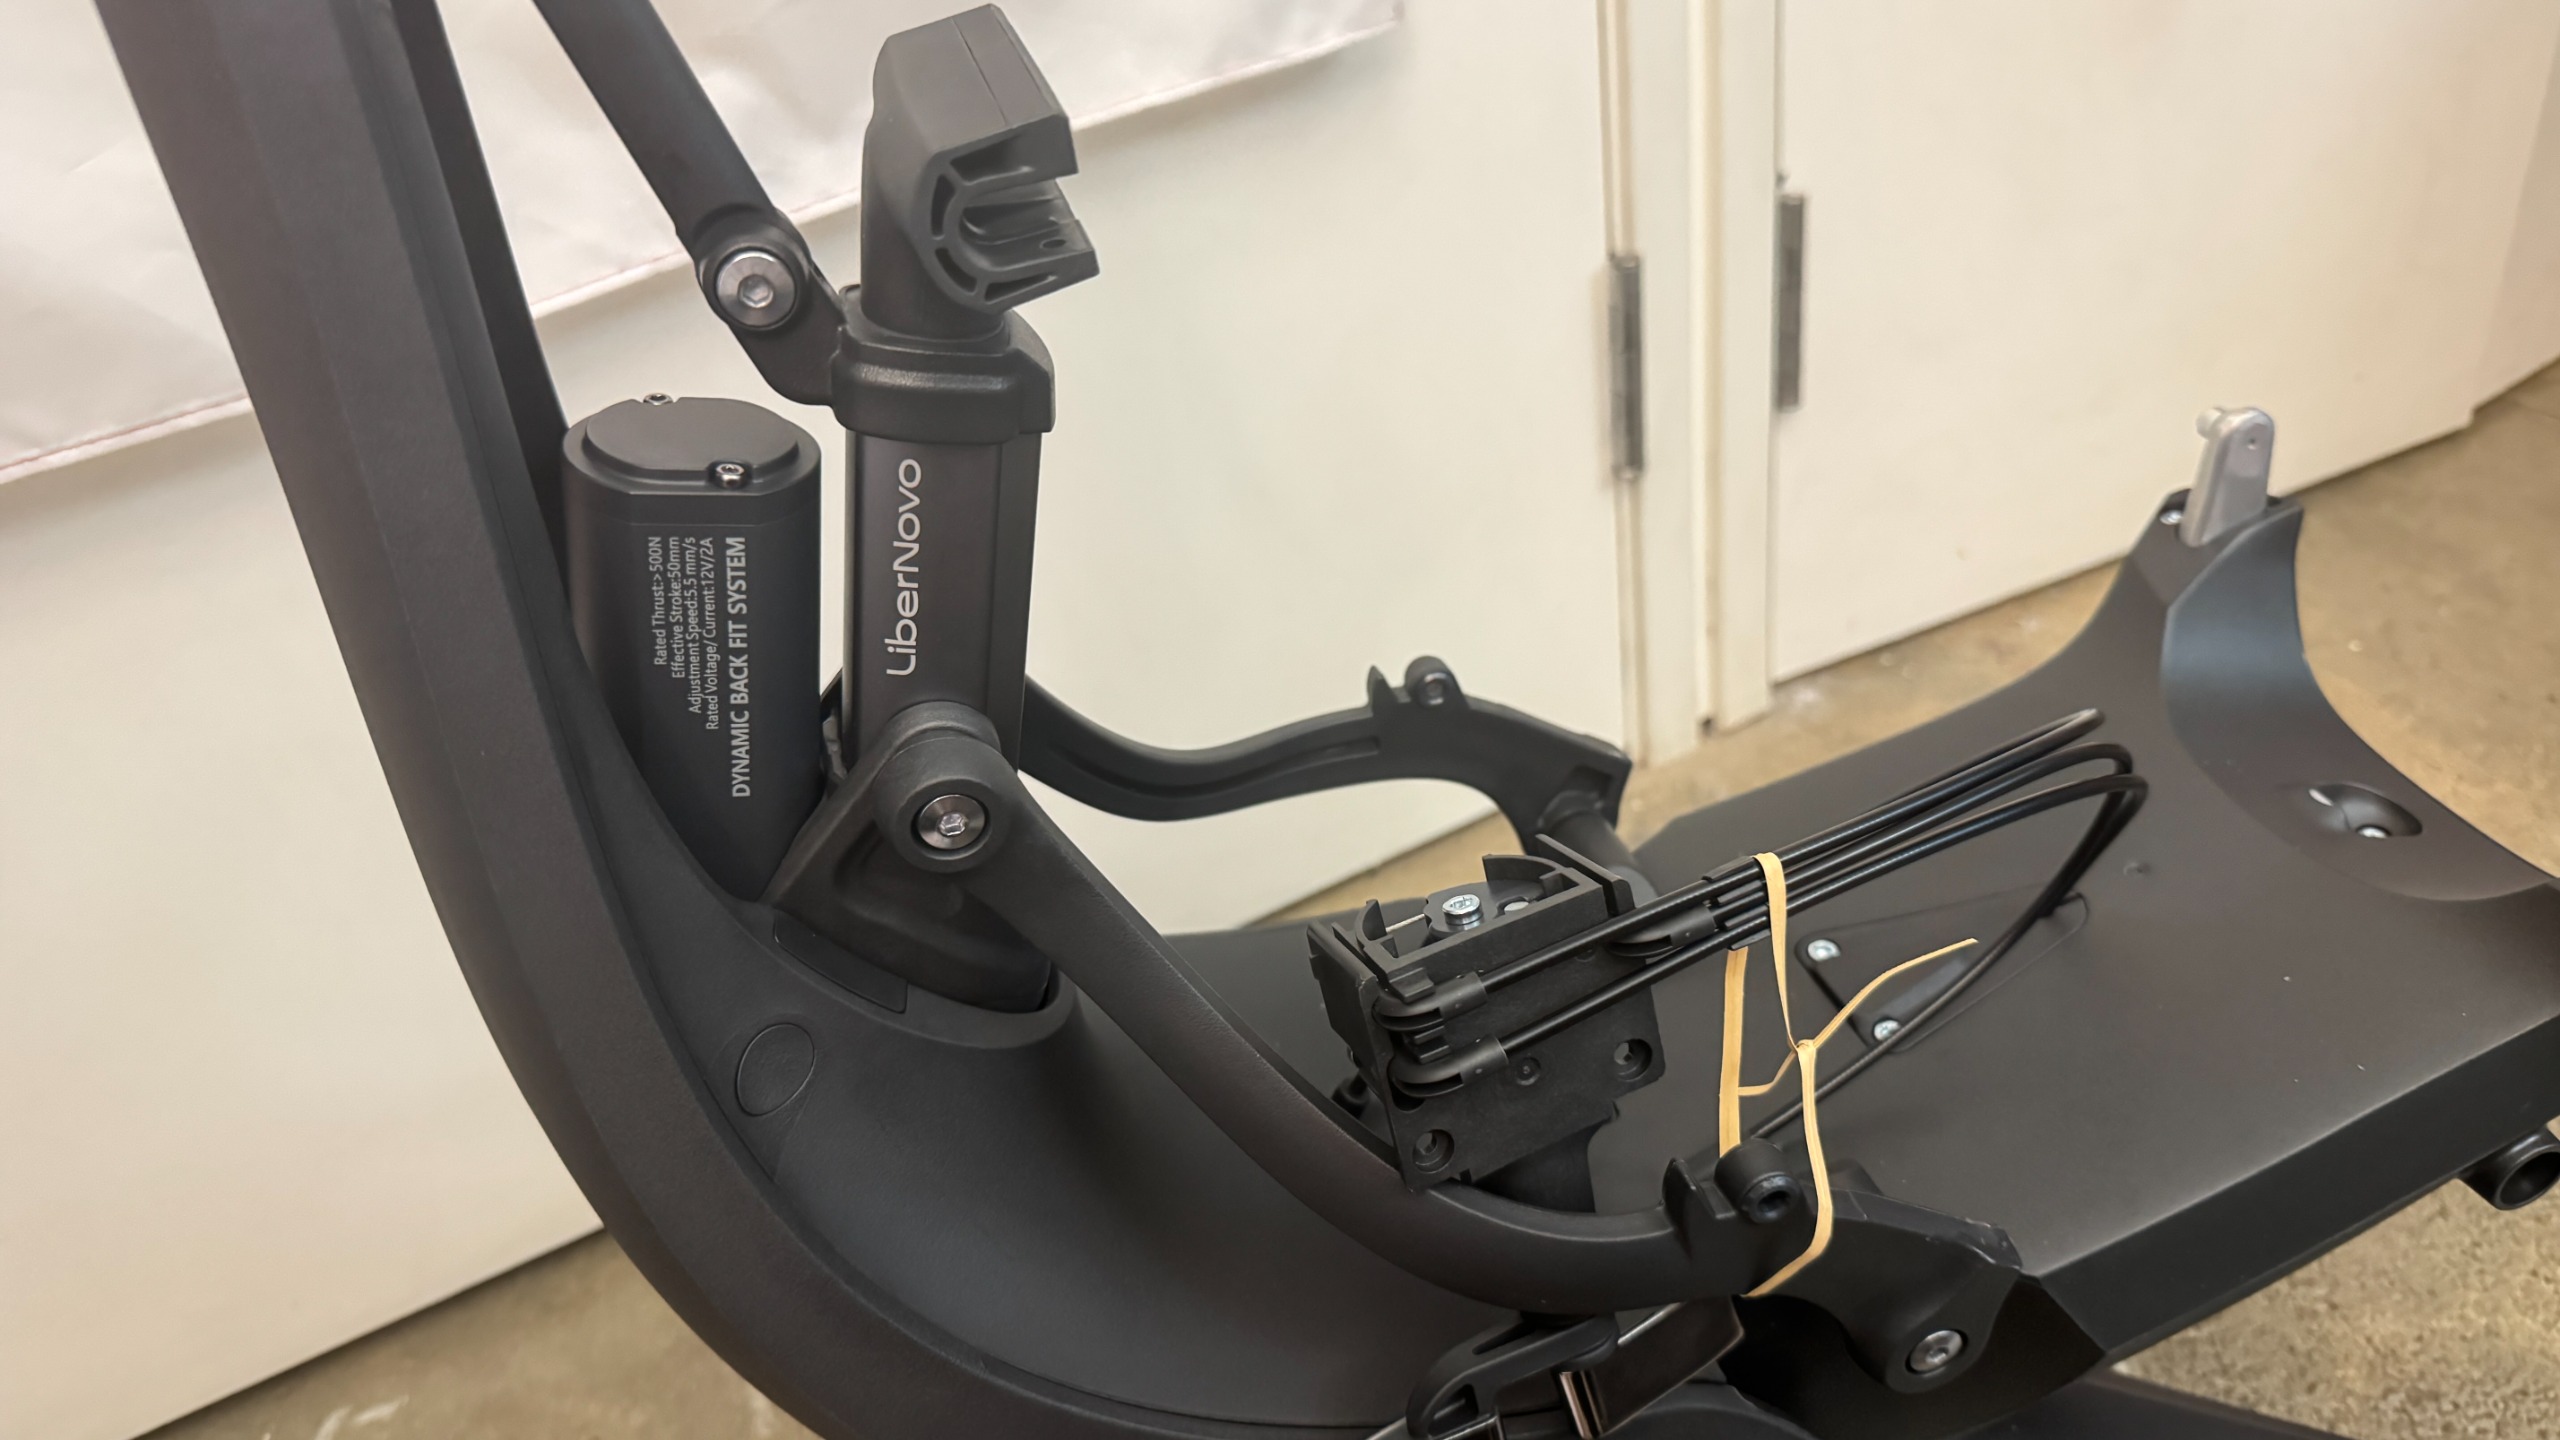
There's also dynamic, adjustable motorized lumbar support, which is controlled via the buttons on the inside of the left armrest. There are two arrow buttons for making the lumbar support firmer (forward) or... less firm (backward), and there's also a spinal massage button that triggers a five-minute spinal massage / stretch (using the chair's lumbar support) when pressed. While I like the Omni Pro's lumbar support, and found it very comfortable, it's worth noting that it's not vertically adjustable — so while it worked well for me, it may not work quite as well for someone with different body proportions.

Libernovo Omni Pro

(Image credit: Tom's Hardware)

Speaking of which, I'm about 5 feet 7 inches and 130 pounds, and the Omni Pro seemed perfect for me — not too big or heavy, and easy to adjust and move around in. The chair is rated for up to 300 pounds (136kg), and it seems sturdy enough — though I'm not sure how well the electronics will hold up if someone who weighs closer to that is using the spinal stretch feature regularly. My husband, who's 5 feet 11 inches and around 180 pounds definitely seemed a little too big for the chair (he has very long legs, though, and the chair's maximum depth of 18.9 inches (48cm) was still a little short for him).

In addition to the lumbar support, the Omni Pro has a ventilation fan under the seat. Unlike the other chairs we've seen with built-in fans, such as DXRacer's Martian Pro Red Triangle or Cougar's NxSys Aero Chair, this fan doesn't blow toward you to cool you off — instead, it removes hot air (I guess?) from around you by blowing away from you. I was skeptical, too, but it actually seems to work... pretty well. I guess there's a lot of heat trapped in the seat, because it instantly felt cooler even on the lower setting.

Libernovo Omni Pro
Tom's Hardware
Libernovo Omni Pro
Tom's Hardware

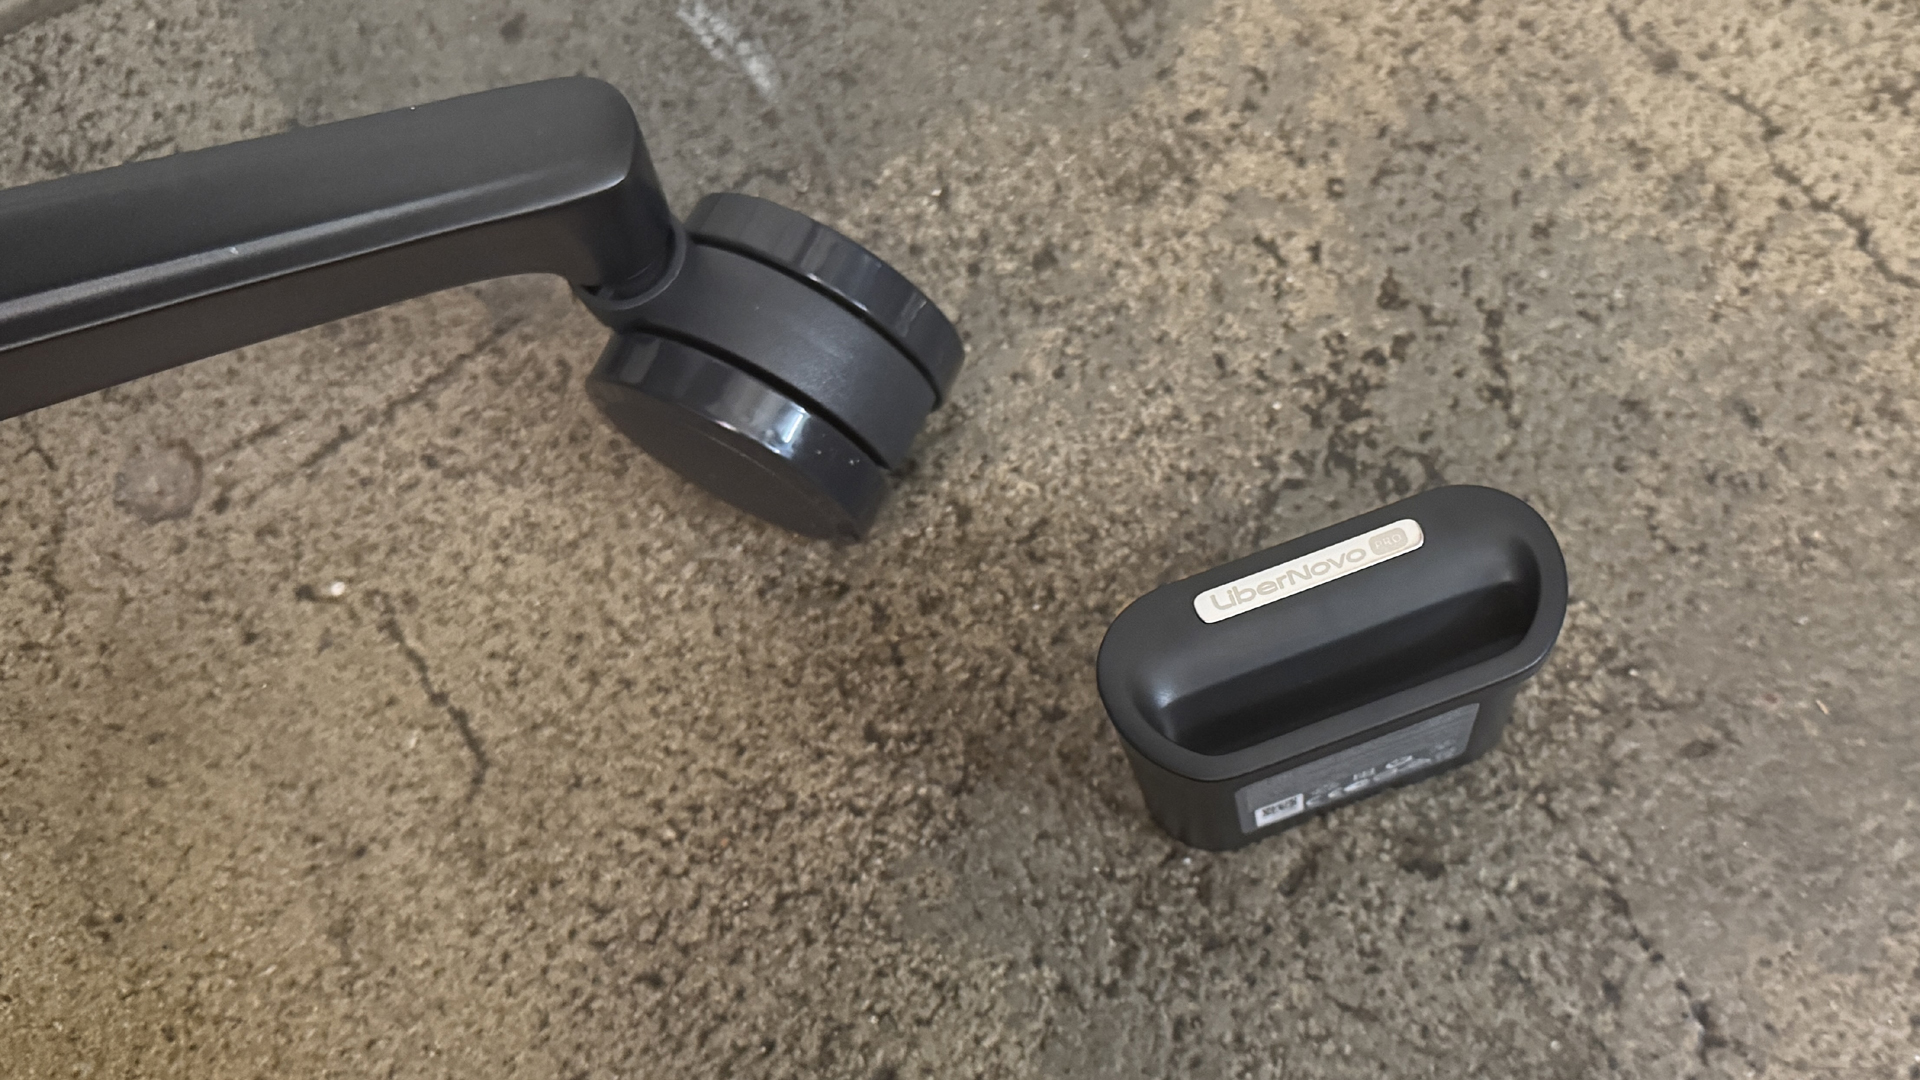
The fan runs on the same battery pack as the motorized lumbar support, and Libernovo says you'll get up to 9 hours of continuous fan usage on the higher setting, and up to 36 hours on the lower setting, and there's also a built-in sensor in the seat that automatically switches the fan off if you stand up (and switches it back on again when you sit back down). I could definitely hear the fan on both the high and low settings, but it faded pretty quickly to background noise on the lower setting. Also, the fan definitely seems to take up some space, because the seat on the Omni Pro is less padded than the seat on the Omni. I could feel the chair's frame through the seat, which wasn't a problem for me but may not be quite as comfortable for someone who's heavier.

Libernovo Omni Pro

(Image credit: Tom's Hardware)

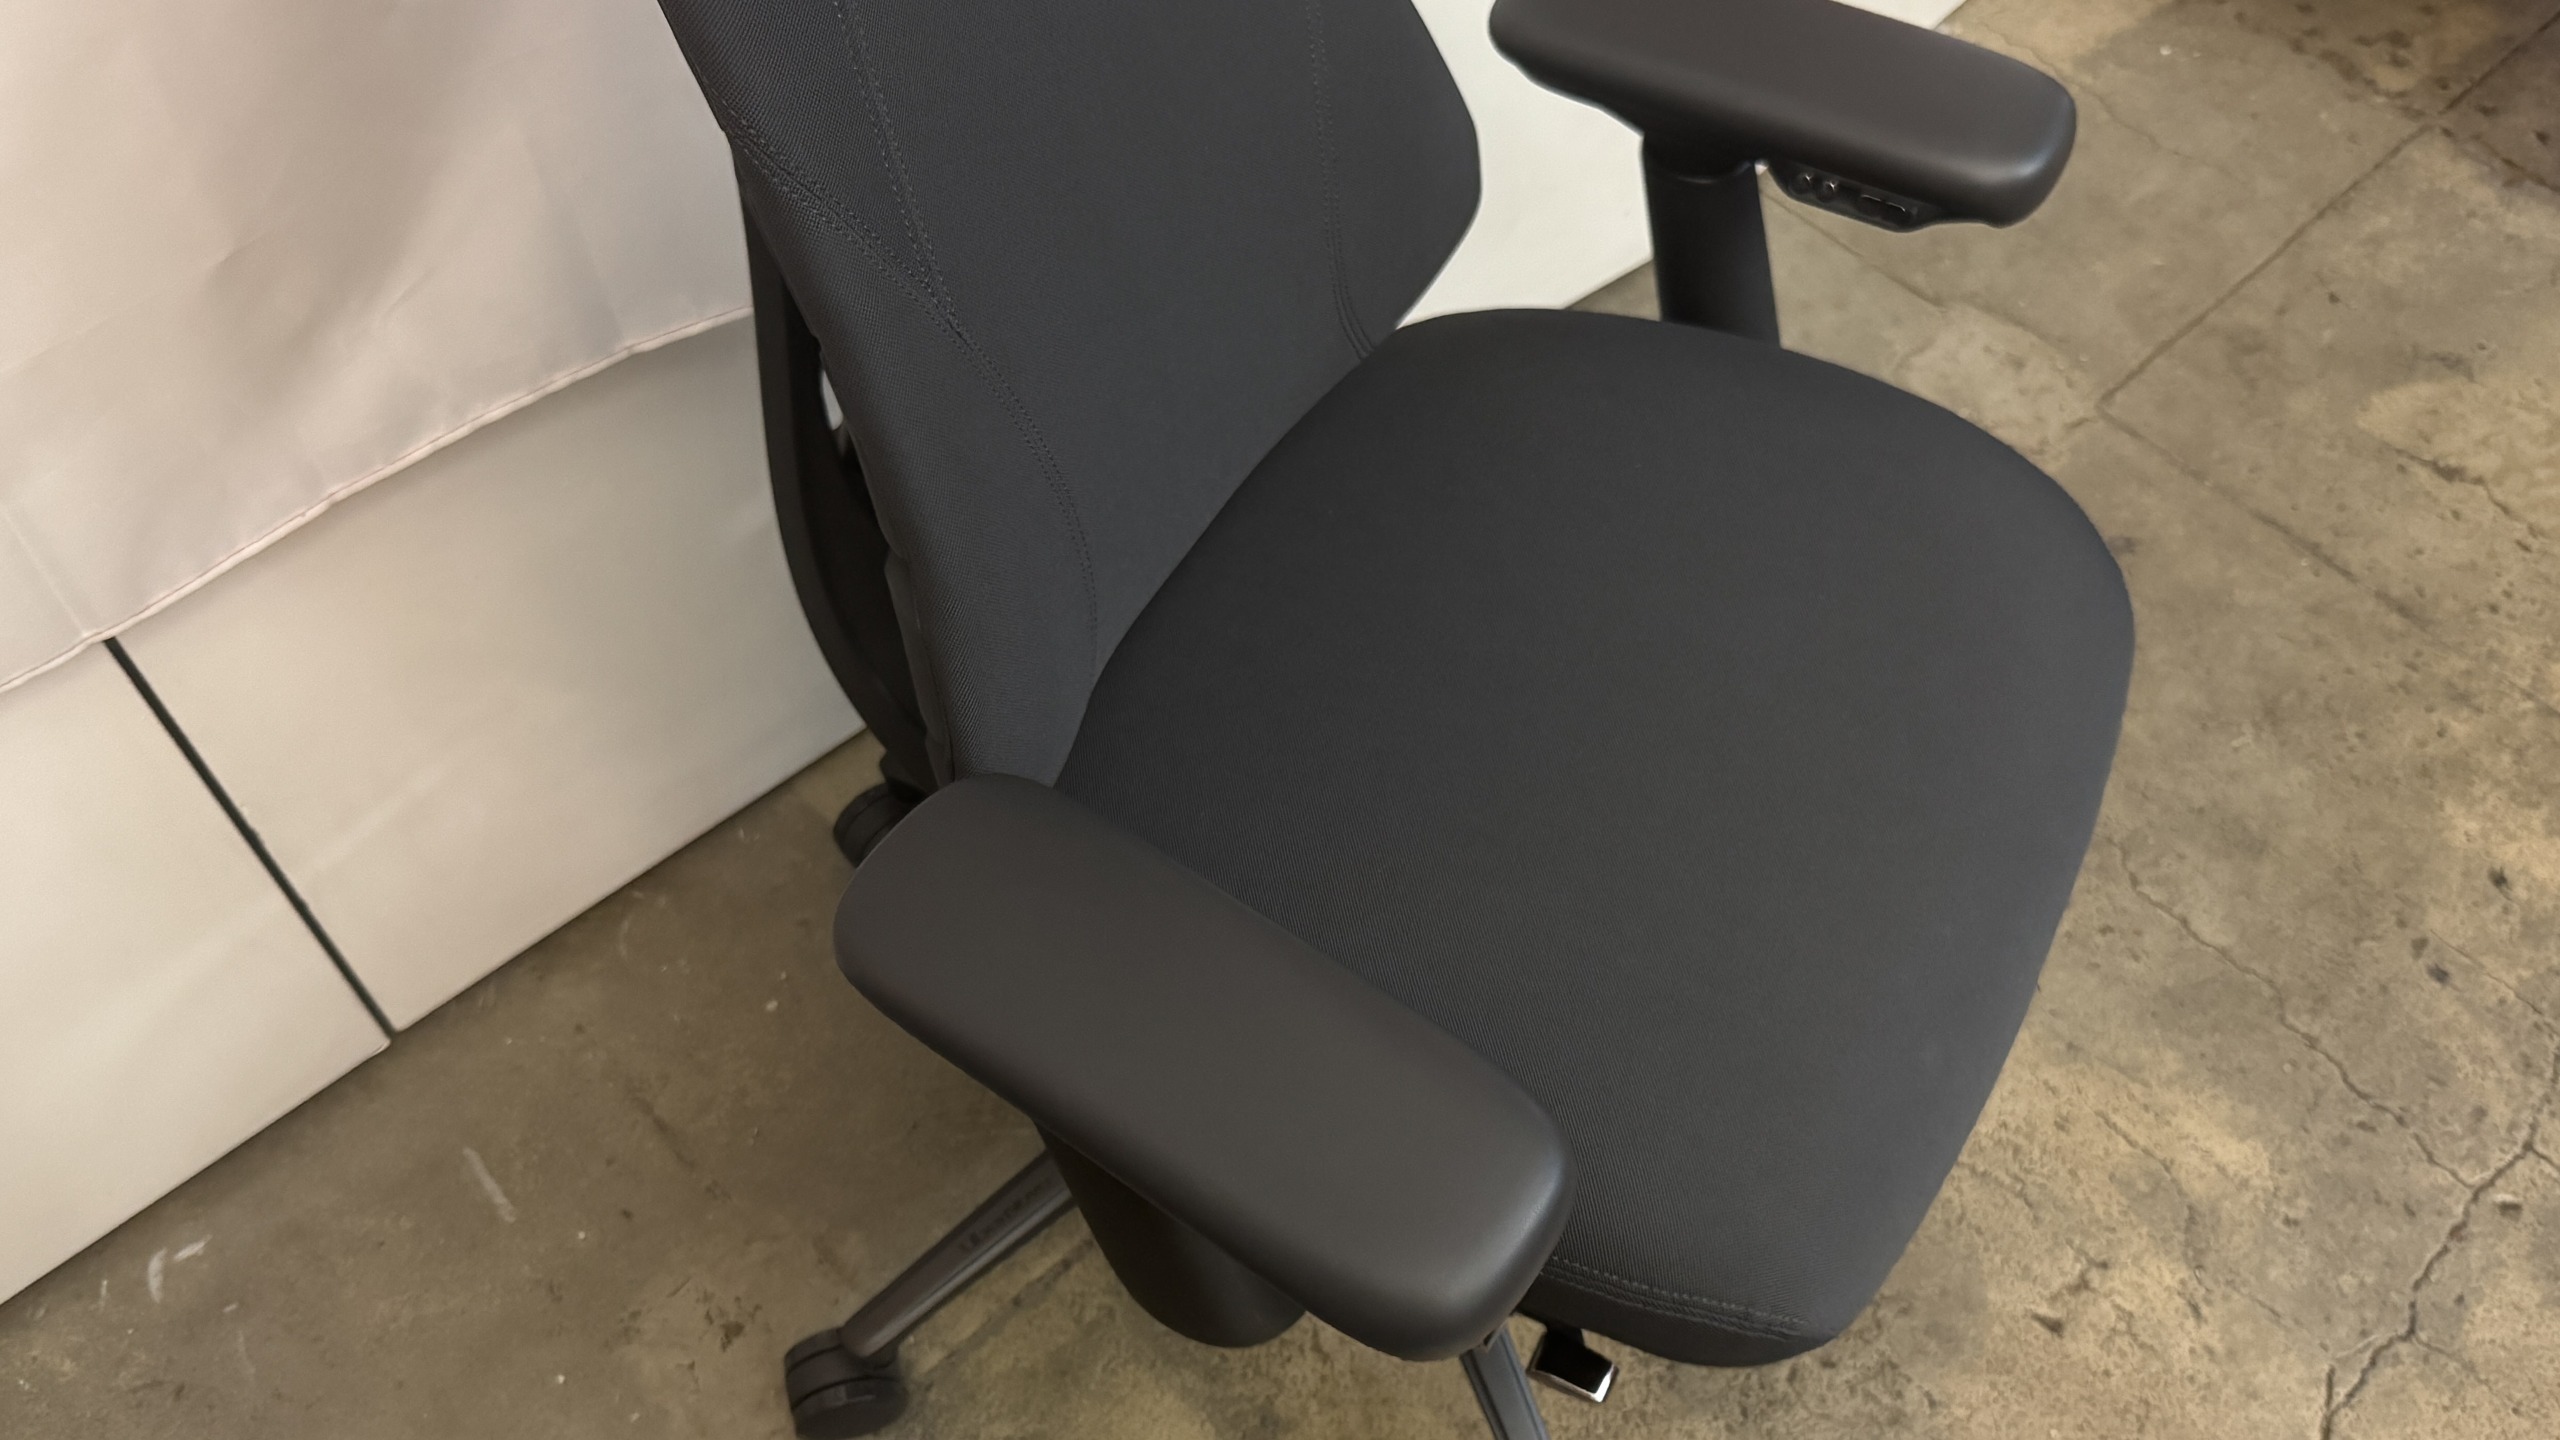
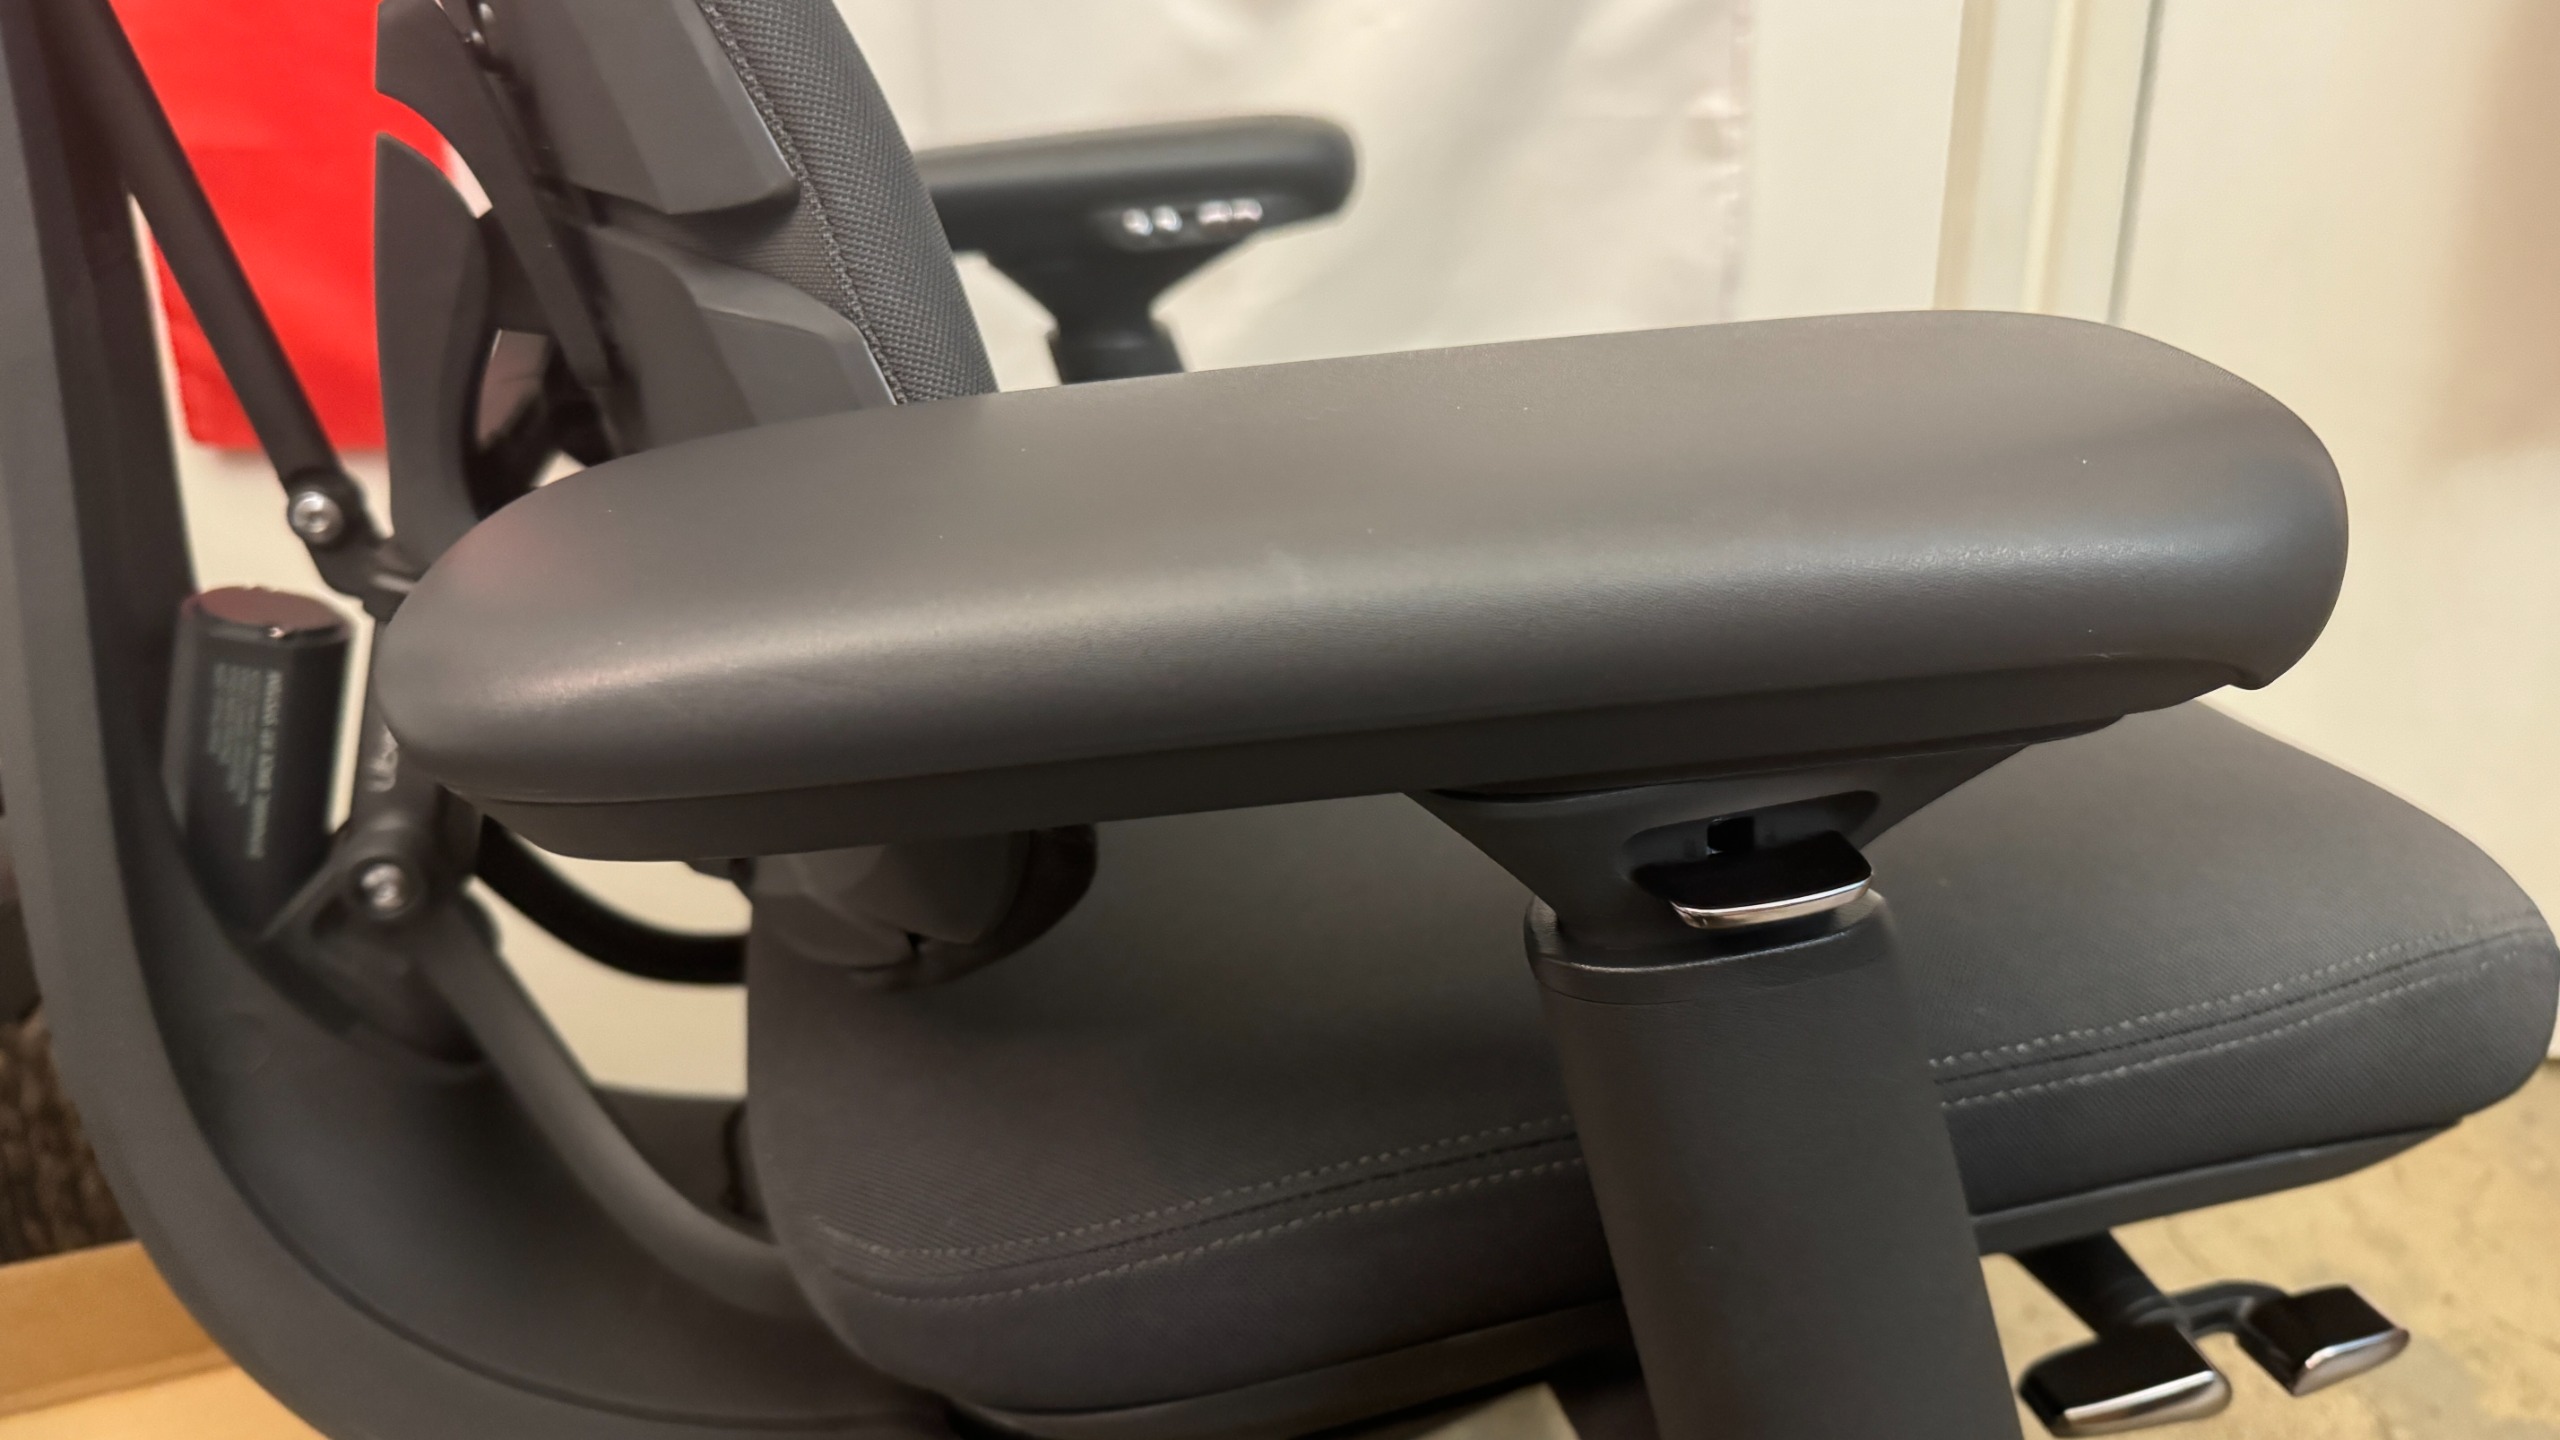
Like the original Omni, the Omni Pro has 4D armrests that adjust four directions: up/down, forward/back, left/right, and angle in/out. There's a lever under the outside of each armrest that you can press to adjust the armrests up/down. To adjust the armrests forward or backward, you just slide the tops (no button/lever necessary); same with adjusting the angle. Bringing the armrests closer to you involves pulling them inward, tilting them toward you. I don't love the way the armrests end up angled toward your body as a result of this, but I also don't ever find it necessary to adjust the width of my armrests so it wasn't an issue.

Libernovo Omni Pro
Tom's Hardware
Libernovo Omni Pro
Tom's Hardware

The Omni Pro also has an adjustable head/neck rest, which is curved to fit the curve of your neck/spine. The neck rest is height-adjustable and can be moved forward/back to suit your needs (or removed entirely).

Libernovo also sent us the corresponding StepSync Footrest, which is a dual height footrest with both a bottom shelf for resting your feet on when you're sitting upright and a padded upper shelf for when you want to recline. It's not a particularly high-tech footrest, but it's sturdy enough and it matches the chair, and it's a nice addition to the entire setup if you snag it in the bundle.

Bottom Line

Libernovo's Omni Pro managed to surprise me — I already liked the original Omni, and the Omni Pro's seemingly gimmicky seat ventilation fan worked better than I expected it to. The Omni Pro is a comfortable ergonomic chair that will fit pretty easily into most gaming setups (especially if you don't have the space for a giant racing-style behemoth), but the issue of longevity that we had with the original Omni carries over.

The Omni Pro has even more potentially breakable technology inside it, and the warranty on electronics is a mere two years — and remember, if the electronics in this chair stop working then you can no longer adjust the lumbar support. The chair itself has a six-year warranty (up from the original Omni's five years), which is on par with other gaming chair companies, but is still only half that of Herman Miller's 12-year warranty.

And while the Herman Miller x Logitech G Vantum has been fluctuating in price, it's still less than the Omni Pro.

✇Tomshardware

Fractal Design Refine 2 Review: Slightly refined

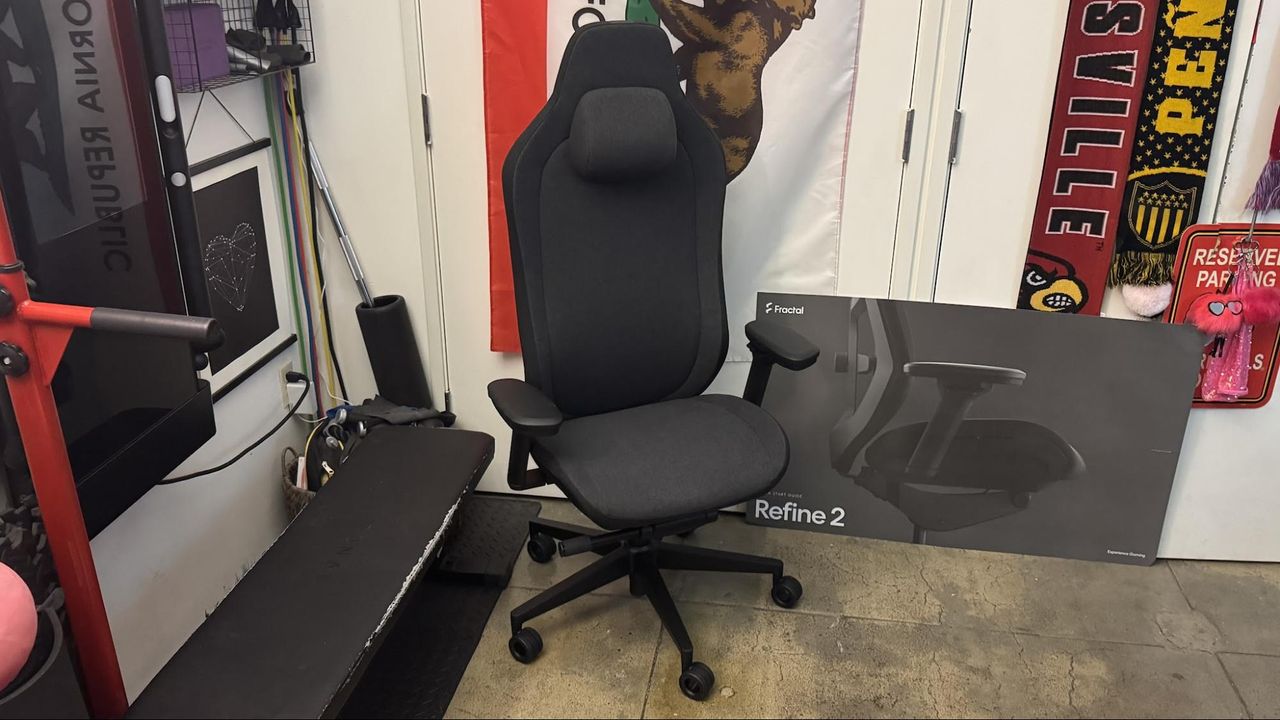
Fractal Design is determined to be on, under, and in front of your desk — the PC peripherals company best known for its designer PC cases has just released the Fractal Refine 2 — the second generation of its minimalist, "refined" take on the typical racing-inspired gaming chair.

The Fractal Refine 2 is very similar to the original Fractal Refine, but it's been... refined... just a bit further. It still features a subdued but unmistakable "gaming chair" silhouette, as well as a fairly high level of adjustability and a large, hefty frame. Fractal has definitely made some changes — the 4D arm rests now lock in place, and the tilt limiter, which I found to be way too strong in the original, has been pulled back a little (but not quite enough). The price has also been adjusted — all variations retail for $640, which is on the higher side for a typical racing-style gaming chair. We did like the original Refine, but its scratchy mesh fabric kept it off our list of best gaming chairs — but this time we're taking a look at the fabric version.

Assembly

The Fractal Refine 2 comes in a heavy box that's so large you might think the chair is already assembled — but it isn't. It's well-packed: all the pieces are individually wrapped and/or boxed, and there's plenty of eco-friendly packing material keeping everything in its place.

The chair comes with all the tools you'll need to assemble it, though there's admittedly not too much assembly. It comes with an allen wrench and several screws — six longer screws for attaching the armrests, two shorter screws for attaching the backrest, and a handful of extra screws, just in case.

Fractal Refine 2
Tom's Hardware
Fractal Refine 2
Tom's Hardware

Assembly is pretty straightforward and is pretty easy to accomplish alone — unlike most of the traditional racing-style gaming chairs, the backrest of the Refine 2 is quite a bit lighter than the base, and is easy to put into place alone. It also has two pre-placed screws that slot into two holes and slide to "lock" in place, so you don't need to somehow hold the two pieces together and screw them into place simultaneously. (This might not sound that noteworthy, but trust me — many chairs are virtually impossible to put together without a partner because of this.)

I was able to assemble the Refine 2 by myself in about 15 minutes, and the most difficult part was unpacking everything (because the box really is huge). The Refine 2 comes with a large illustrated instruction panel, as well as an information booklet with more detailed instructions.

Specs

Upholstery

fabric / mesh / hybrid

Total Height (with base)

53.7 - 58.5" / 1365 - 1485mm

Floor to Seat Height

19.3 - 24" / 490 - 610mm

Armrest Adjustments

4D (height, width, depth, angle)

Recline

125 - 130 degrees under load

Backrest Length

34.45" / 875mm

Backrest Width (Shoulder Level)

18.75" / 476.25mm

Seating Area Width (Point of Contact)

16.5" / 419.1mm

Seating Area Width (total)

20.5" / 520.7mm

Seating Area Depth

16.7 - 19.69" / 425 - 500mm

Armrest Width

16.9 - 22" / 430 - 560mm

Armrest Height

5.5 - 9.8" / 140 - 250mm

Max Recommended Weight

300lbs / 135kg

Weight

~80lbs / 36kg

Warranty

3 years (upholstery); 5 years (all other parts)

MSRP / Price at Time of Review

$639.99

Release Date

Sept. 2, 2026

Design

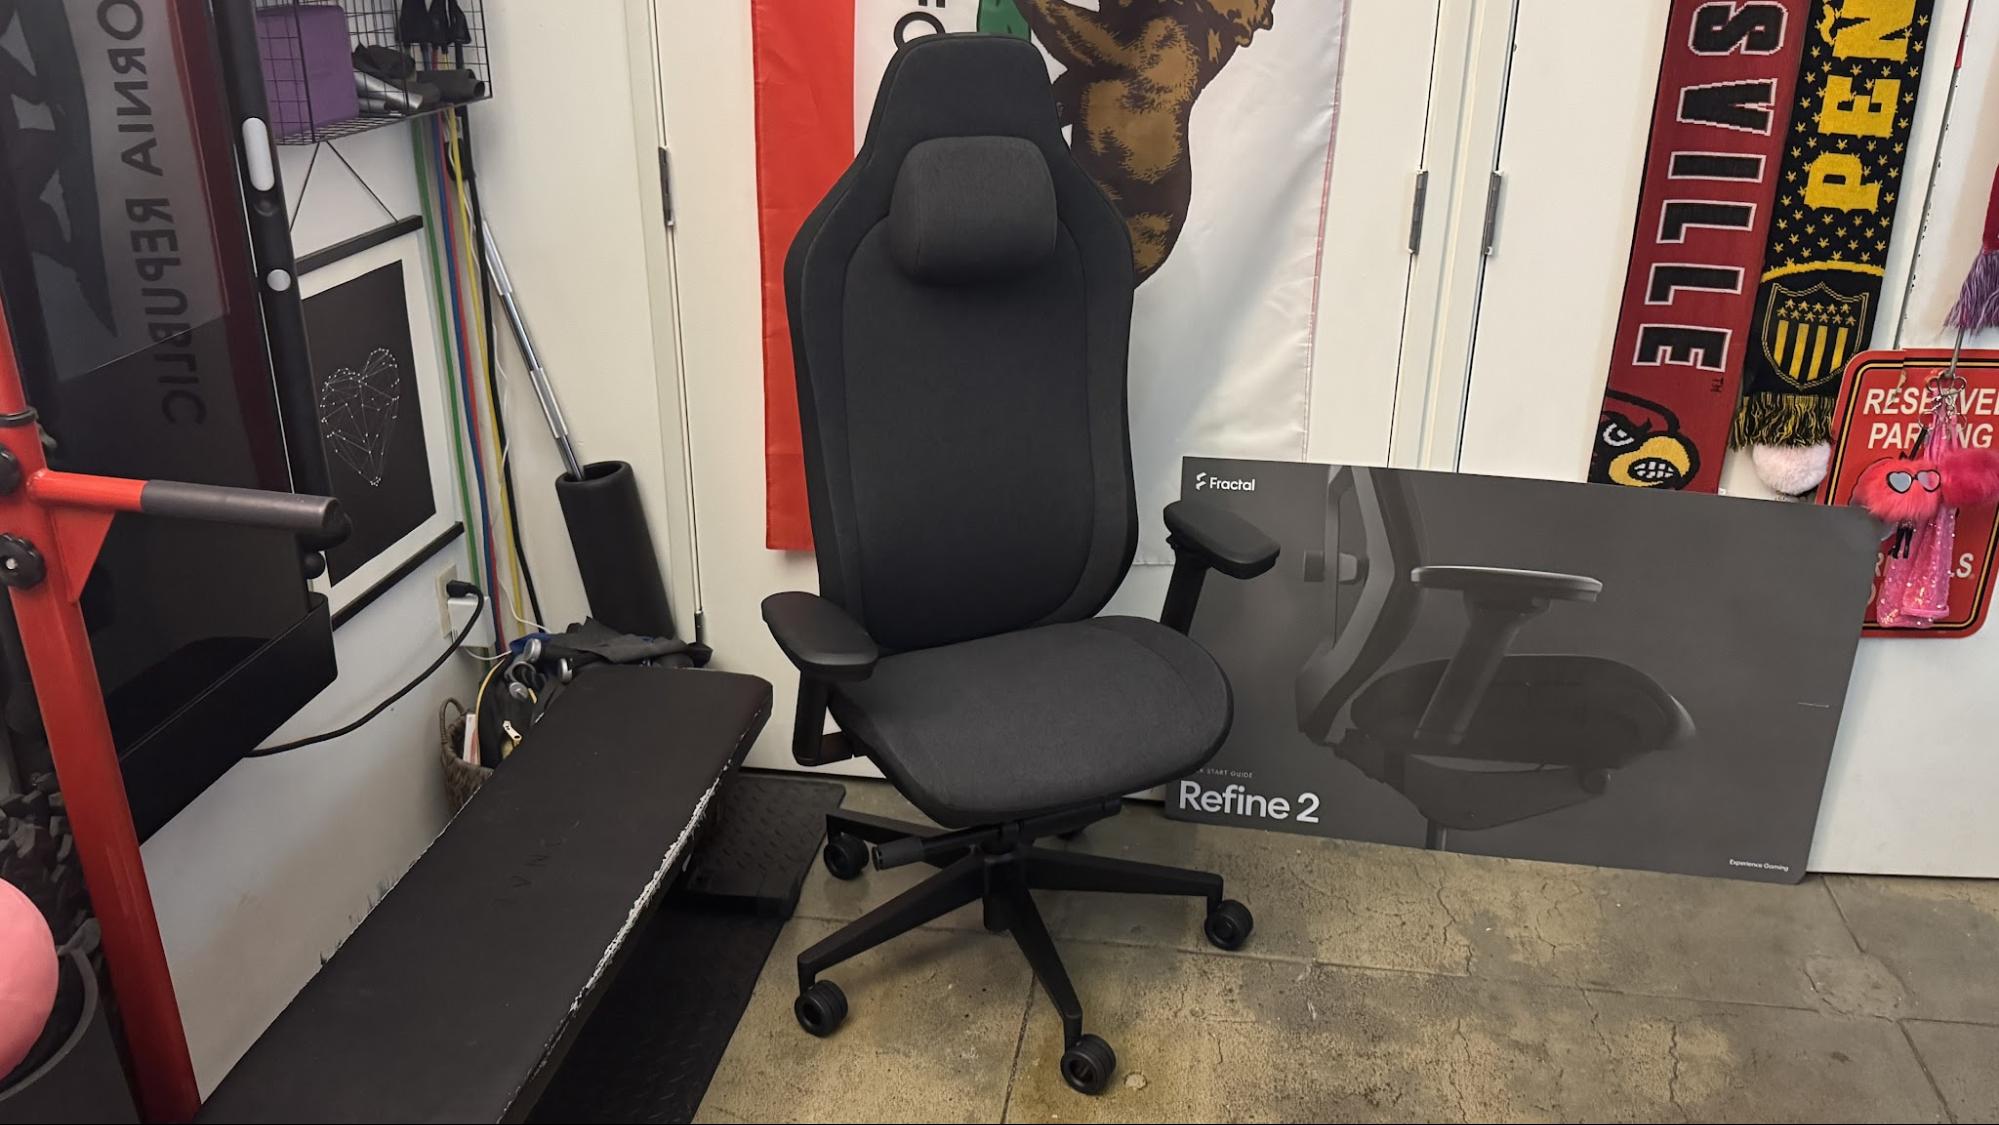
The Refine 2 comes in three upholstery options — fabric, mesh, and hybrid (fabric seat, mesh back) — and two colorways — light and dark. Our review unit came in the dark colorway, a dark slate heathered gray with a black frame, with full fabric upholstery. The fabric feels like soft brushed cotton and is much more comfortable than both the mesh and the fabric of the mesh version of the original Fractal Refine that we reviewed two years ago.

Fractal Refine 2
Tom's Hardware
Fractal Refine 2
Tom's Hardware

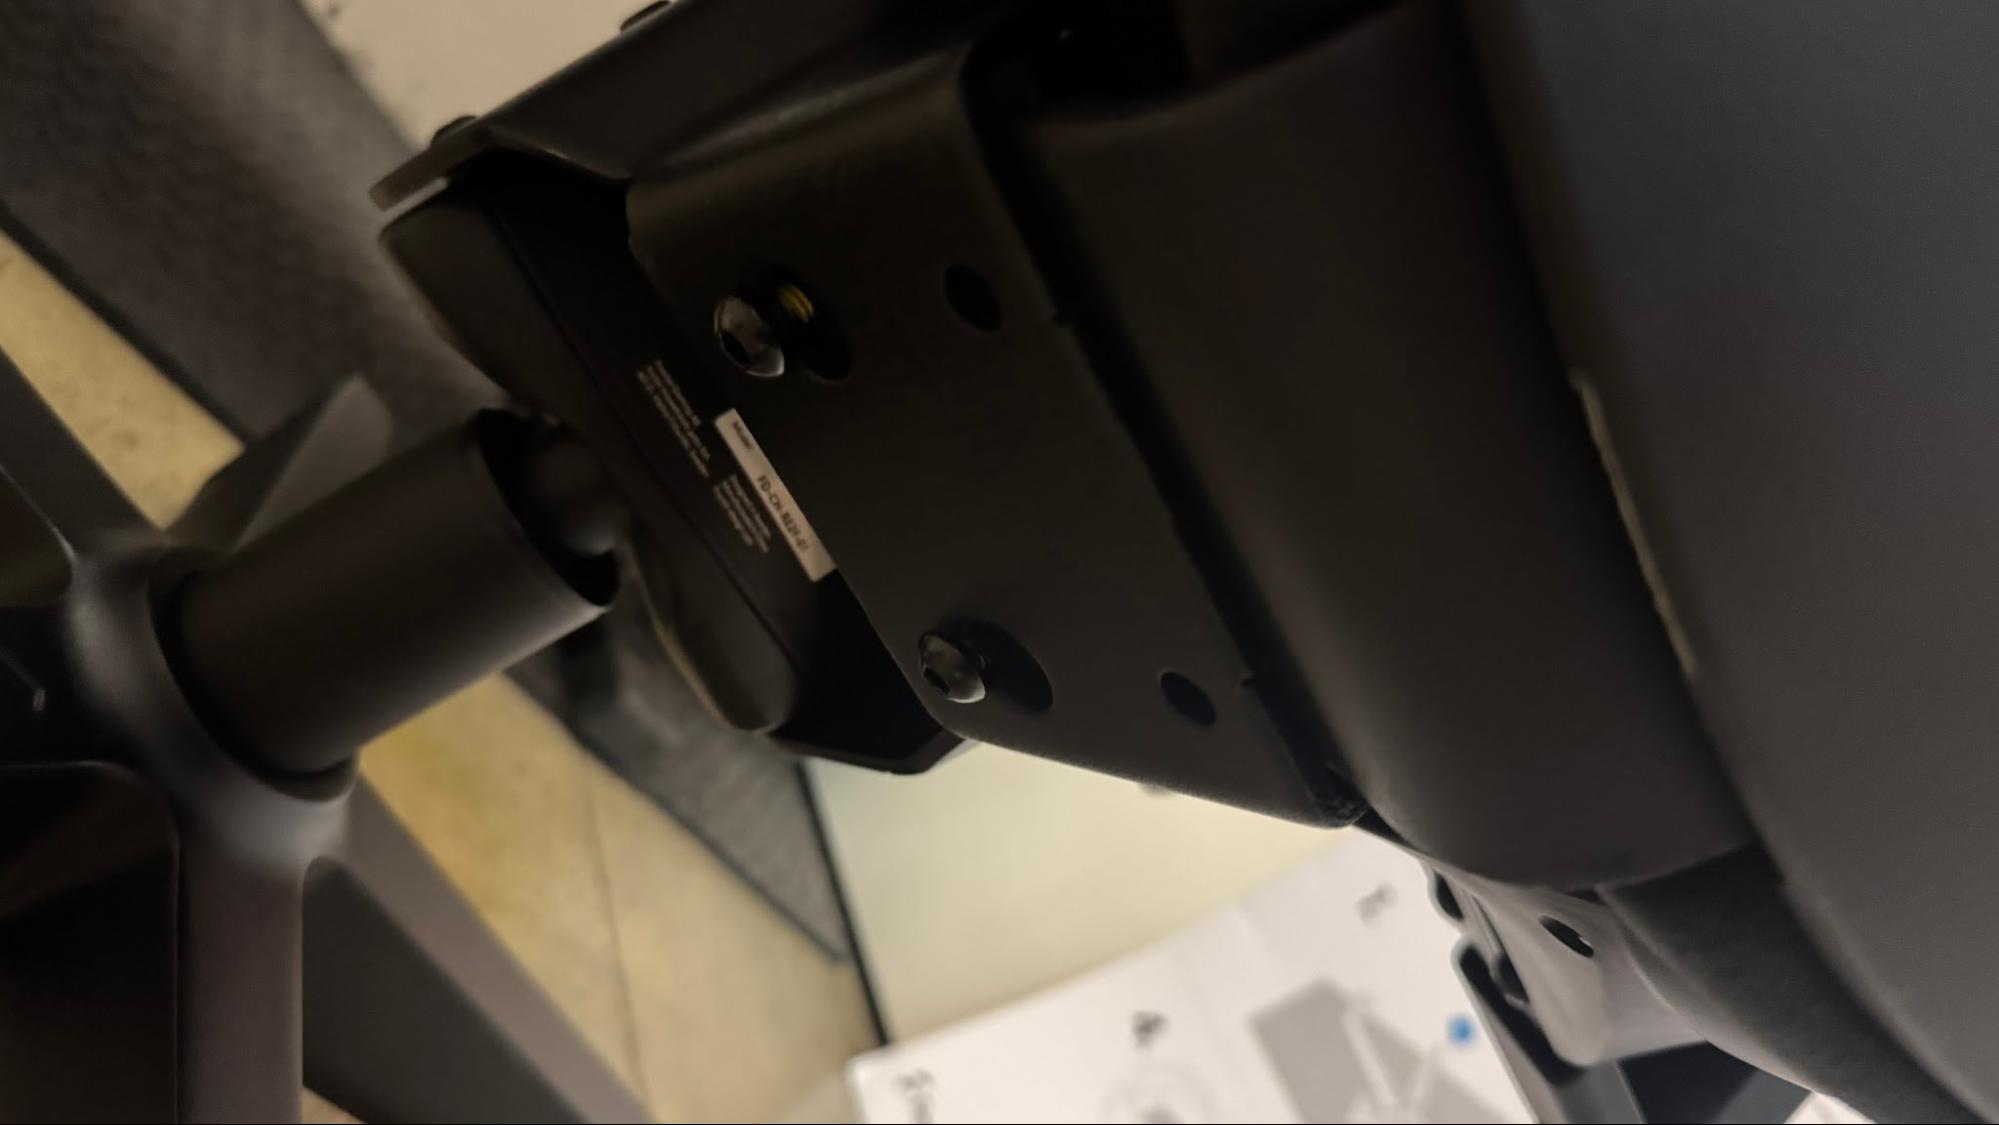
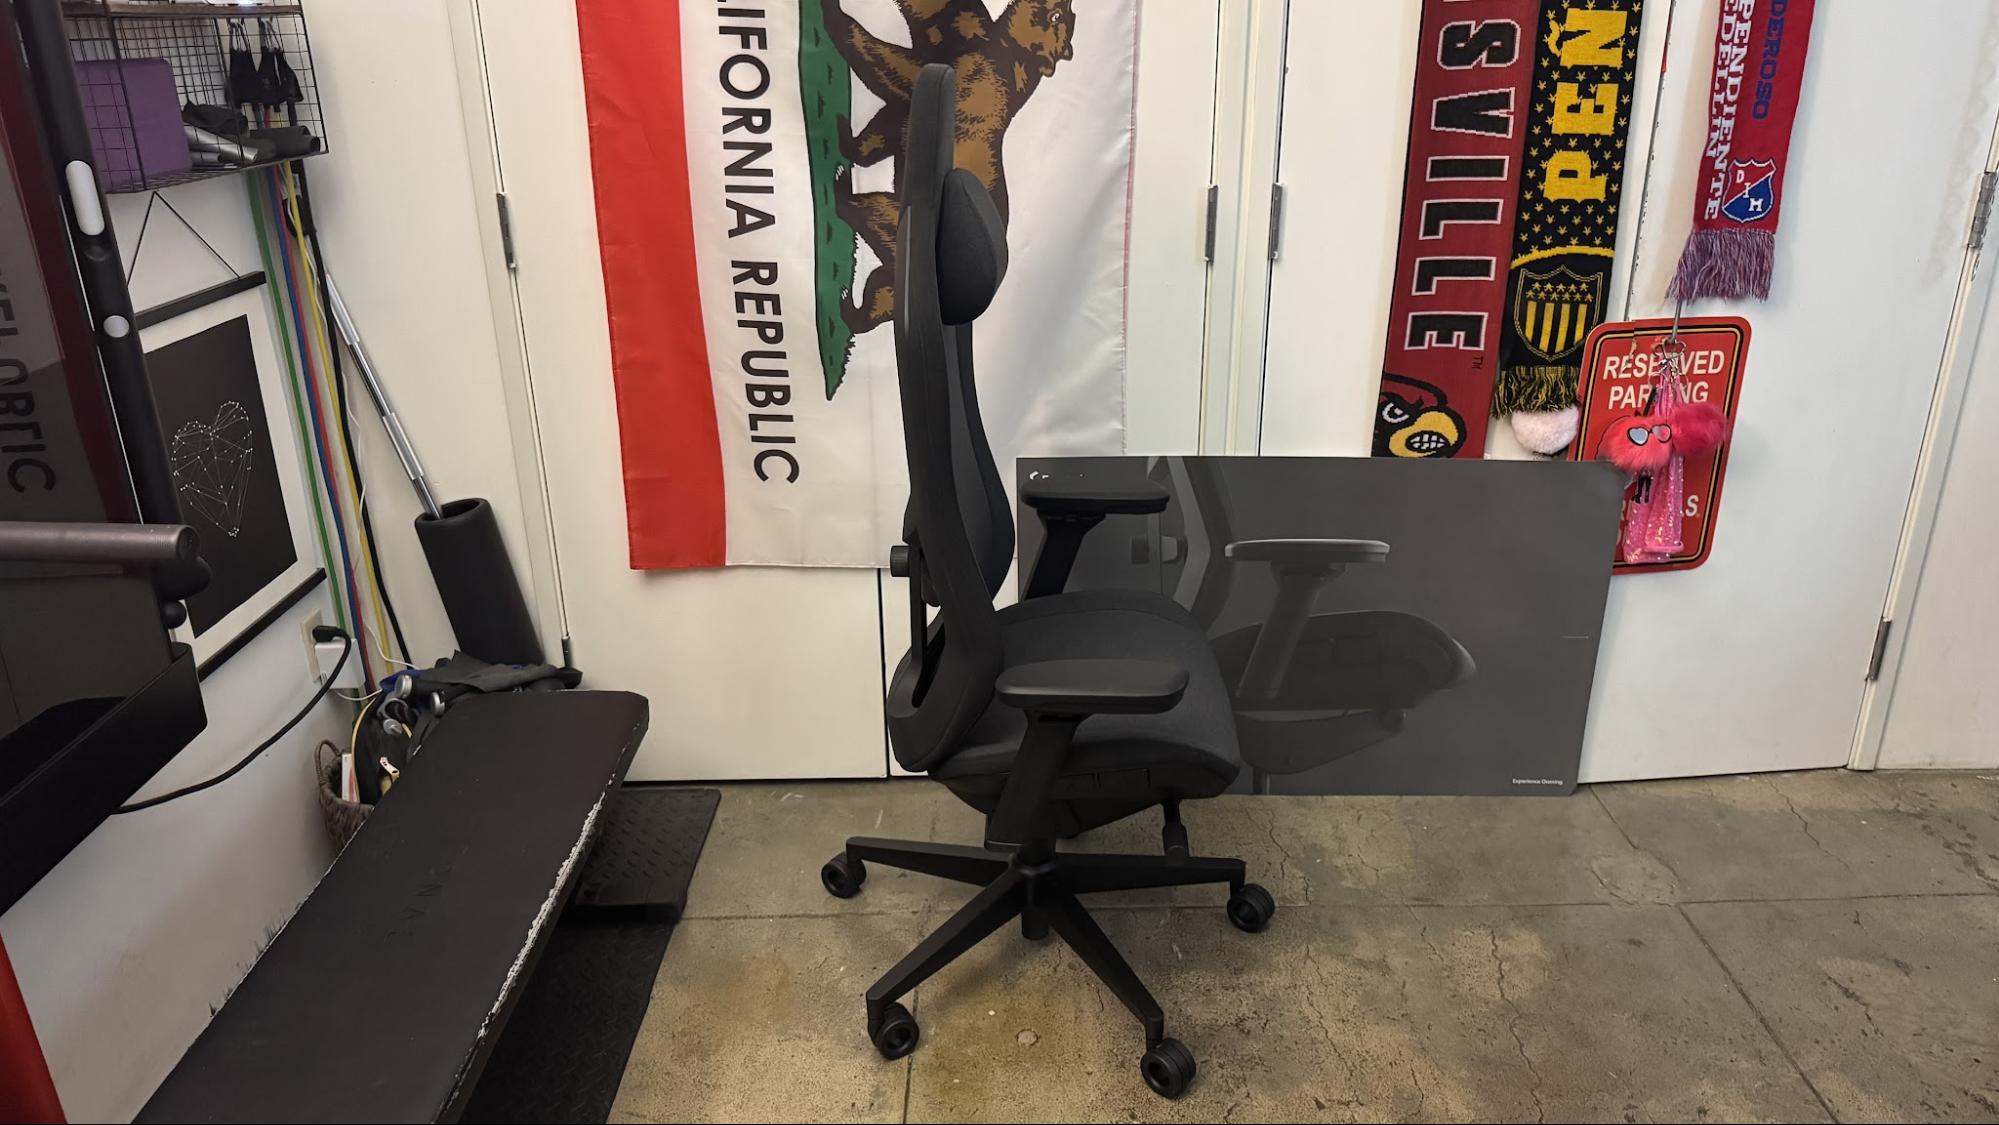
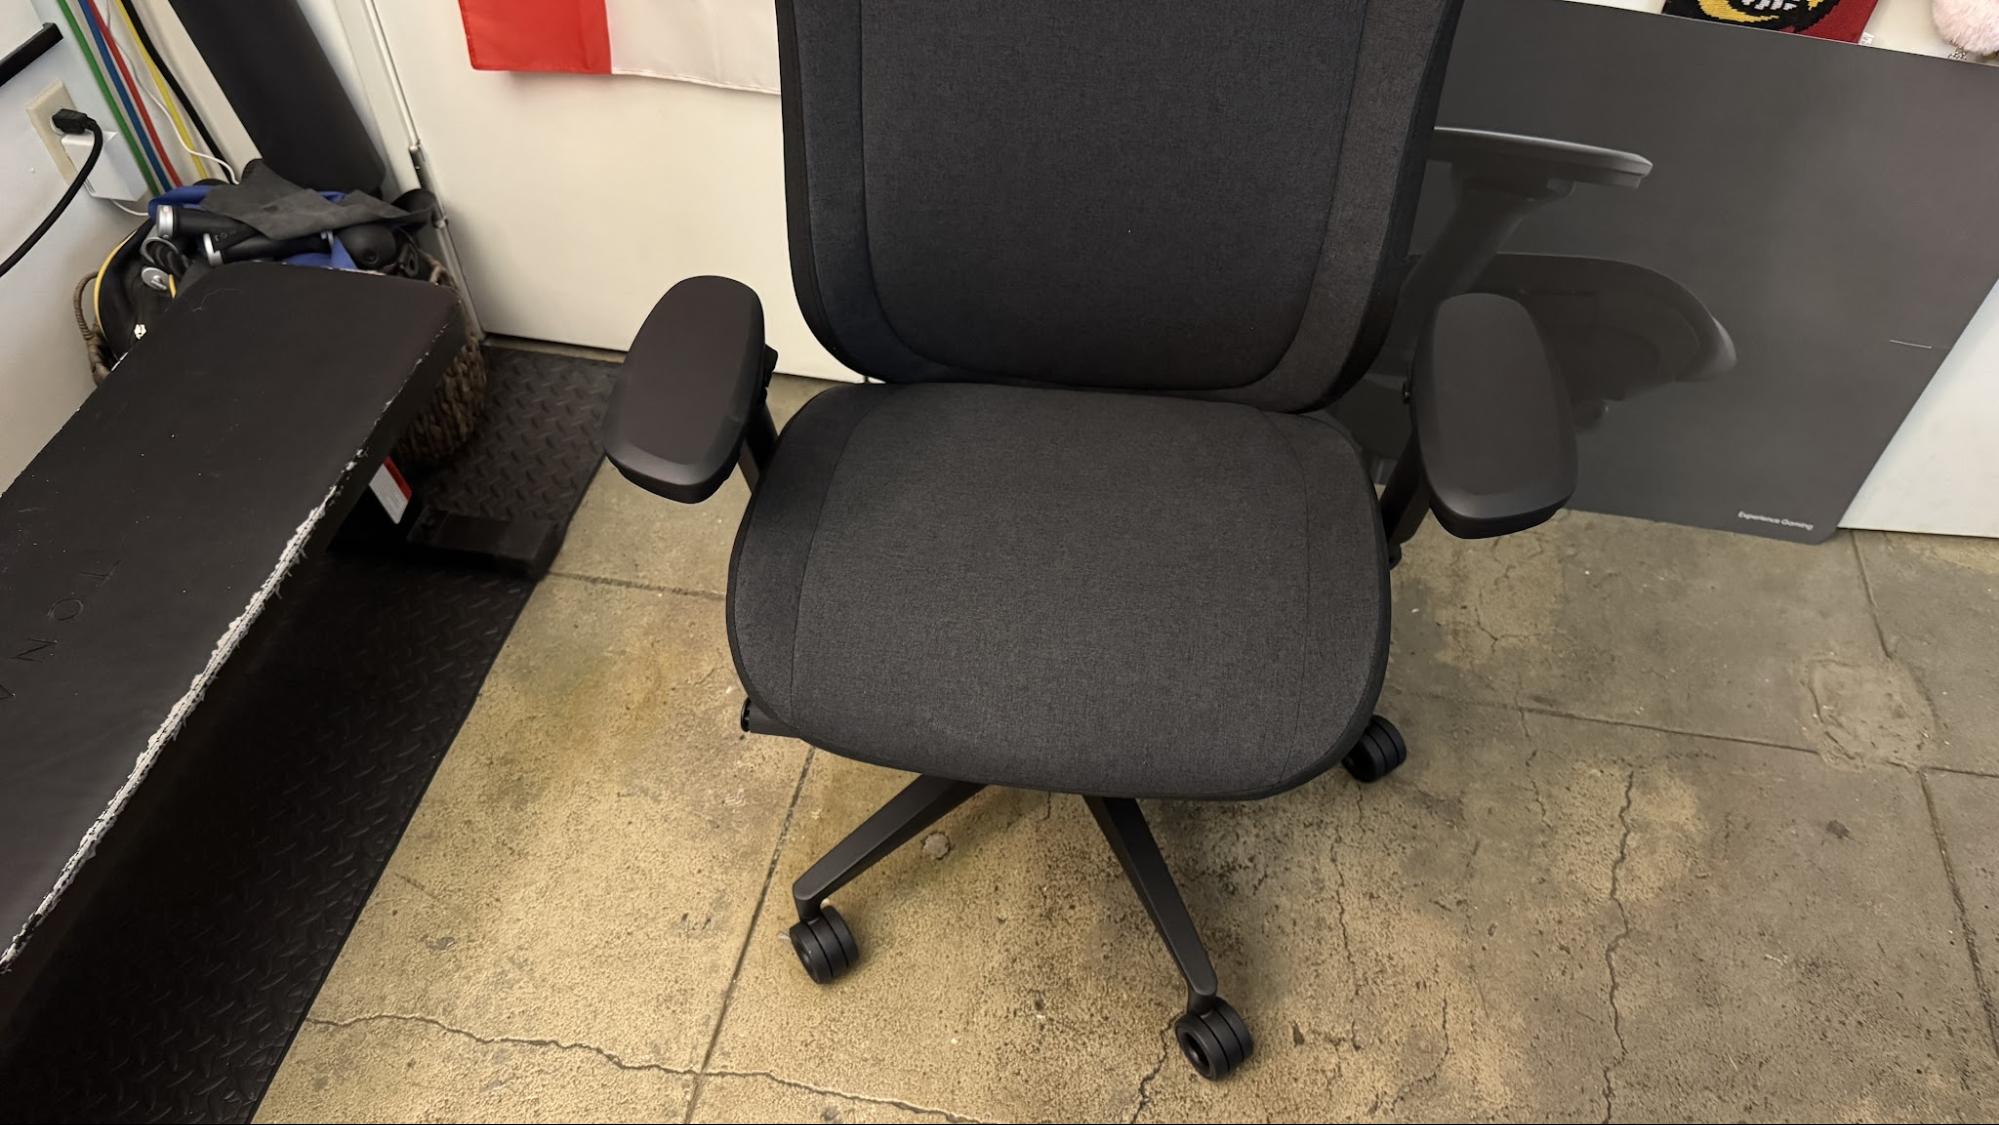
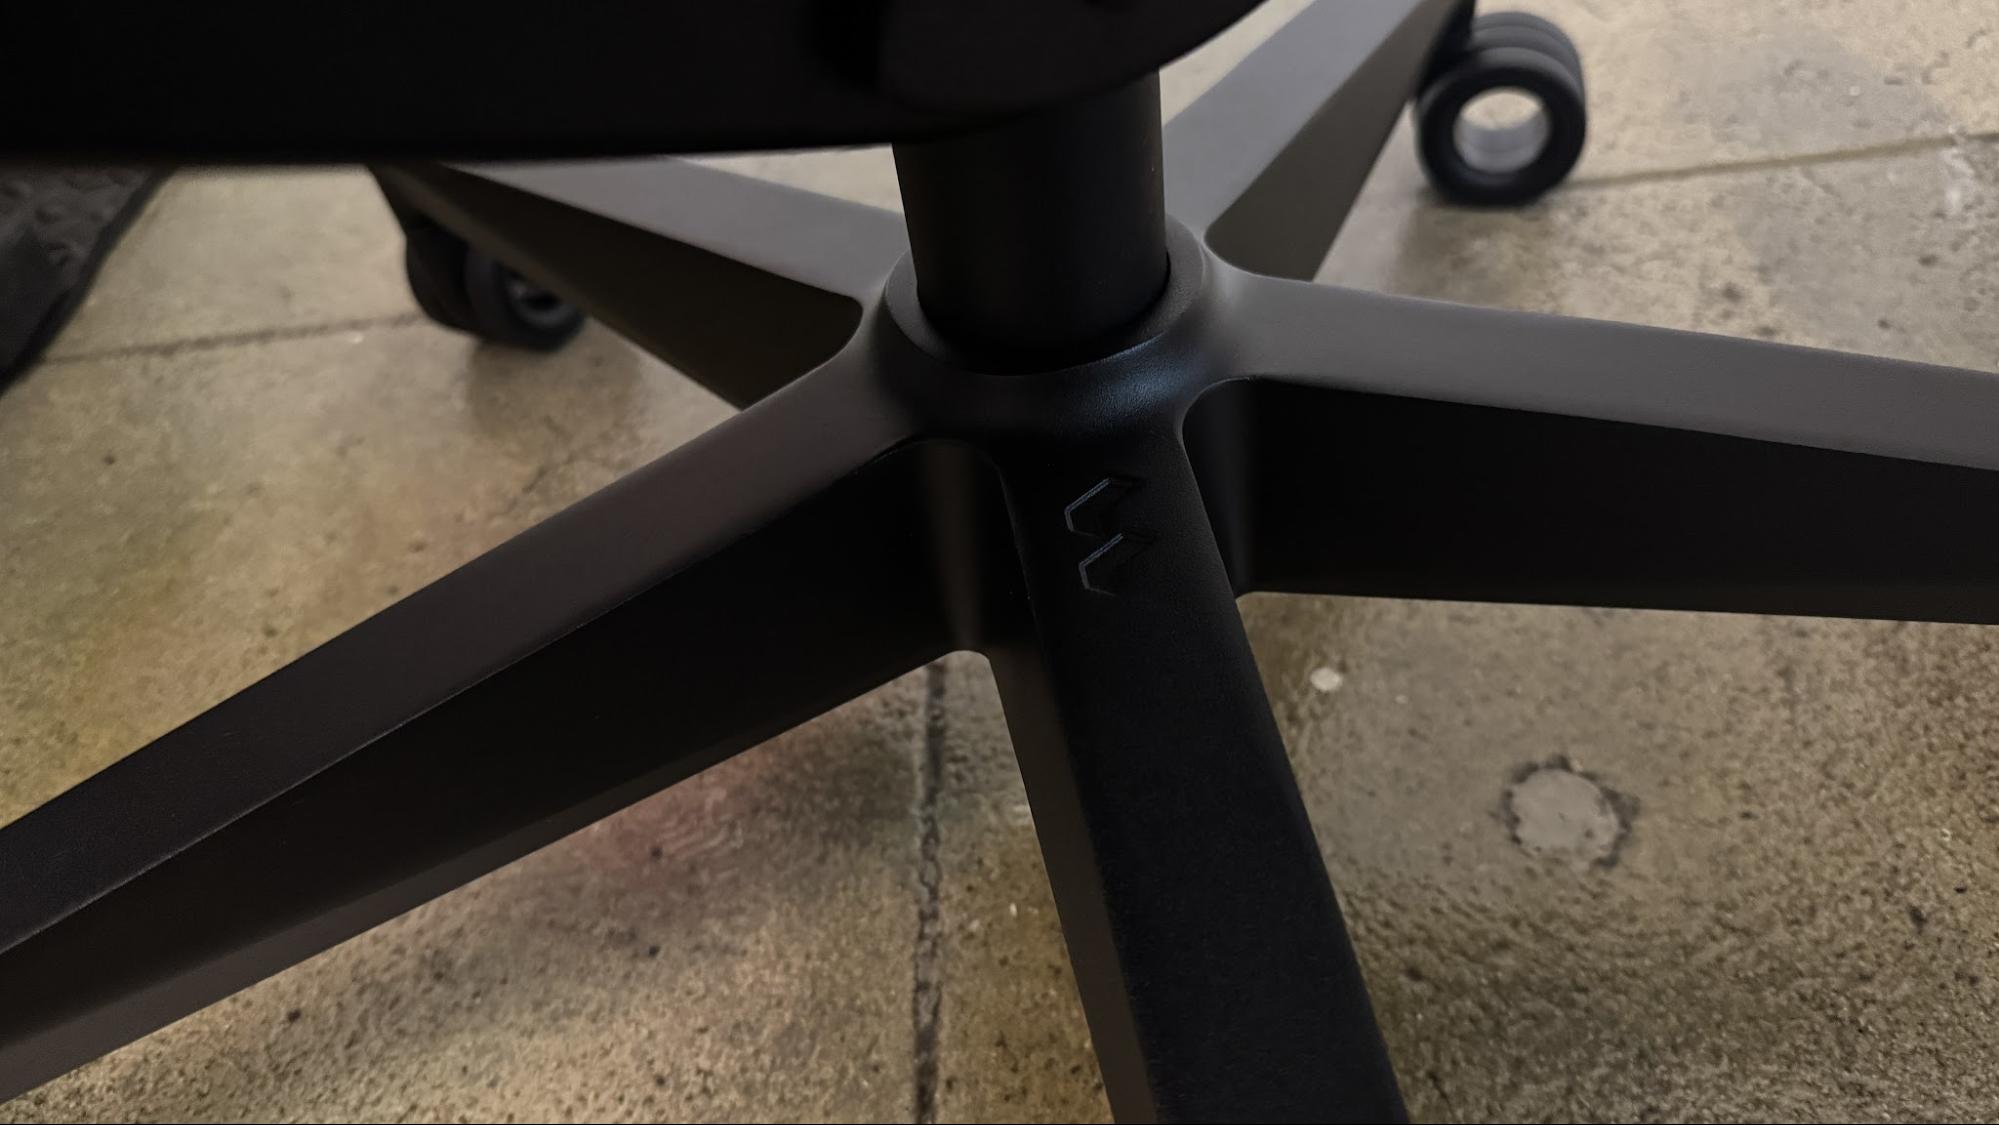
Fabric aside, the Refine 2 looks very similar to its predecessor, with the same "refined" racing-inspired silhouette. It sits on a sturdy, five-spoke metal base with large, hollow plastic casters and a class 4 pneumatic gas lift. It features a glass-fiber reinforced frame with a thick, padded seat that has slightly raised sides — not quite a bucket seat, though it does have the traditional forward hump that bucket seats have. The seat width is approximately 17 inches (431.8mm) between the sides; with the sides included it's closer to 20.5 inches (520.7mm).

Fractal Refine 2
Tom's Hardware
Fractal Refine 2
Tom's Hardware
Fractal Refine 2
Tom's Hardware
Fractal Refine 2
Tom's Hardware
Fractal Refine 2
Tom's Hardware

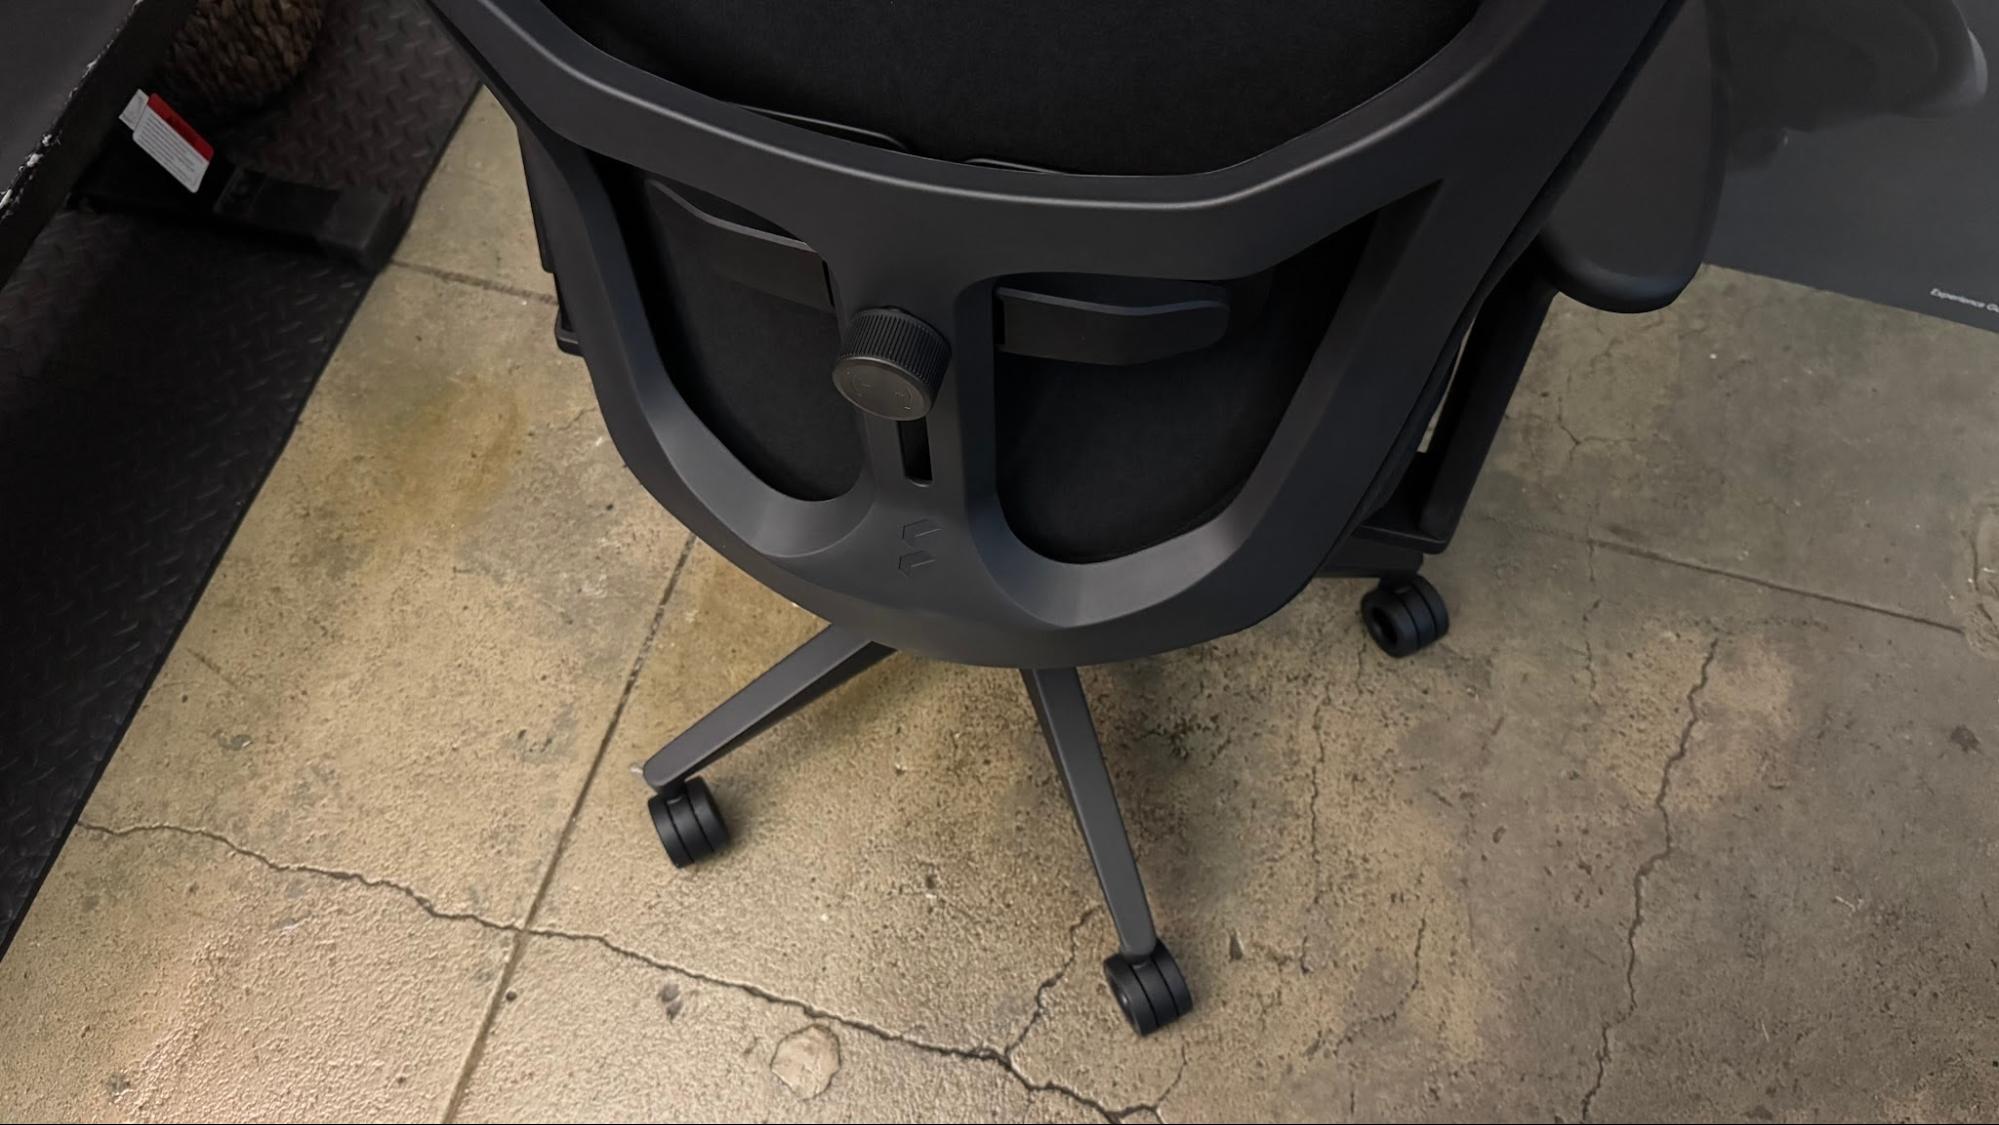
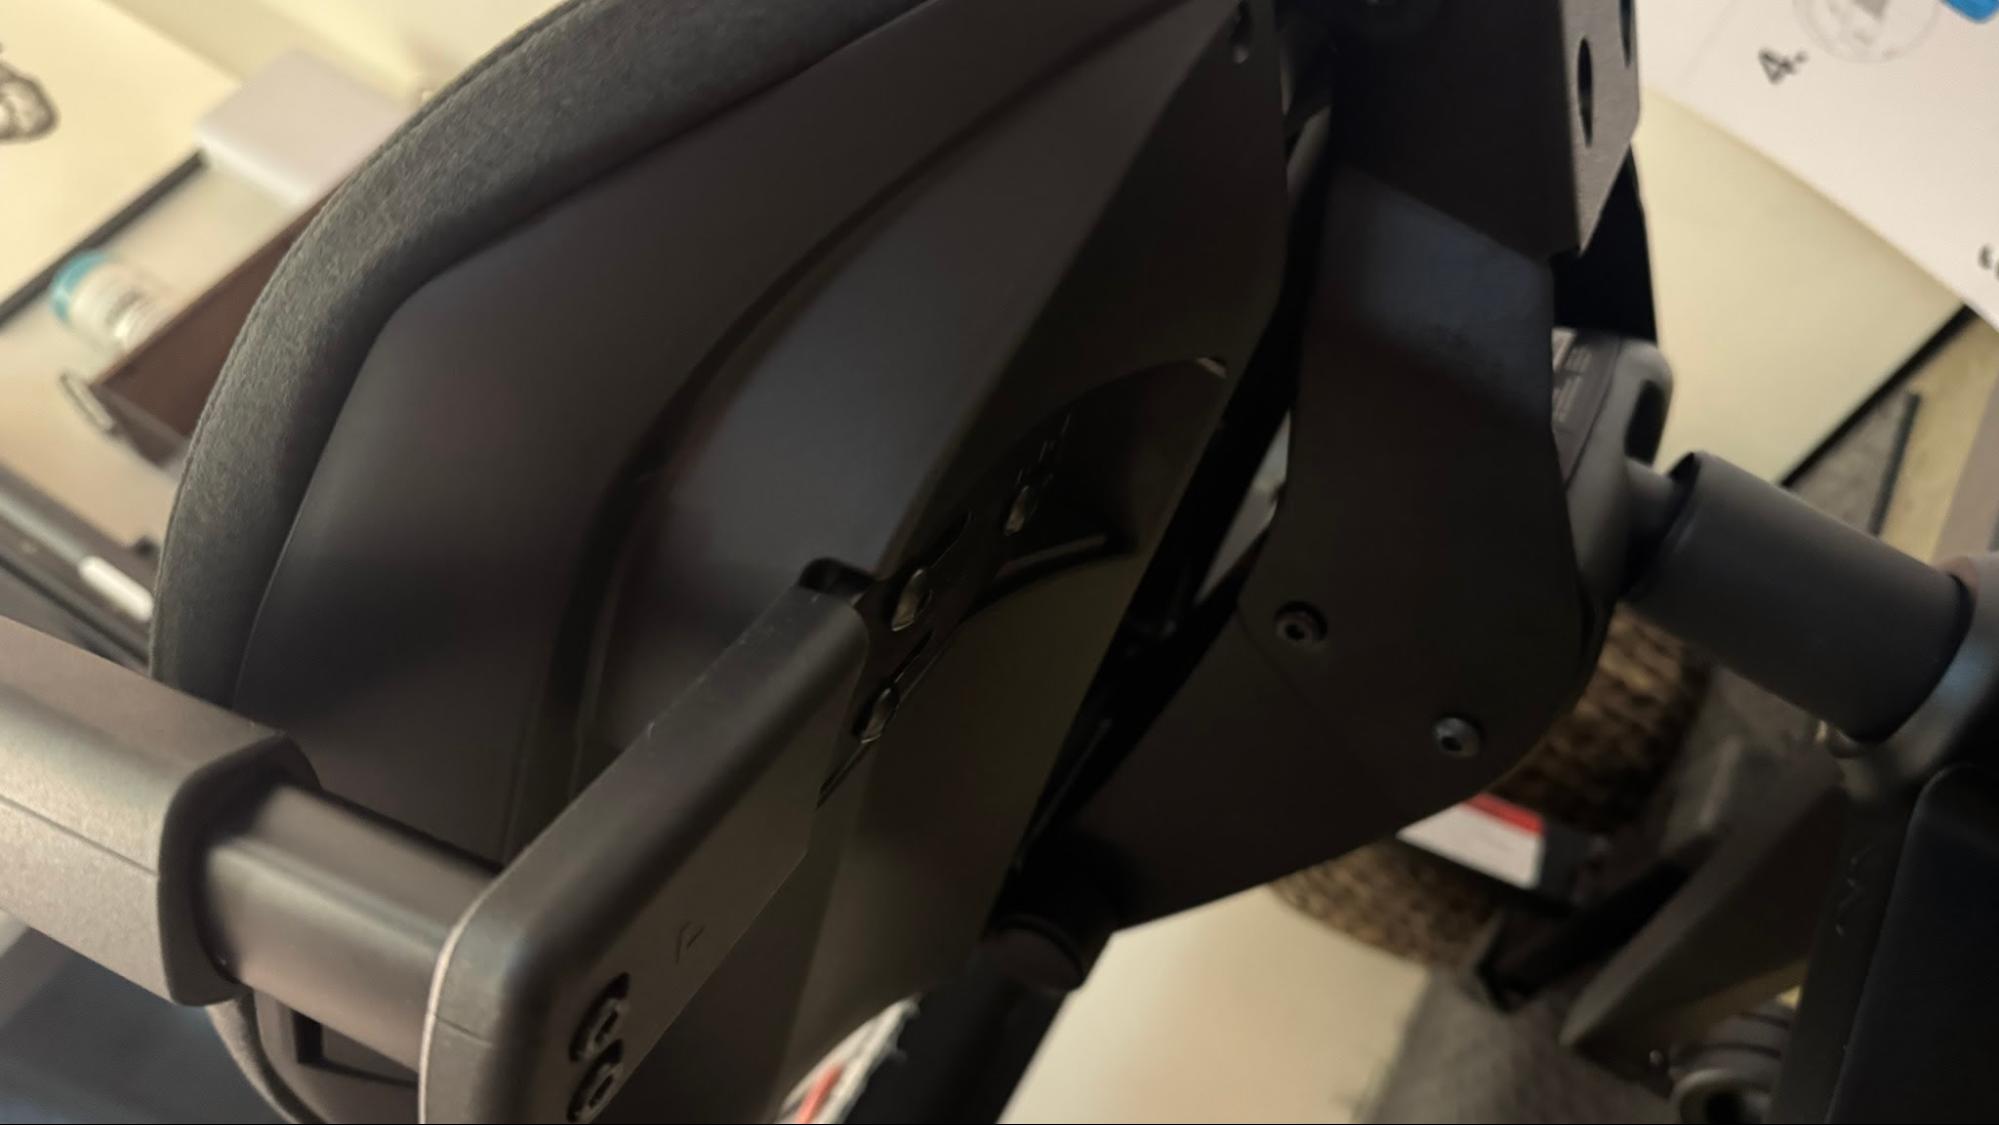
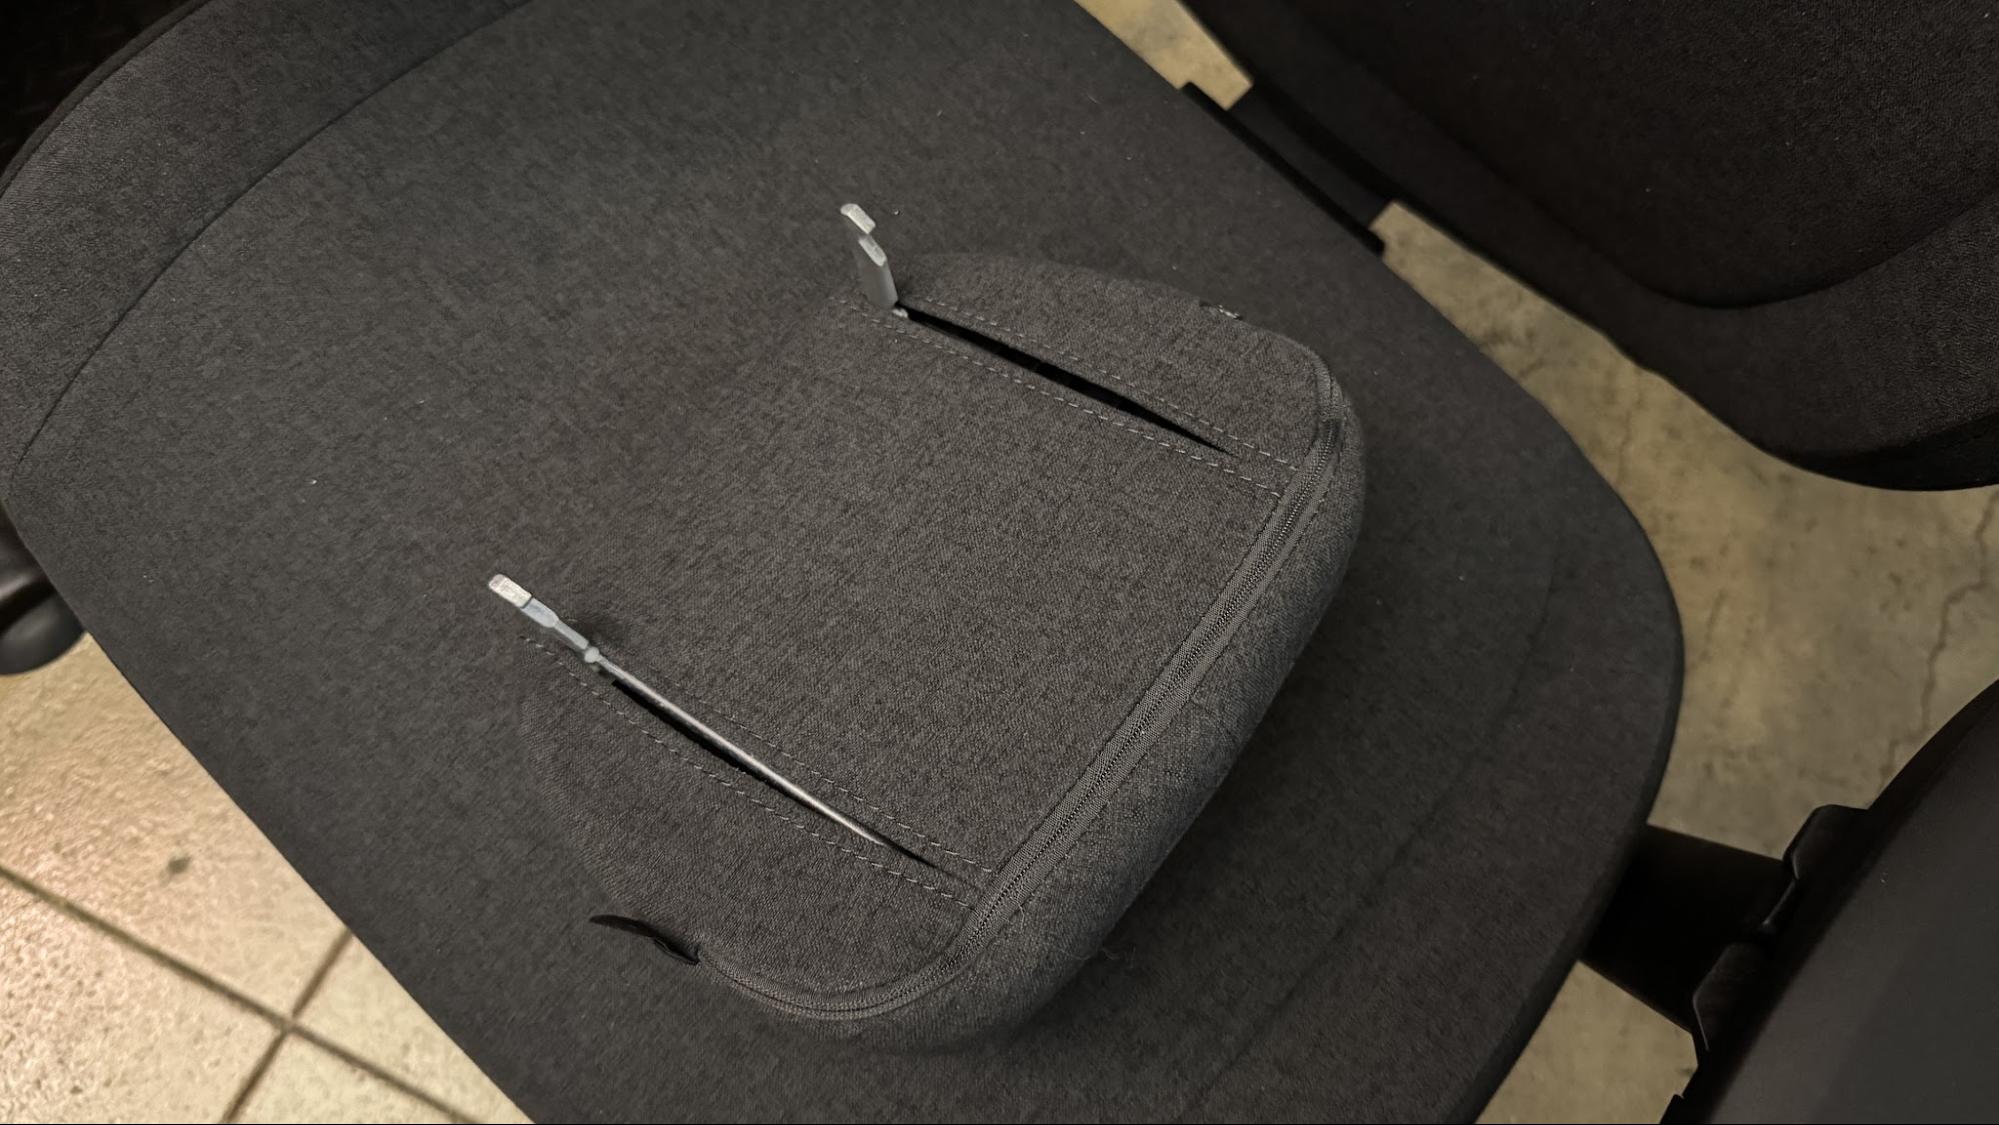
The chair has a tall, racing-style backrest with slightly winged shoulder support and a headrest. The chair measures 18.75 inches (476.25mm) wide at the shoulders, and is approximately 53.7 - 58.5 inches (1365 - 1485mm) tall overall. The backrest consists of fabric stretched over a plastic frame for firm, suspension-style support. The chair also features manually-adjustable lumbar support, which presses through the backrest and can be moved vertically and adjusted for strength.

The Refine 2 is not a bad-looking chair, but it is big, heavy, and difficult to maneuver once it's been assembled. It weighs almost 80 pounds (36kg), and is fairly bottom-heavy, which I suppose is good for those who want to spend a lot of time tilting in this chair.

Comfort and Adjustments

The Refine 2 is highly adjustable, though it doesn't offer some of the traditional gaming chair adjustments, such as the ability to lie almost completely flat. There are two levers on the right side of the chair, just under the seat, that control seat depth and height. The front lever controls height, and works as expected — pulling it raises and lowers the chair's height via its gas lift. The floor-to-seat height ranges from 19.3 - 24 inches (490 - 610mm).

Fractal Refine 2
Tom's Hardware
Fractal Refine 2
Tom's Hardware

The back lever controls seat depth, which starts at around 16.7 inches (425mm) and can be adjusted to approximately 19.69 inches (500mm), which is pretty deep. Under the two levers there's a knob for adjusting the strength of the chair's tilt limiter — twisting forward (clockwise) makes it stronger, while twisting backward (counter-clockwise) makes it weaker. One of my main issues with the original Refine was that the tilt limiter was far too strong, even at its weakest setting. I'm pleased to see that the Refine 2 has toned down the absolute strength of the tilt limiter, but unfortunately it's still just a little too strong for me to be able to easily lean back. While I did manage to find a comfortable position with the Refine 2 by tilting back and locking the chair into a slightly reclined position, I would still prefer more flexibility in the seatback while I'm working.

Fractal Refine 2
Tom's Hardware
Fractal Refine 2
Tom's Hardware

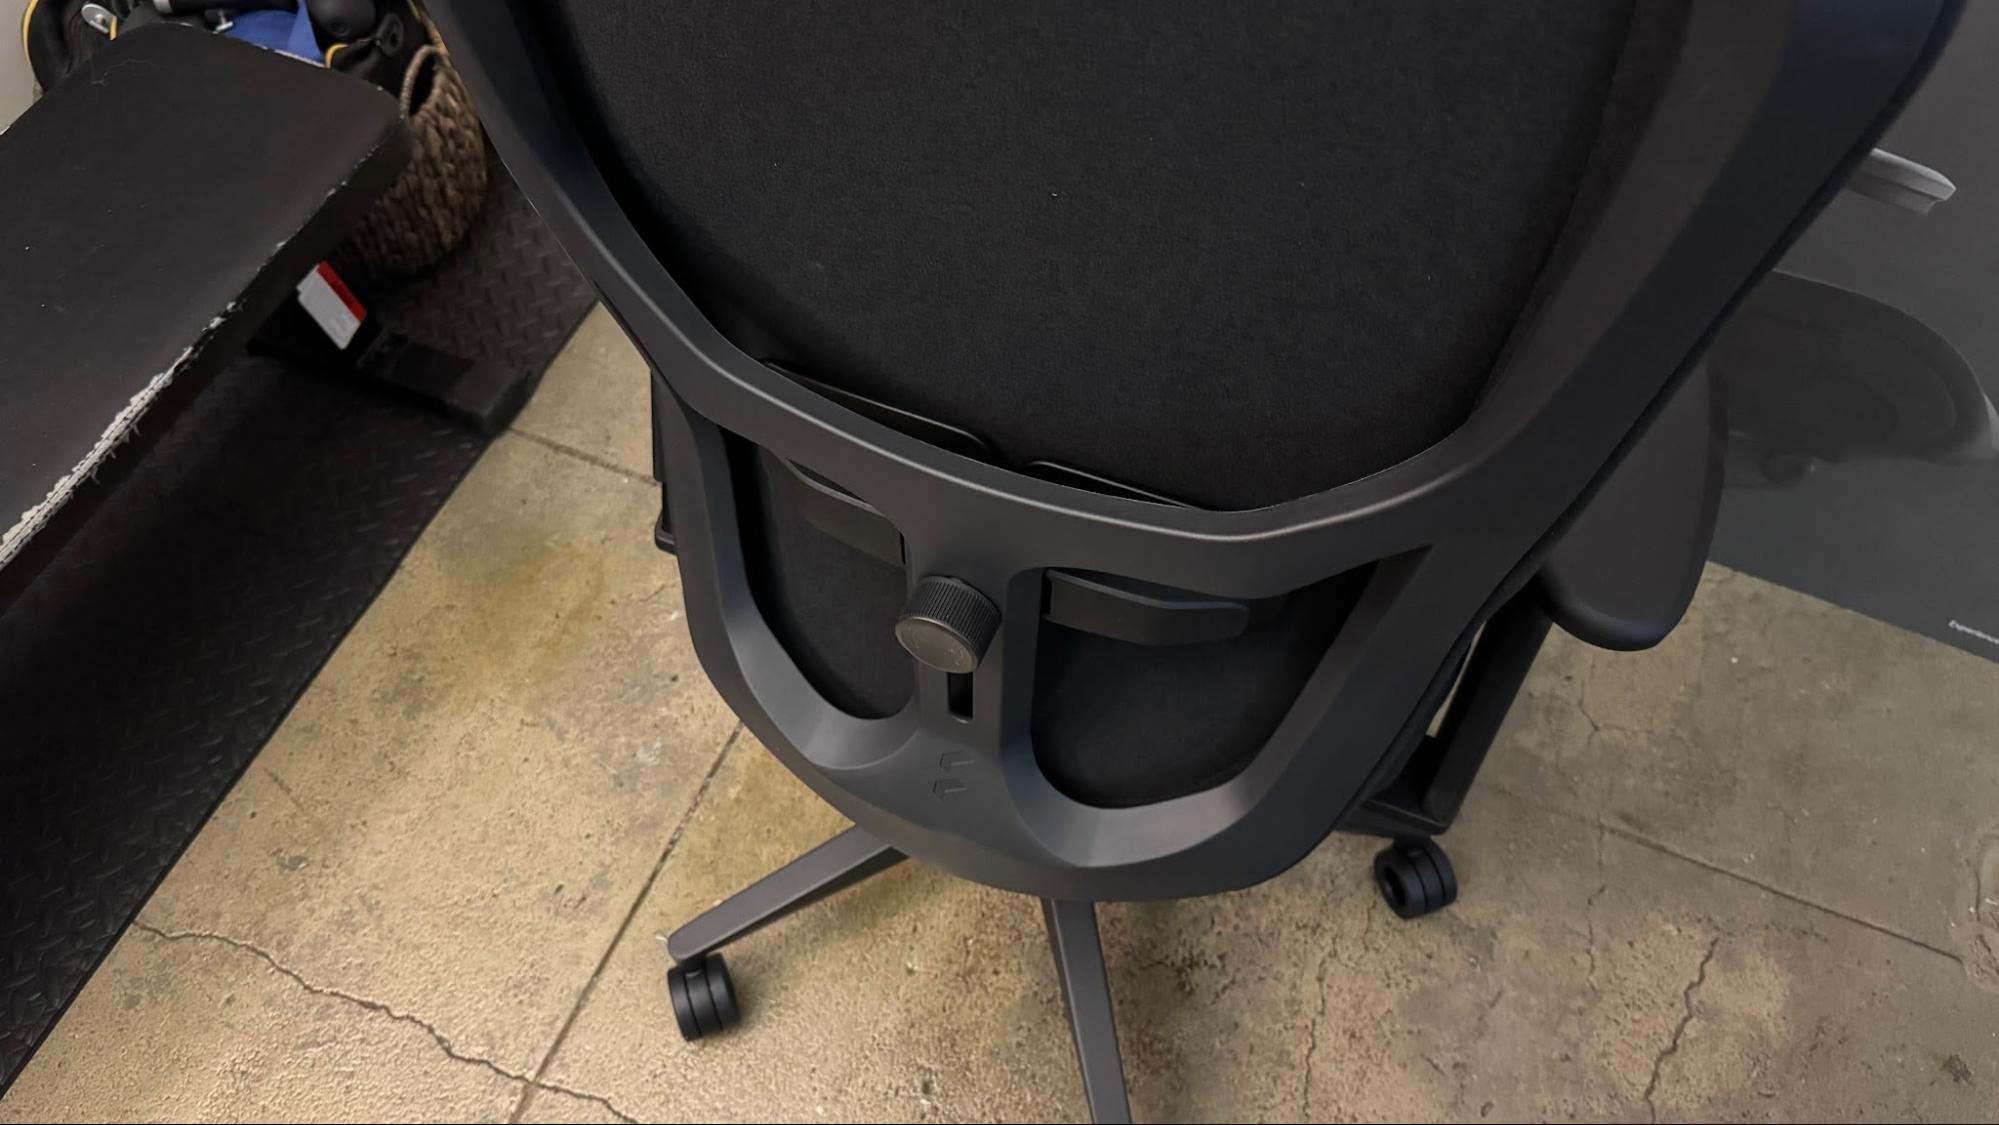
The Refine 2 has adjustable lumbar support in the form of a moving lumbar pad that presses through the seat's suspension back. The lumbar pad can be moved up and down (you'll need to move it manually), and support can be dialed up by twisting the knob clockwise, or dialed down by twisting the knob counter-clockwise. The lumbar support now features dual pads on either side of your spine (instead of just one pad, like the original Refine had), which flex and adapt as you move to better support your lower back. The dynamic support was nice, though I think I still prefer vertically-adaptable support (like what's on the Herman Miller x Logitech G Vantum).

Fractal Refine 2
Tom's Hardware
Fractal Refine 2
Tom's Hardware

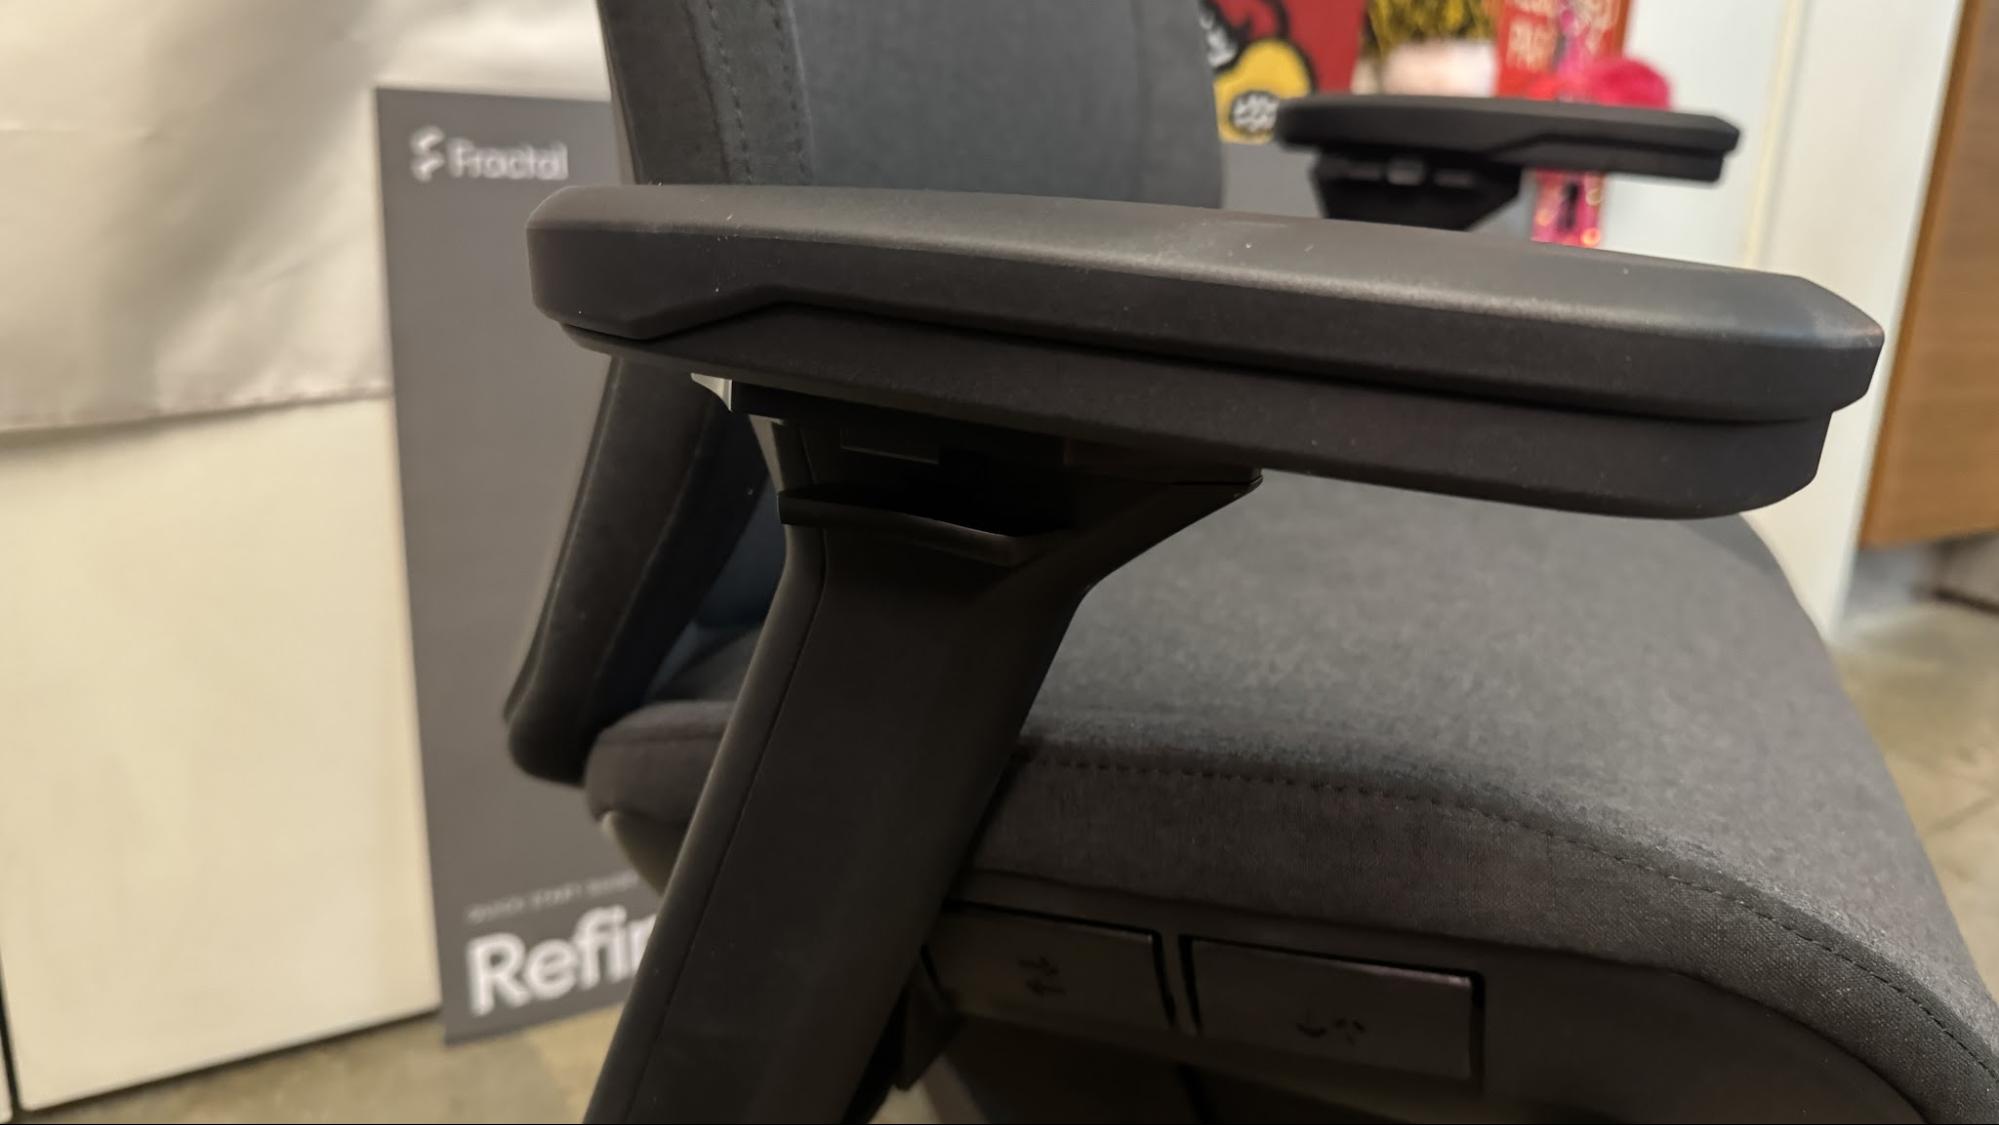
Like its predecessor, the Refine 2 has 4D adjustable armrests — you can adjust the height, width, depth, and angle. Unlike its predecessor, these arm rests do fully lock in place, as the depth (back/forward) movement is now locked to the small button (on the inside of the armrest, near the front) that also locks angle. There's a lever on the outside of each armrest for adjusting height, and a button on the inside (in the middle) for adjusting width. You can also adjust overall armrest width at the base, though you'll need to break out the hex wrench to do this.

Fractal Refine 2

(Image credit: Tom's Hardware)

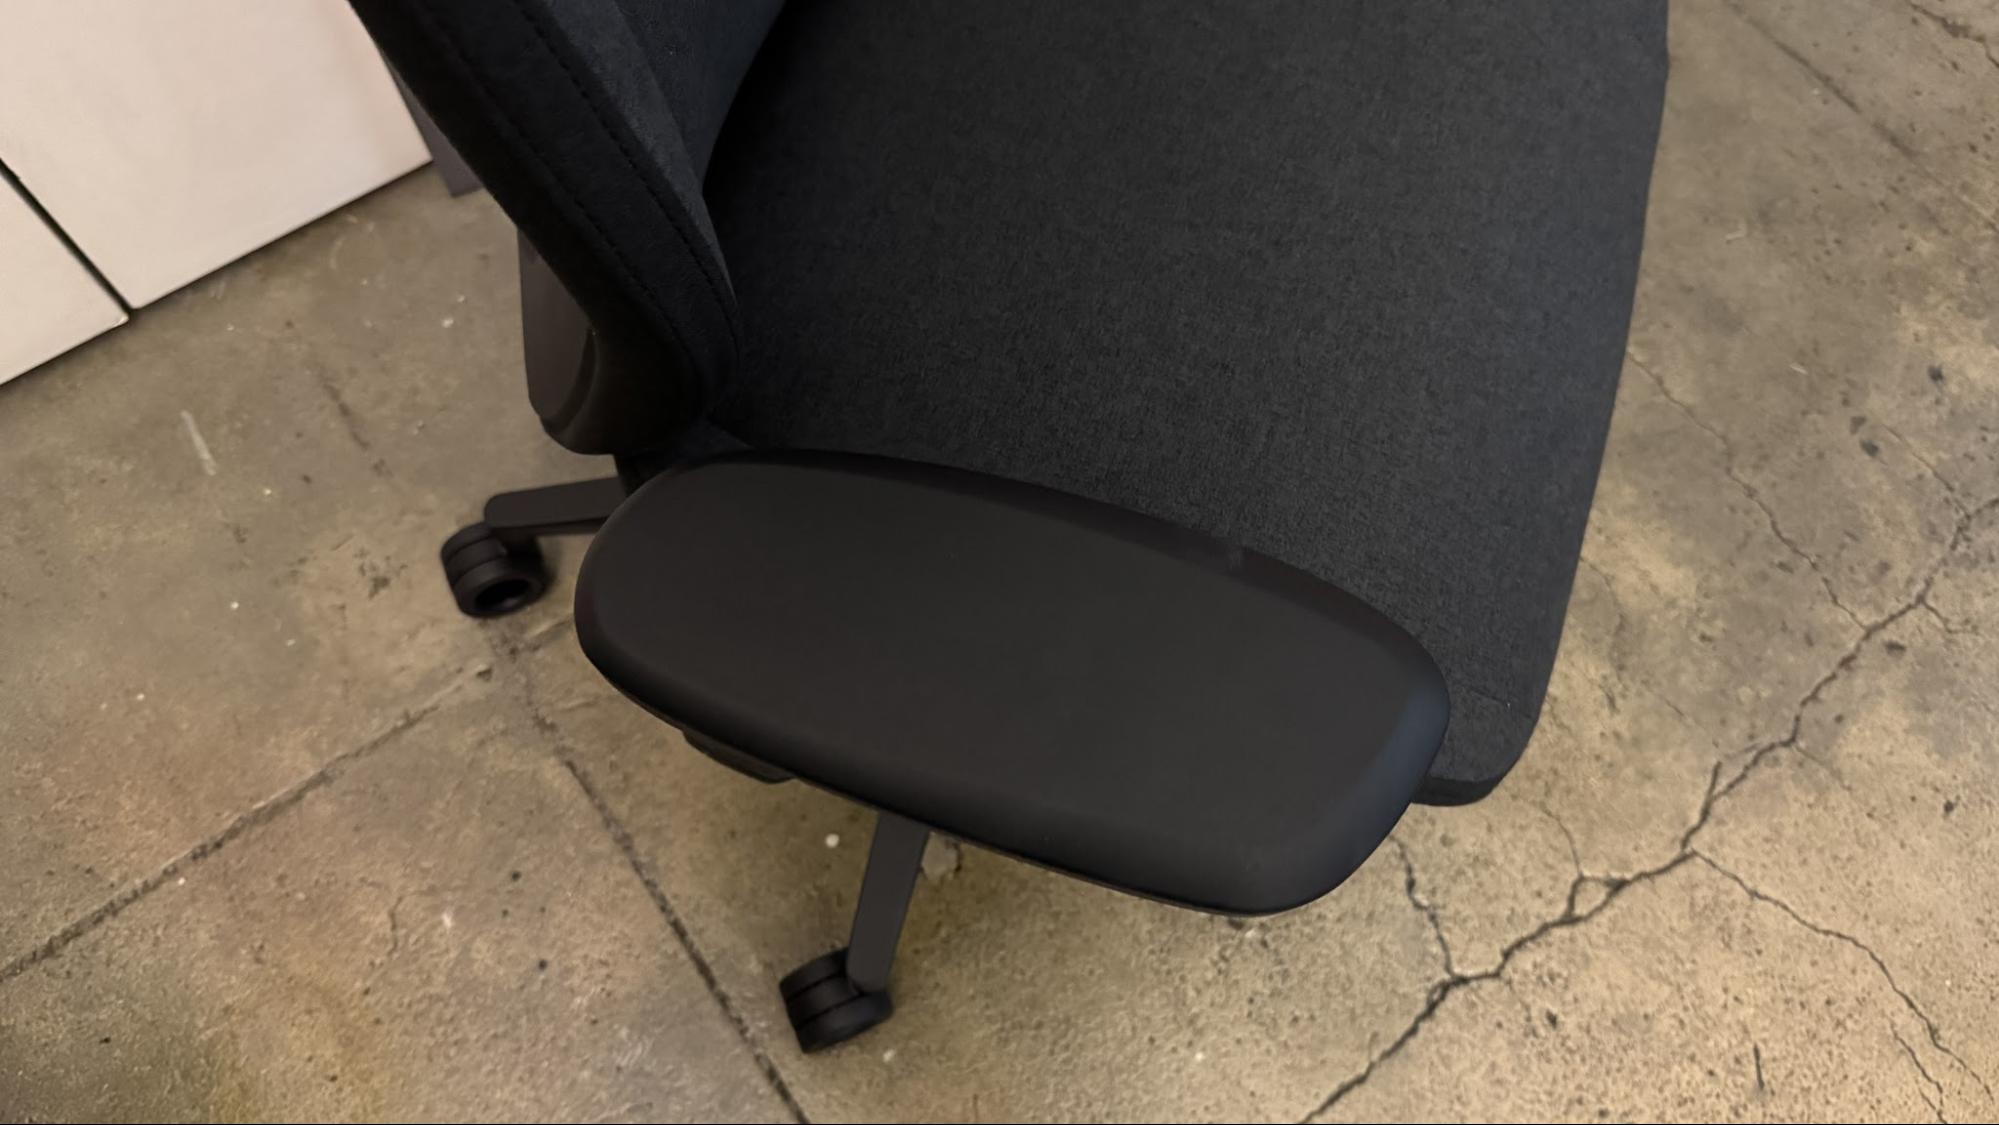
The armrests have wide, padded polyurethane-covered tops and are fairly comfortable. I did find the depth/angle lock to be a little difficult to easily maneuver — especially when I wanted to adjust angle (there are only three angles — neutral/straight, and about 20 degrees inward and outward), but I suppose that's the price we pay for locking arm rests.

Fractal Refine 2
Tom's Hardware
Fractal Refine 2
Tom's Hardware
Fractal Refine 2
Tom's Hardware
Fractal Refine 2
Tom's Hardware

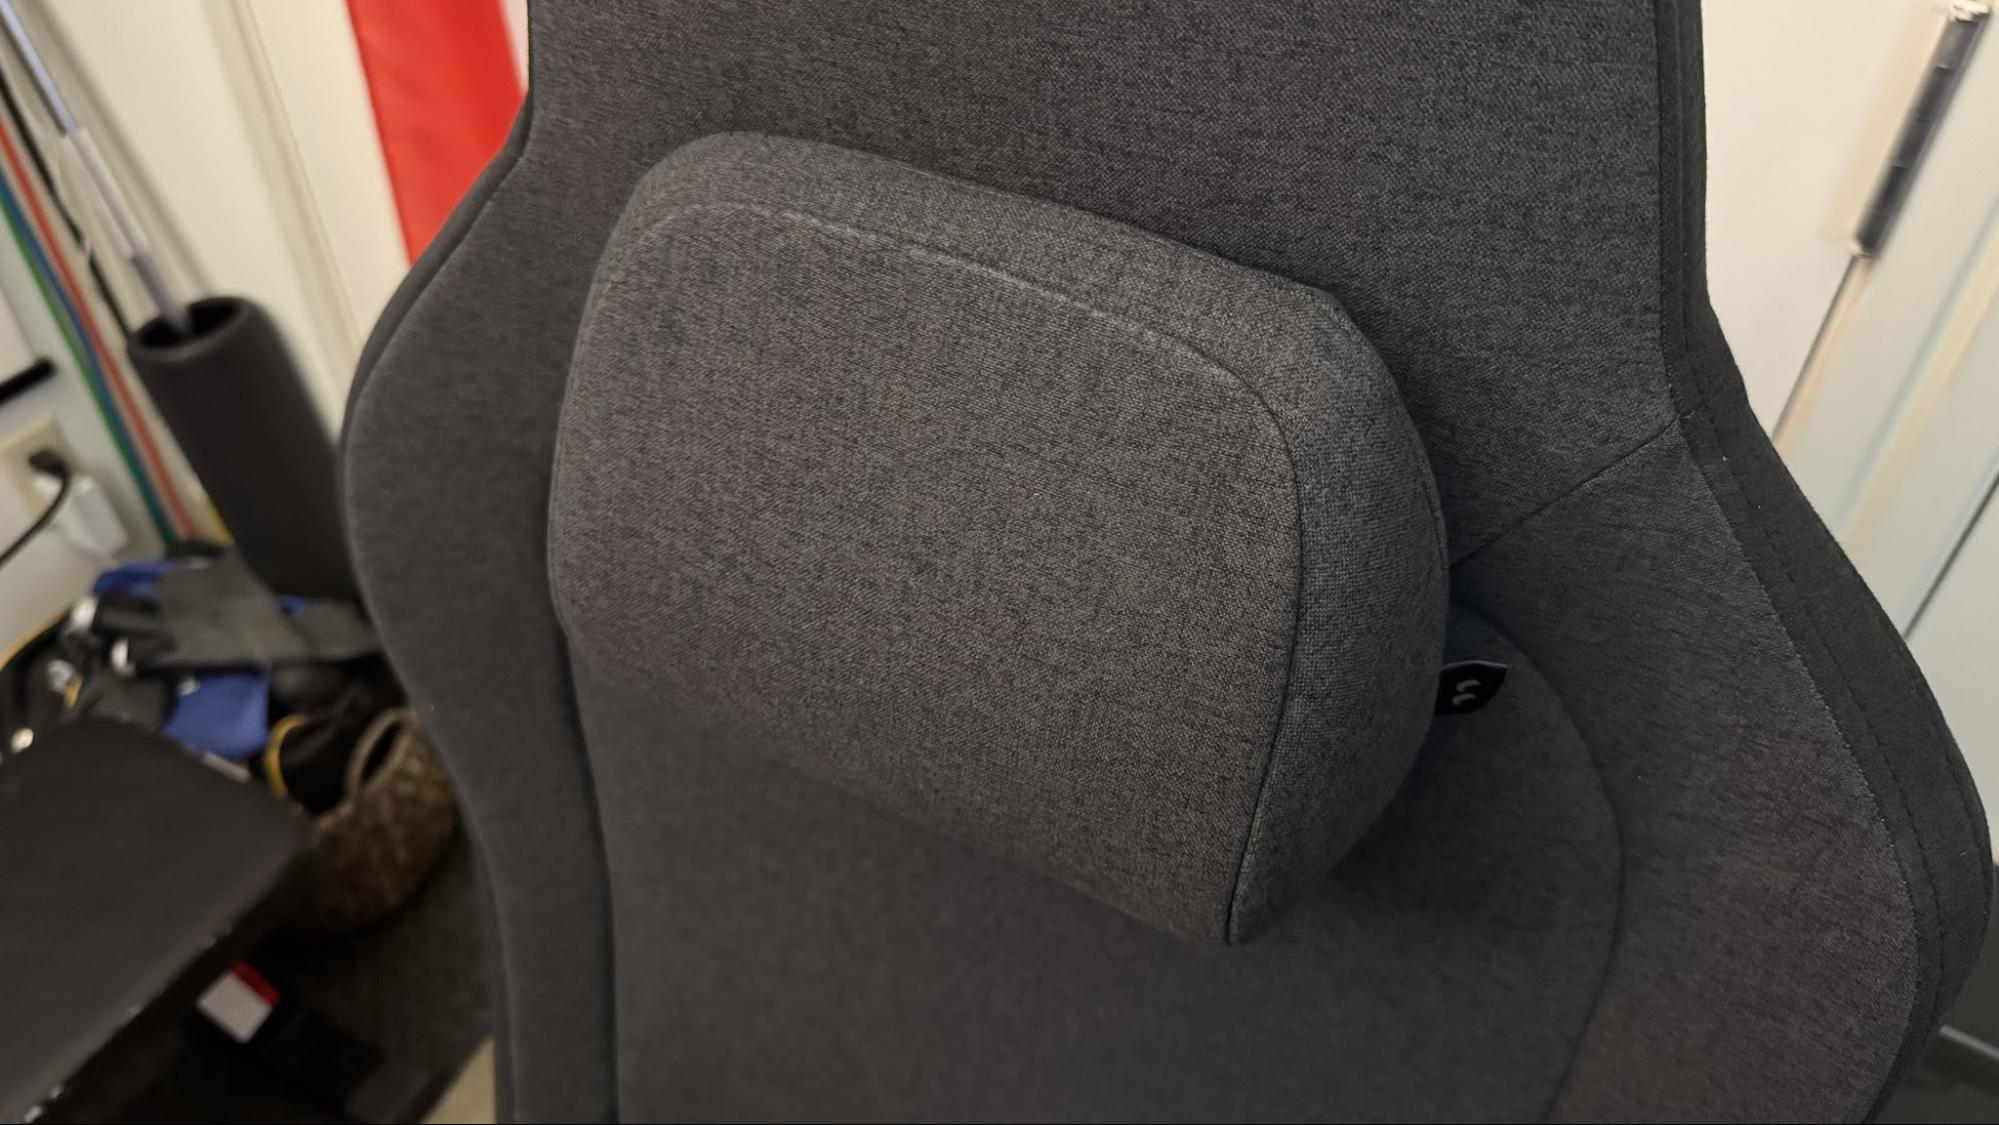
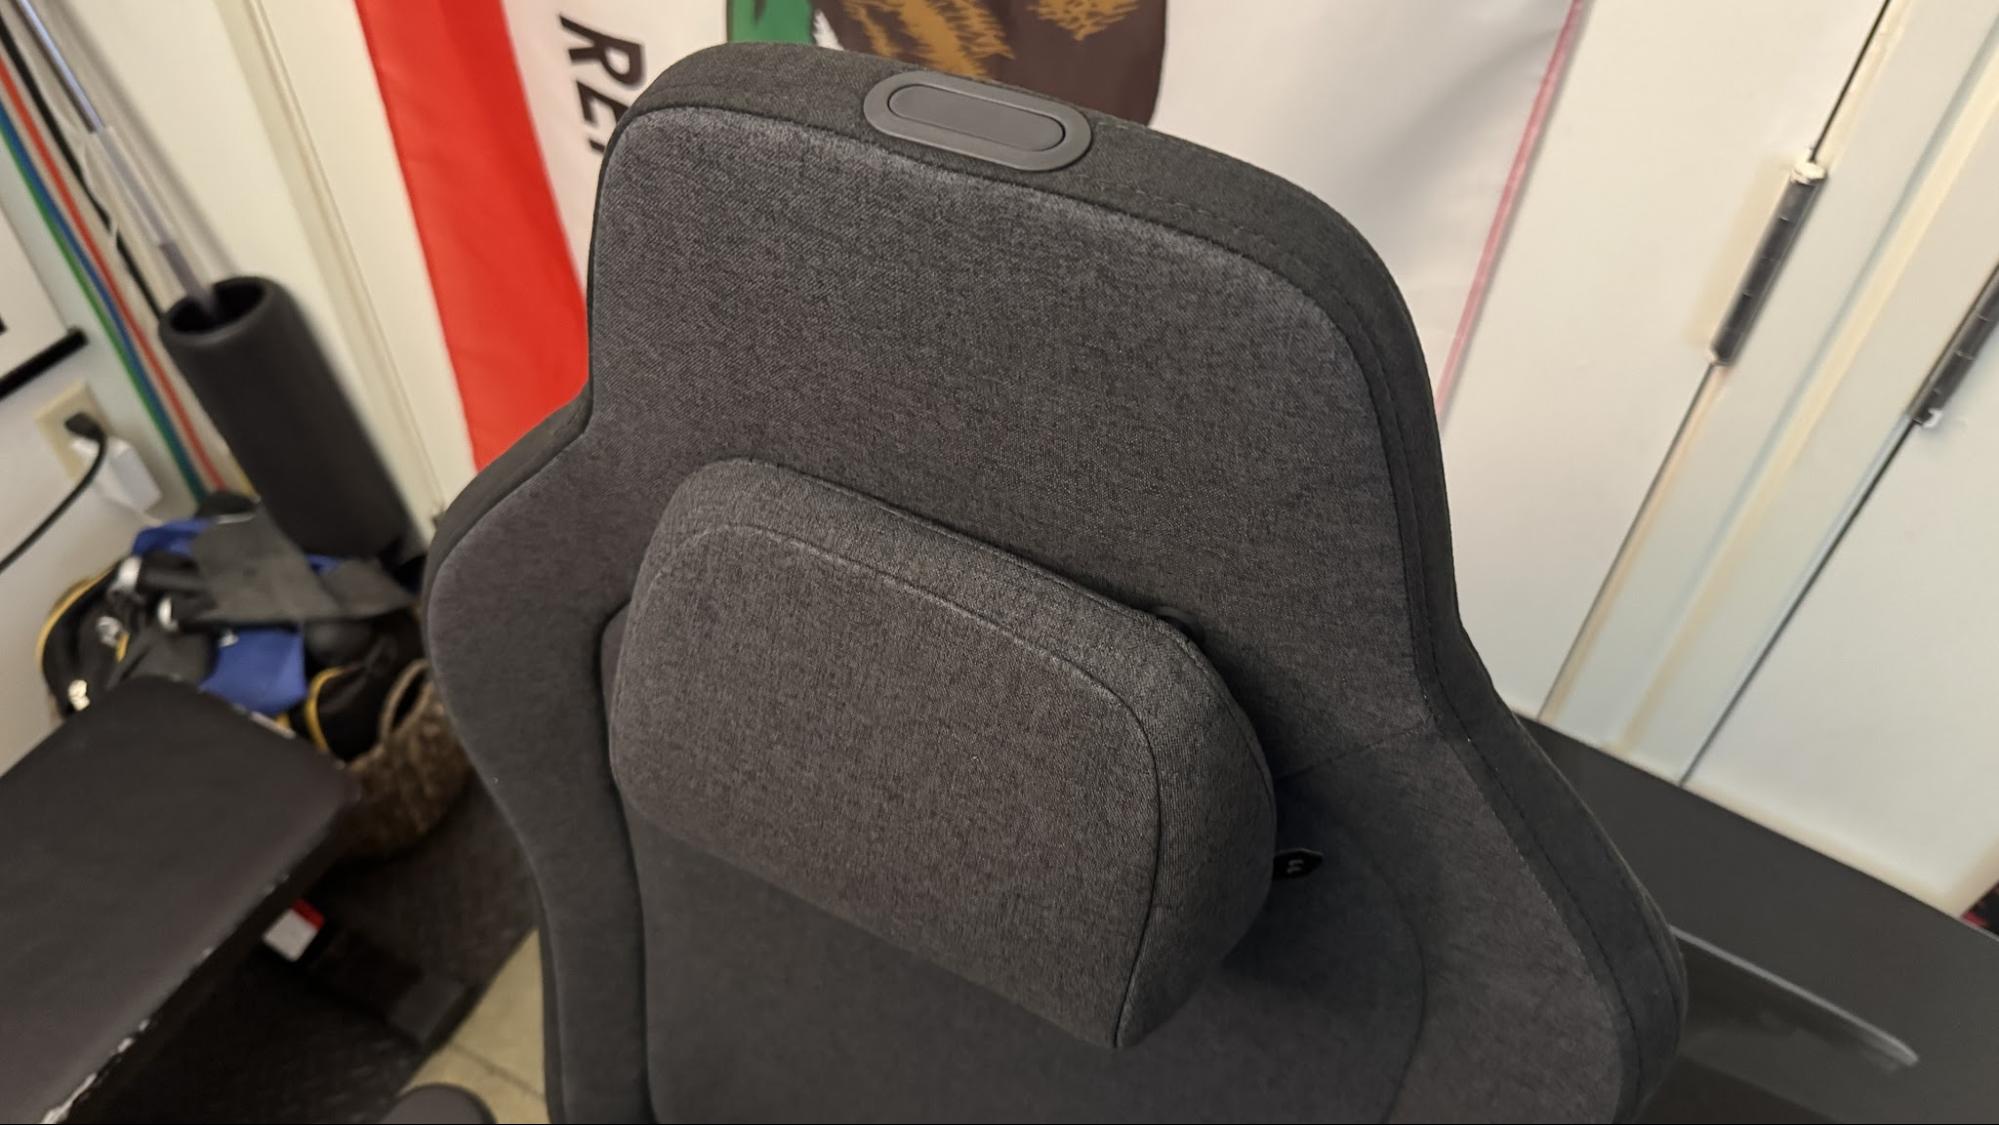
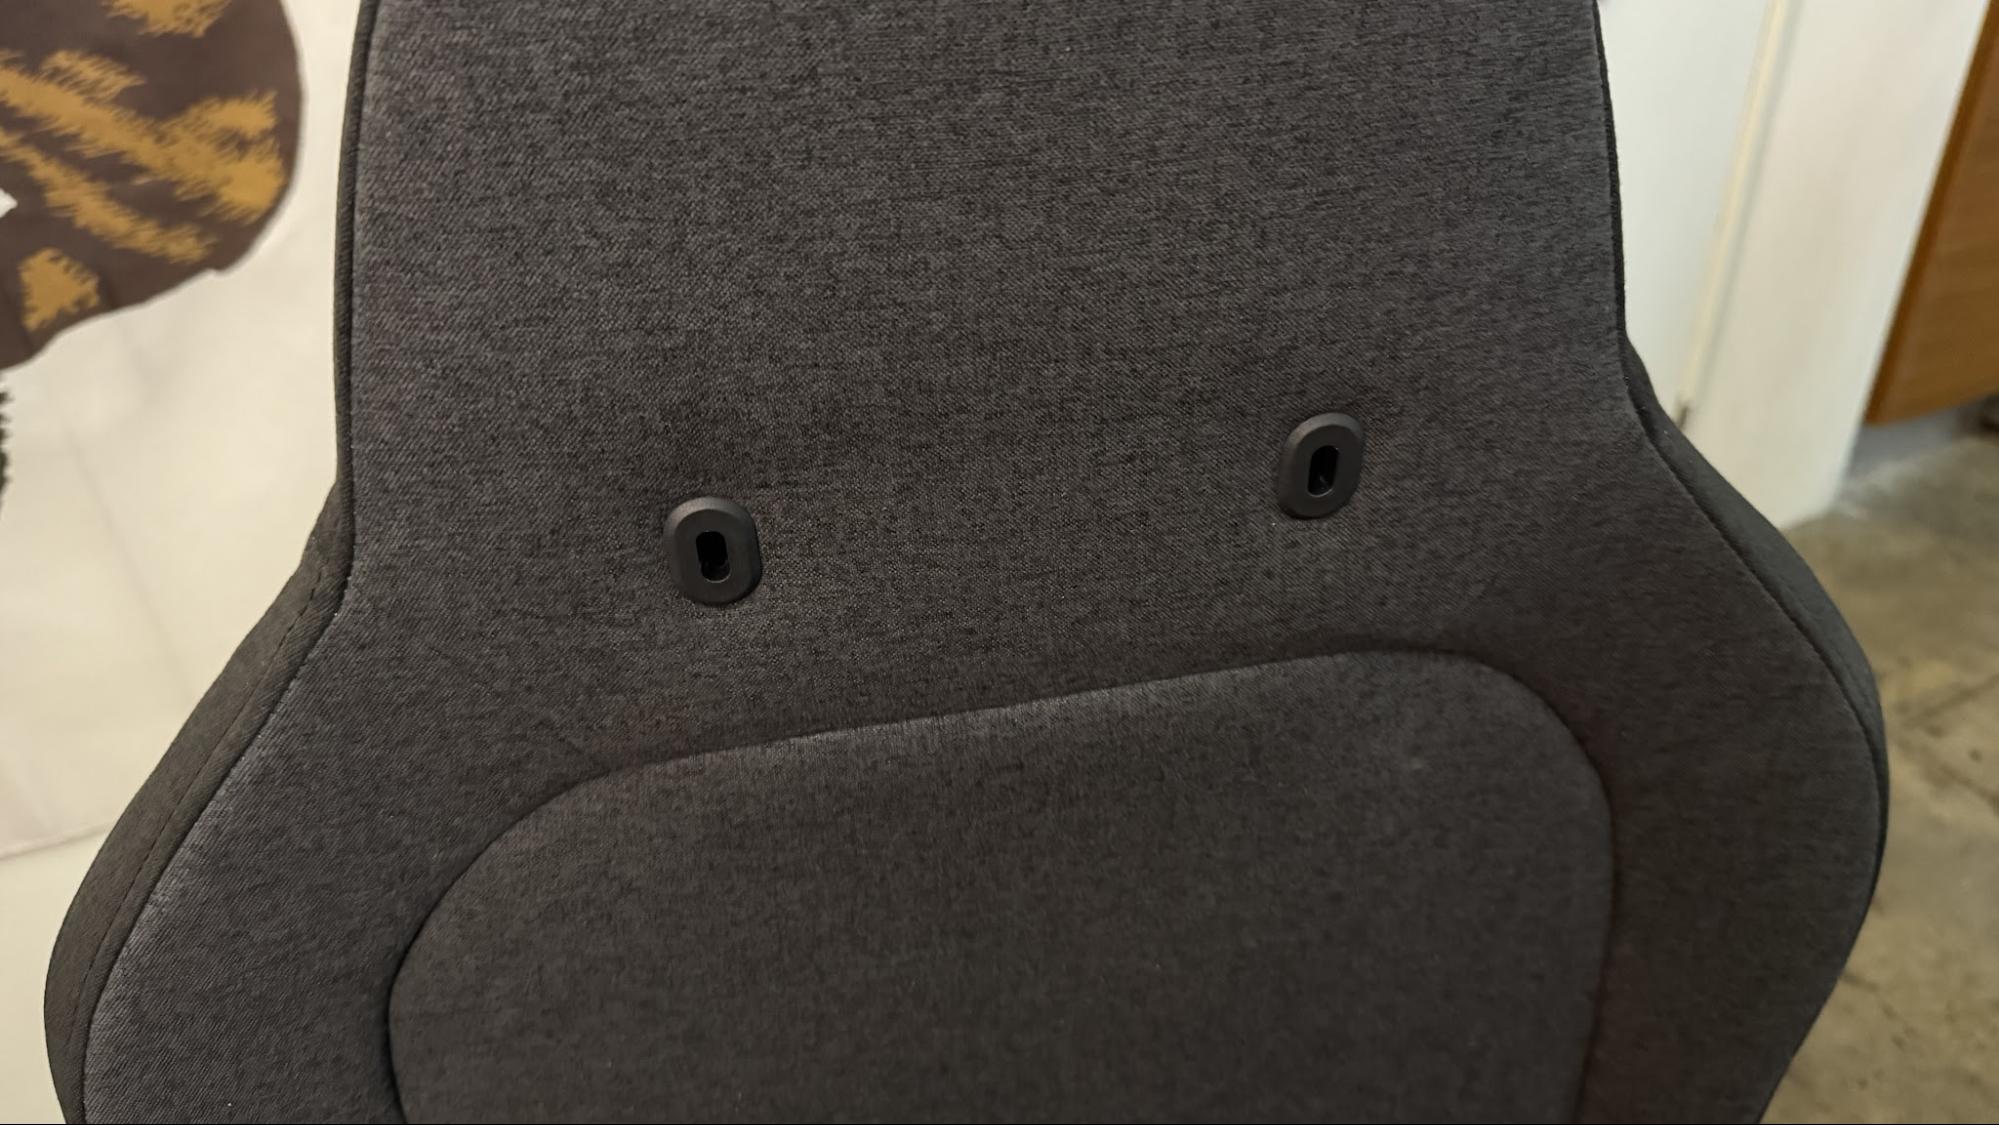
The chair has a built-in, detachable neck pillow implemented the same way it is on the original Refine — attached to the chair via two sturdy metal attachments that click into place. The neck pillow can be manually raised or lowered, or it can be removed completely by pressing the button at the top of the backrest. The neck pillow is very similar to the one in the original Refine — moderately dense fabric-covered memory foam with a bottom-heavy sloped shape designed to sit at the base of your neck.

The maximum recommended weight for the Refine 2 is approximately 300 pounds (135kg). However, the recommended weight range is 132 - 300 pounds (60 - 135kg) and the recommended height range is 5'5" - 6'7" (160 - 200cm). I'm right at the lower end of this range (I'm around 5'7" / 171cm and I weigh around 135 pounds / 61kg), and the chair still seemed too heavy for me. While the tilt limiter was weaker than the tilt limiter on the original Refine, I still found it hard to easily tilt back and ended up having to lock the chair into position for comfort. My husband, who's 5'11" (180cm) and weighs around 190 pounds (86kg) had a much easier time tilting and maneuvering the chair.

Bottom Line

The Fractal Refine 2 is actually a pretty nicely refined version of the original Refine. The company definitely took some feedback into account and made some adjustments — but are they enough? This chair is practically identical to its predecessor, and the relatively minor changes aren't really enough to warrant an upgrade if you already have the original. If you don't already have the Fractal Refine, the Refine 2 is a pretty nice halfway point between racing-style gaming chairs and pricier task/office chairs — and the price is about halfway, too. At $640, this is a little more than you'll spend on a typical racing-style chair, such as SecretLab's Titan Evo NanoGen, but it's significantly less than you'll spend on most office-style chairs, such as SteelCase's Karman.

✇Tomshardware

$30 buys you a brand-new HyperX gaming headset — save 40% on the CloudX Stinger 2 with massive 50mm drivers

Fighting all the doom and gloom around the ever-increasing prices for our favorite gaming tech, it's nice to come across the occasional cheap deal that makes for a fantastic impulse purchase. If you want a gaming headset for the kids, or something you can chuck in a bag for travelling and not worry too much if it gets damaged, then we have a winner today! With a massive 40% knocked off the list price, the HyperX CloudX Stinger 2 is only $29.99 on the HyperX store. That's a very nice saving of $20 on the $49.99 list price shown. This is a wired gaming headset that is marketed for the Xbox, but has a standard 3.5mm combo jack, so it is compatible with any 4-pole TRRS combo-jack audio connector.

Check out this deal at HyperX

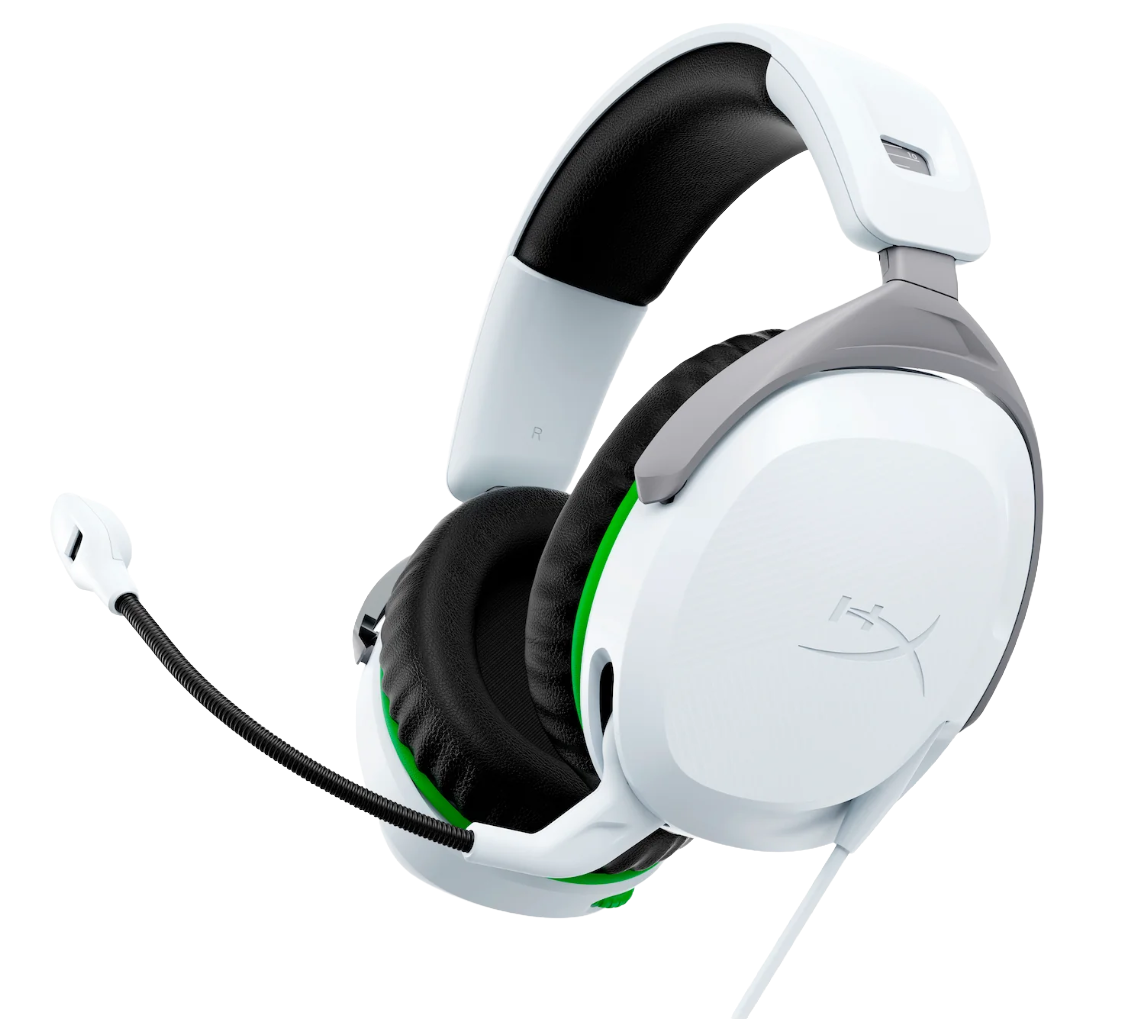
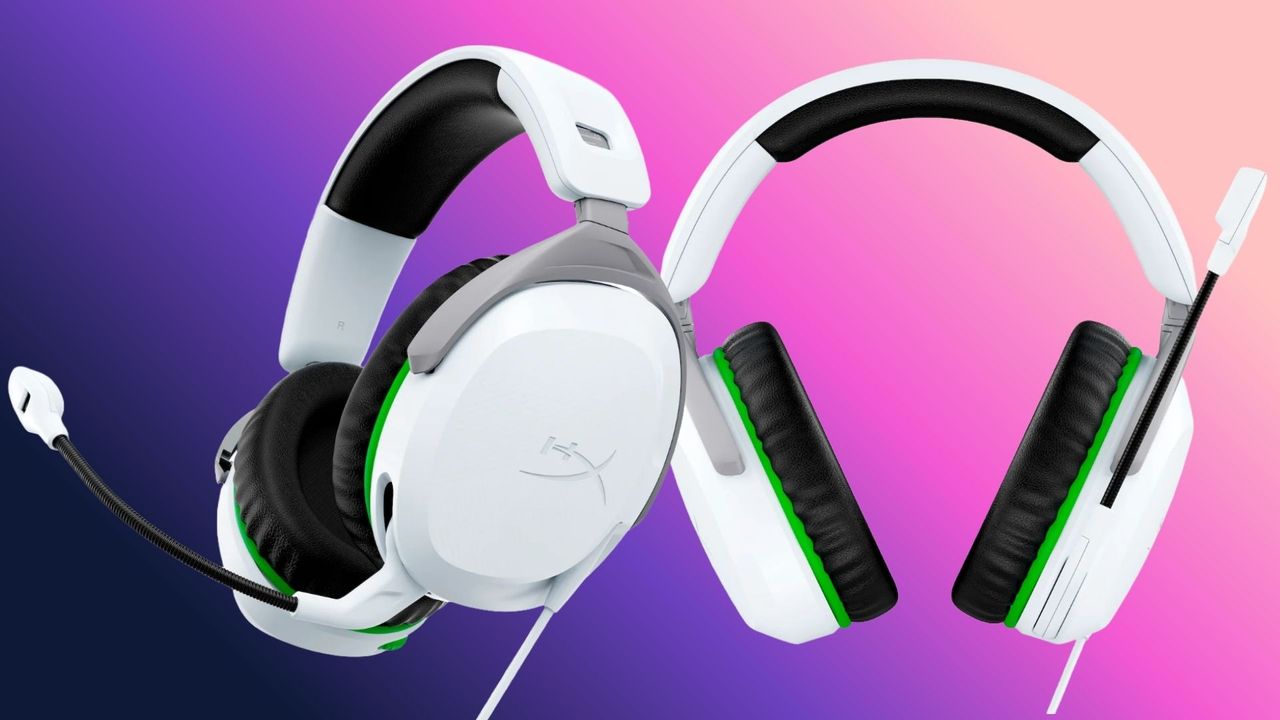
The HyperX CloudX Stinger 2 is a wired gaming headset that connects to your audio source via a 3.5mm audio connection. The headset comes in the Xbox livery, with a mainly white color scheme and green and black accents, matching the infamous Xbox green used on their consoles and peripherals. Inside the over-ear earcups are large 50mm drivers with comfortable memory-foam earpads. This is a one-size-fits-all headset and has an adjustable headband to customize the fit. You can chat to friends and quickly cut comms with the flip-to-mute microphone, making it easy to have a conversation without everyone else in the chat hearing.

CloudX Stinger 2 (wired): was $49.99 now $29.99
The HyperX Cloud Stinger 2 is a wired headset with a 3.5mm audio connection, large 50mm drivers in the earcups, an adjustable headband, flip-to-mute microphone, and comfortable memory-foam earpads. View Deal

Just $29.99 is a fantastic price for a budget gaming headset from a reputable brand. You can connect these cans to any audio source with a 3.5mm audio port, but if you want to connect to your desktop and your PC doesn't have a combo jack (headset/mic combined) input and has separate headphone and Mic inputs, then you will need an extra TRRS-to-dual-TRS Y-splitter cable; these can be picked up for a few bucks from Amazon.

✇Tomshardware

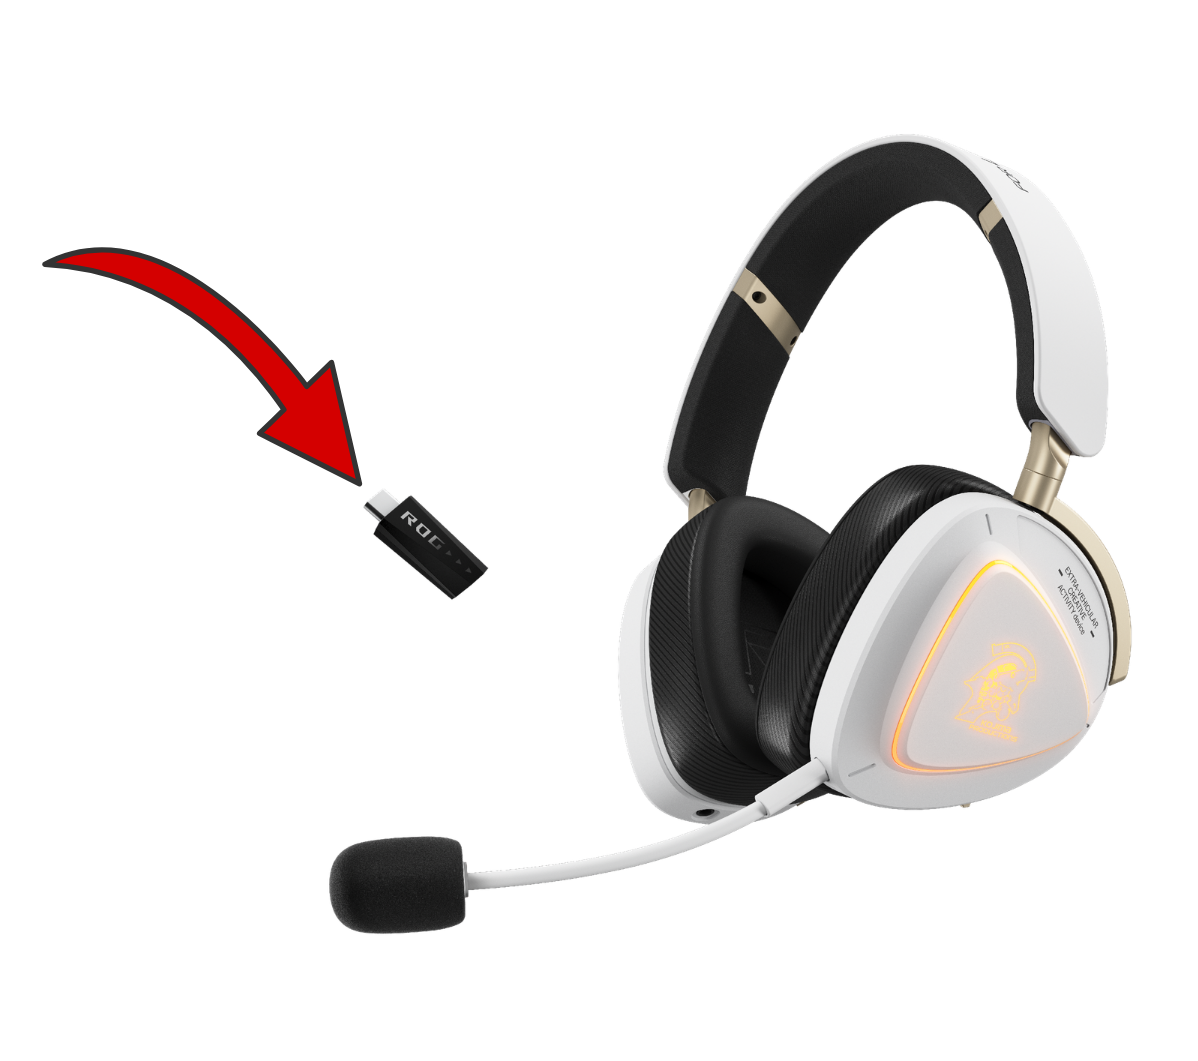
Diehard Asus customer gets RMA denied for a cheap 2.4 GHz headset receiver despite spending more than $30,000 with the brand — firm refuses to send a cheap dongle, then relents after social media backlash

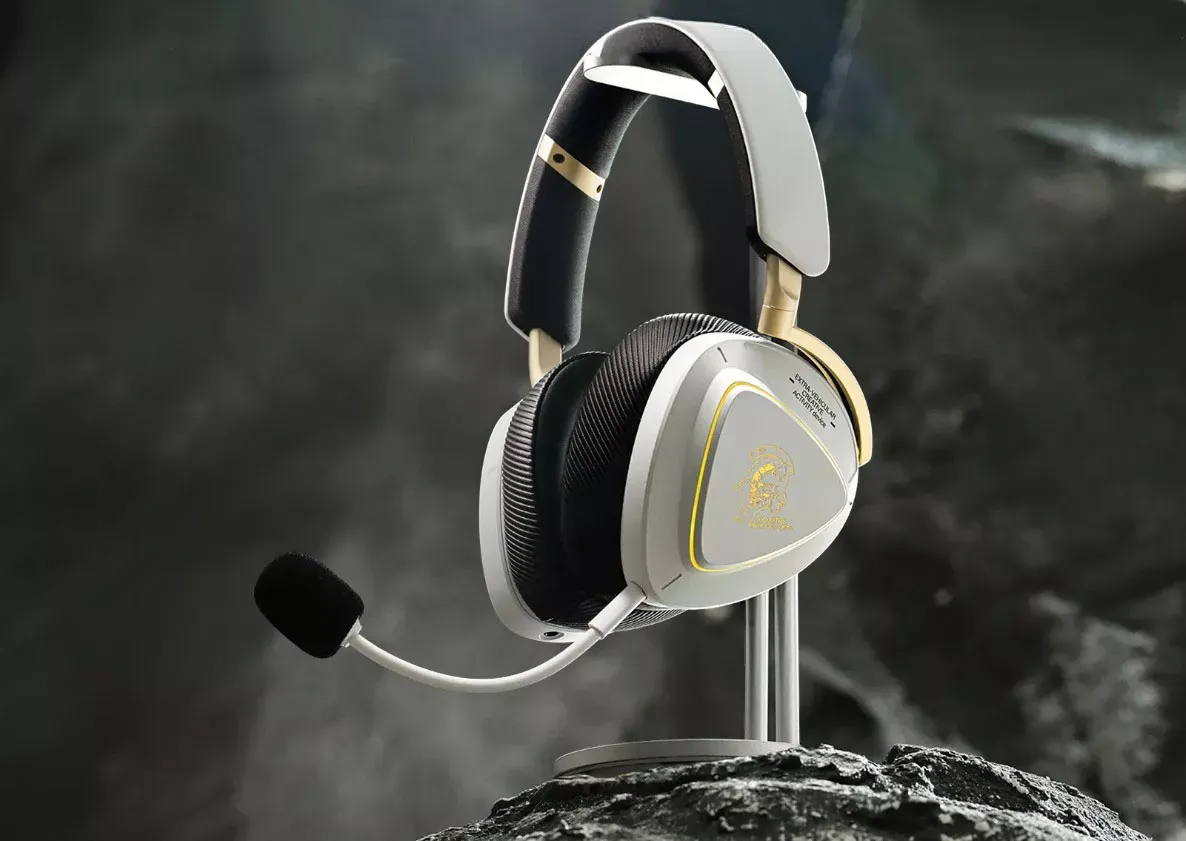
An ardent Asus customer who's bought over $30,000 worth of the company's products recently had his brand loyalty put to the test. Lucas (u/lucaslucaalucas123) wanted a replacement for the 2.4 GHz wireless receiver that came with his ROG Delta II KJP gaming headset, but was denied support because accessories aren't covered under warranty. He took to Reddit to express his disappointment and was met with a hopeful reply in the comments.

ASUS support has been a nightmare over a simple 2.4 GHz headset receiver
 from r/ASUSROG

The OP brought receipts (literally) to prove his unwavering commitment to the brand, with screenshots showcasing at least 18 different items bought just this year alone. In the second picture, we can see the ROG Delta headset was purchased in April, and it's still under warranty till 31 January 2027. This is a premium headset; it costs $270 normally, though it's on sale for just $199 on Best Buy right now.

Asus' official support policies say that free accessories, such as a mouse with a laptop, are not covered under warranty. But accessories bundled with peripherals are indeed covered under the same terms as the peripheral itself. Since a wireless receiver is a key component of the headset, it should be replaced in case of a defect or hardware failure. However, if you lose it or break it yourself, that's a different story.

Asus ROG Delta II KJP with its receiver

The replacement item in question (Image credit: Asus)

Since the customer was asking for a replacement outright instead of opening a ticket for a defect, it's possible that customer service simply wasn't equipped to help him out. Small parts like these often don't carry their own SKU number, so it's hard to bill them separately, or it could be just that the reps are misinformed on the exact nuances of free, optional accessories versus core accessories required for proper functioning.

Anyhow, Lucas was told to buy the receiver himself through a third-party reseller. Asus lists three suppliers in North America for replacement parts, but we weren't able to find the specific receiver for the ROG Delta II KJP on any of these websites. It's actually unclear if the OP has found a supplier that even has this receiver in stock, because the post concludes with him asking others how they managed to get a replacement.

Asus Accessories website showing nothing when searching for ROG Delta

(Image credit: Future)

Fortunately, an Asus rep in the comments apologized and said they've escalated the matter. They also remarked how this shouldn't have happened regardless of one being a new or a loyal customer. Lucas' allegiance to Asus had perhaps created a bubble where he thought the brand would reciprocate the loyalty. We're not inferring this either; his caption clearly implies he felt betrayed after investing so much.

Ultimately, it took one simple receiver to completely shatter that illusion. Businesses operate on the basis of fatter margins. Laws bind them to offer customer support. It wouldn't be unreasonable to say that they'd do much worse if they could get away with it. So, let this serve as a cautionary tale for the next time you're being brand-conscious or trying to be an evangelist; remember that they are profit-making organizations first and foremost.

✇Tomshardware

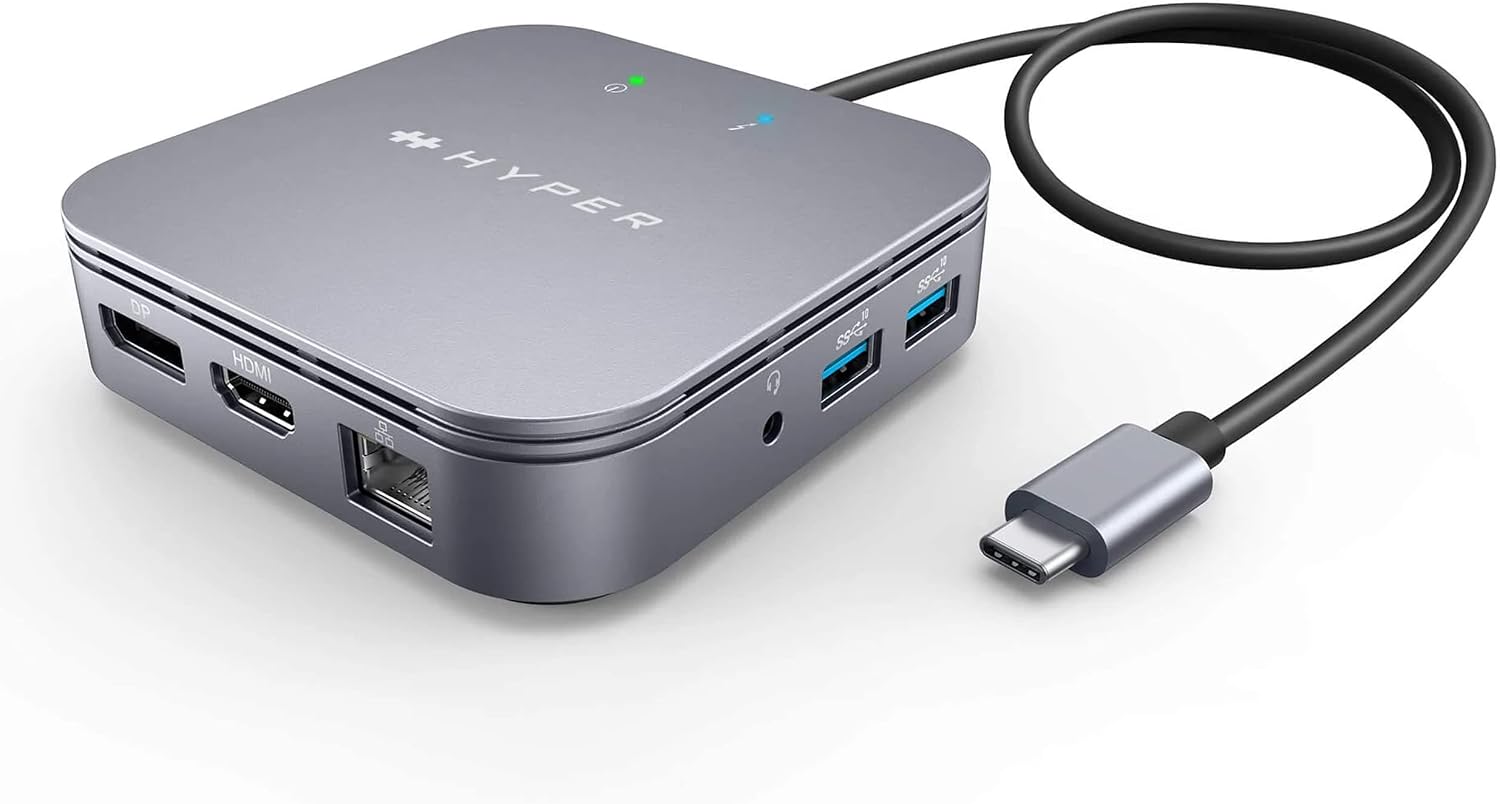
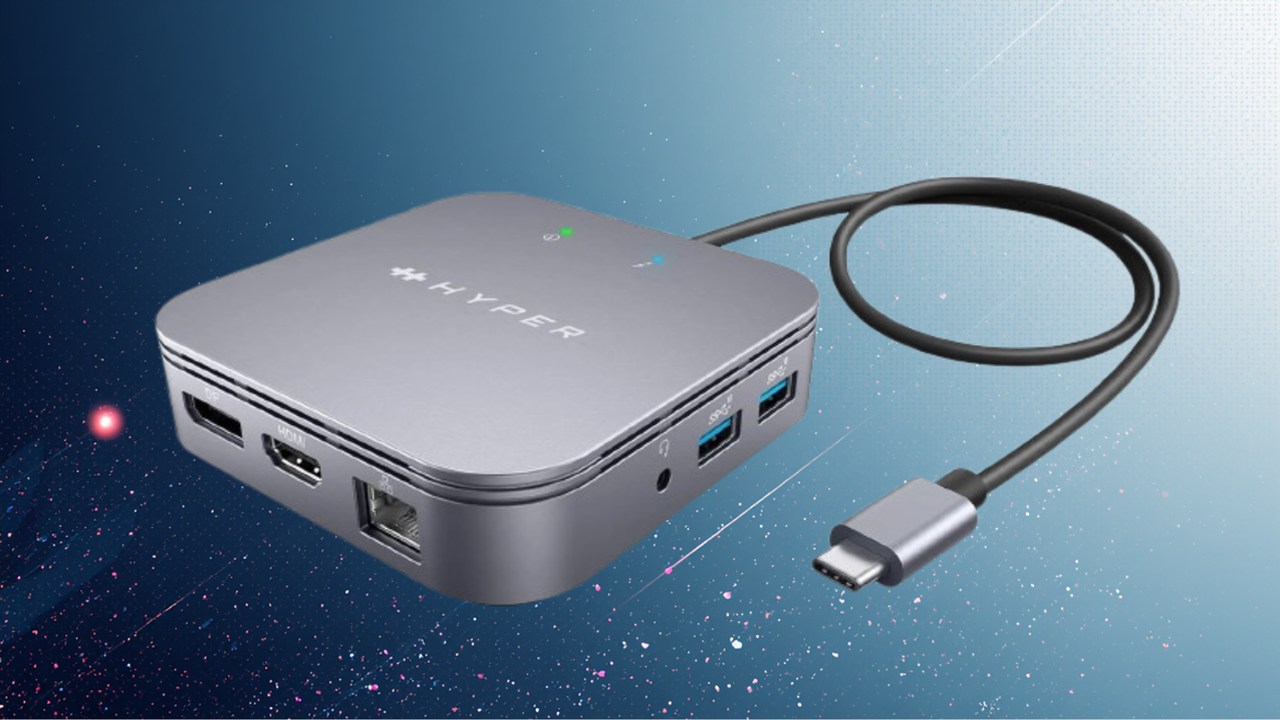
Save a ridiculous 76% on this 7-in-1 Hyper Dual Monitor Thunderbolt 4 Dock — just $24 buys a dual 4K60Hz HyperDrive docking station for pennies on the dollar

The portability of a laptop is nice, but it’s not without drawbacks. I often find myself wanting more from their generally tiny screens and more connectivity than my laptop offers, especially for heavy multitasking. Even writing a simple deals post like this requires multiple windows to be open, and my 14-inch 2560x1440 work laptop doesn't offer enough screen real estate to work efficiently. An extra monitor or two is great for viewing multiple things (for me, browser tabs) at once without using ‘Alt+Tab’ to move around between active applications on your desktop. This $99.99 docking station costs only $24.29 with Woot using promo code WOOTDOCK ($29.99 without); it’s a whopping $77 (76%) off and is the best deal you’ll find on a name-brand 7-in-1 docking station this side of a Prime Day.

Starting with video output, this tiny little device offers a single HDMI 2.0 output good for 4K60Hz, along with a DisplayPort 1.4 port for up to 8K30Hz output. In other words, you can run two 4K60Hz monitors or a single 8K30Hz display, either dramatically increasing your screen real estate from a single, generally small, native laptop monitor. In addition to video output, it supports up to 60W USB-C PD, so you can also quickly charge your host device when connected to an external charger.

It’s not all about the video with docking stations, though. You get additional connectivity, including two USB 3.2 Gen 2 (10 Gbps) Type-A ports and a 3.5mm audio combo jack. It also offers a 1 GbE port so you can connect your laptop to a wired local network or the internet for faster speeds, lower latency, a more stable connection, and increased security over Wi-Fi. The HyperDrive dock connects to your MacBook Pro/Air, iPad Pro/Air, Windows, or ChromeOS device via a Thunderbolt 4 (40 Gbps) connection for ultra-fast data and file transfers.

With a price of $24.29 after using the promo code WOOTDOCK at checkout, you’re not going to find another name-brand dock at a better price. In fact, you’d be hard-pressed to find any Thunderbolt 4 dock at this price that offers the port count and high-res video support. Deals at Woot.com don’t last long, so if you’re even thinking about buying a dock for your laptop, jump on this deal now before it disappears.

✇Tomshardware

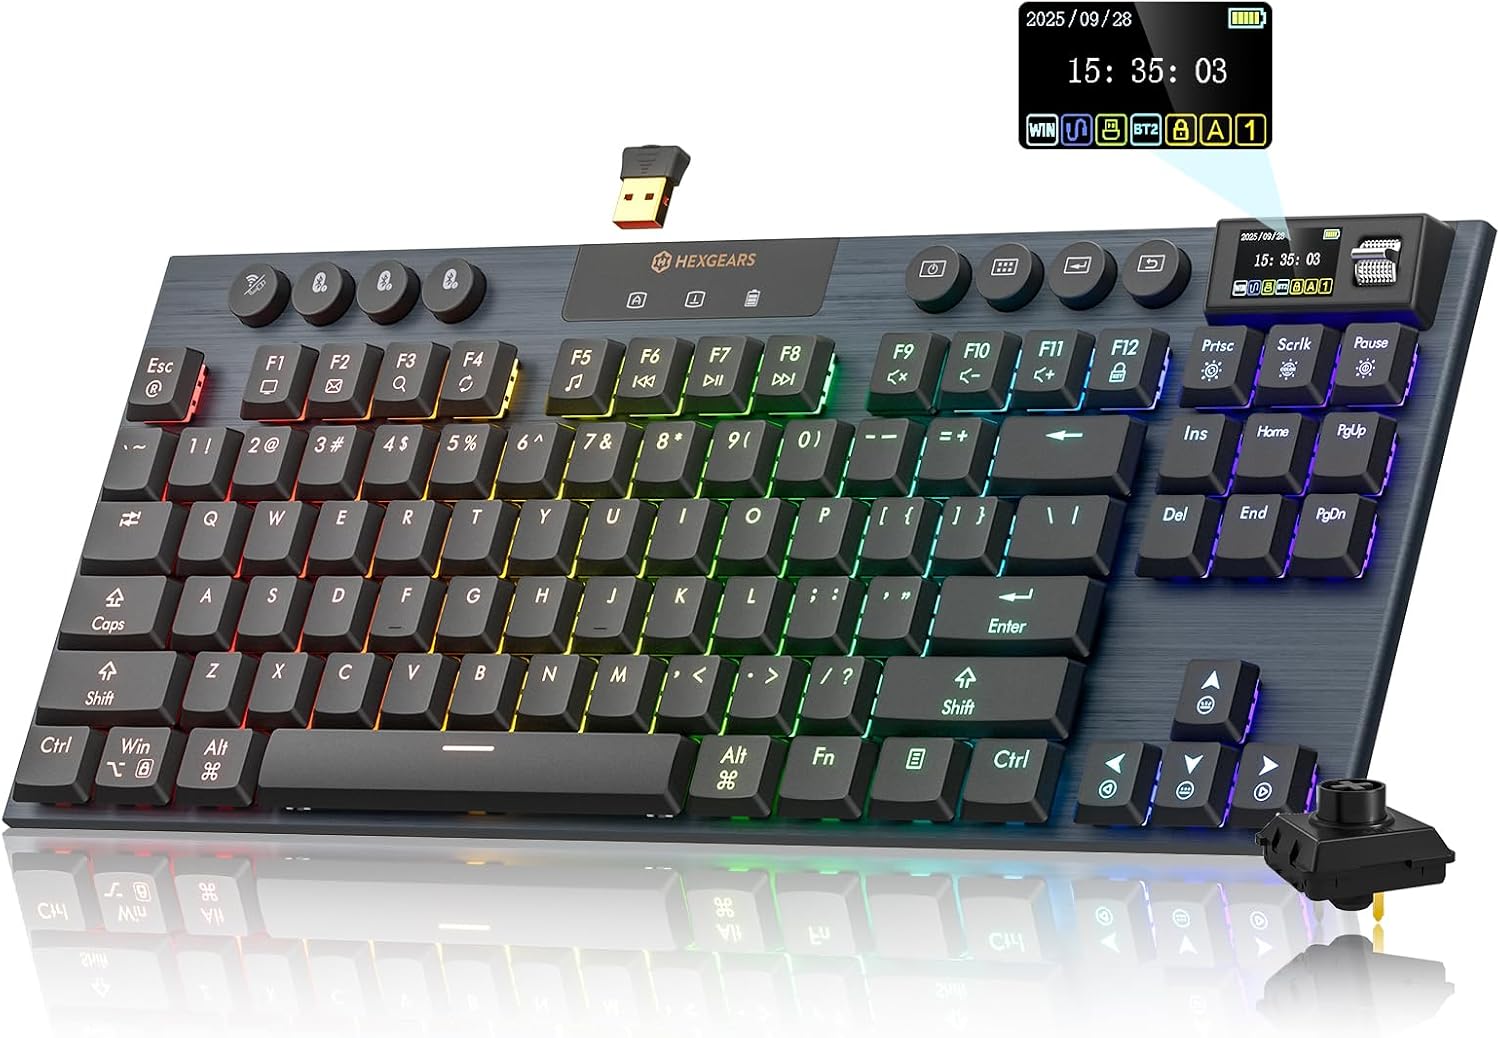
Upgrade to a premium wireless low-profile gaming keyboard for just $42 — save 42% on the hot-swappable Hexgears Immersion A3 TKL with these stackable discounts

If you fancy a cheeky little PC upgrade that doesn't involve raiding your savings for memory or storage, then how about sprucing up your peripherals? Your mouse and keyboard get the most use and abuse on the daily, and although a good clean and maintenance can extend their life by years, sometimes they just get a little too grotty and need to be swapped out. Keyboards, however, can command a good chunk of cash these days too, so finding a great deal like today's really helps you land a winning upgrade. At Amazon, you can clip a coupon and add the code Q2BJETPO at checkout to pick up the Hexgears low-profile Immersion A3 TKL gaming keyboard for just $42.20. That's a saving of $30.59 on the current list price, and a superb value considering this keeb launched at $159 in 2024.

Check out this deal at Amazon

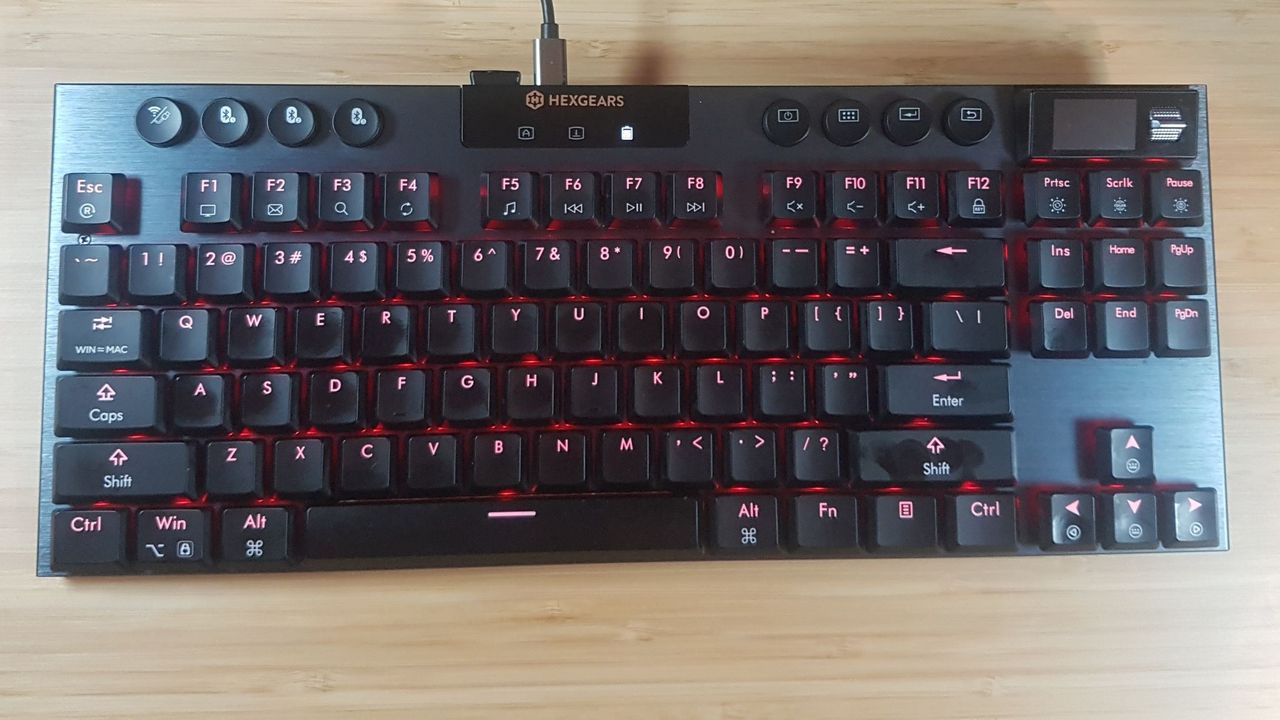
The Hexgears Immersion A3 features plenty of bright, gamer-ready RGB lighting with onboard profiles and more available via the Hexgears software. The keyboard also features a small TFT screen that gives you current keyboard info, such as a Caps Lock indicator and battery life updates. You can also upload customizable GIFs to personalize your peripheral further.

The Immersion A3 TKL is very thin, and it doesn’t take up much desk space, thanks to its compact TKL layout. There's a choice of switch types, with all versions available for the same price. Choose between Kailh White Rain (silent, linear), Kailh Black Cloud (tactile), or Kailh Hide Mountain (clicky). All of these switches are low-profile and come pre-lubed, with a total travel distance of 2.8mm. The Immersion A3's PCB is hot-swappable, with other 3-pin switches, so you can change up your low-profile switches in the future if you have a preference or fancy something different.

Immersion A3 TKL: was $72.79 now $42.20
Hexgears Immersion A3 combines the small footprint of a TKL keyboard with low-profile keycaps and switches, and multi-connectivity with 2.4GHz wireless, Bluetooth, plus a wired connection. There's even a small TFT screen to monitor battery life or host a personalized GIF.

Clip the coupon, then add code Q2BJETPO at checkout to receive the combined $30.59 discount. View Deal

A wireless, low-profile keyboard for just $42.20 is an absolute bargain, especially with so many features. Its versatile connectivity allows the Immersion A3 to connect to multiple devices easily via 2.4GHz wireless, Bluetooth (up to three connections), or wired via a 5.9-foot (1.8m) USB-A to USB-C cable.

Check out our review of the Hexgears Immersion A3 TKL gaming keyboard for more information if this deal piques your interest.

✇Tomshardware

The world's first webcam was switched off 25 years ago today — 128x128 grayscale feed predated the World Wide Web to monitor a Cambridge coffee pot

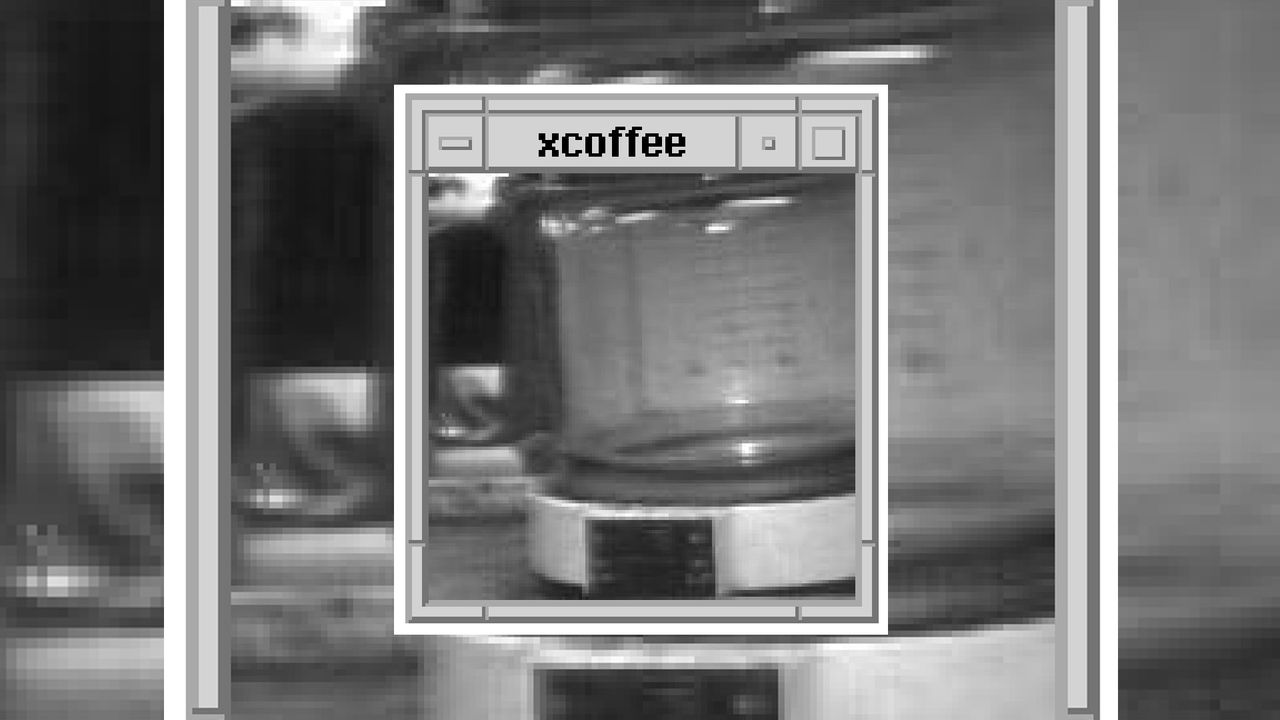
It has been a quarter century since the world’s first webcam was turned off for good. The Trojan Room Coffee Pot was retired on Wednesday, August 22, 2001, after 10 years of service at Cambridge University. This extraordinary webcam’s final low-res image was of its own switch-off, with the fingers of Daniel Gordon, Martyn Johnson, and Quentin Stafford-Fraser pressing the power-off switch on the Acorn Archimedes to which the cam was attached.
Quentin Stafford-Fraser and Paul Jardetzky created the webcam for the entirely practical purpose of preventing team members from being disappointed when they visited the coffee pot. “There were about fifteen of us involved in related research and, being poor, impoverished academics, we only had one coffee filter machine between us, which lived in the corridor just outside the Trojan Room,” Stafford-Fraser recalls. “However, being highly dedicated and hard-working academics, we got through a lot of coffee, and when a fresh pot was brewed, it often didn't last long.” With several team members in other parts of the building, some needing to traverse several flights of stairs to reach the coffee pot, XCoffee was devised as a solution.

The Archimedes mentioned in the intro wasn’t the first host for the Trojan Room Coffee Pot camera; that was an unnamed Motorola 680X0 machine. The Acorn RISC computer took over webcam duties less than eight years prior to the switch-off in 2001.

This webcam has a history going even further back, though. Remarkably, the Trojan Room Coffee Pot webcam was live even before the World Wide Web was a thing. It began service in 1991, when a 128 x 128 pixel grayscale camera was connected to the science lab’s LAN via a frame capture card. An image of the coffee pot was captured three times a minute and via a custom-coded server-side X Window System protocol app so that any team member on the network could monitor/check it. This pioneering webcam actually connected to the internet for the first time in November 1993, just a few months after web browsers gained the ability to display images.

Today, webcams can be used to broadcast very high-quality streams with high resolutions and supporting very fast data and frame rates. Great capture hardware, fast computers, and fiber internet are widespread now, so if you wanted to live-stream a coffee pot, it would be a cinch to do so in true color, in up to 4K, and 60 frames per second using one of the best webcam picks of 2026.

✇Tomshardware

Logitech faces lawsuit for withholding $61M in tariff refunds from customers — lawsuit claims company extracted up to $97M from consumers in 2026 through tariff-justified price increases

A class-action lawsuit has been filed against Logitech after it allegedly failed to return the tariffs that the U.S. government refunded to the company after the U.S. Supreme Court ruled that President Donald Trump’s tariffs were illegal. According to Ars Technica, the company increased the prices on more than half of its product line by as much as 25% in April 2025, the same month that the U.S. president announced the “Liberation Day” tariffs.

The lawsuit [PDF] alleges that the company received a full refund of $61 million as of June 30, 2026, but it has yet to return or refund any of its customers who bought Logitech products at the inflated prices. In fact, the price increases that it implemented last year in response to the illegal tariffs are still in place. “Many companies that received the benefit of a tariff refund, like the shippers that are now voluntarily returning money that they paid on customers’ behalf, are returning those ill-gotten gains to customers,” the attorneys argued in their class-action complaint.

“What separates Logitech from these shippers is that Logitech has made it clear it has no intention of returning that refund to its customers.” This contrasts with some companies, like Arctic, that have begun implementing refunds by cutting product prices.

Another argument in the complaint states that Logitech has more than enough capability to refund its customers. “Logitech’s own figures establish that the Company extracted approximately $73 million to $97 million from consumers in fiscal years 2026 alone through tariff-justified price increases, a conservative estimate of the amount passed through to the Class is therefore at least $75 million to $100 million,” the lawsuit alleges. It also pointed to the company’s statement in its May 2026 earnings call, saying that “manufacturing diversification actions combined with the price increase in the U.S. more than offset the negative impact of tariffs.”

Nintendo is in the same boat as Logitech, which is also facing a similar lawsuit after it refused to pass on its tariff refunds to customers. Although the Japanese console manufacturer managed to keep Switch 2 prices at its launch price of $449, the price of the previous-generation Switch increased by $40 to $50, and other accessories like Joy-Con 2 controllers also got a price bump. The list price of the older console has since reverted to pre-tariff prices, but the company refused to refund customers who bought at the higher prices.

“Nintendo or one of its retailers set a price for each product, and consumers decided whether that price was worth paying,” Nintendo’s lawyers said. “Those who bought Nintendo’s products received exactly what they bargained and paid for: a console, game and/or accessory at a price to which both parties agreed.”

✇Tomshardware

Razer HyperFlux V2 Review: The best wireless charging mat for Razer mice

There aren't too many wireless charging mouse pads on the market, which is perhaps a little surprising given how many wireless gaming mice there are. Possibly there just isn't that much demand for wireless charging mouse pads. After all, not many people want to pay $100+ when the best gaming mouse pads start at much, much lower prices.

The Razer HyperFlux V2, introduced about a year ago, is the current version of the brand's wireless charging mouse pad lineup, which debuted back in 2018. The HyperFlux V2 supports several of Razer's current mice from three of its lines — Naga, Basilisk, and Cobra — but not from the DeathAdder or Viper lines. It comes in hard and soft editions, both of which are priced at $119.99.

Design of the HyperFlux V2

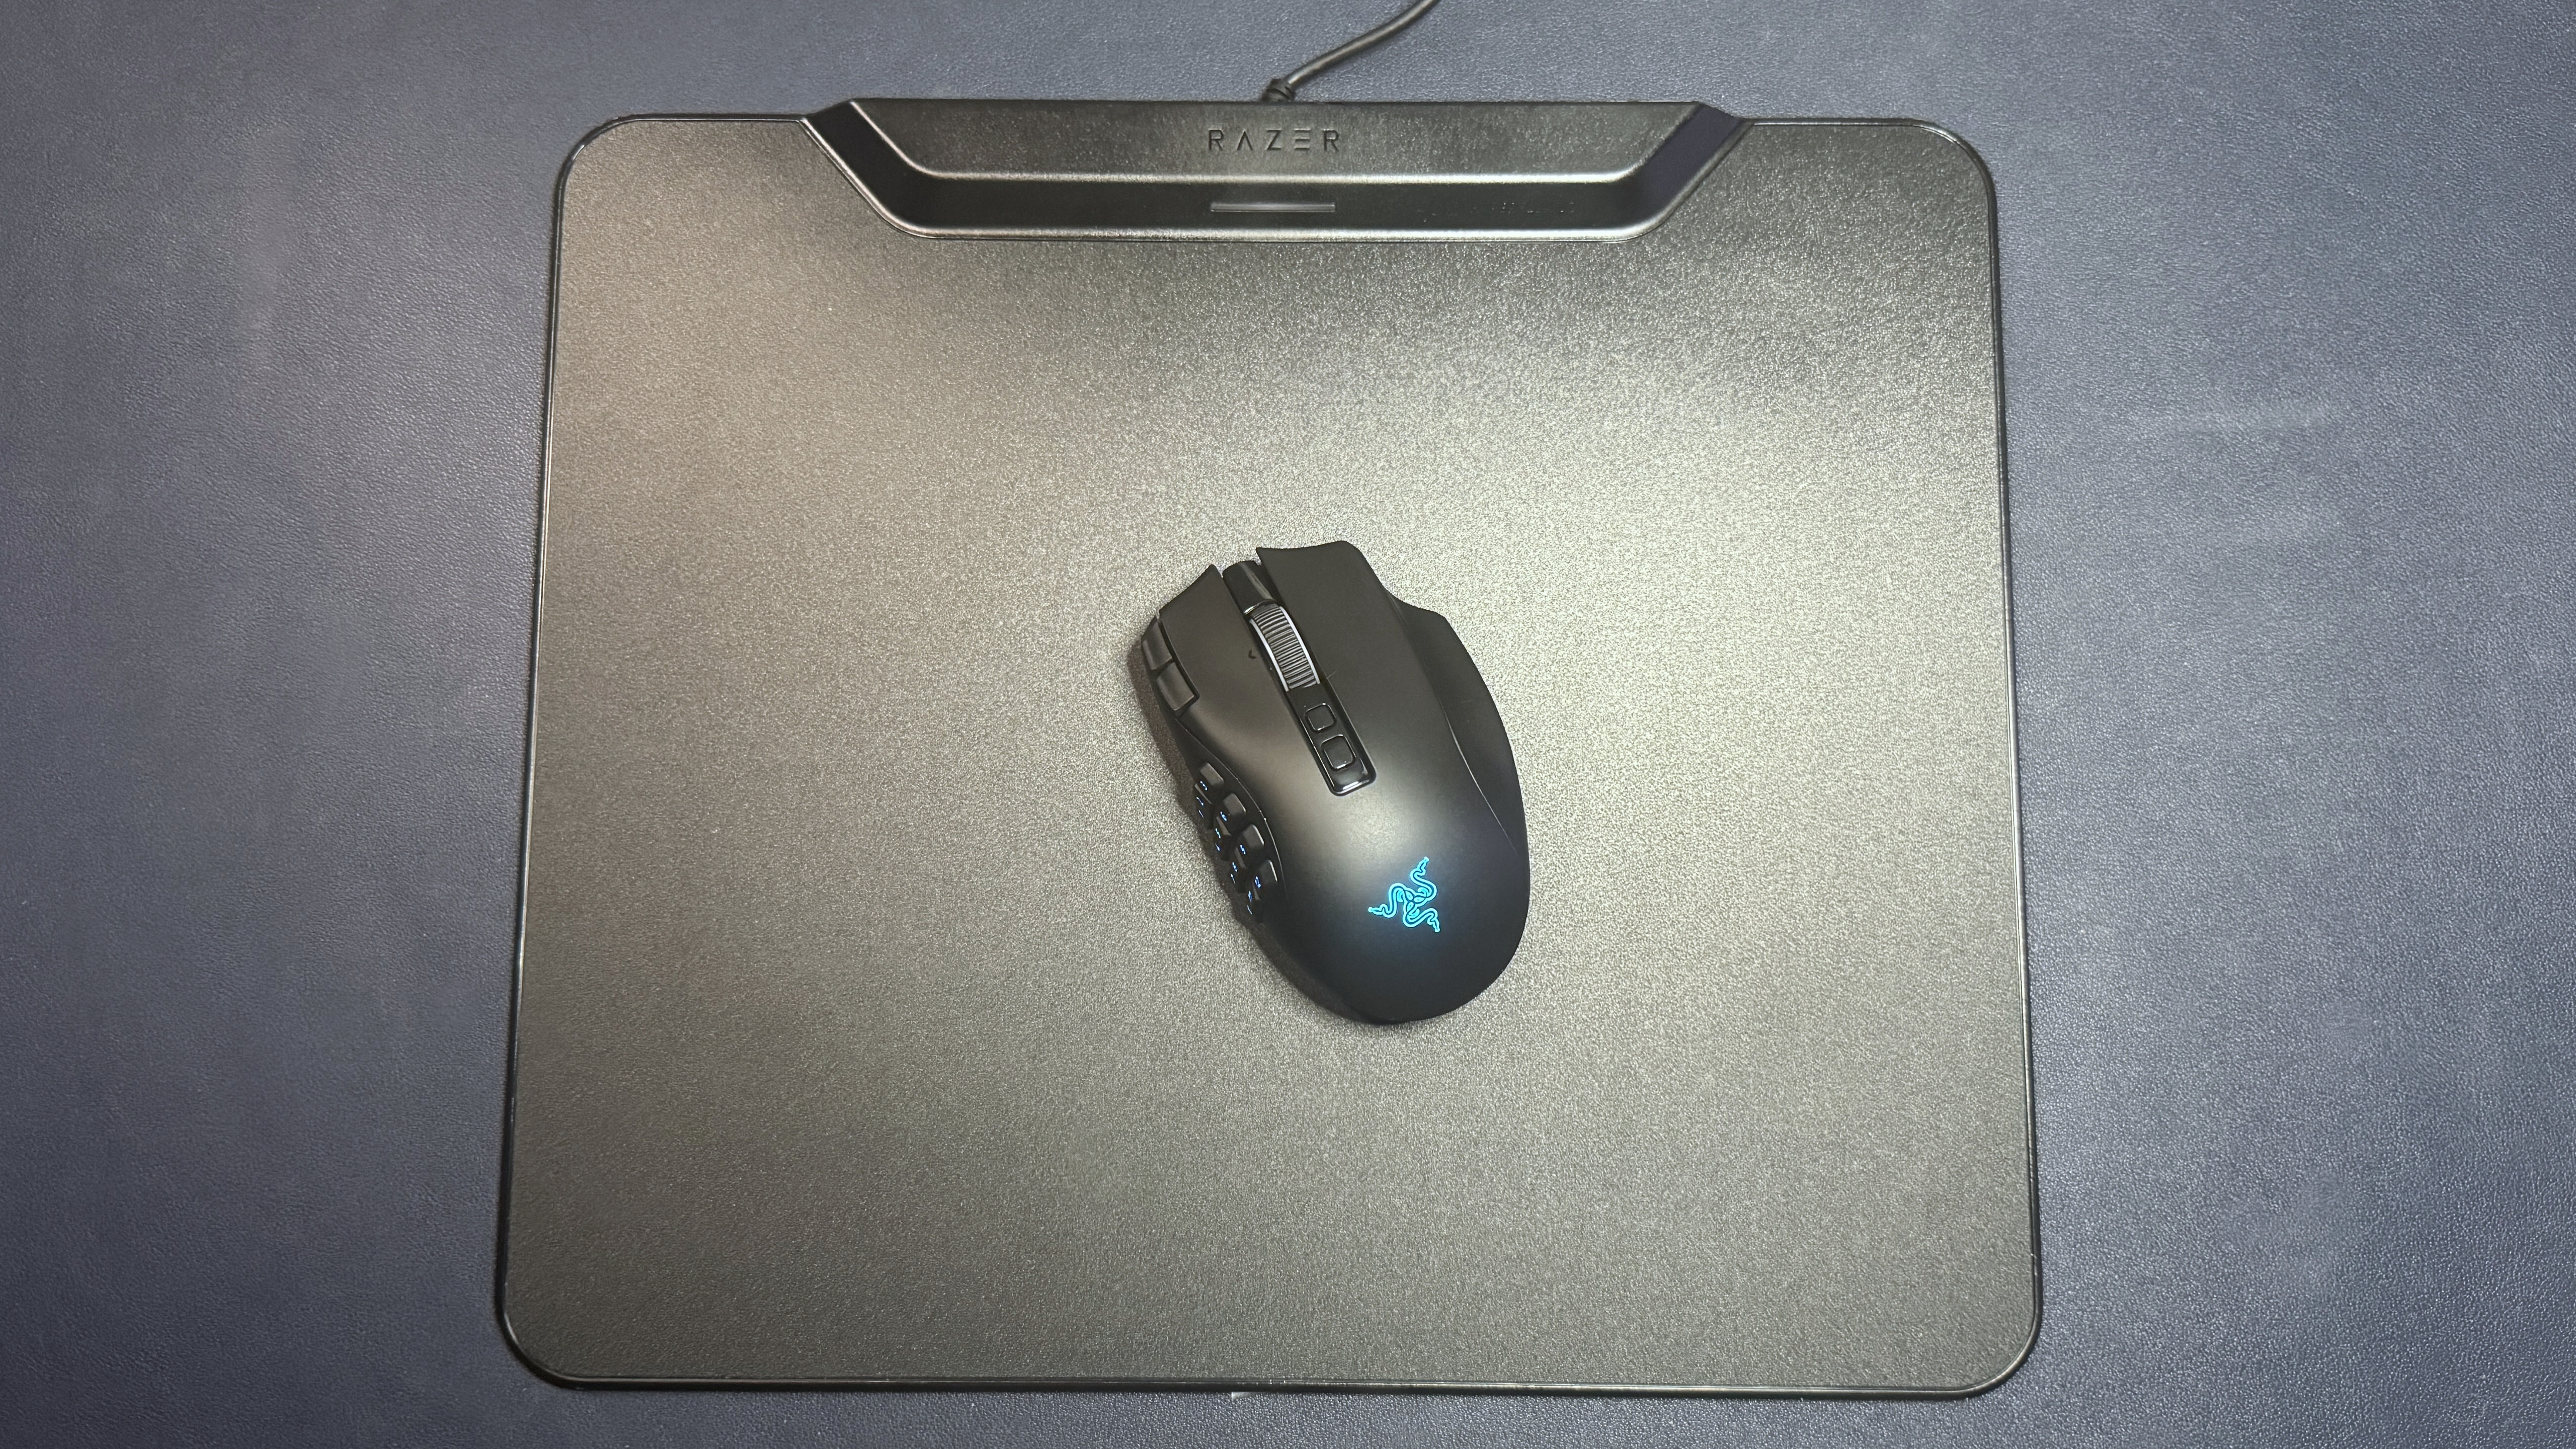
The HyperFlux V2 comes in two variations — a hard edition, which has a hard, polycarbonate surface designed for speed; and a cloth edition, which has a soft, cloth surface for control. Both versions share the same specs, aside from surface type. For this review, we tested the hard edition.

Razer HyperFlux V2

(Image credit: Tom's Hardware)

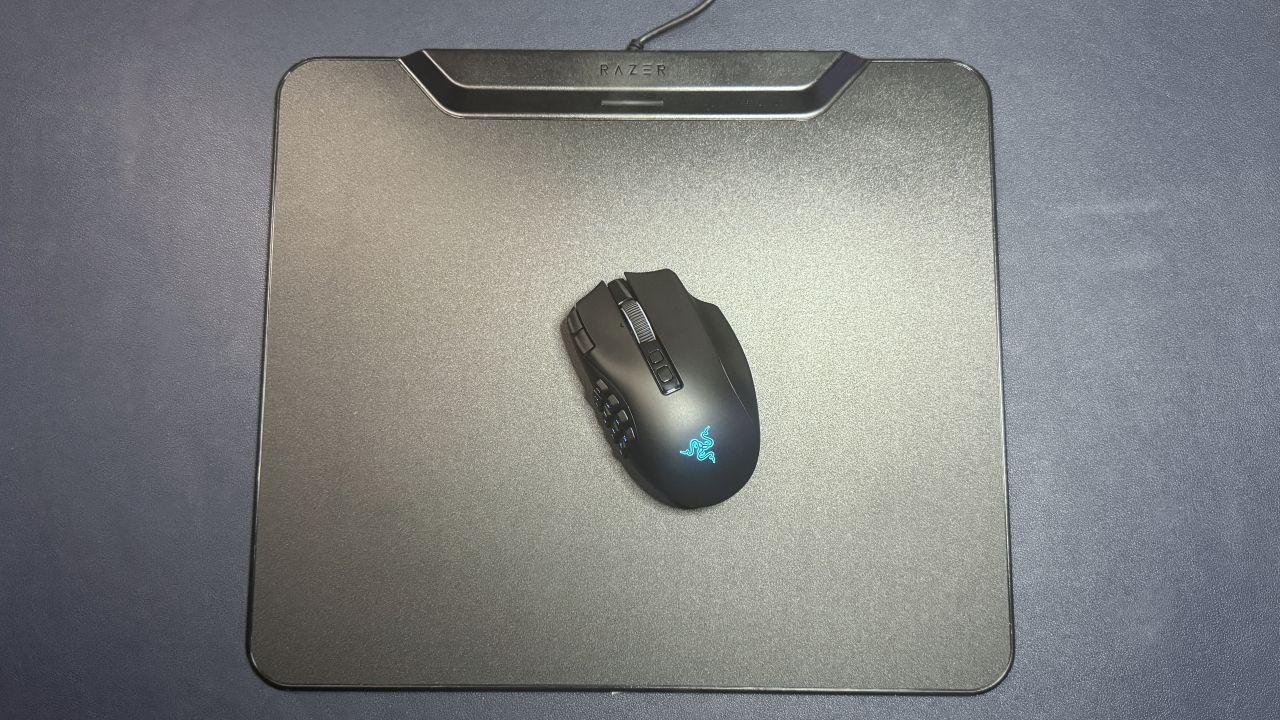
The HyperFlux V2 is a medium-sized gaming mouse pad that's a little larger than other medium-sized gaming mouse pads. It measures 16 inches (360mm) wide by 12.24 inches (311mm) long, so it shouldn't take up too much space on the average gaming desk. The surface itself is only 0.2 inches (5mm) thick, though the power/charging module at the top is around 0.52 inches (13.3mm) thick. The HyperFlux V2 is slightly larger than Logitech's PowerPlay 2, which measures 13.54 x 11.14 x 0.14 inches (344 x 238 x 3.5mm). But both should fit on your desk pretty easily.

Razer HyperFlux V2
Tom's Hardware
Razer HyperFlux V2
Tom's Hardware

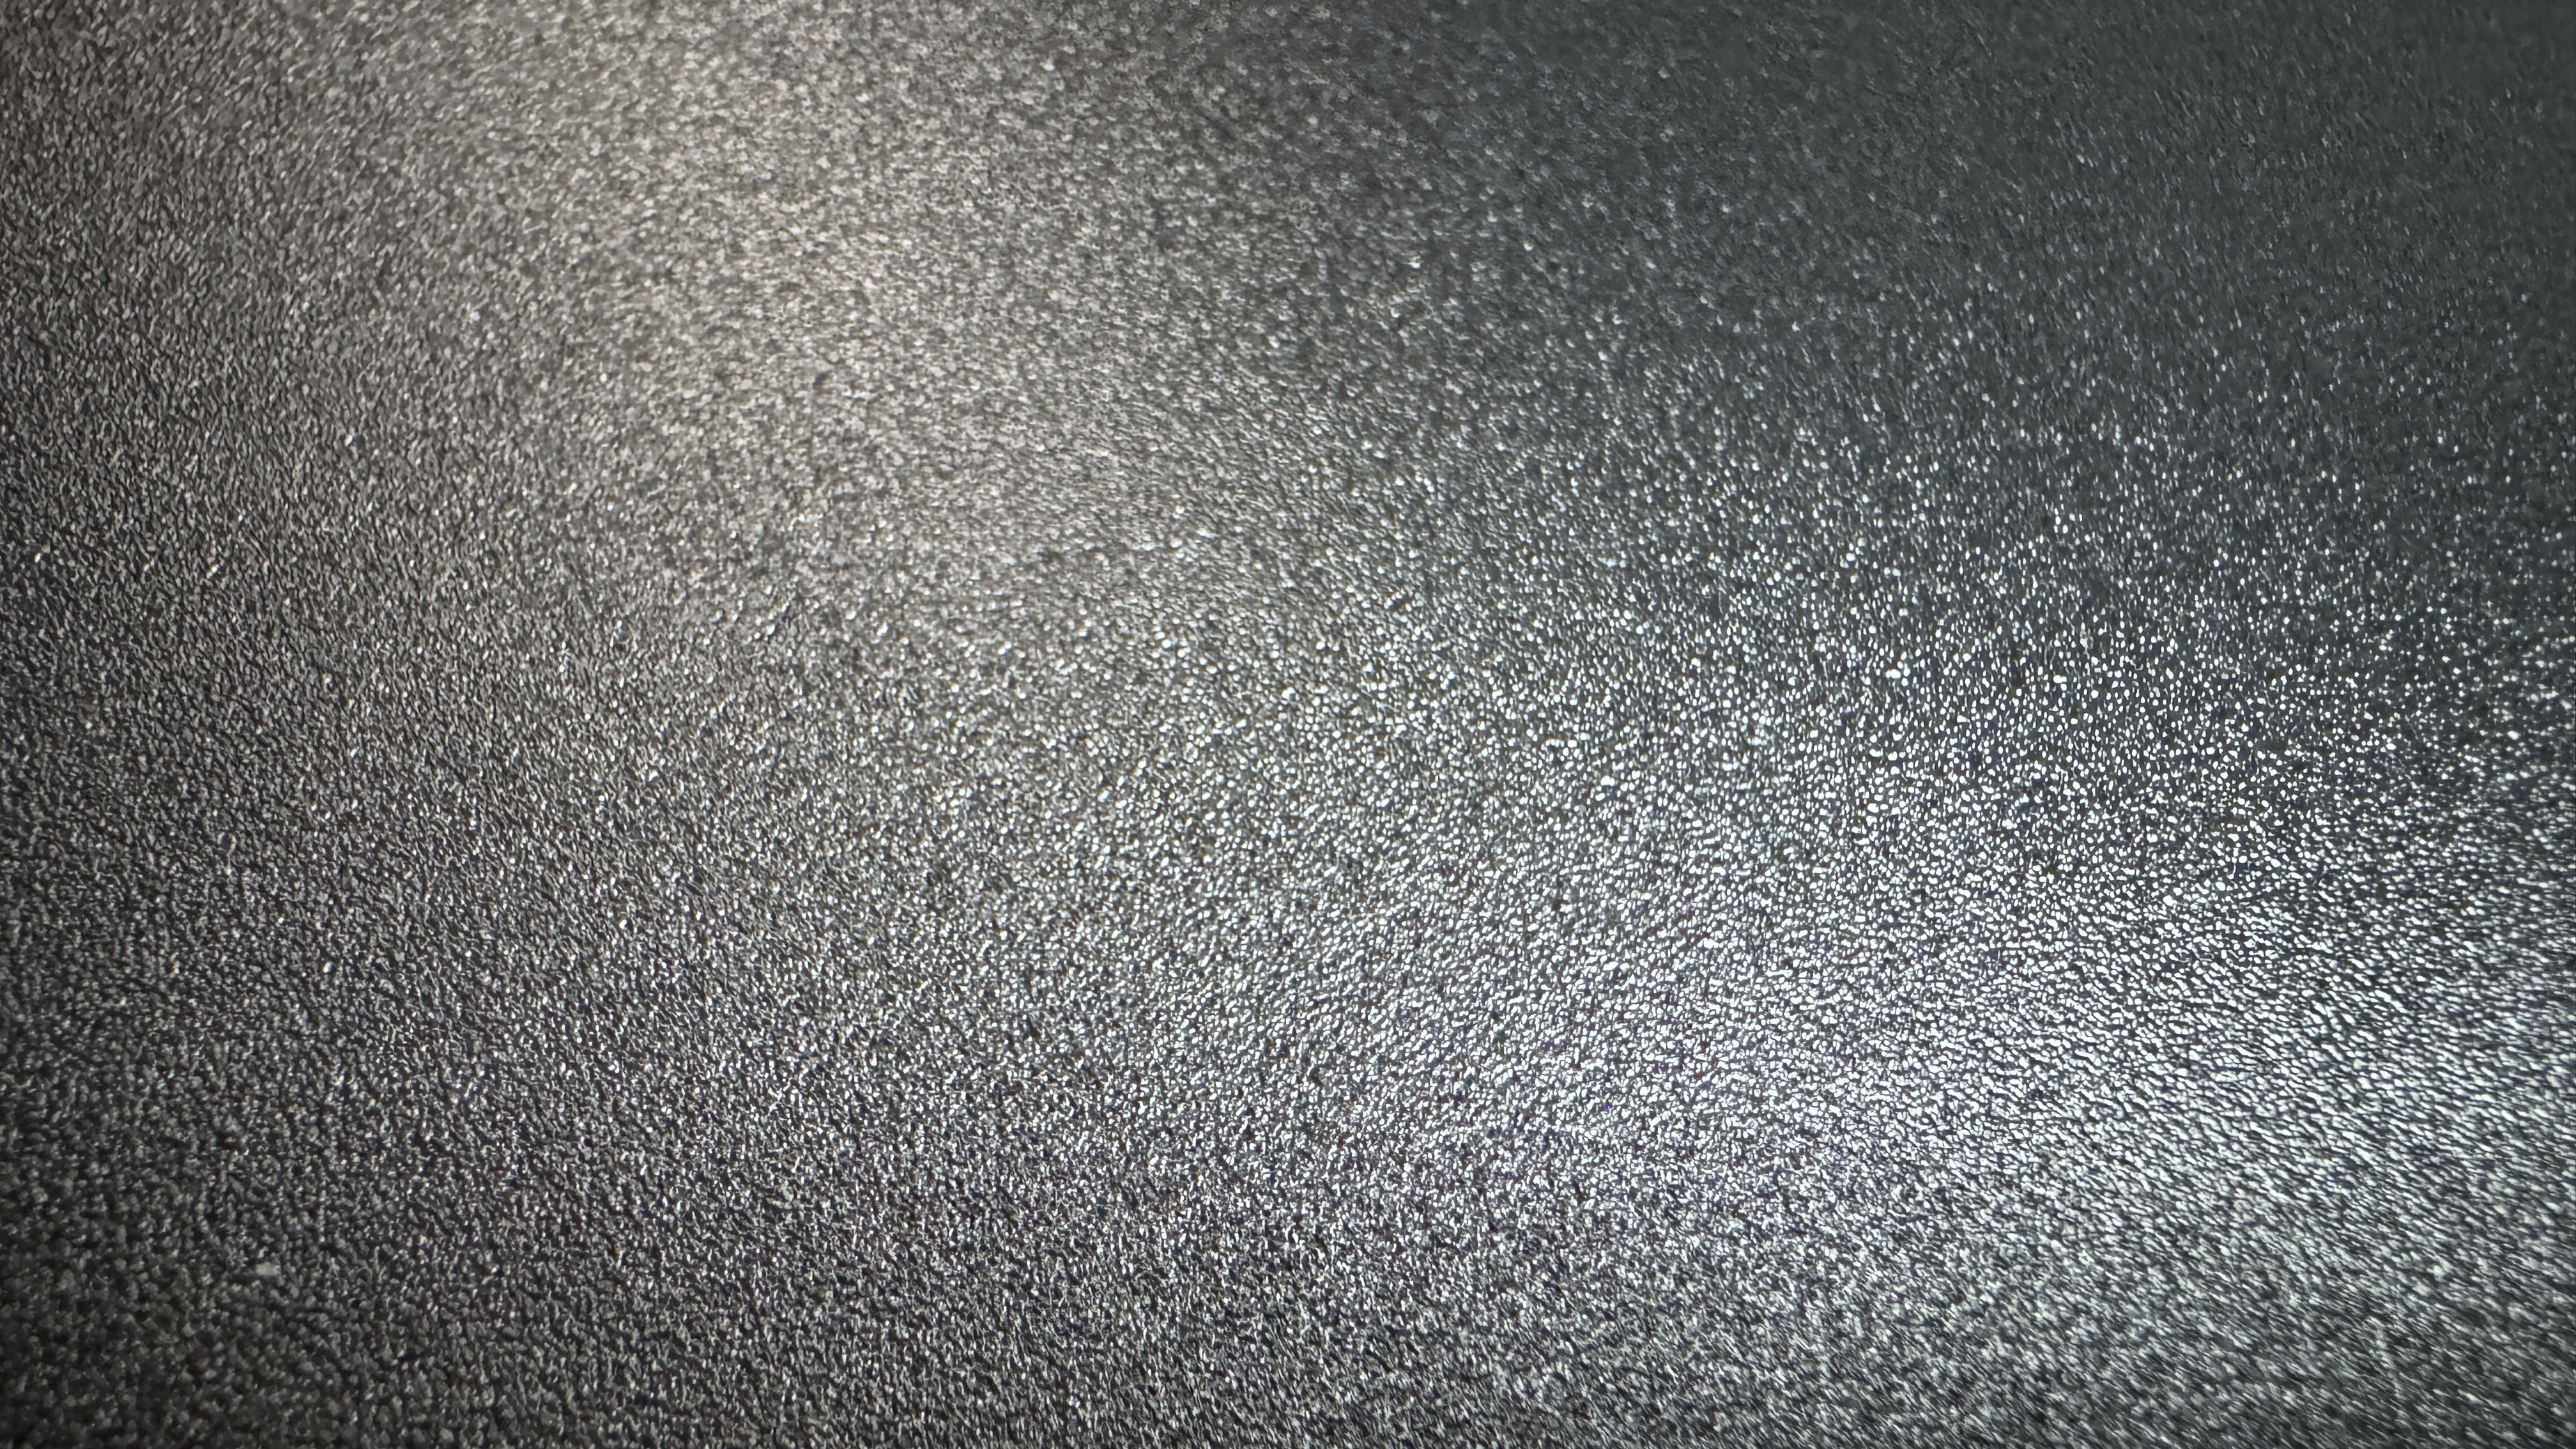
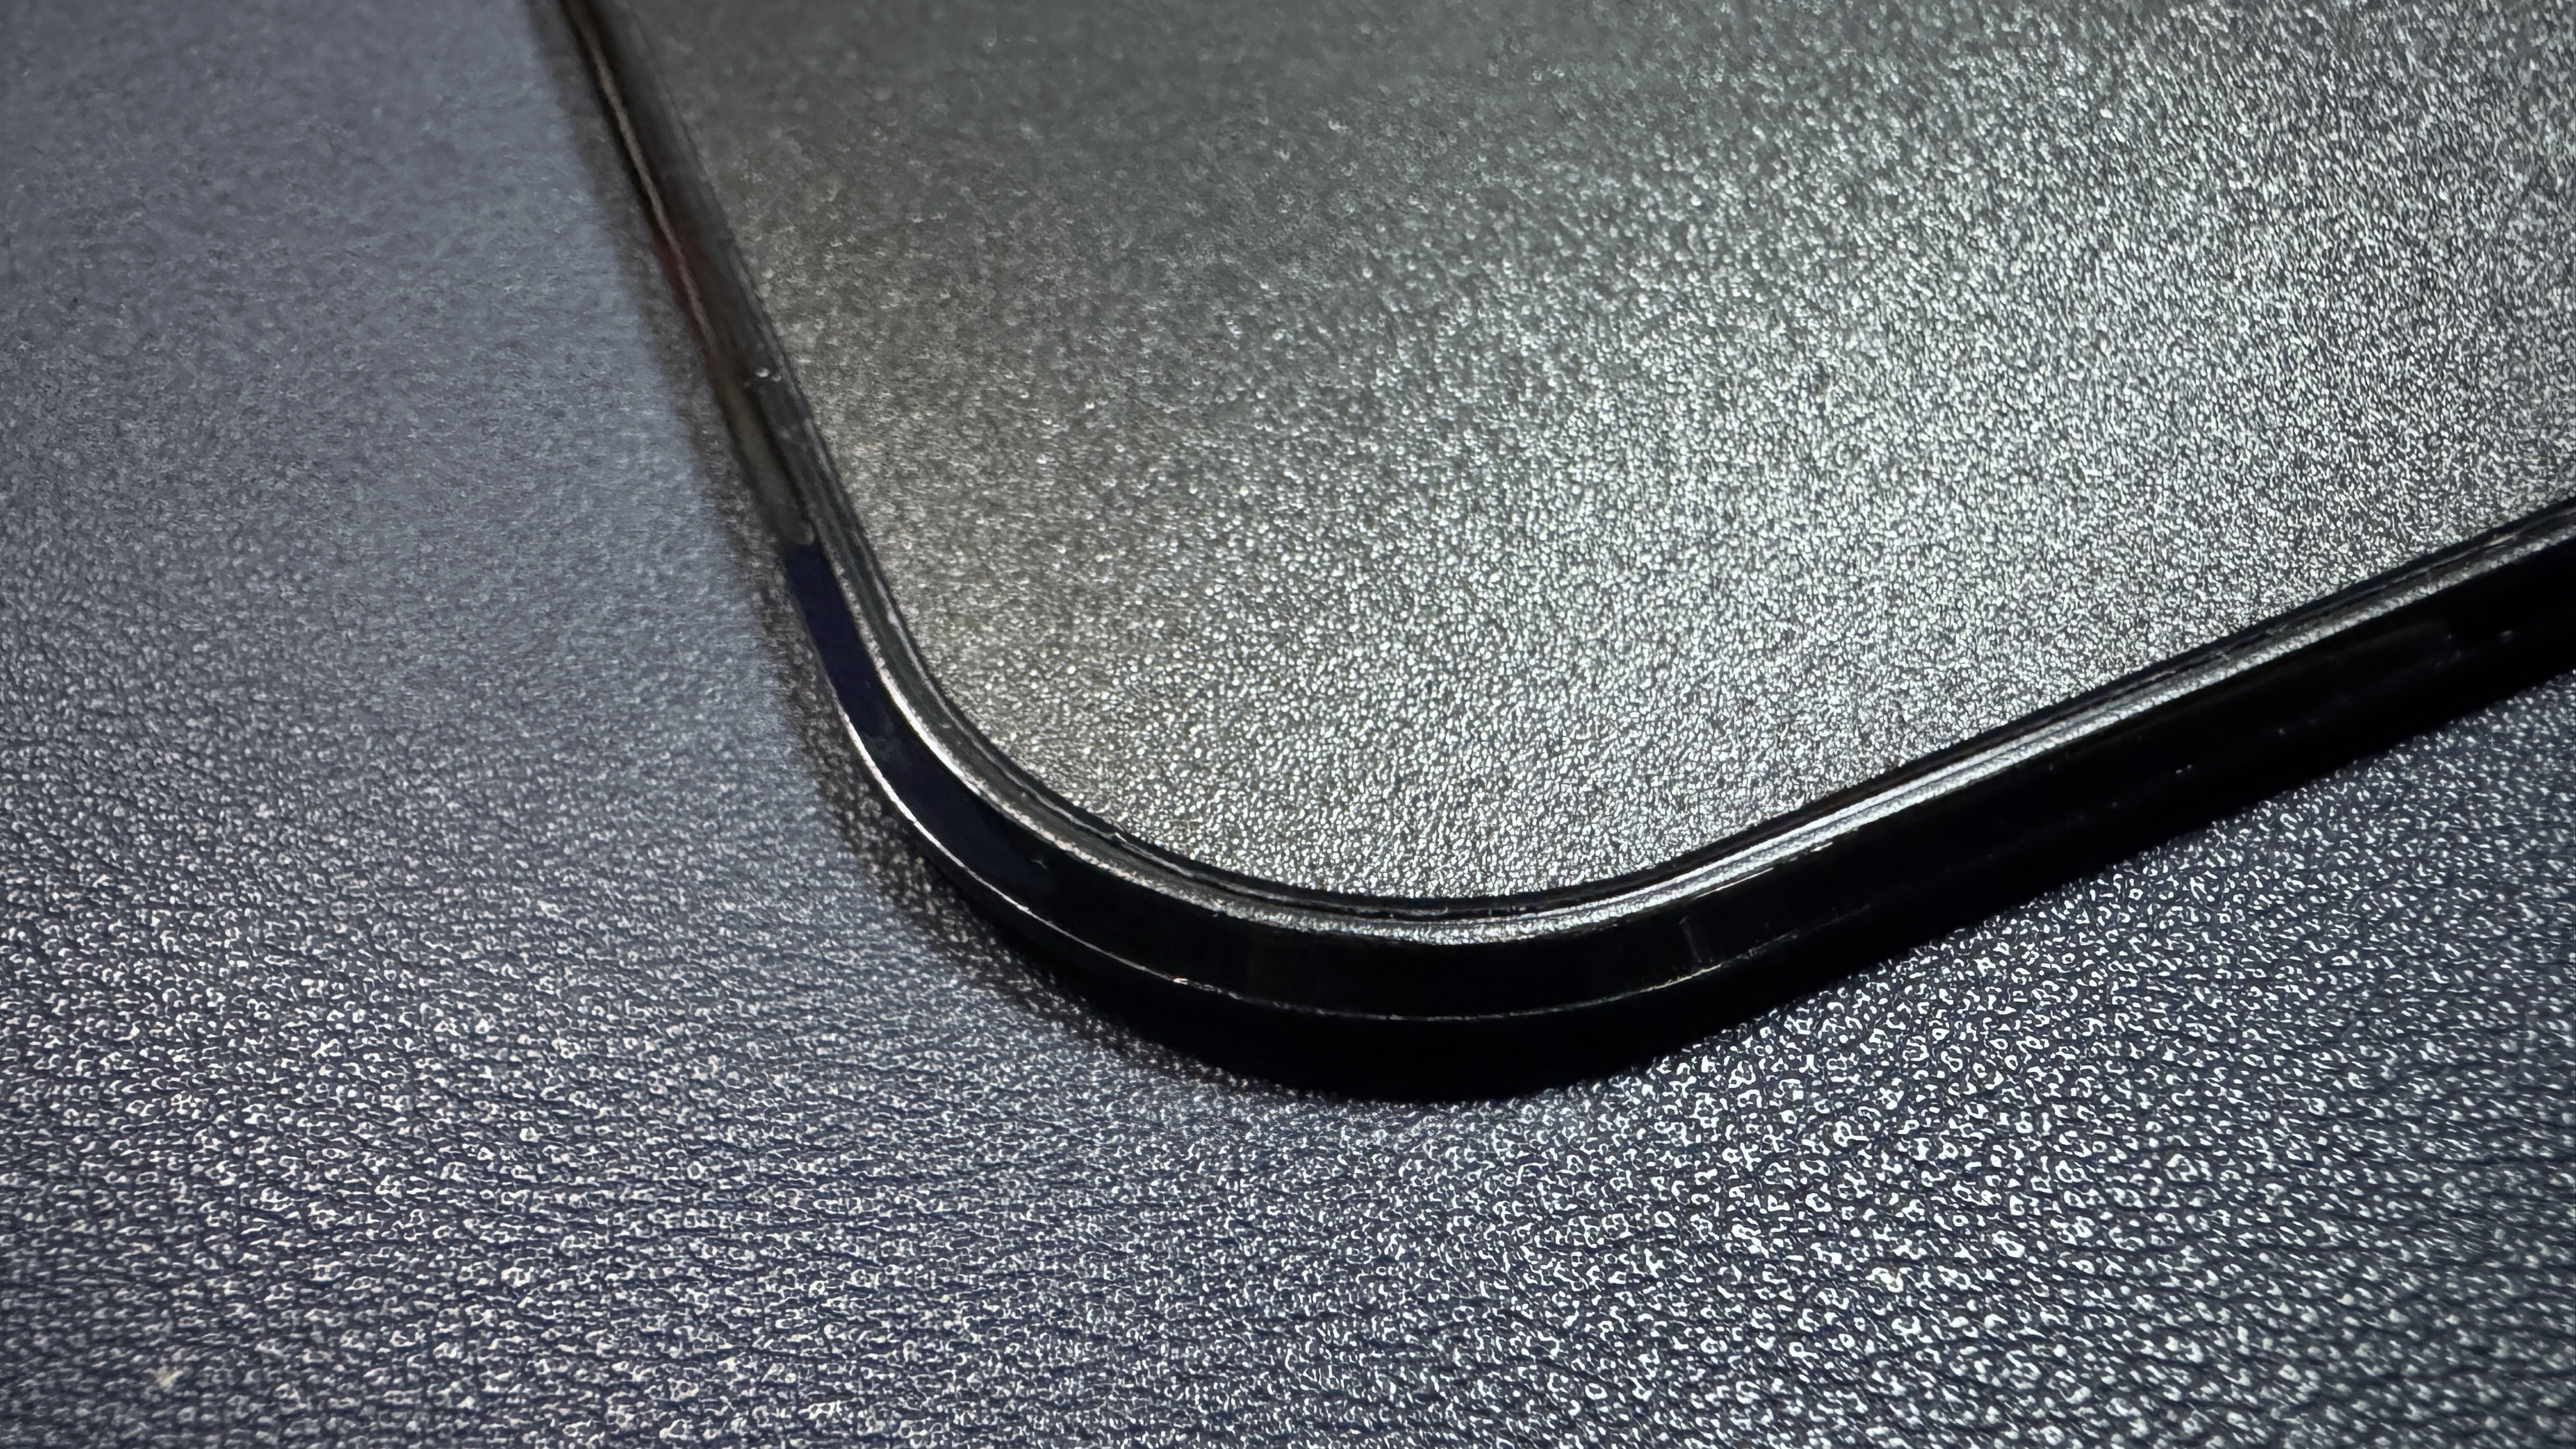
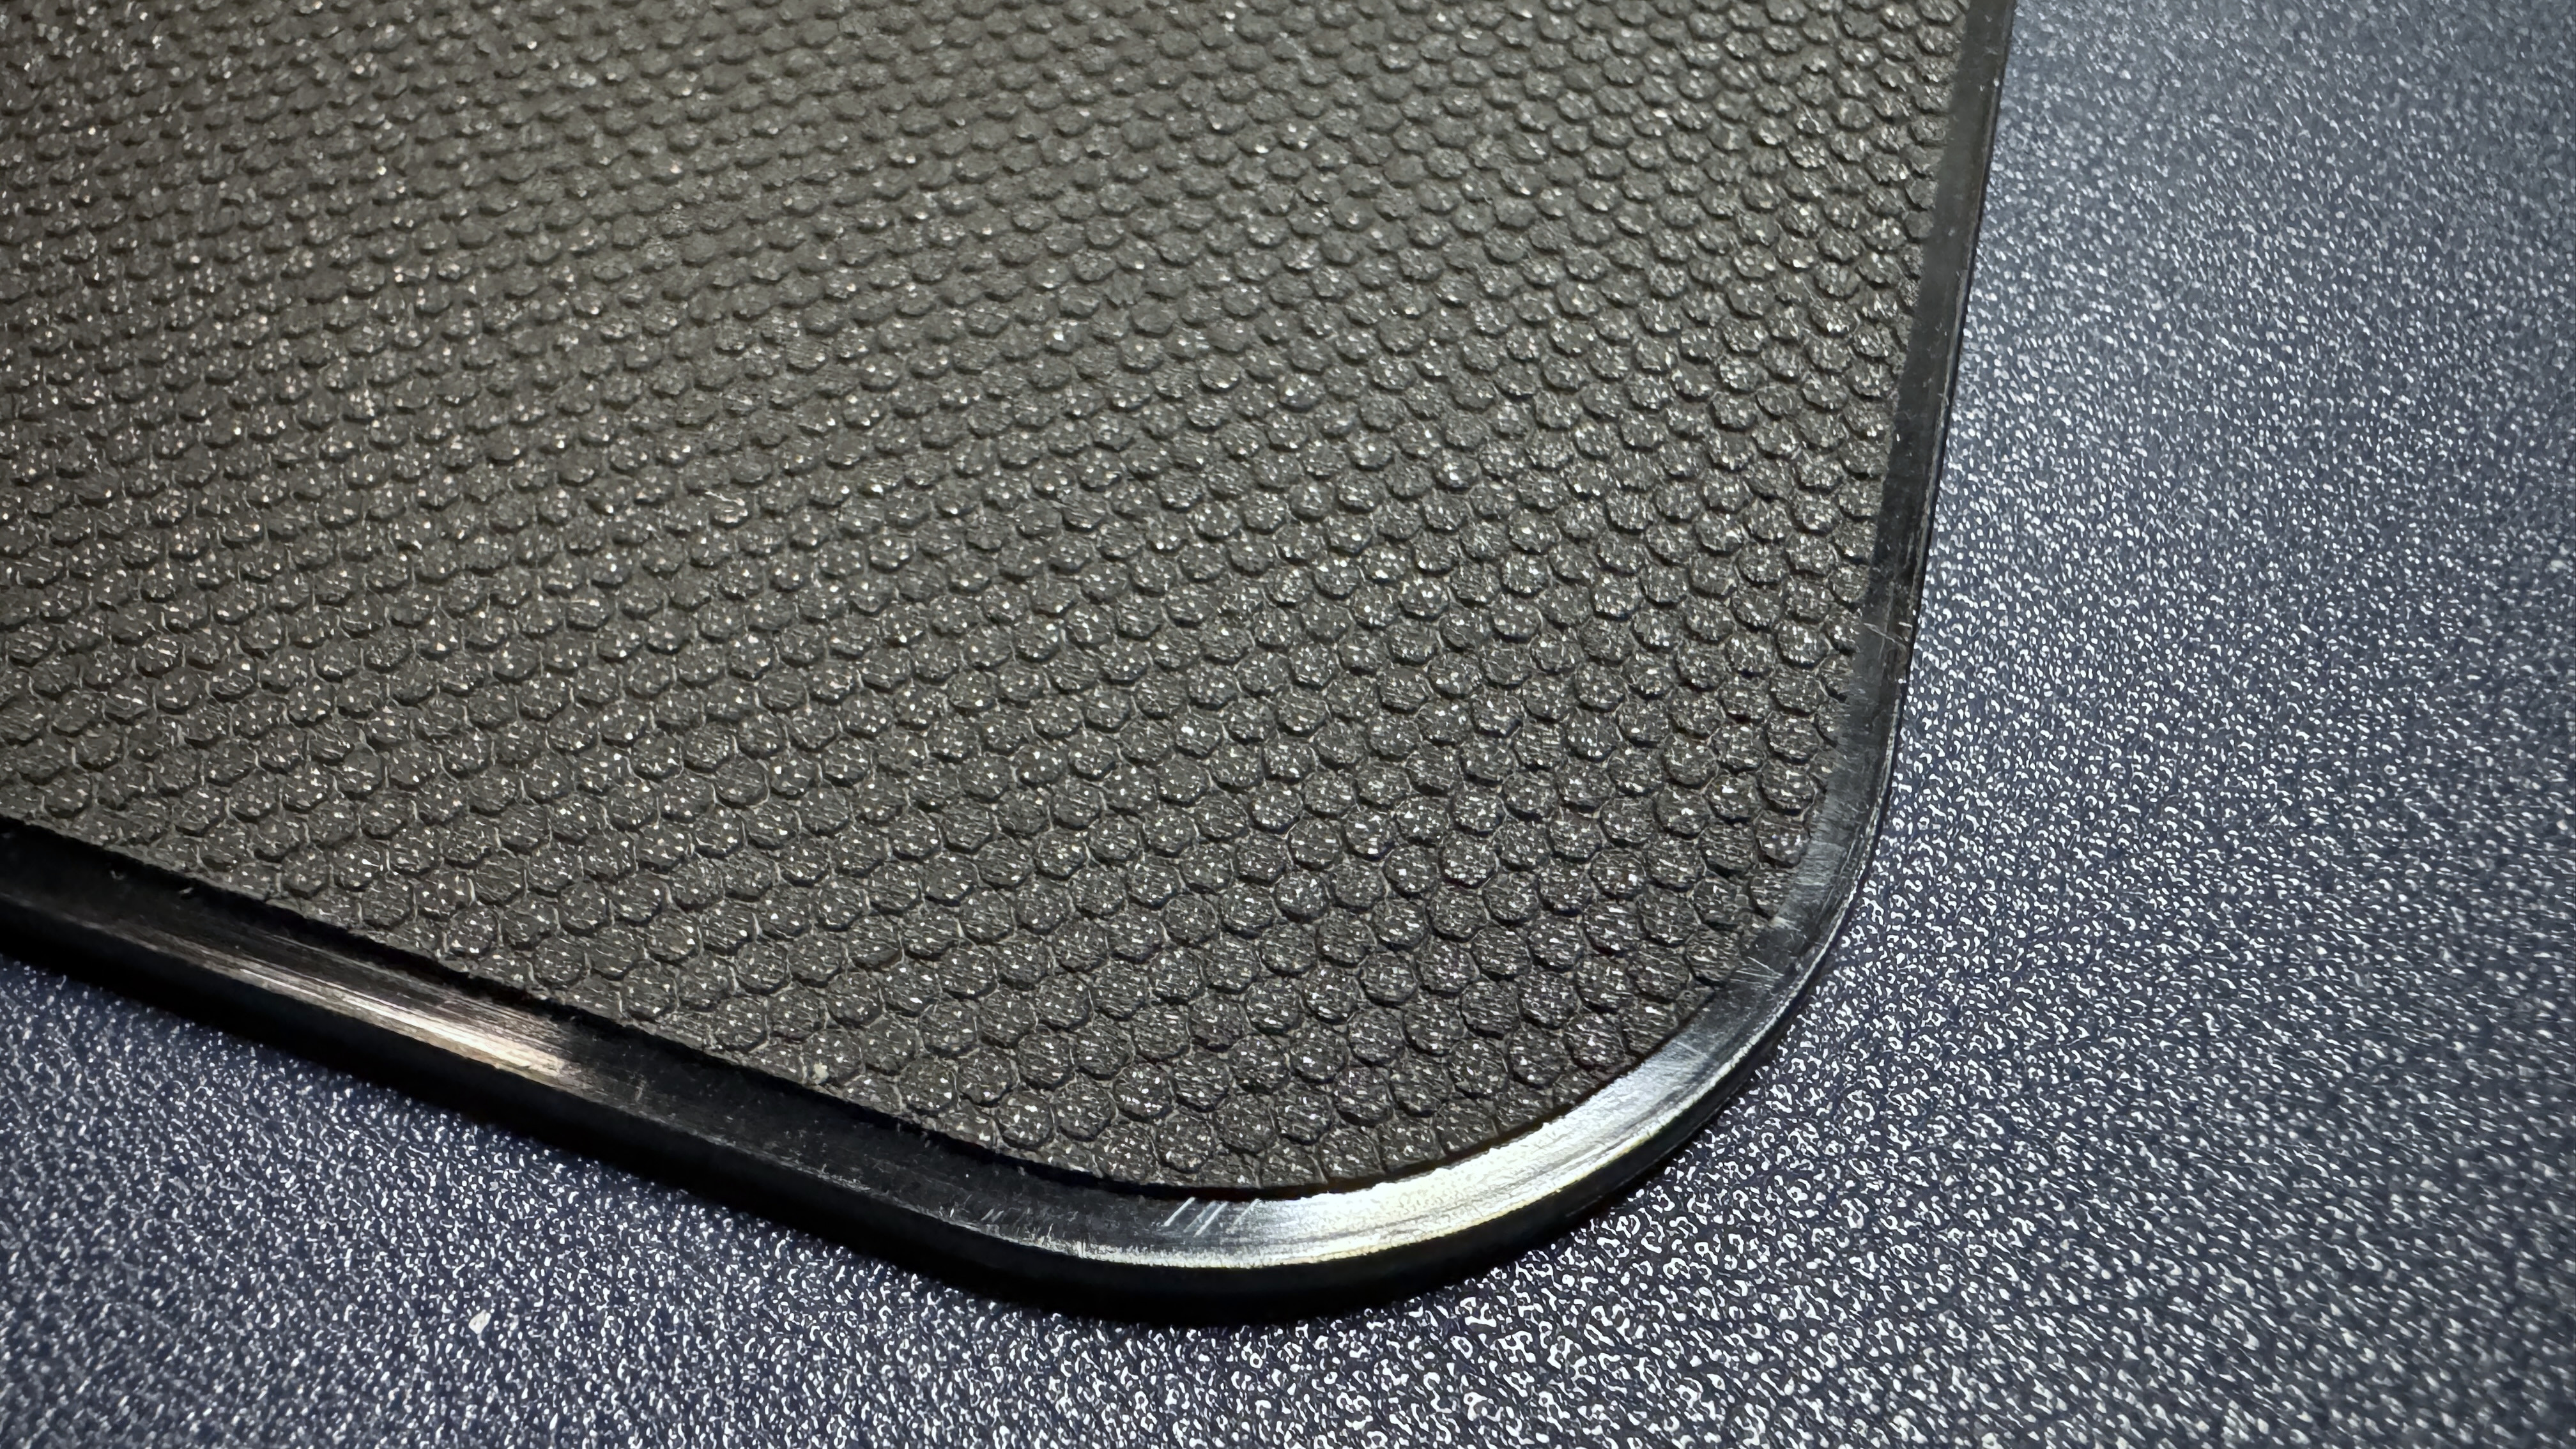
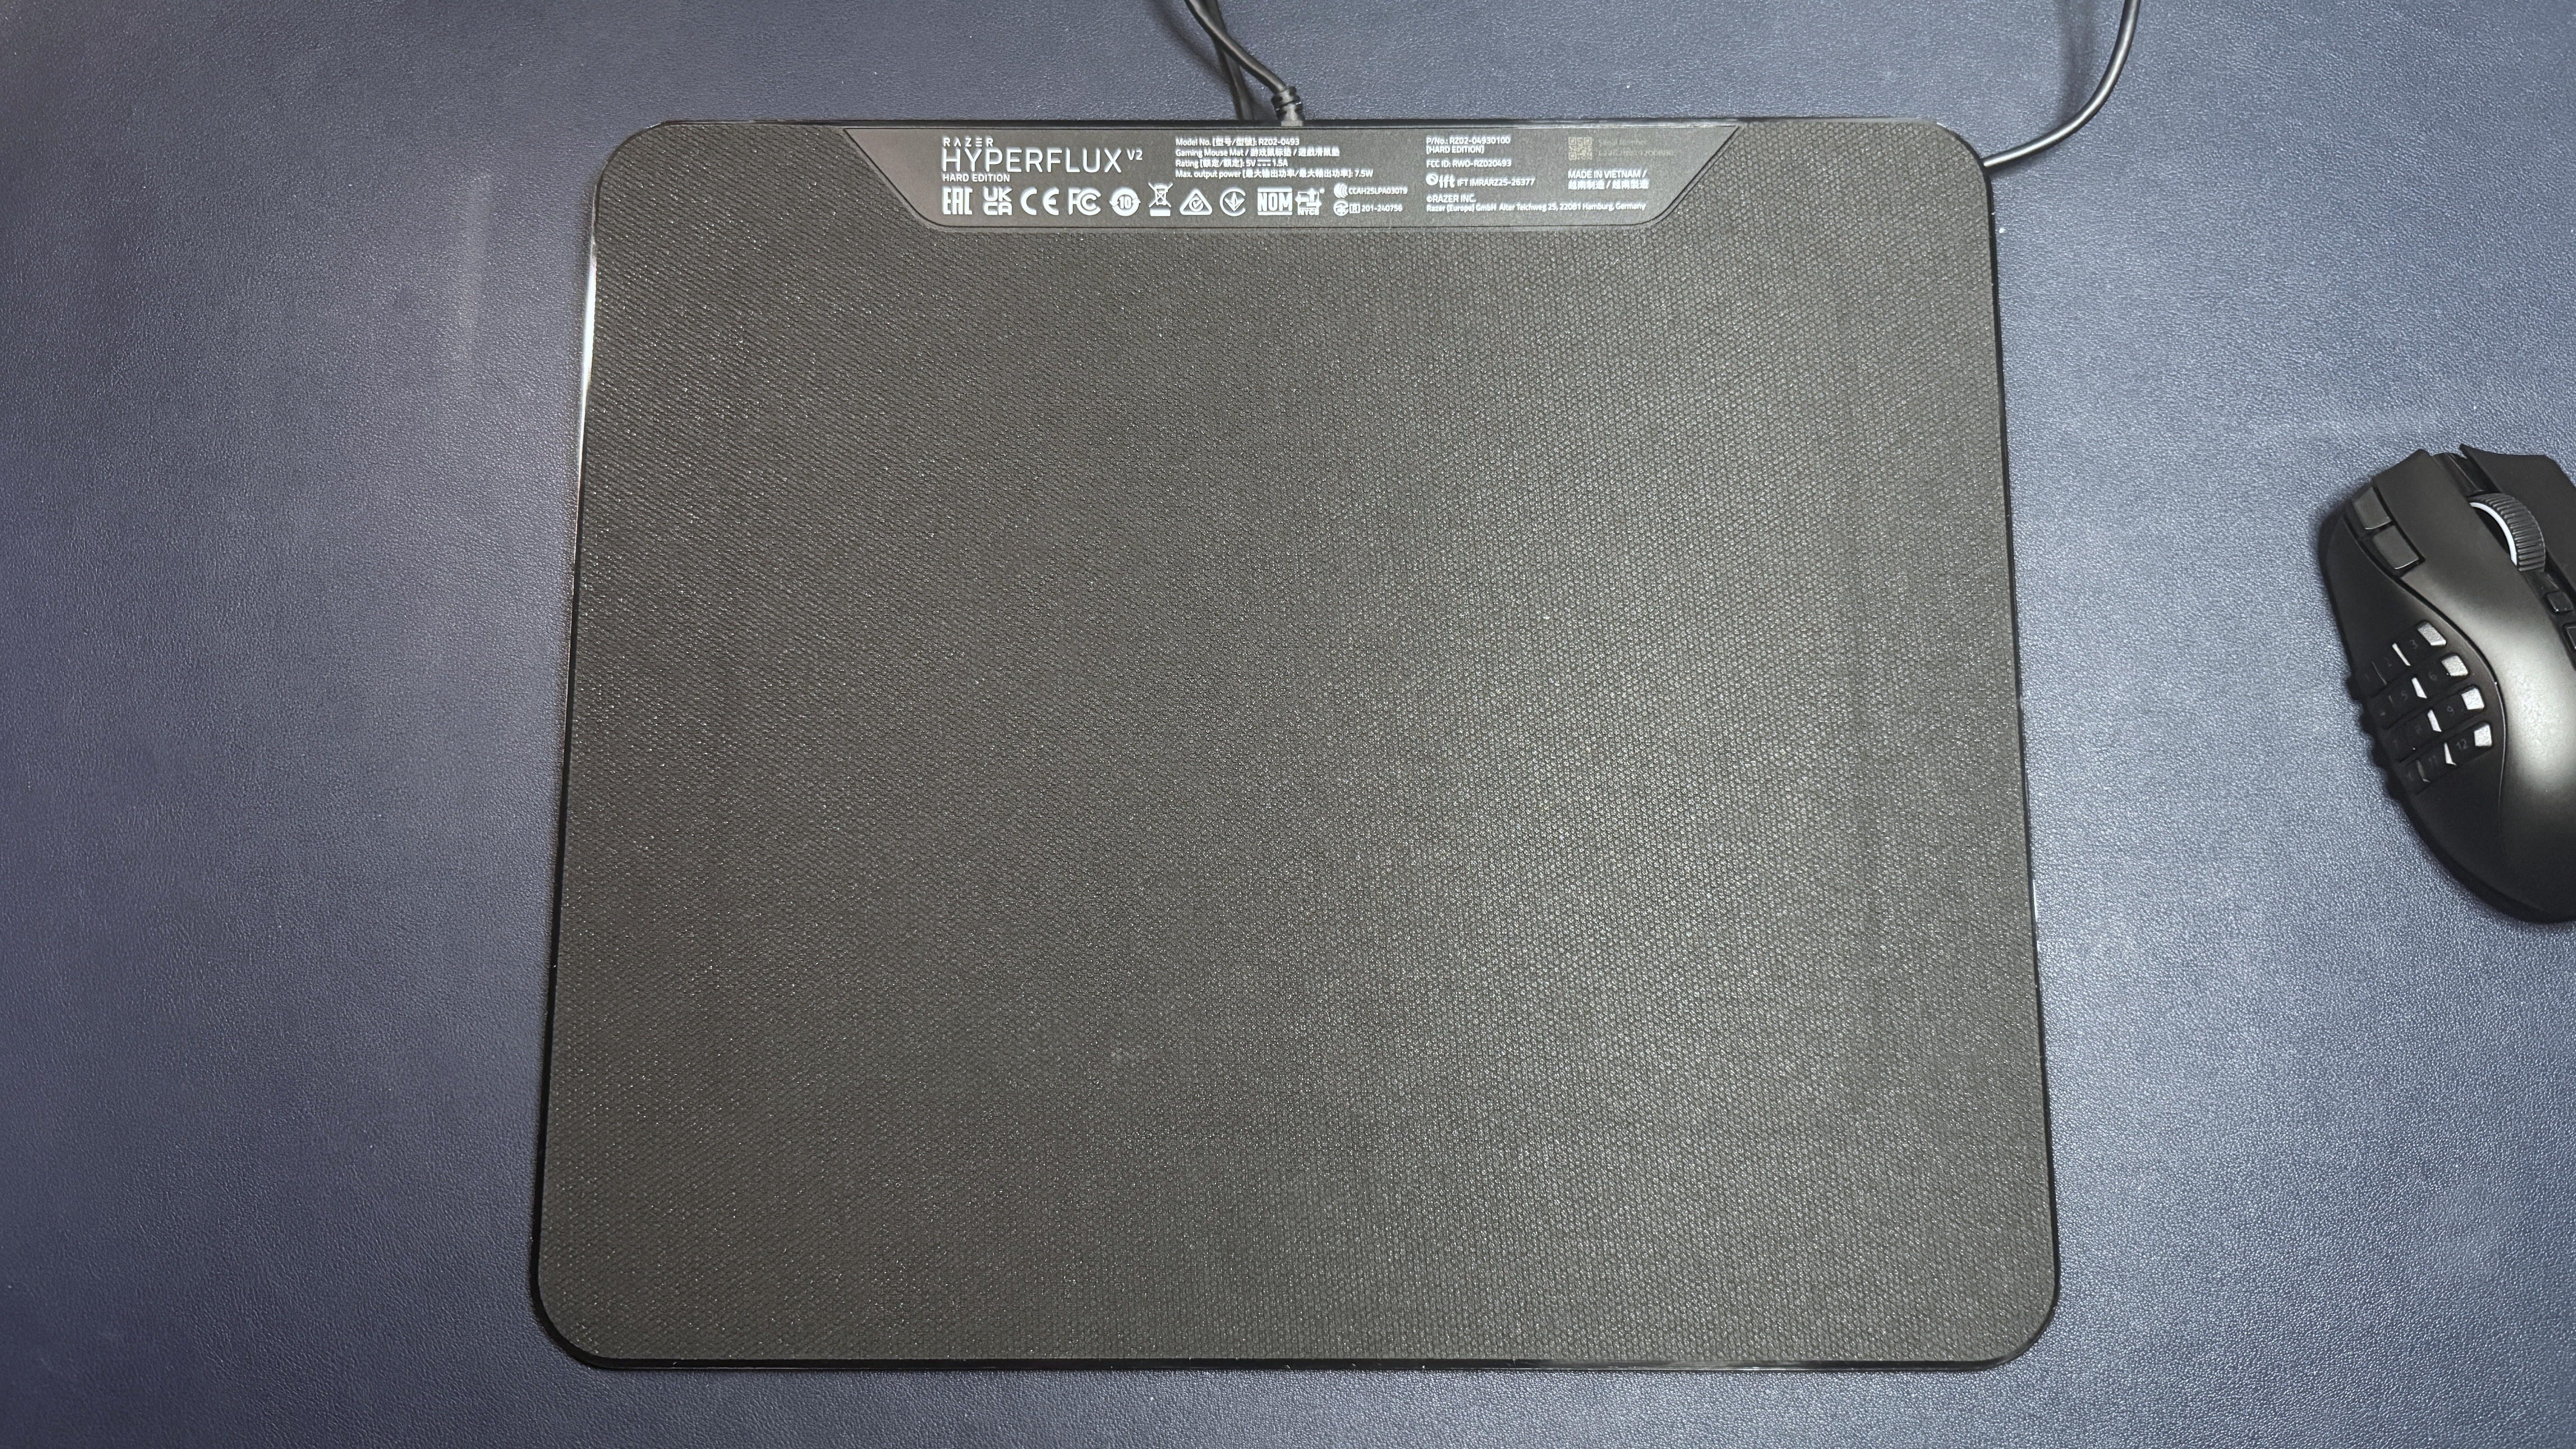
The mouse pad has a hard, microtextured polycarbonate surface surrounded by a shiny plastic bezel. It's not particularly luxurious-looking, but the surface is flat and consistent and seems fairly easy to clean, though dust does seem to gather in the (very tiny) gap between the surface and the bezel.

Razer HyperFlux V2
Tom's Hardware
Razer HyperFlux V2
Tom's Hardware

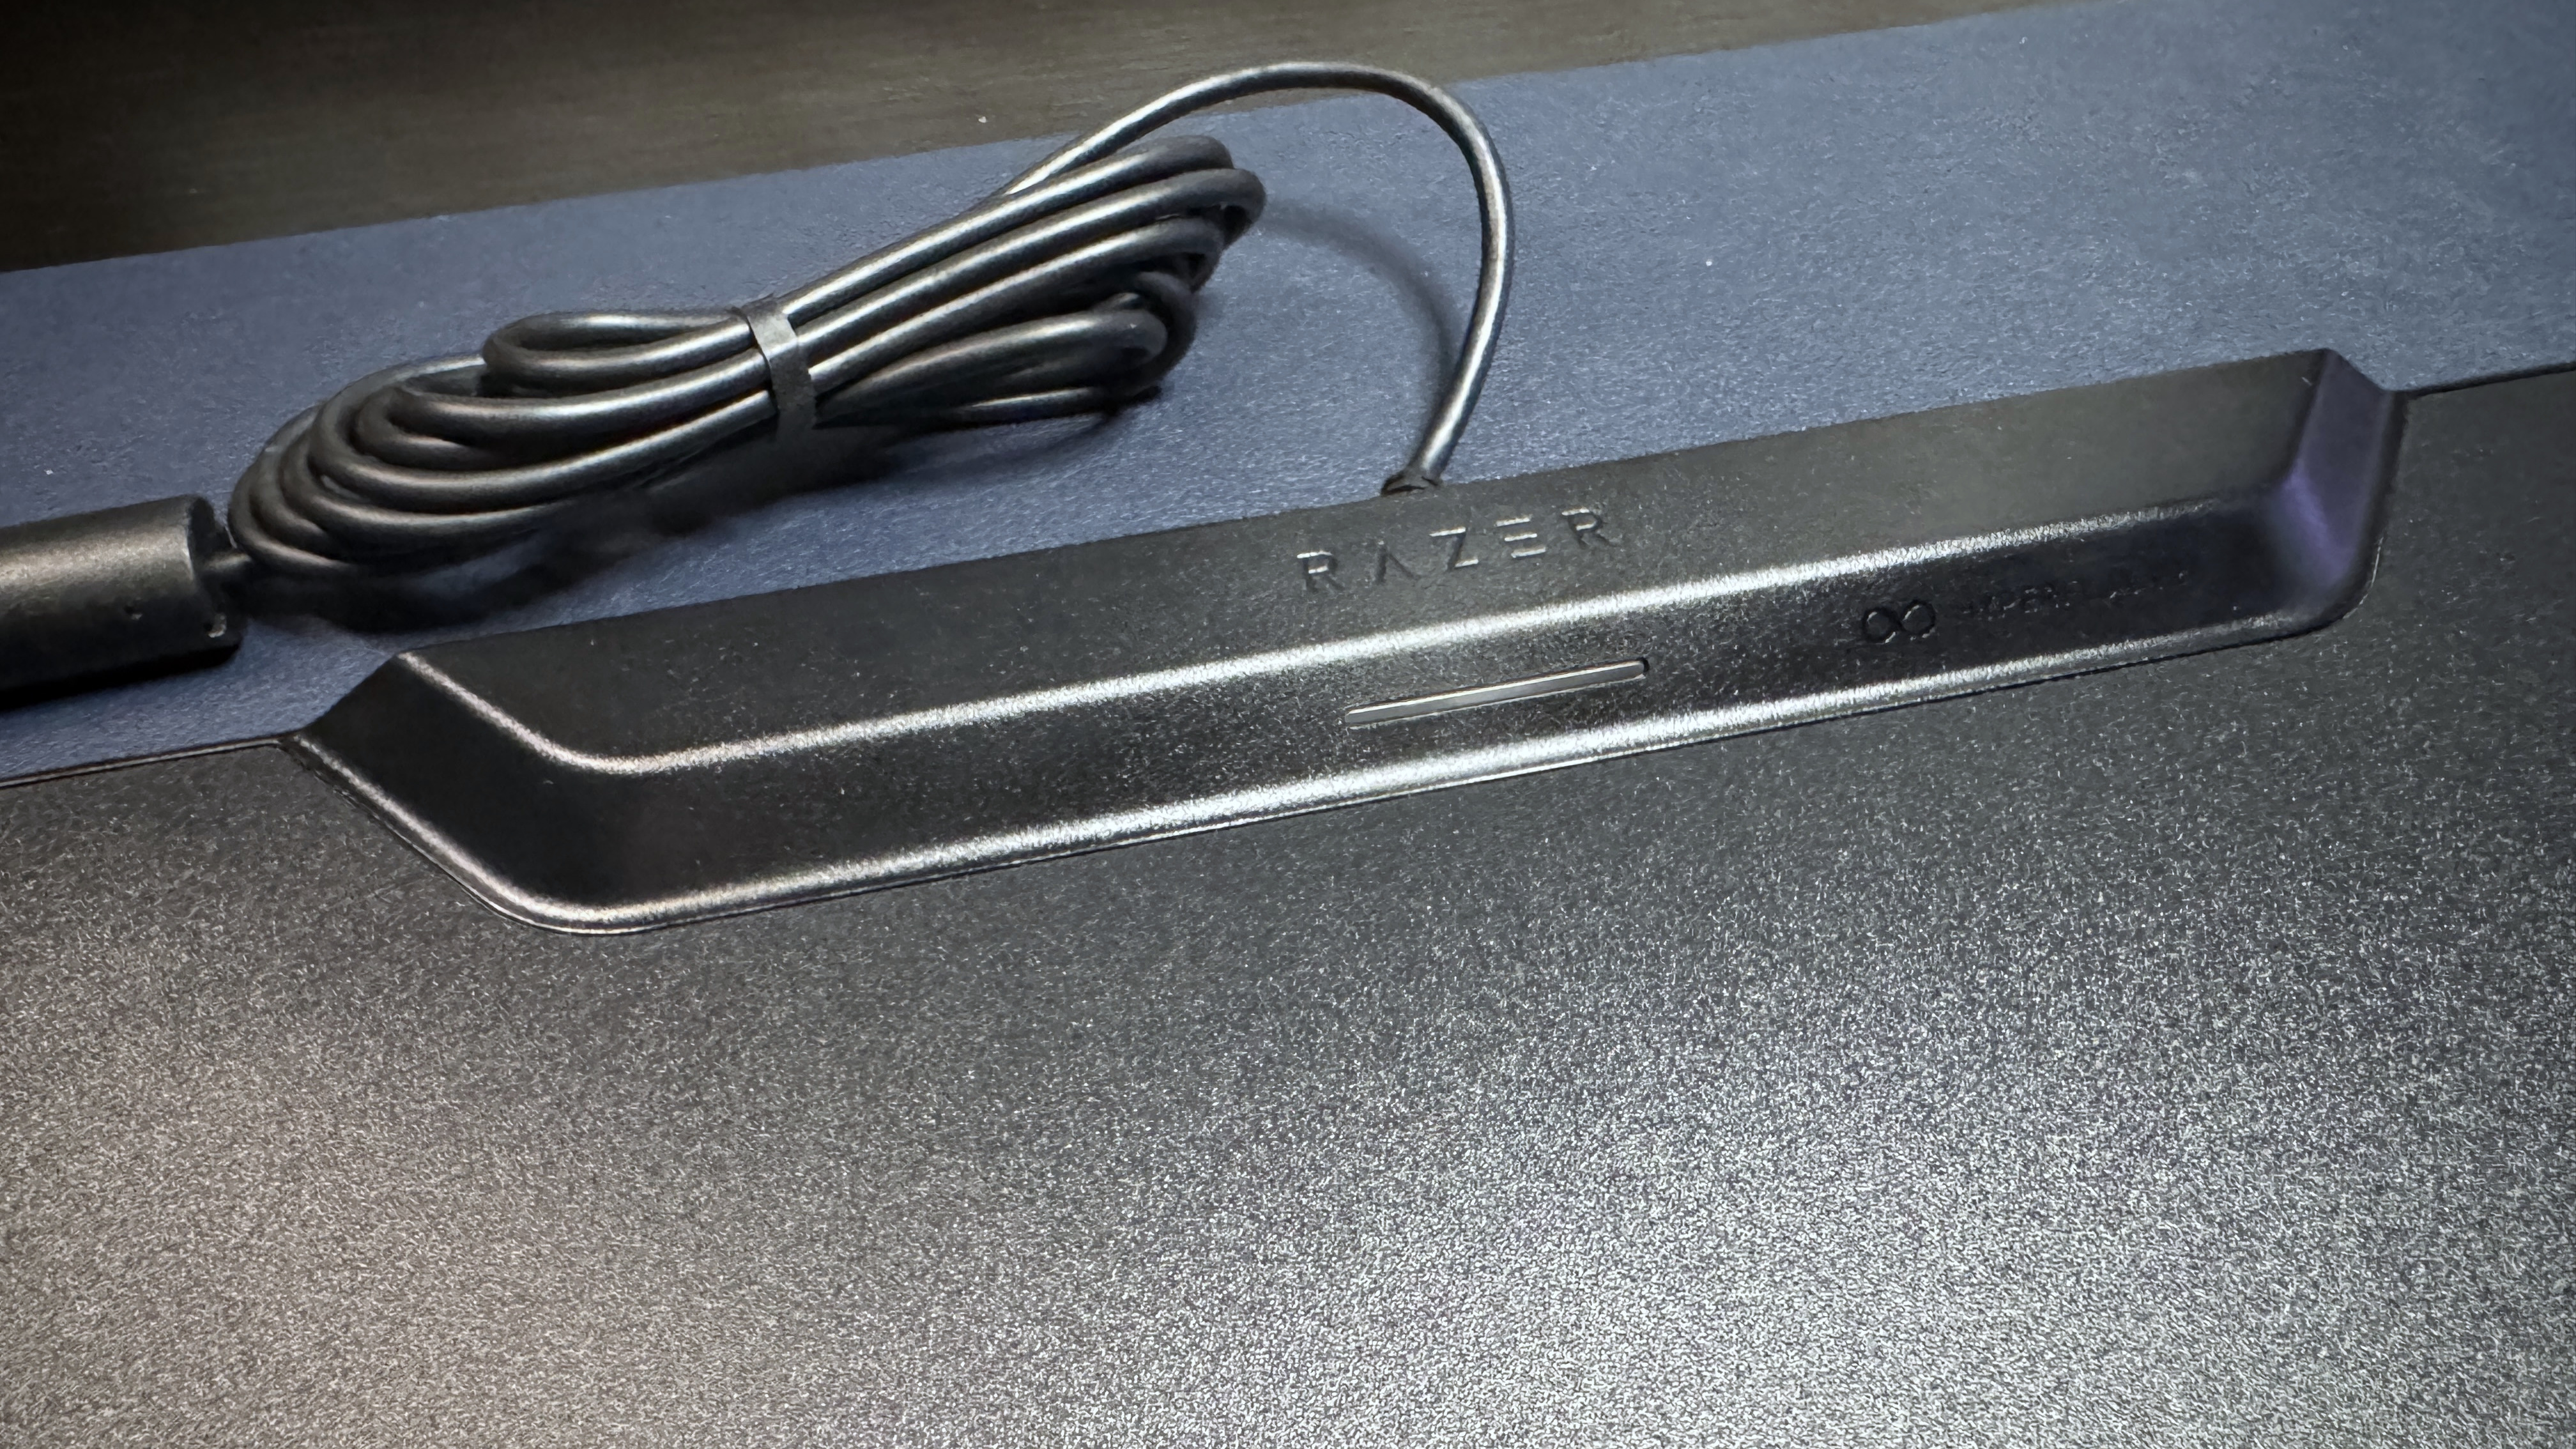
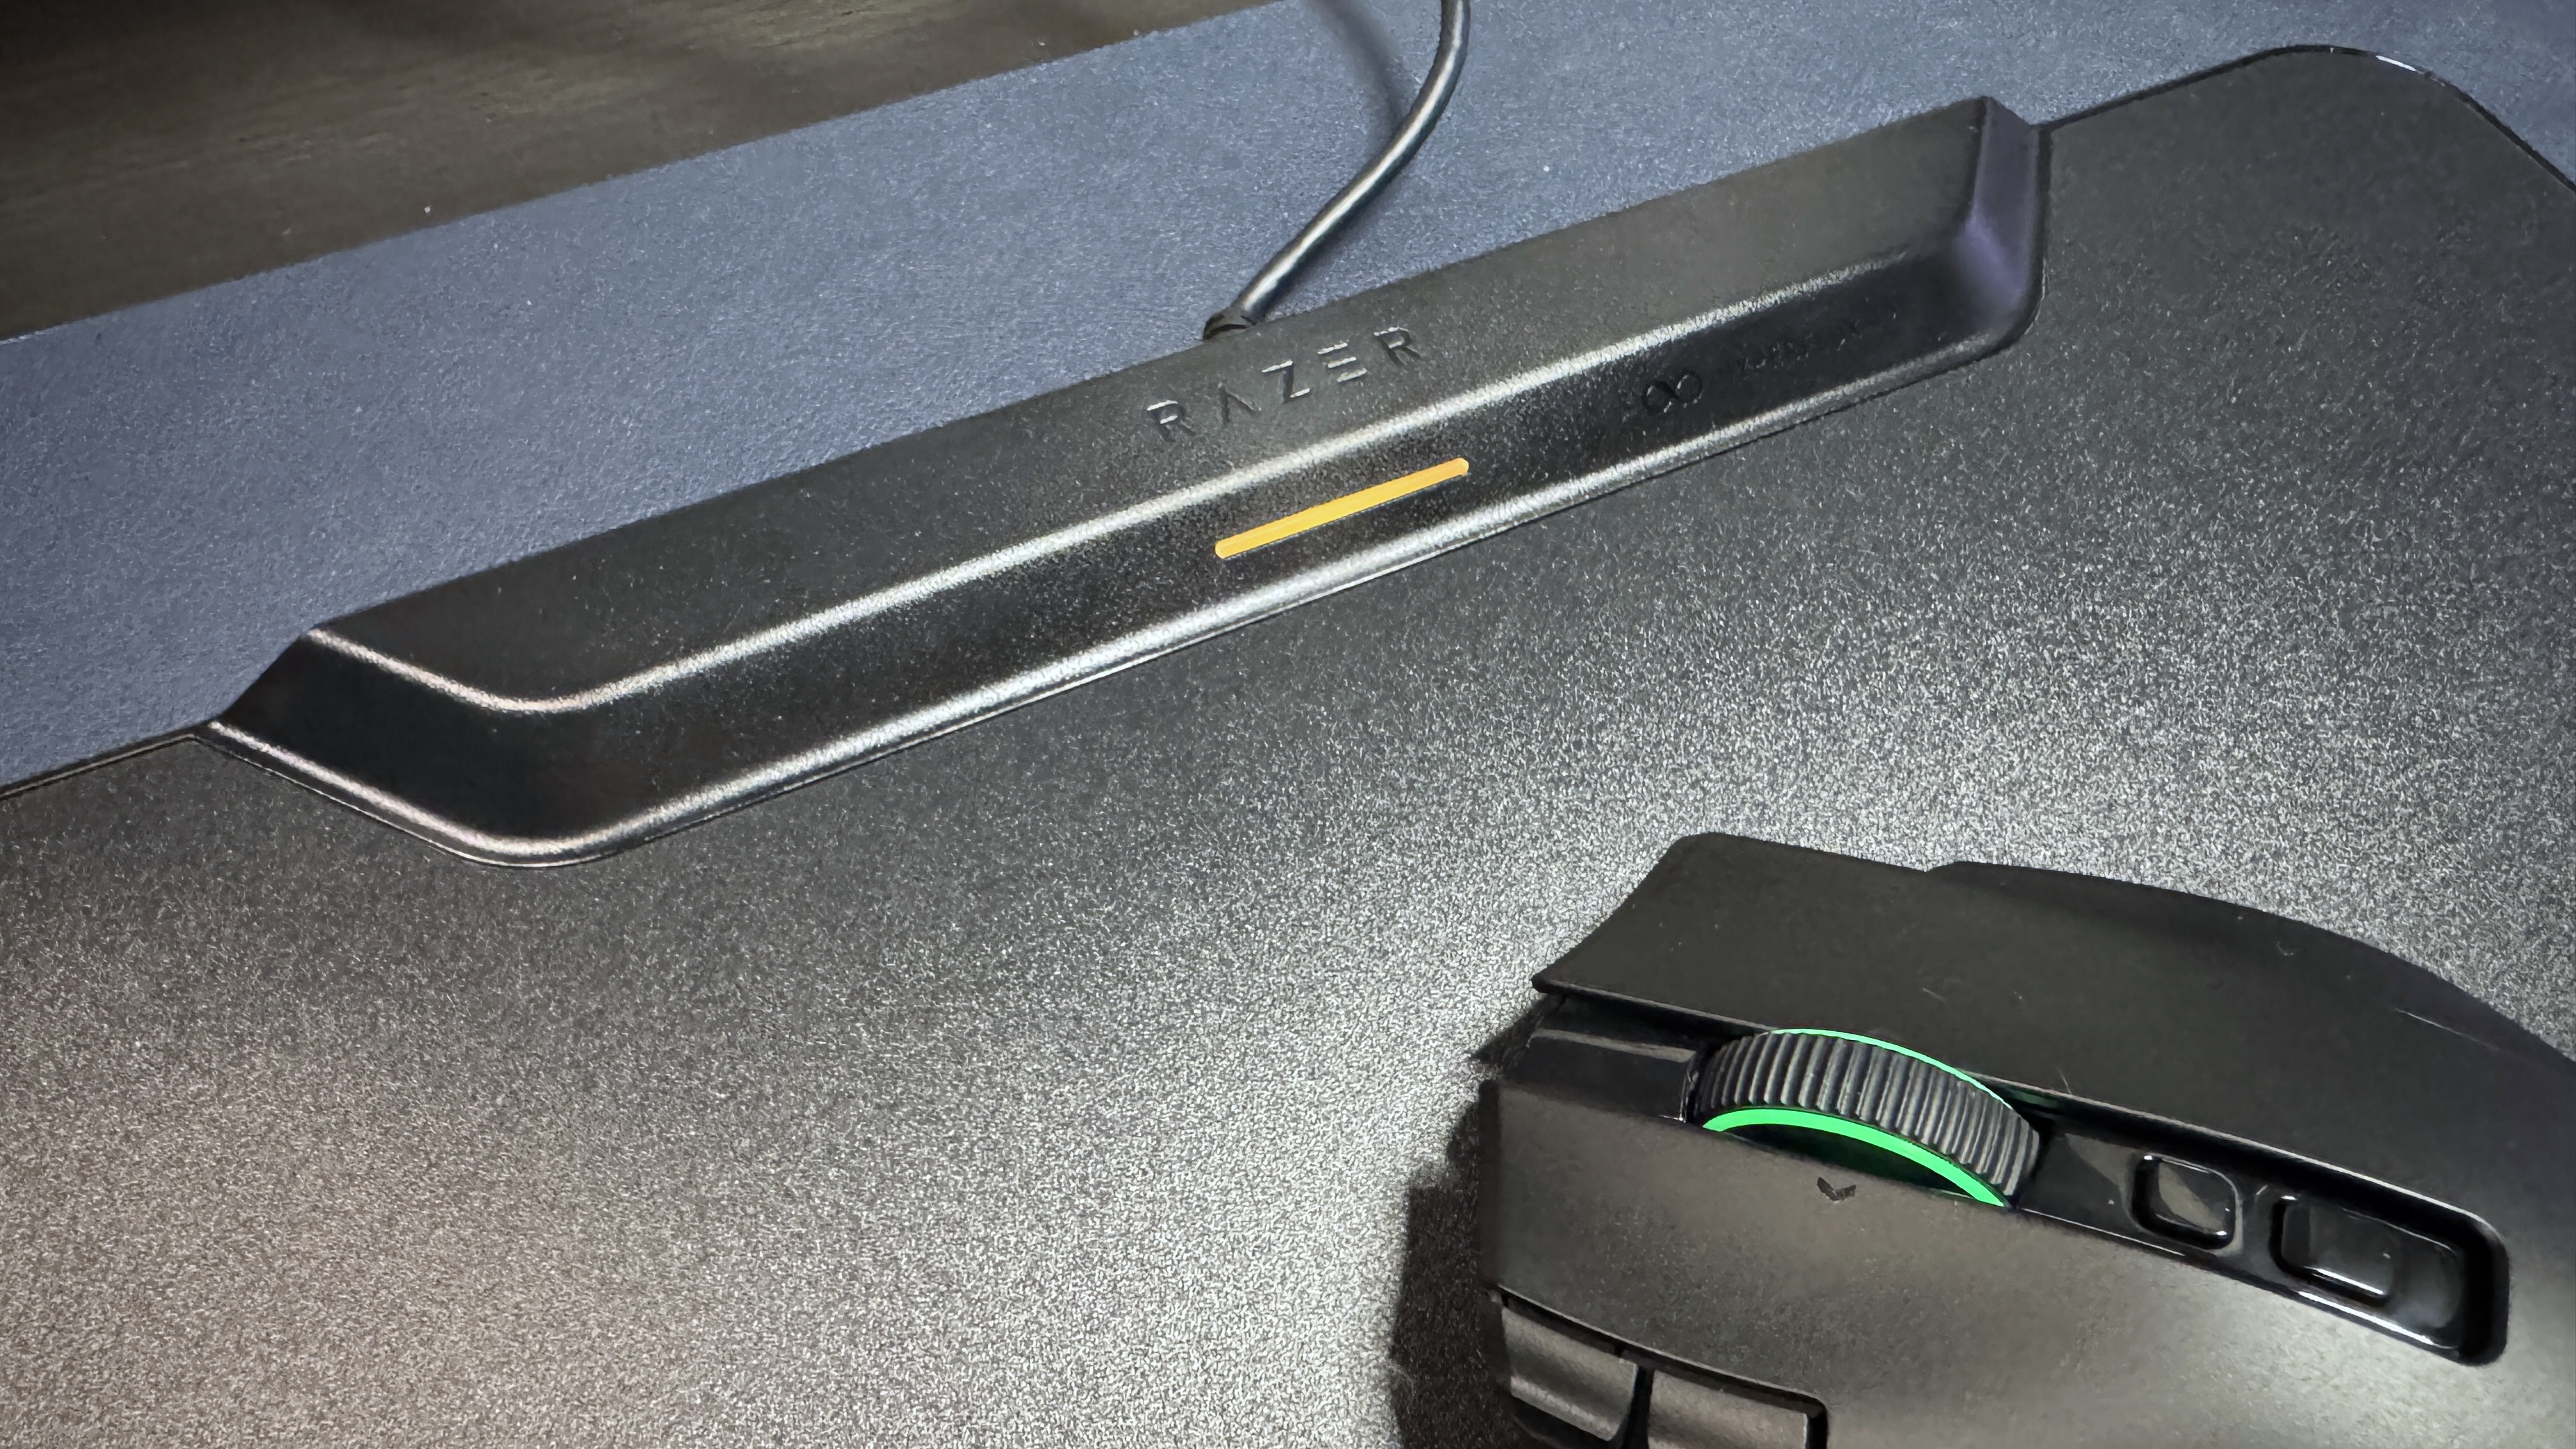
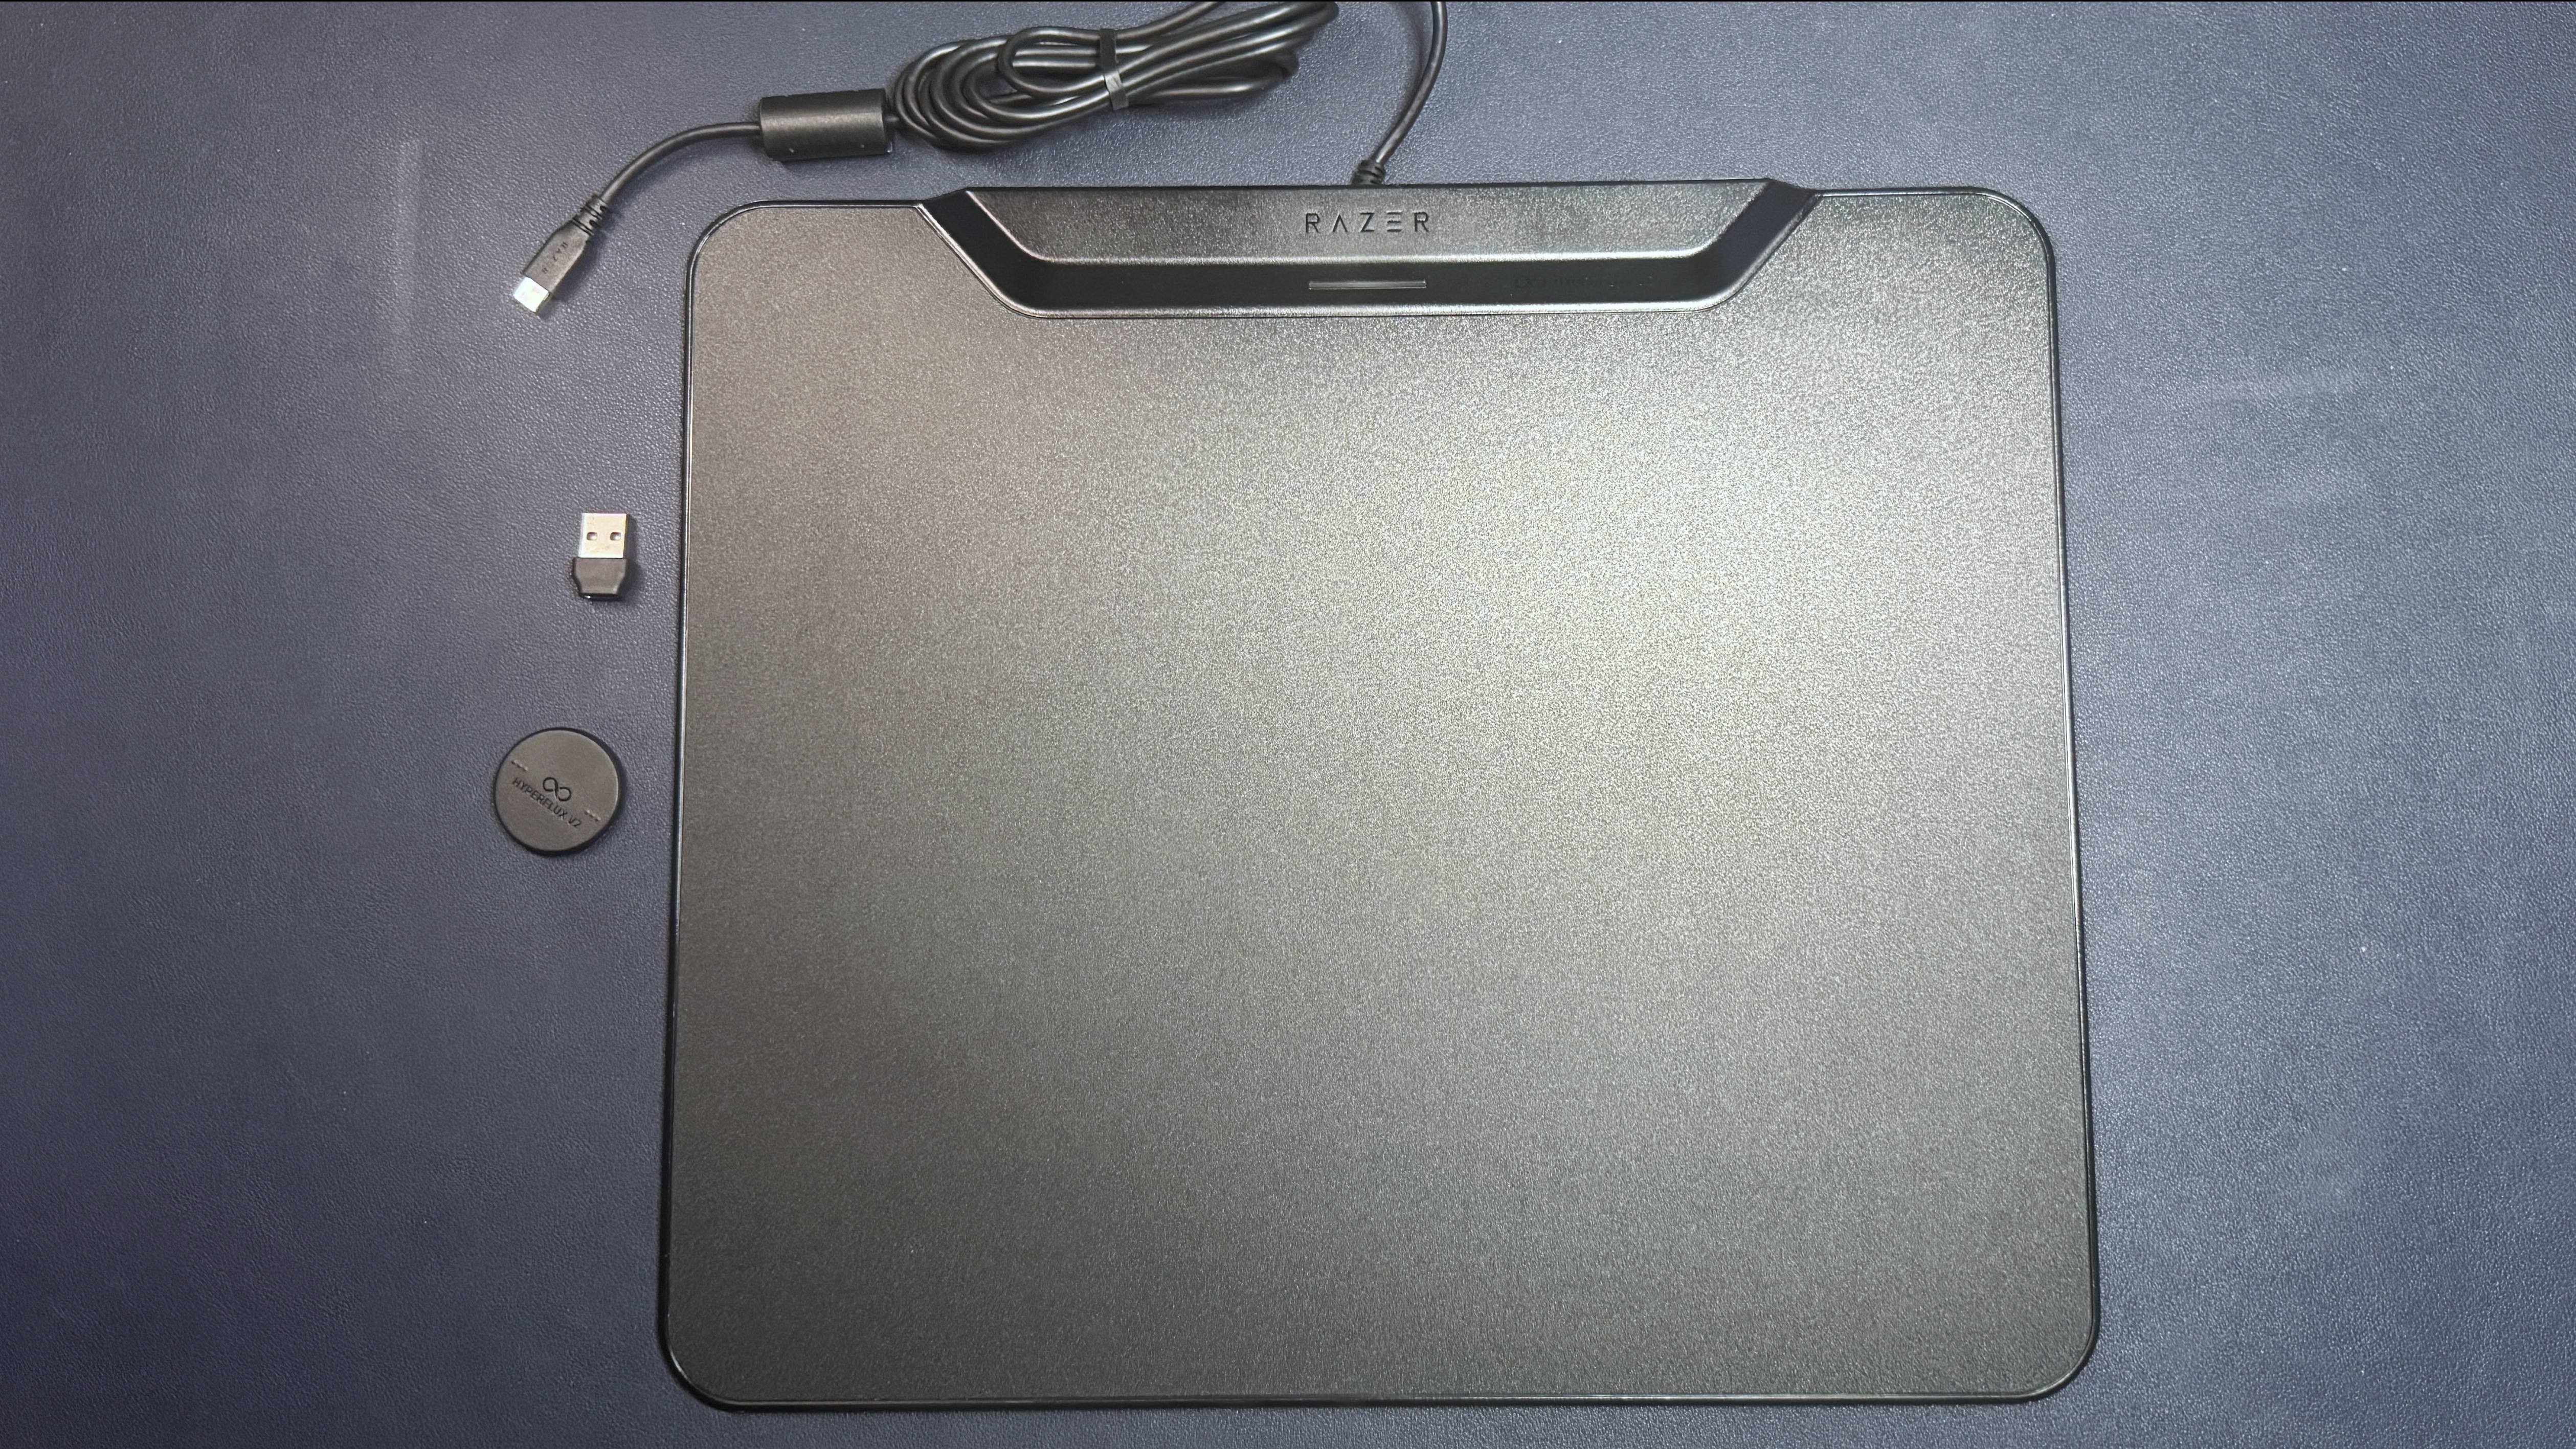
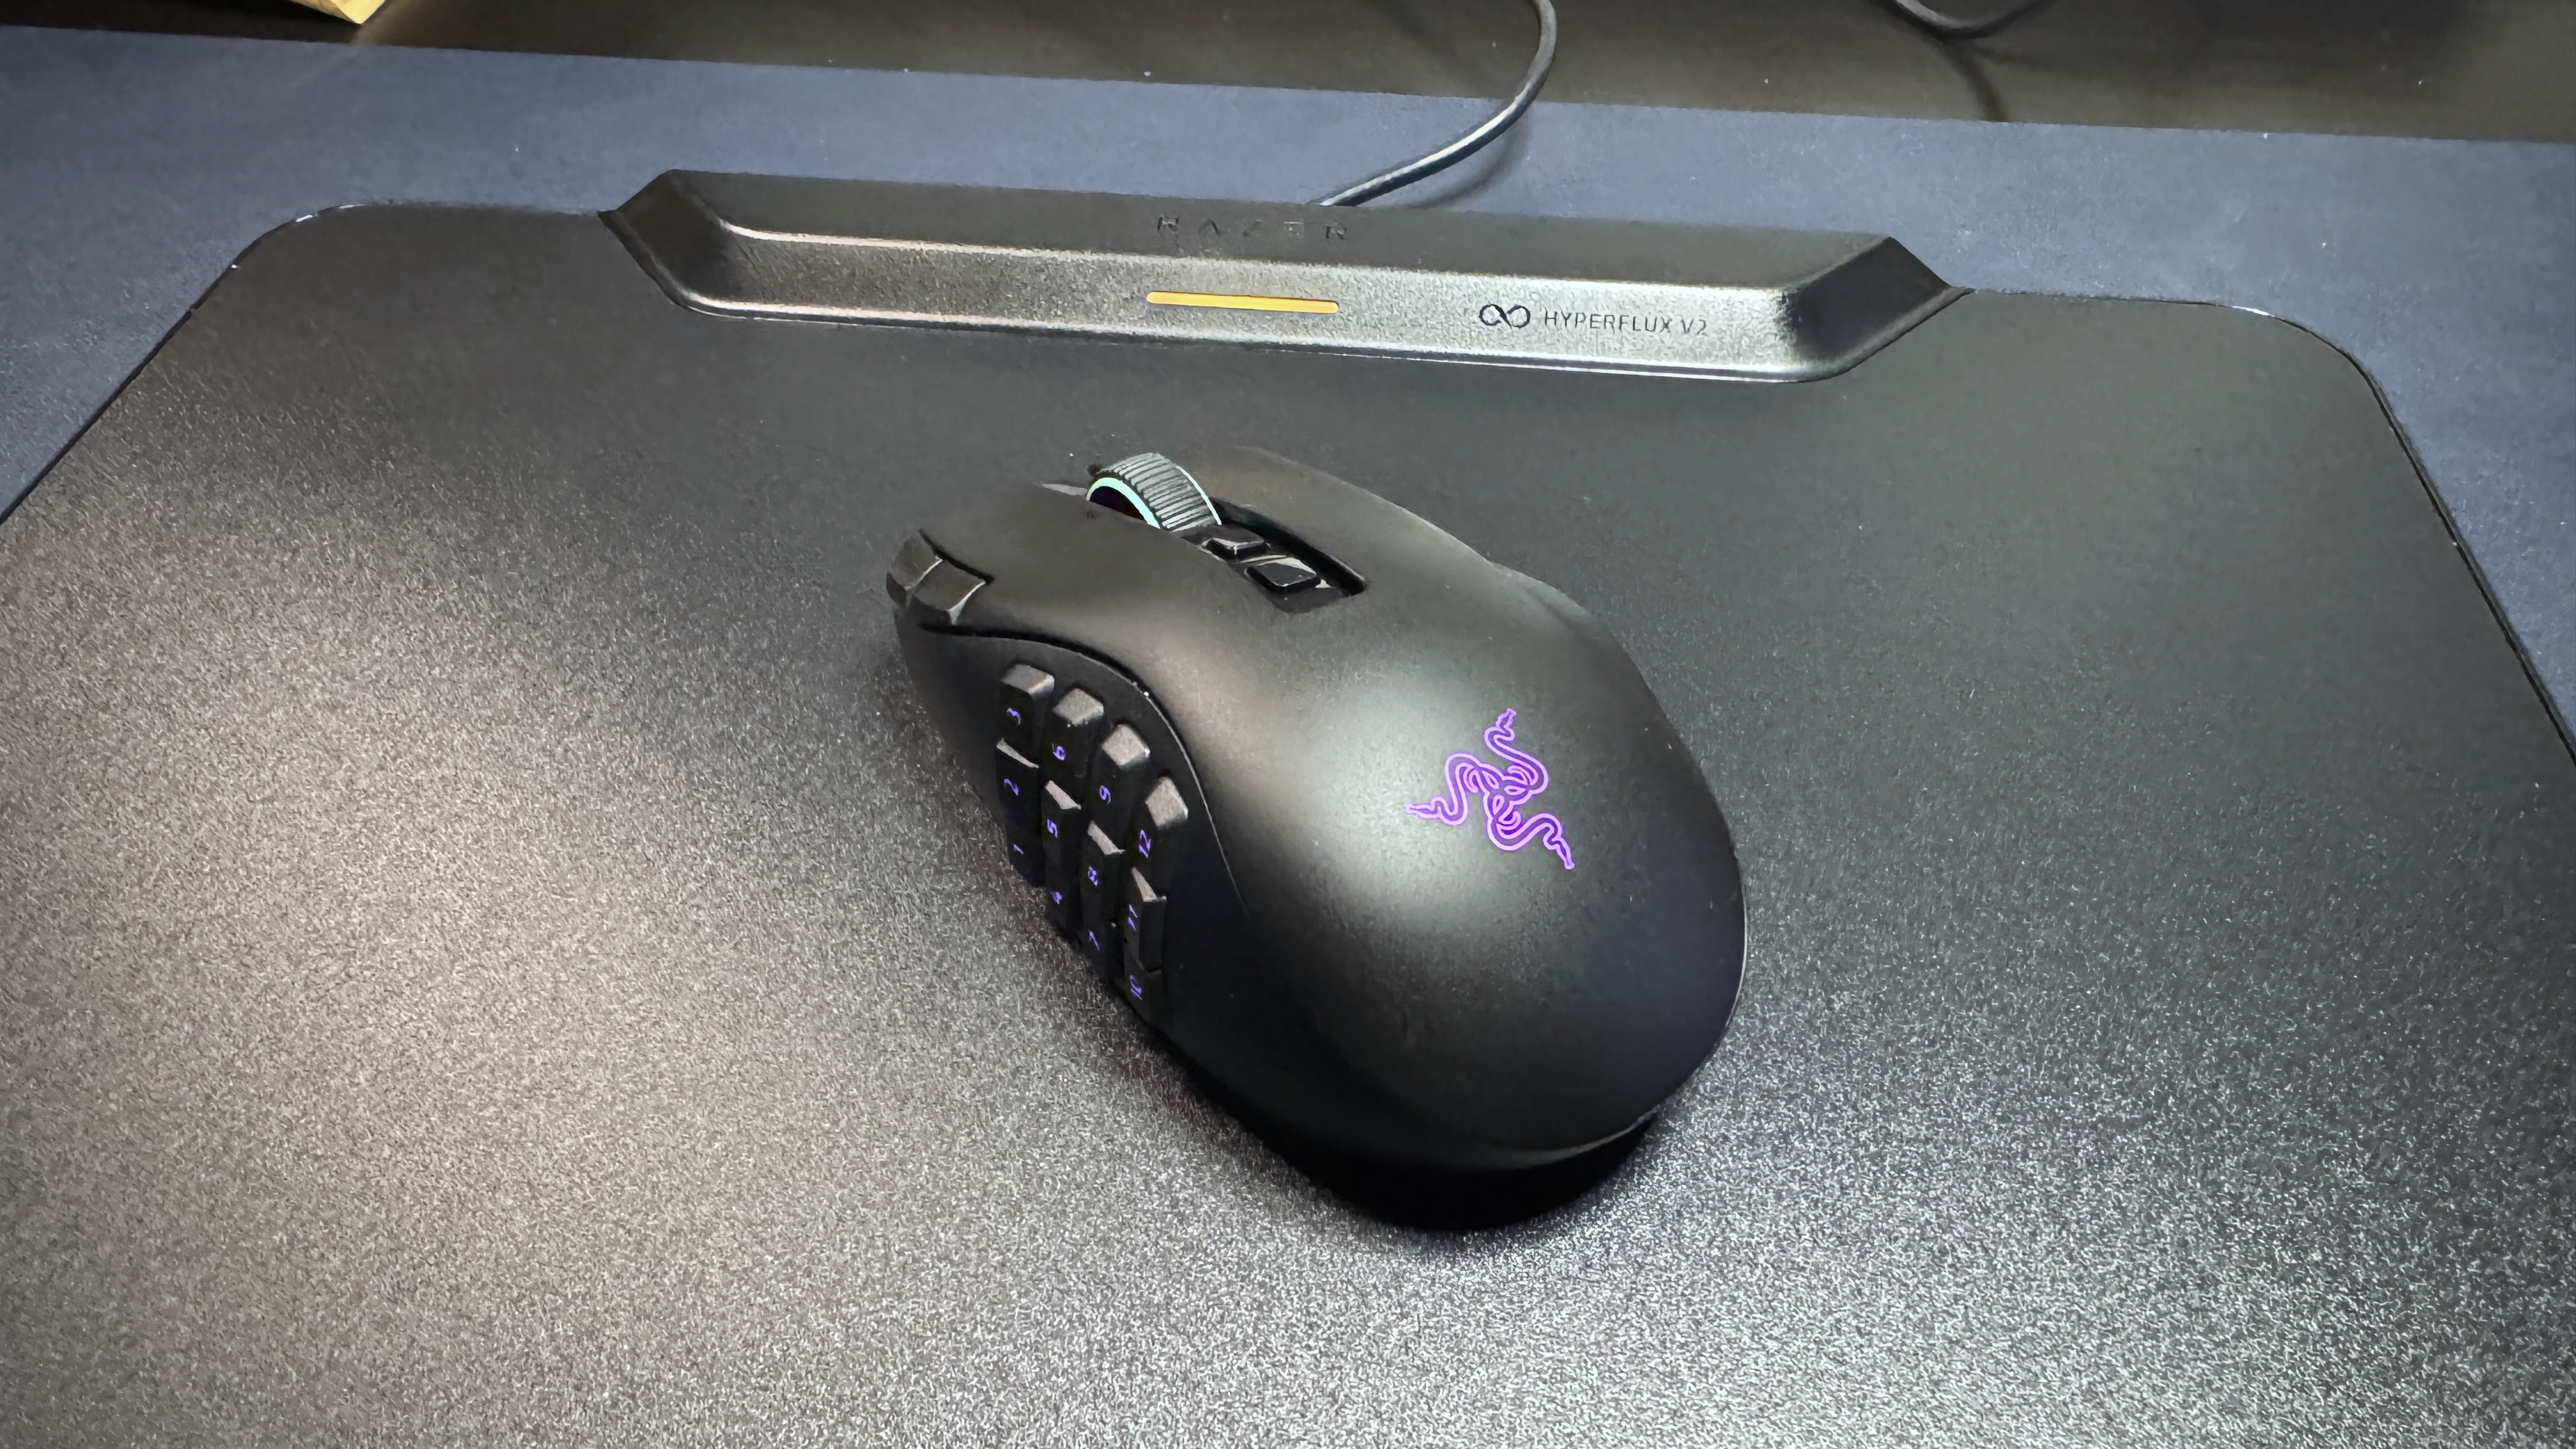
There's a long, thin charging module at the top of the mouse pad, in the center. It's longer and more prominent than the PowerPlay 2's charging module, but it's also better integrated into the design. It's very similar to the power module in the Razer Firefly V2 Pro. In the center of the charging module, there's a 1.25-inch (32mm) LED indicator light, which lights up to indicate the mouse's charging status and battery level.

Razer HyperFlux V2
Tom's Hardware
Razer HyperFlux V2
Tom's Hardware
Razer HyperFlux V2
Tom's Hardware

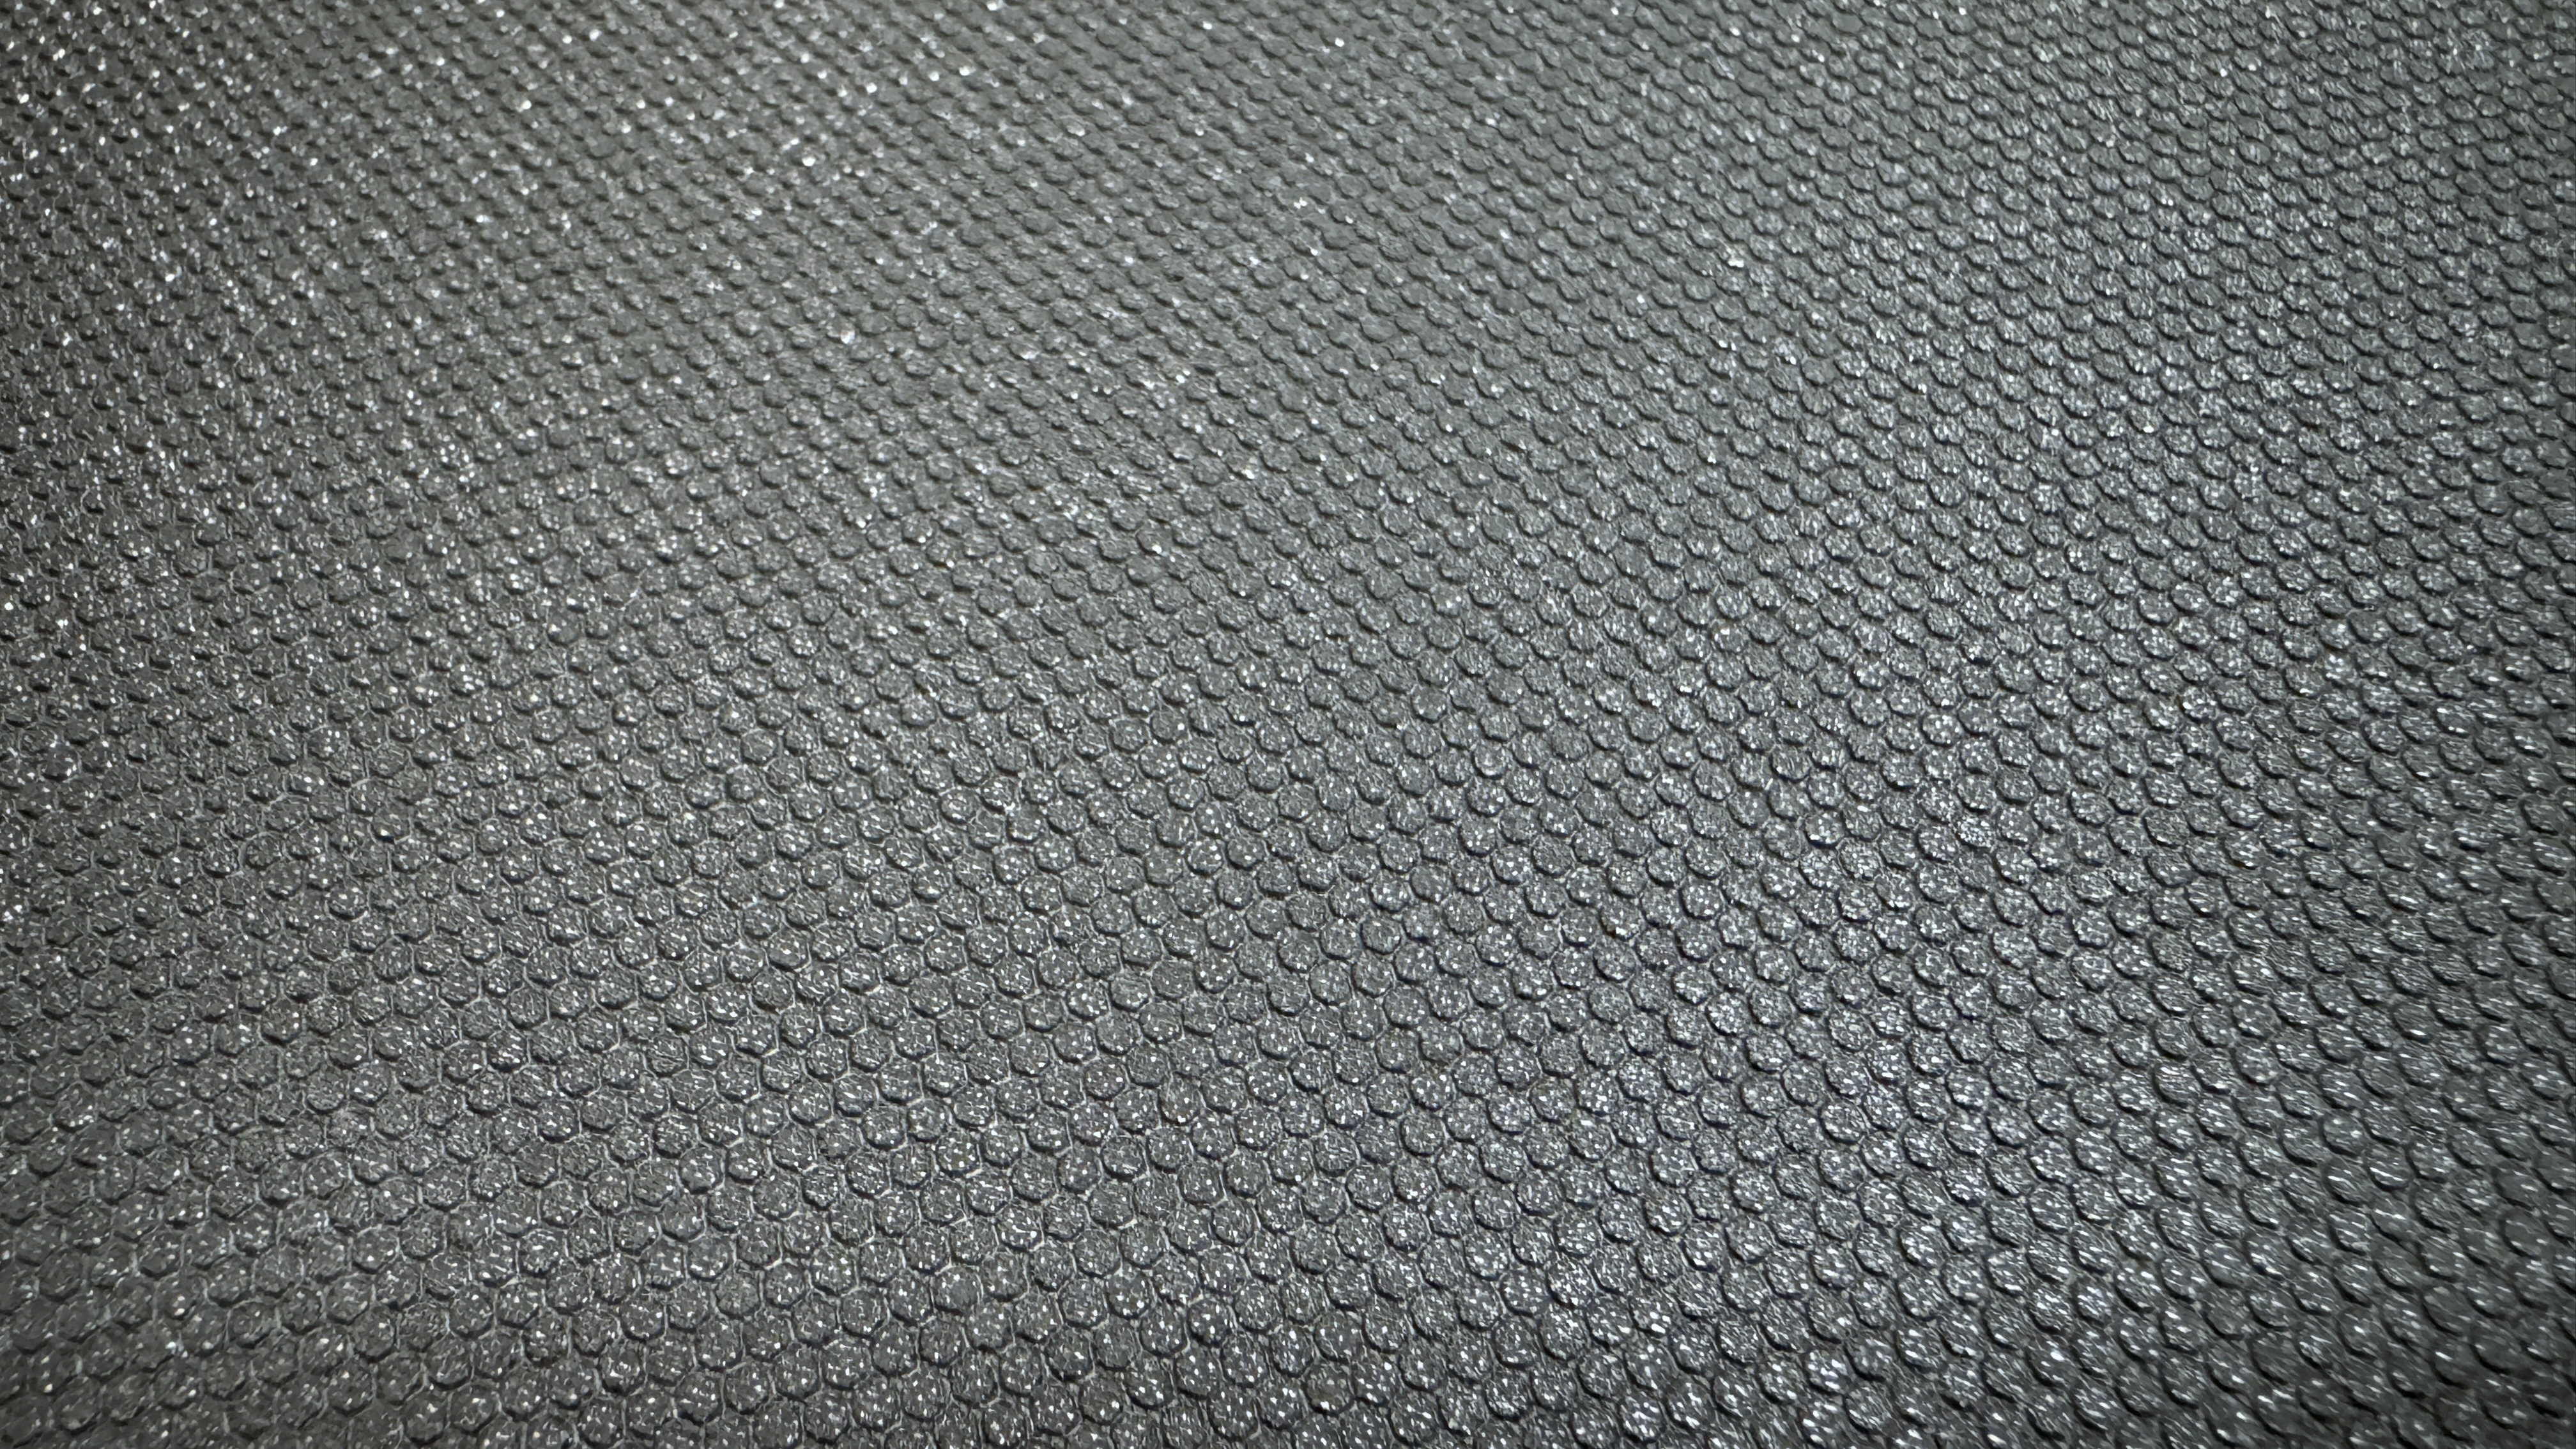
The bottom of the mouse pad is fully lined with an anti-slip rubber base to keep it from moving around on your desk.

Razer HyperFlux V2

(Image credit: Tom's Hardware)

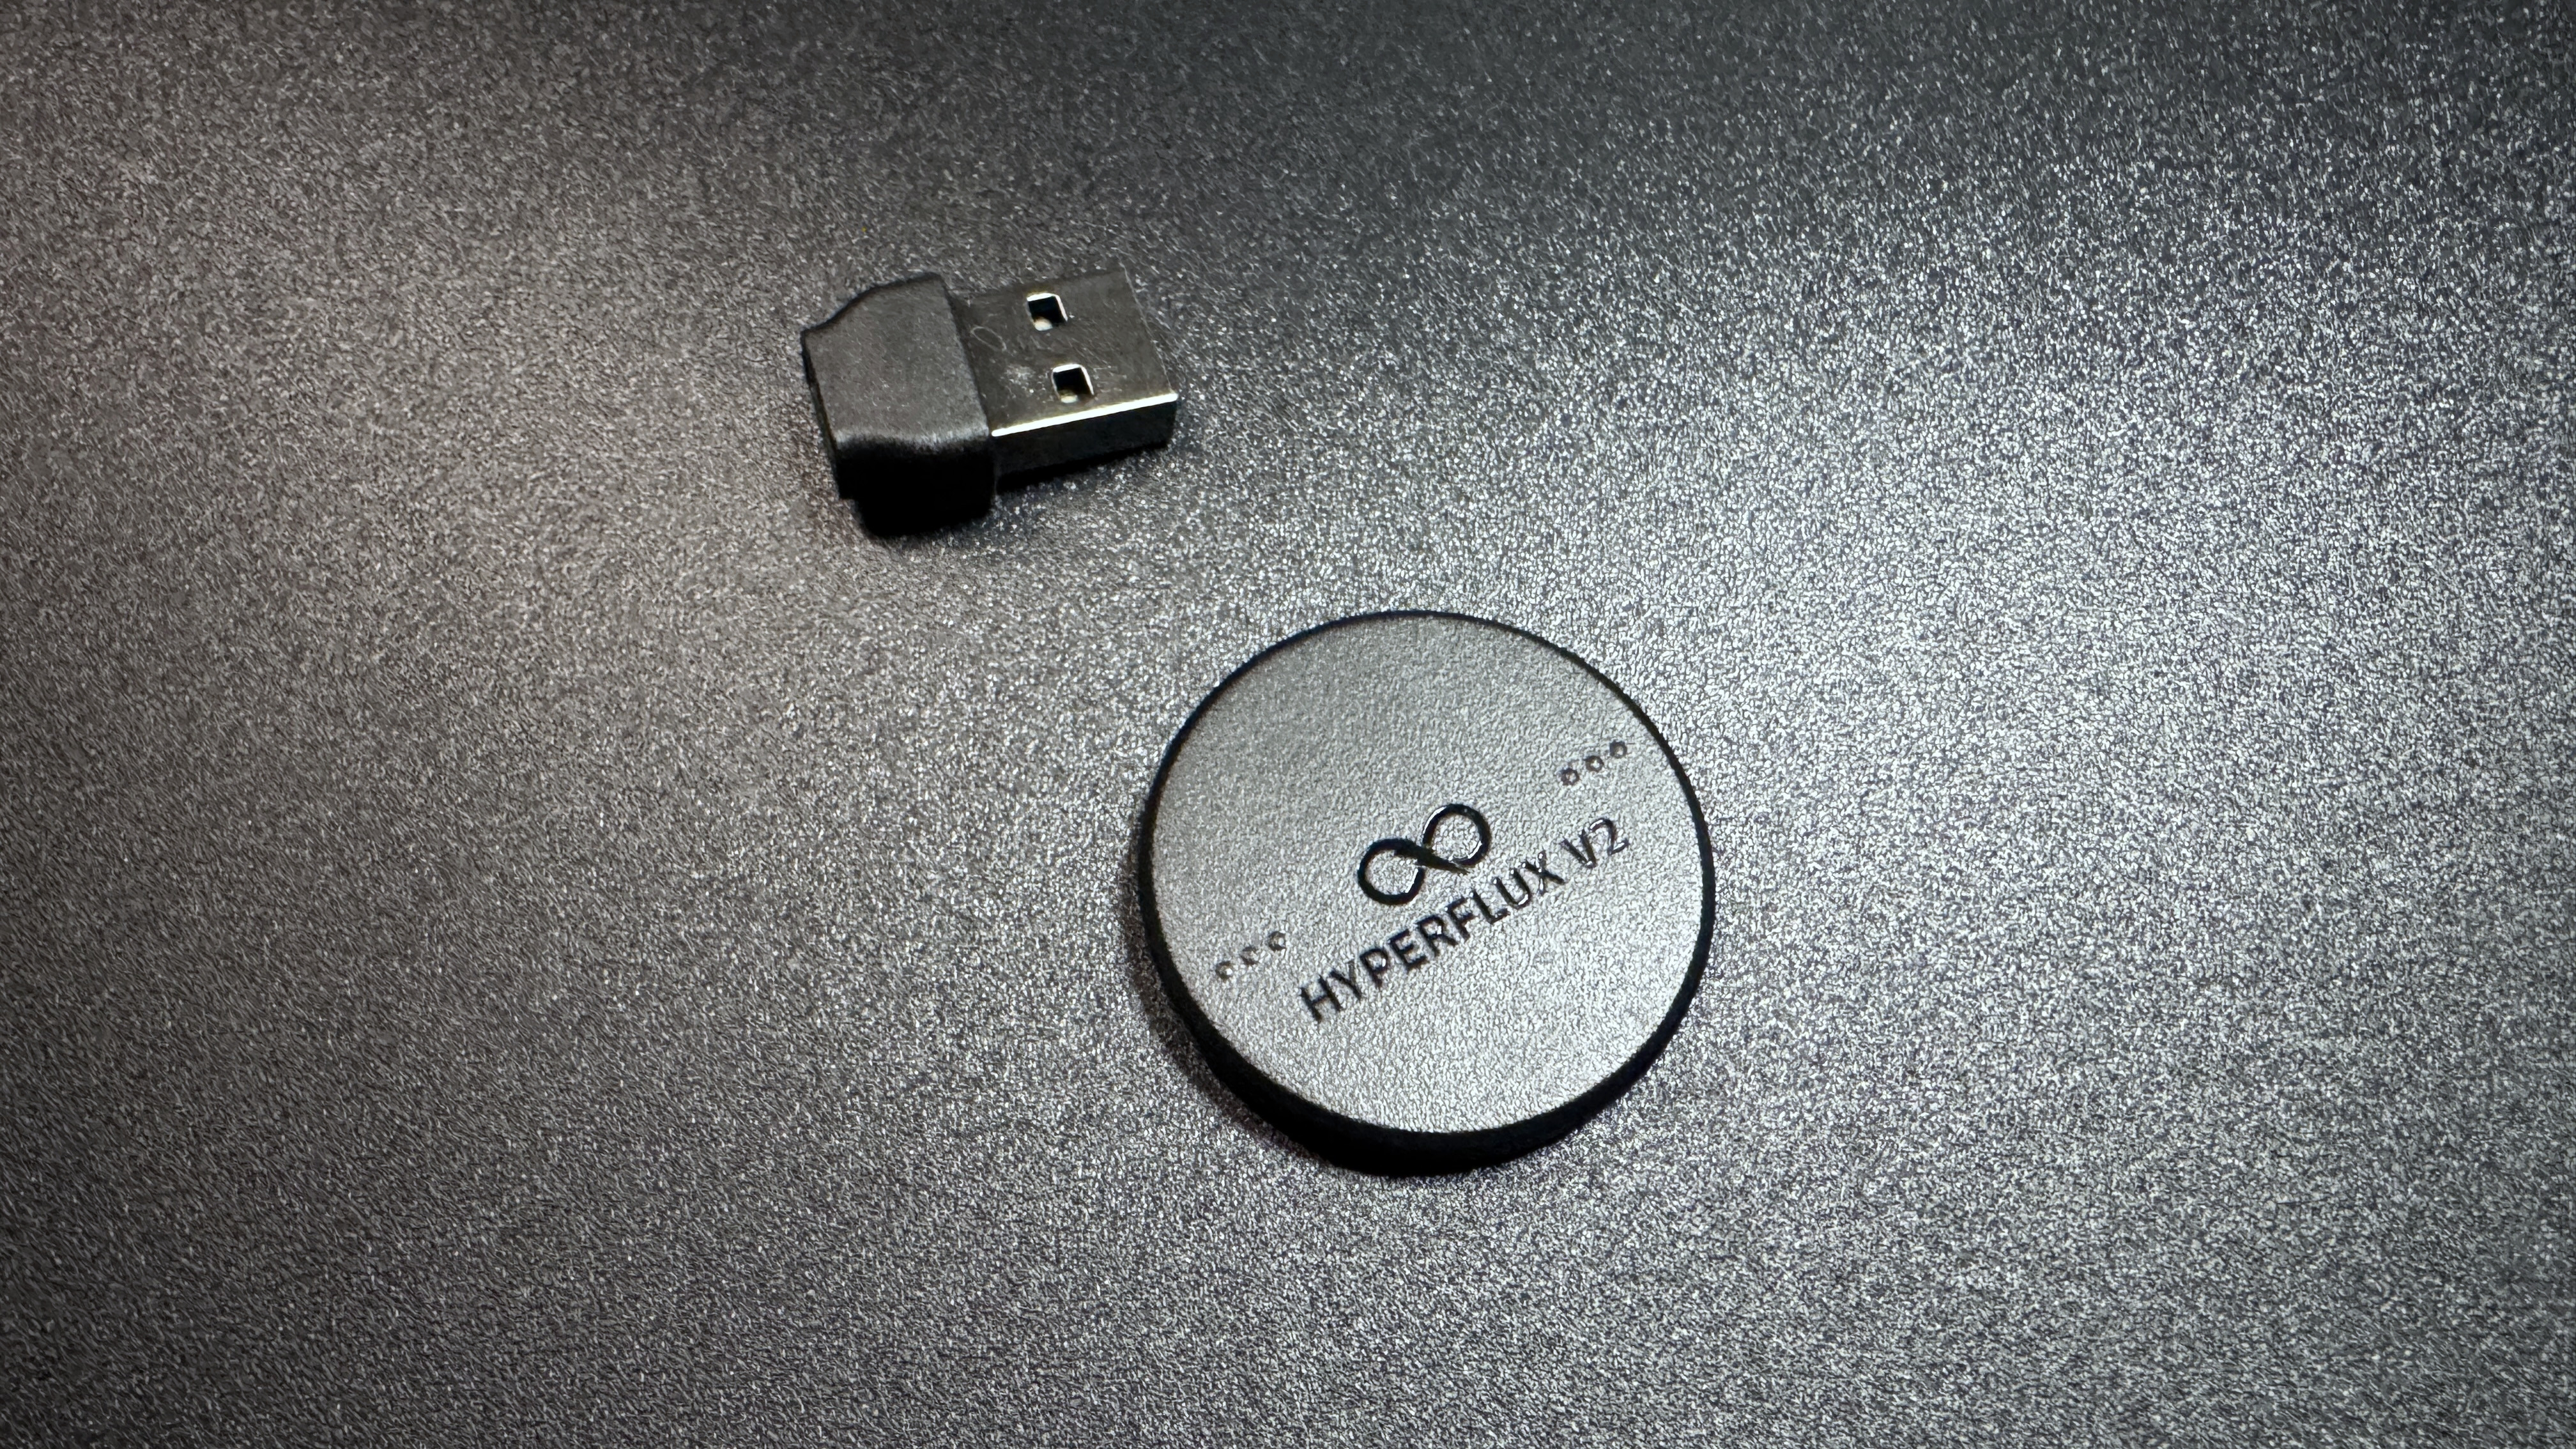
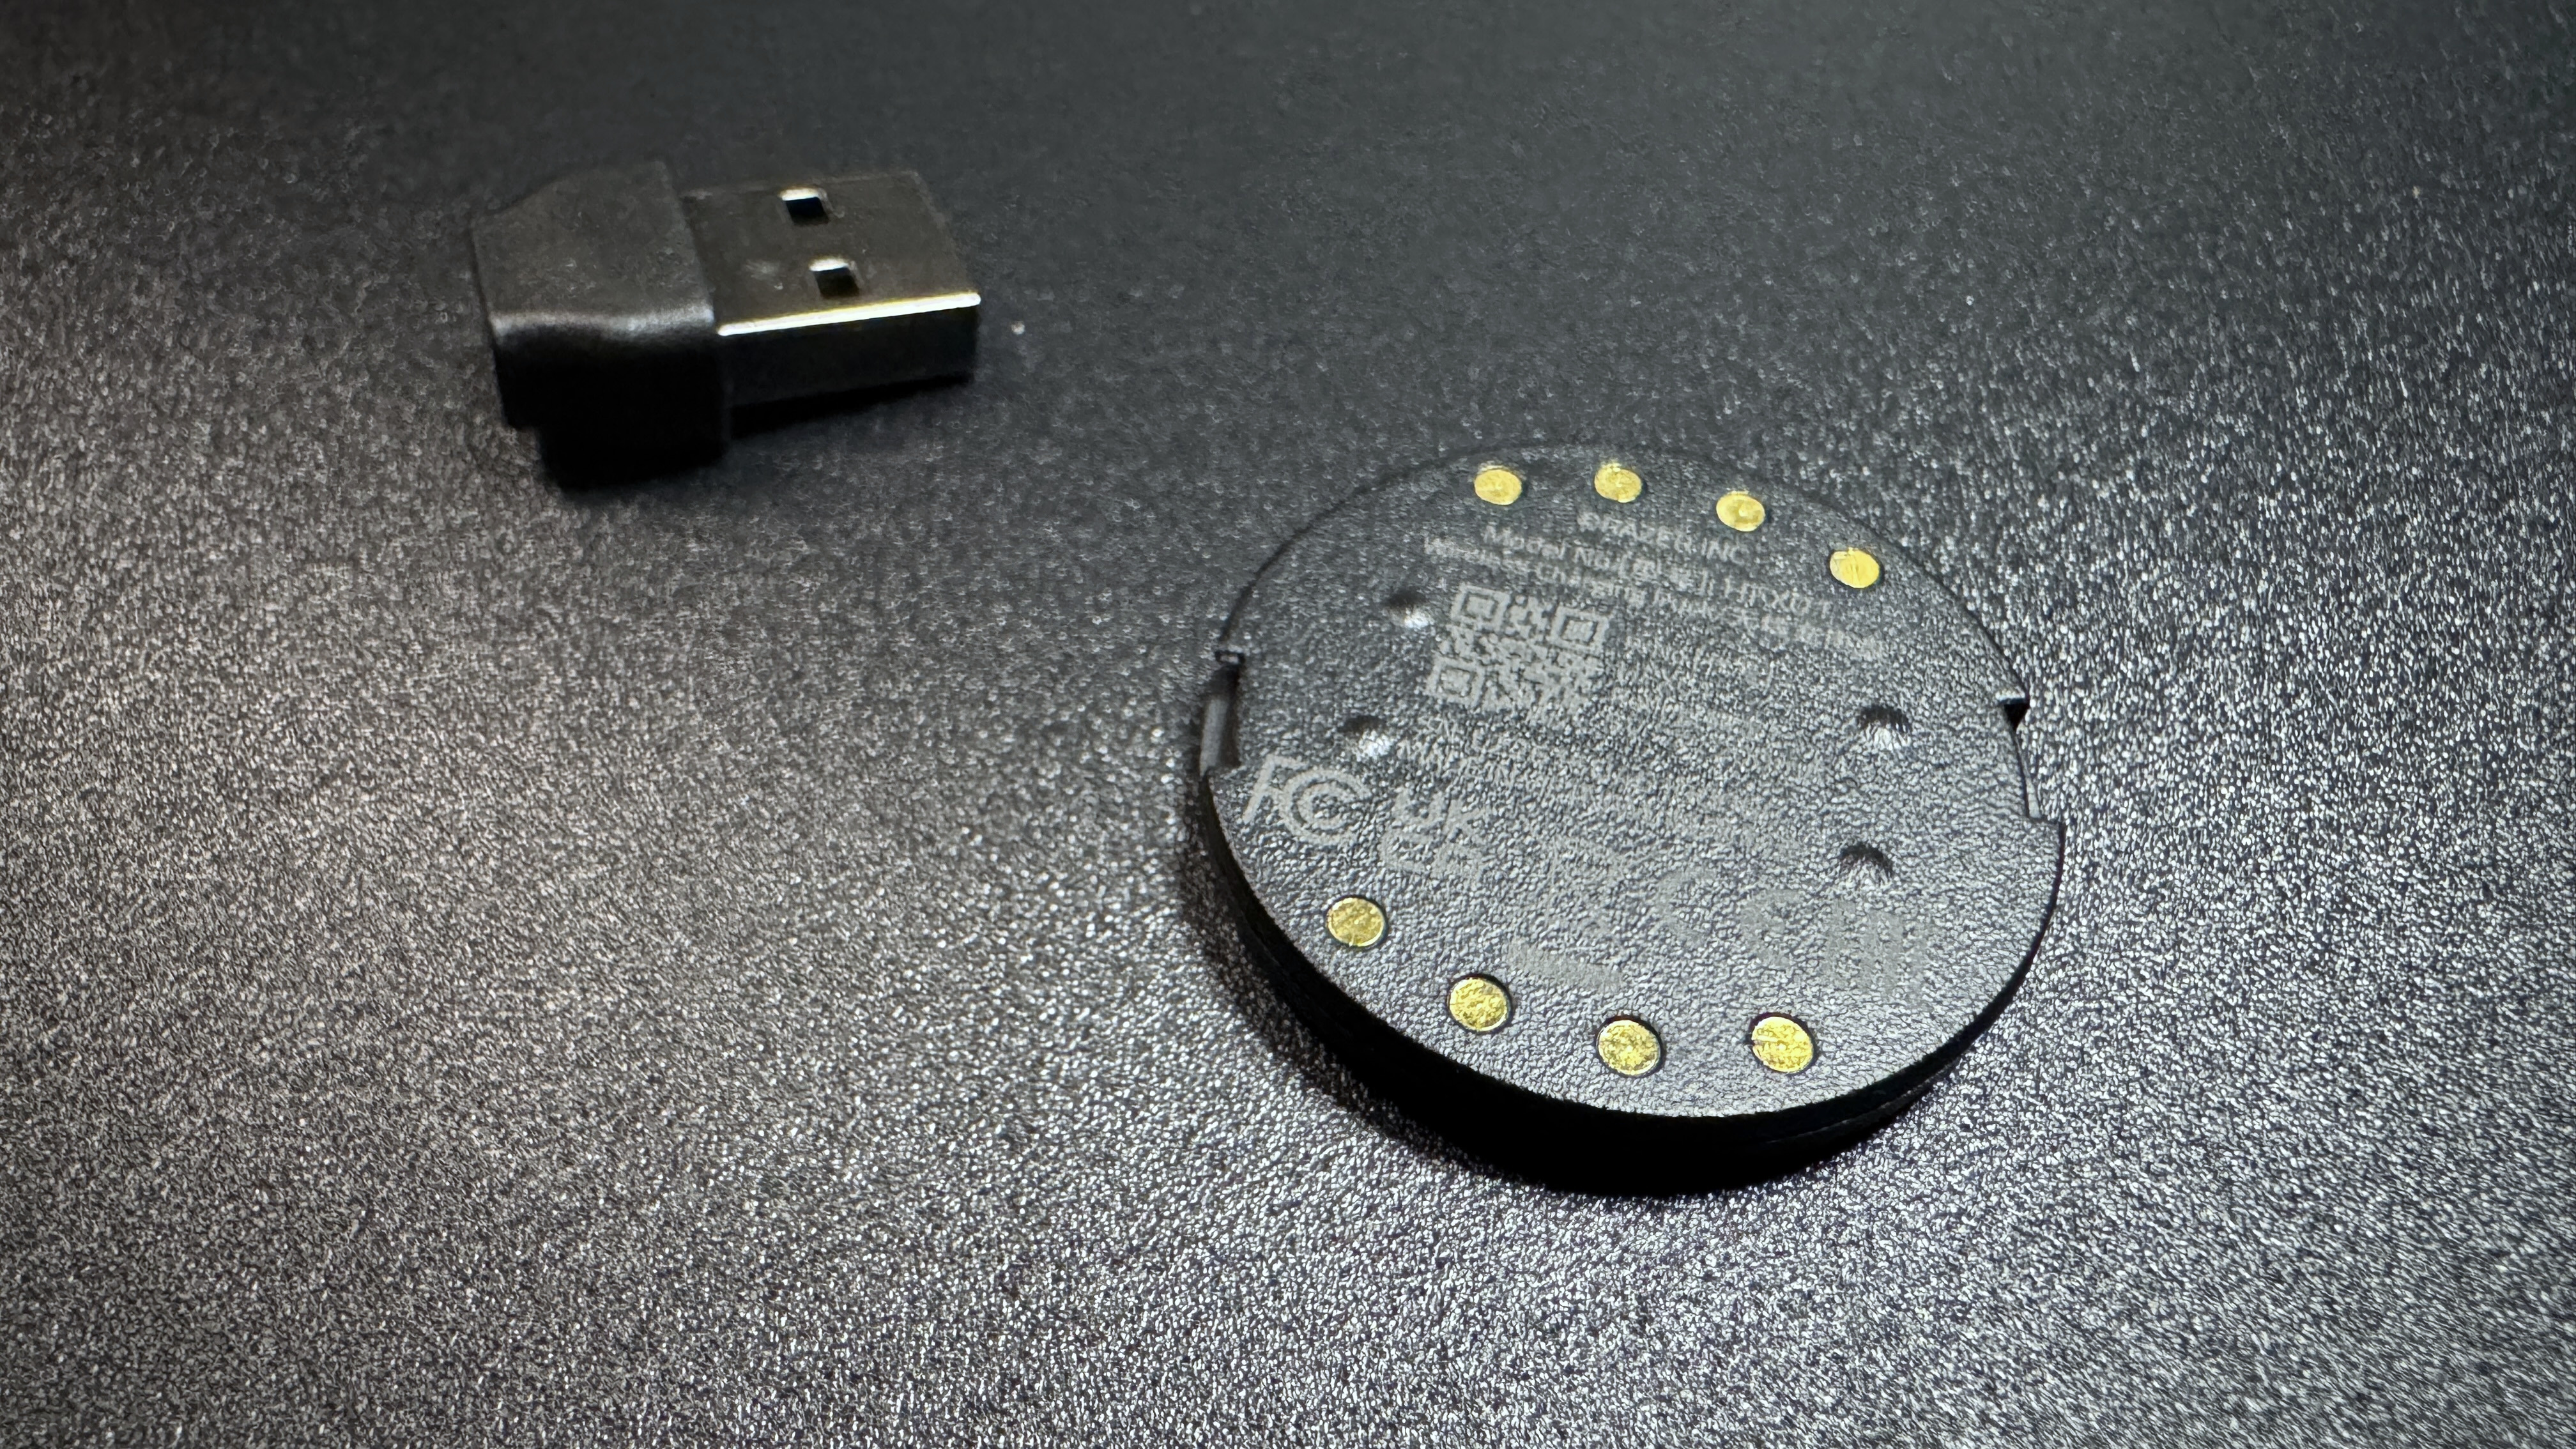
The HyperFlux V2 comes with just two accessories — a wireless charging puck and a USB-C to USB-A adapter, as the mouse pad has a non-detachable USB-C cable. The cable is similar to the non-detachable, rubber cable on the PowerPlay 2.

Specs

Surface

Hard (microtextured polycarbonate)

Cable

6ft / 1.8mm non-detachable, USB-C

Size (W x L x D)

16 x 12.24 x 0.2 inches / 360 x 311 x 5 mm

Price

$119.99

Release Date

June 2025

Performance of the HyperFlux V2

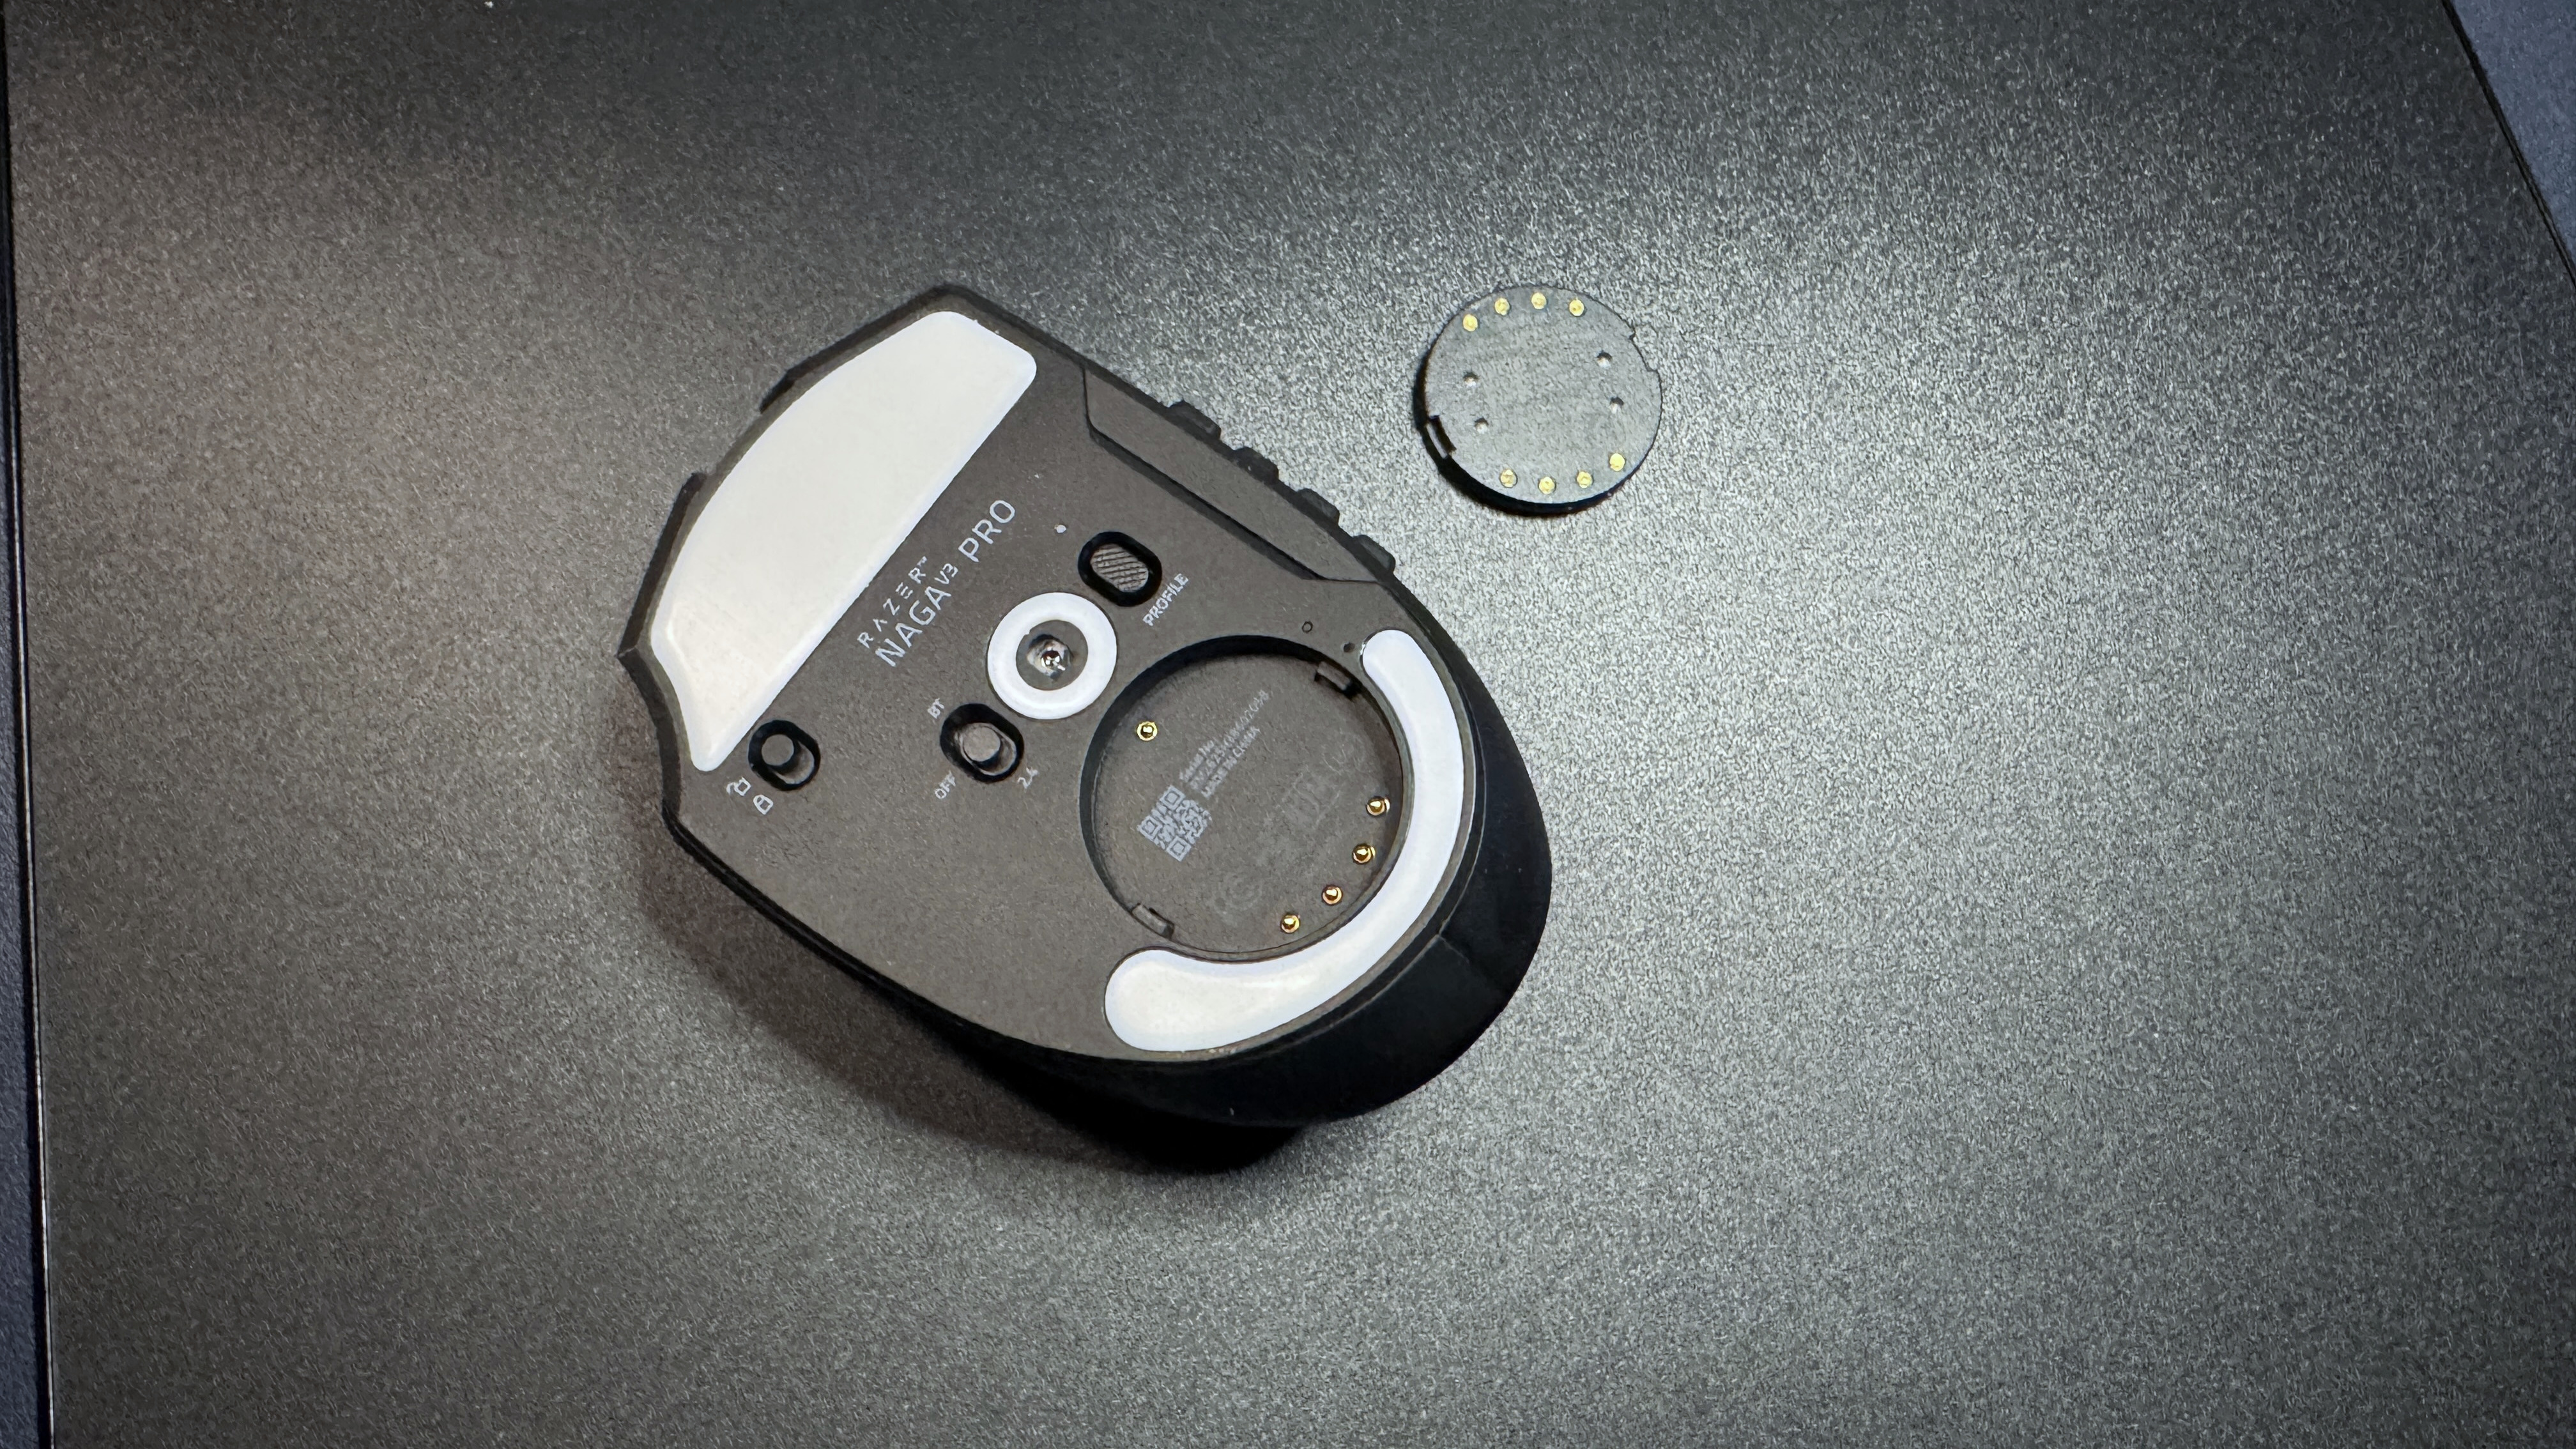
The point of the HyperFlux V2 is to eliminate the need for you to manually charge your wireless Razer mouse, and it executes this... exactly as expected. All you need to do is replace the puck on the bottom of your compatible wireless Razer mouse. I'm using the recently-launched Razer Naga V3 Pro, but other compatible mice include the Naga V2 Pro, the Basilisk V3 Pro, the Basilisk V3 Pro 35K, the Cobra HyperSpeed, and the Cobra Pro with the included wireless charging puck that comes with the HyperFlux V2. Then, place the mouse on the mouse pad and, assuming the mouse pad is plugged in, it will automatically detect the mouse and pair with it wirelessly. (I did have a minor hiccup with this process, but we'll talk about that later.)

Razer HyperFlux V2

(Image credit: Tom's Hardware)

I will point out that the HyperFlux V2 has a polling rate that tops out at the standard 1,000 Hz. If you want to get a higher polling rate, such as 4,000 or 8,000 Hz, with your mouse, you'll need to connect via Razer's HyperPolling Wireless Dongle ($40) or Razer's Mouse Dock Pro ($70), both of which are sold separately. You can still use the HyperFlux V2 as a wireless charging mat, even if you aren't connected through it.

As for the mouse pad's surface, I didn't have any complaints, but I also wasn't particularly impressed. The hard surface version of the HyperFlux V2 is hard, micro-textured polycarbonate with a slight sheen. It's designed for speed, and while it seemed fast enough, it wasn't anywhere near the smooth, speedy glide of a glass mouse pad such as Razer's Atlas. The mice I tested with it — the Naga V3 Pro and the Basilisk V3 Pro 35K — had no issues with tracking and accuracy, but that's not particularly surprising as the sensors in modern-day premium gaming mice are all pretty consistently great at tracking on any sort of traditional mouse pad surface. The surface is textured enough that precision wasn't an issue, though the mouse pad also comes in a cloth surface version for those who need just a little more control. And the full rubber backing ensured that the surface remained perfectly level at all times.

If you ignore the wireless charging part, the HyperFlux V2 is a decent mouse pad. It's not particularly impressive, exciting, or attractive to look at if you don't have a wireless mouse in need of charging. I do like the size. There's plenty of room for big mouse swipes, and the mouse pad still fits very easily next to a full-size keyboard setup. It's a few inches larger than the PowerPlay 2, and the difference in surface area is noticeable.

But let's be serious — you're buying this mouse pad for the wireless charging and connection. And it does do both of these things pretty seamlessly; it's definitely a "set it and forget it" type of product. But without the wireless charging/connection, you definitely wouldn't give it a second glance.

Features and Software of the HyperFlux V2

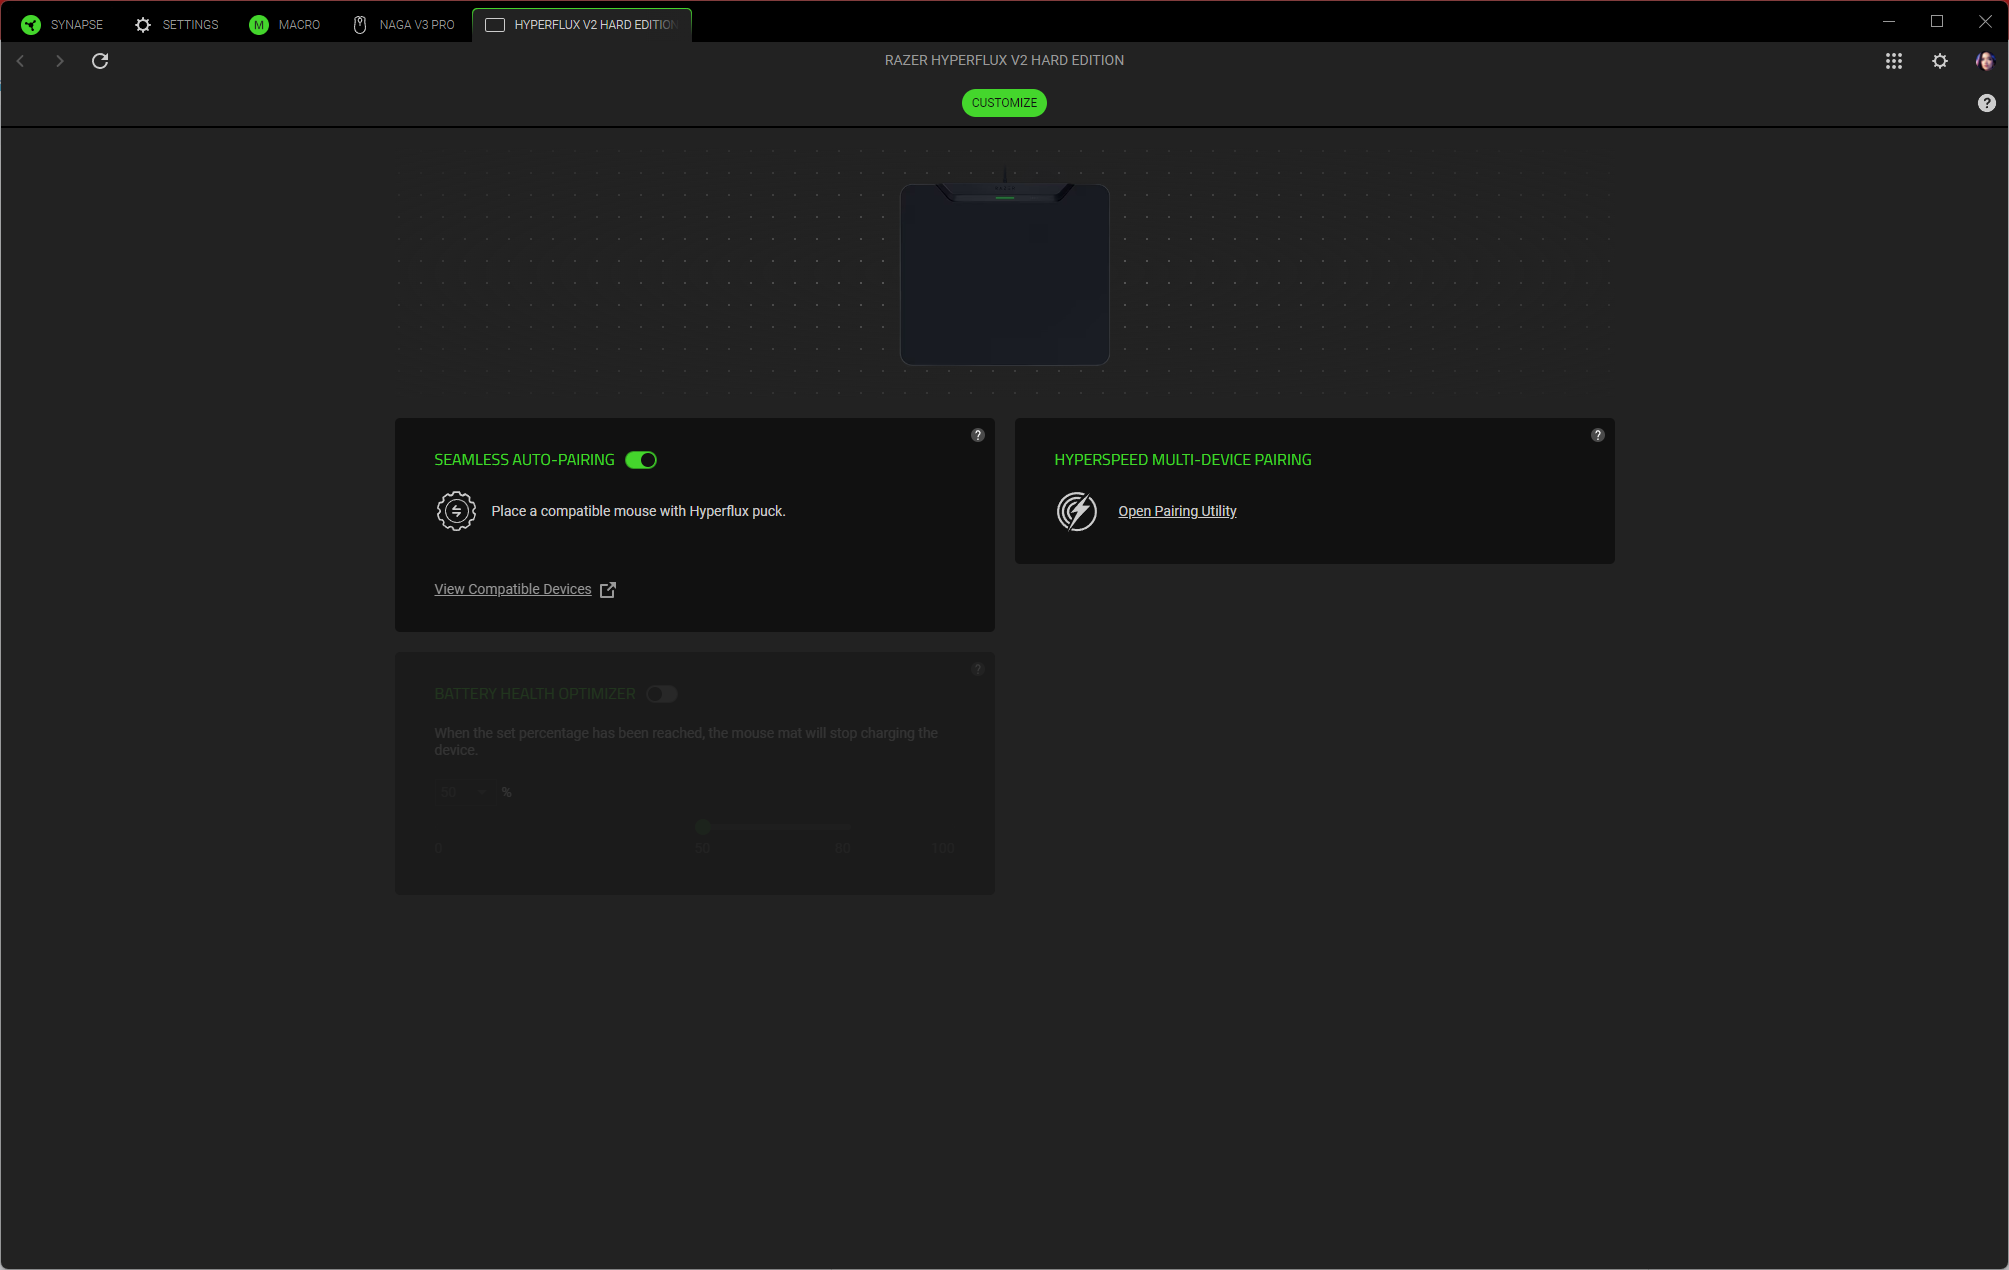
The HyperFlux V2 does connect to Razer's universal peripheral app, Synapse 4, even though it doesn't have a ton of customization options (it doesn't have any RGB lighting, for example). Still, it's useful for managing what devices are or aren't paired to the HyperFlux V2. The mouse pad features "seamless auto-pairing," which means all you have to do is put the charging puck in a compatible wireless mouse and place it on the mouse pad, and it should pair automatically.

Razer HyperFlux V2

(Image credit: Tom's Hardware)

This wasn't perfectly seamless for me, however, as I already had the Razer Naga V2 Pro with a wireless charging puck from the Razer Mouse Dock Pro inside it — and when I set it down on the HyperFlux V2 to put the charging puck in the Razer Naga V3 Pro, the mouse pad recognized and paired with the Naga V2 Pro. While the mouse pad is apparently compatible with other Razer charging pucks, it can only pair with one mouse at a time, so I had to unpair the Naga V2 Pro before I could pair the Naga V3 Pro (the Mouse Dock Pro puck also only appears to work for connecting, not charging).

Razer HyperFlux V2
Tom's Hardware
Razer HyperFlux V2
Tom's Hardware
Razer HyperFlux V2
Tom's Hardware

The HyperFlux V2 does support multi-device pairing, just not multi-mouse pairing. It can pair with a mouse (via the charging puck) and a compatible wireless Razer keyboard simultaneously, which lets you free up a USB slot.

There's also a battery health optimizer option in Synapse 4, which automatically turns off wireless charging when the mouse reaches a certain battery level percentage (adjustable, from 50% to 80%).

The Bottom Line

The Razer HyperFlux V2 works as intended — it charges compatible wireless Razer gaming mice as you use them, so you'll never have to worry about docking your mouse or plugging it in to keep the juice up. There's not a lot of competition on the market, aside from Logitech's PowerPlay 2, and there's basically no competition if you already own a Razer mouse.

The HyperFlux V2 shares some of the issues we didn't love on the PowerPlay 2; specifically, it feels a little cheaper, overall, than its $120 price tag would suggest. Like the PowerPlay 2, it has a non-detachable rubber USB-C cable and comes with a wireless charging puck that plugs into the bottom of your mouse. It's larger than the PowerPlay 2, though its charging module takes up more of the actual mouse pad real estate. Like the PowerPlay 2, it acts as both a wireless charging pad and a wireless receiver, and you can free up a couple of USB ports on your PC by connecting via this receiver. It can also simultaneously connect to a compatible wireless Razer keyboard, if you happen to be fully inundated in the Razer ecosystem.

Also like the PowerPlay 2, the HyperFlux V2 works best for those who are fully inundated in (or plan to be) the brand's ecosystem. At the end of the day, the best wireless charging mouse pad for you really comes down to which company made your wireless mouse of choice. Don't get me wrong, the HyperFlux V2 will remain on my desk for the foreseeable future, but only because my main mouse is the Razer Naga V3 Pro.

✇Tomshardware

Grab Keychron's compact K8 wireless mechanical keyboard for an all-time low of $34 — 87-keys, Gateron Red switches, and white backlight keeb is 56% off

SOLD OUT, BUT MORE DEALS AVAILABLE: This one proved popular! This model is already sold out, but Woot has similar discounts on a whole set of Keychron keyboards that are still on sale and in stock, starting from $24.99.

There are loads of budget mechanical keyboard options, but few companies do affordable clackers better than Keychron. And the company's 87-key mainstay, the Keychron K8, is on sale at Woot for the lowest-ever price of just $34.99 when you add the code KEYCRON. In fact, if you're a new Woot customer, the price drops $5 more to just $29!

For this surprisingly low sale price, you get a compact TKL layout, Gateron Red linear switches, and a white backlight – sorry, RGB fans. Note this is the Mac-specific model, but it of course supports both Windows and macOS, and Keychron includes extra keycaps for both operating systems. This model is also wireless, but solely via Bluetooth, so serious gamers will want to connect via the USB-C port for faster response times.

K8 Tenkeyless Wireless Mechanical for Mac: was $79.99 now $34.99
All-time low price with code KEYCHRON

This 87-key keyboard is nicely compact, sports Gateron Red linear switches, keycaps for both Mac and Windows, and a white backlight. It is wireless, but is Bluetooth-only, without an RF USB dongle. So you may want to plug the keyboard in while gaming.View Deal

This model sports a plastic chassis, rather than the metal of some pricier models. But it doesn't look or feel cheap. I used a similar (slightly more compact) Keychron K2 for years as my main keyboard for work and gaming, and it served me well until I upgraded to the prettier, more premium K8 HE last year. I've used three or four Keychron keyboards extensively over the past several years and have had no serious hardware issues with any of them. My original K2 even survived a soup spill (once I cleaned it and let it thoroughly dry before turning it on again) years ago.

When a keyboard like the Keychron K8 is on sale for just $34, there's no reason to opt for no-name budget options. You could certainly spend more and get something with magnetic switches, RGB, a volume knob, and a metal chassis. But if you spend less, you'll almost certainly wind up with something significantly worse than the Keychron K8.

✇Tomshardware

Physical media nostalgia sees fundraisers flock to Blu-Ray Kickstarter — drive with 9-in-1 dock achieves 160x funding goal halfway through campaign

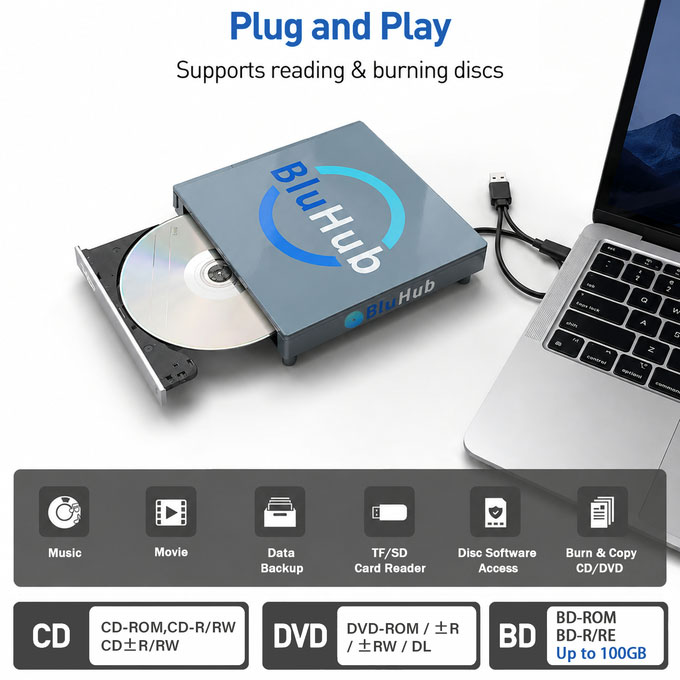
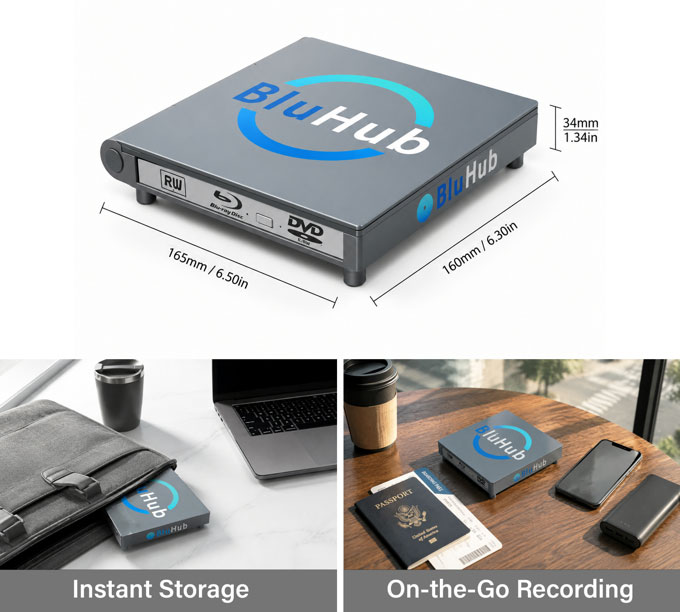
A Blu-ray drive has got tech fans excited over on Kickstarter. This project has hit 160x the initial (but low) funding goal just halfway through the campaign. The device that has caught plenty of eyeballs and pledges is the BluHub: 9-in-1 Blu-ray Hub for Memories, Ports & Storage, to give it its full, overly long title. We’ll just call it the BluHub from now. Why is it so popular? We think the combination of a USB-attached Blu-ray read/write drive (also DVD and CD compatible, of course) plus extensive docking abilities looks quite attractive. Its ‘super early bird’ price of $59 is not frightening either. But the cherry on top here may be the BluHub’s unique ‘grand piano styling.’

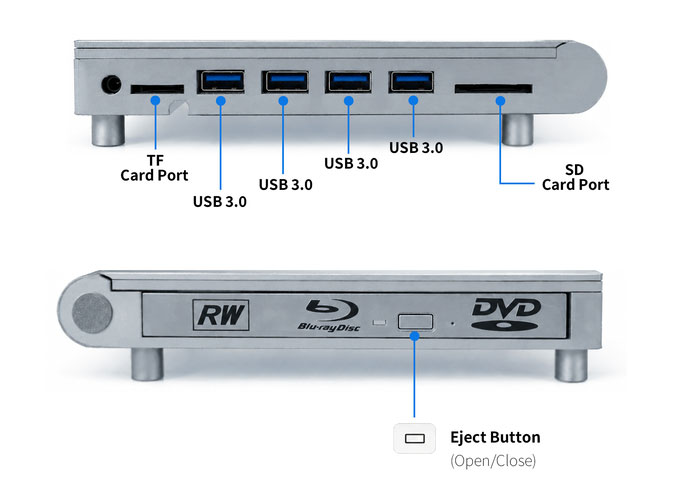
As a 9-in-1 device, there are a lot of specs to work through. So we’ve made a table to set out the capabilities of the BluHub as clearly and succinctly as possible.

BluHub specifications

Optical Drive

Blu‑ray / DVD / CD read & write, 6x Blu‑ray burning speed

Disc Handling

Standard disc tray plus ‘piano‑lid’ spare disc holder

USB Ports

4× USB‑A (USB 3.0)

Card Readers

SD and microSD slots, read speeds 160 MB/s+

Host Connectivity

Dual connectors: USB‑A and USB‑C

Data Rate (Host Link)

USB 3.2 Gen 2, up to 10 Gbps

Power

USB bus‑powered (no external PSU required)

Compatibility

Windows, macOS, Linux, Chrome OS, and mobile OTG

Chassis Material

Aluminum

Dimensions

165 x 160 x 34mm (6.5 x 6.3 x 1.34-inches)

Weight

409g (14.4oz)

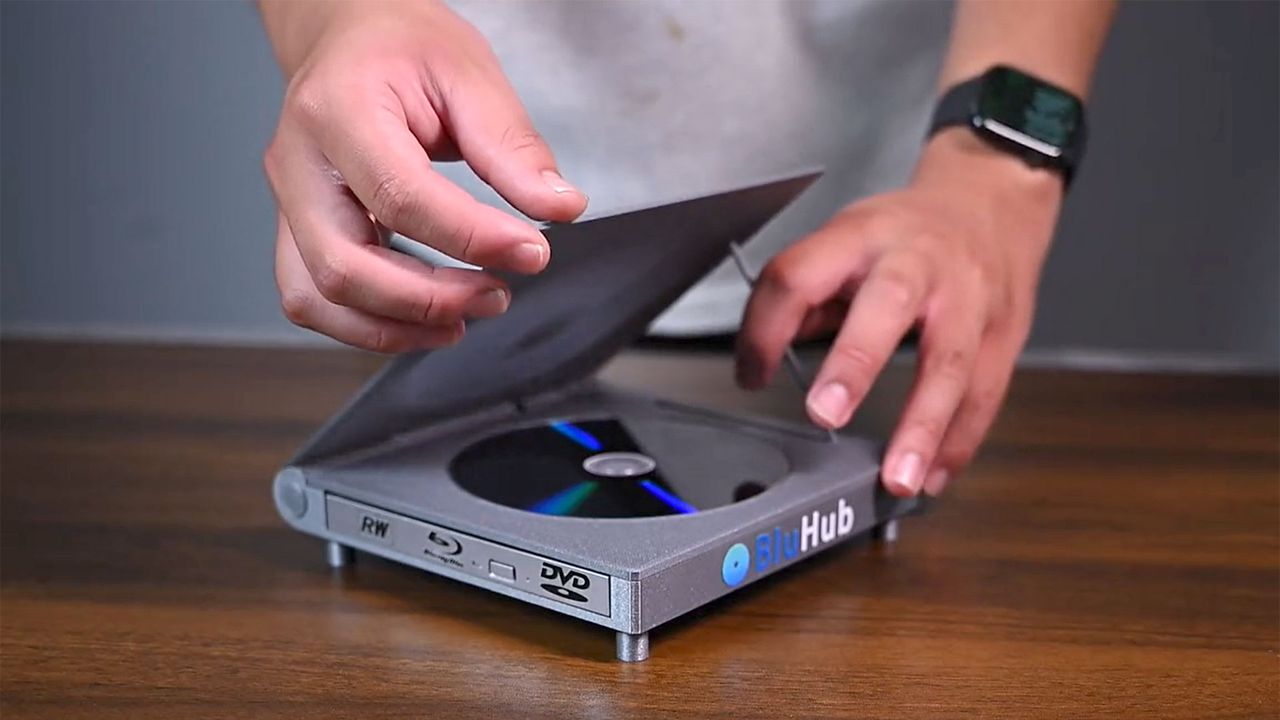
When I first saw this device, I naturally thought the optic disc exposed when the 'piano lid' was propped open was the one accessed by the computer. That rekindled my memories of owning an original PlayStation back in the day. However, that top tray is just a spare disc holder. The actual disc you will be reading / writing is inserted via a tray that pops out of the side, like from a slimline laptop drive of old. The device maker describes this as a “one in use, one on display dual-disc experience.” Might we suggest you keep a high-brow movie classic in the top display holder, like Jeanne Dielman, 23 quai du Commerce, 1080 Bruxelles (1975), while in the drive you can secret away your guilty pleasure of the day, something like Con Air (1997).

From the look of it and the specs, the BluHub seems like a reasonable choice for a flexible hub that can handle most of the optical discs you have in your collection. Of course, we’d recommend waiting for a review to make sure capability and quality promises live up to expectations. However, the crunch is that this drive is being offered to Kickstarter backers from $59. Very sensible folks who wait for retail availability and expert reviews are warned that it will subsequently cost from $129. The first batches of drives are expected to ship to backers starting November 2026, if all goes to plan. U.S. shipping for one drive is $6 or $7 to ROW.

Our customary crowdfunder disclaimer applies. Remember that crowdfunding a project is not a guarantee of receiving a finished product. Backing a crowdfunded project is akin to an investment; you believe in the project and want it to succeed. You are not purchasing a retail product.

BluHub portable Blu-ray hub
BluHub
BluHub portable Blu-ray hub
BluHub
BluHub portable Blu-ray hub
BluHub
BluHub portable Blu-ray hub
BluHub

Some reckon it is a good time to grab a Blu-ray drive such as this, with industry big hitters like Sony and LG showing signs of pulling back from this market. Media makers are also thinning out. There are plenty of alternatives to this BluHub already on the market though. For lesser-known Chinese Blu-ray read/write drives, a price of around $70 seems to be the going rate on Amazon.com. A drive from a well-known brand like Asus or LG will cost much more. The cheapest portable Asus Blu-ray rewriter we saw today is being sold for $159.

✇Tomshardware

Save $60 on Corsair's impressive 96% gaming keyboard with Elgato Stream Deck integration — the Vanguard 96 RGB features pre-lubed mechanical switches, sound dampening, a color LCD screen, and a full-size number pad

Desk space is an important commodity, and for some, it's an ongoing battle to keep as much free space as possible. Apart from regularly removing clutter, one thing that has popped up over the years is the minimization of keyboard sizes. Gamers have gotten used to sporting tiny 60% keyboards in an effort to free up more space for unhindered mouse movement, but what if you still want a useful keyboard for your day job that has a number pad and some function keys? Well, that's where this keyboard sits: the Corsair Vanguard 96 RGB has a discounted sale price of just $119.99 at Best Buy, a hefty $60 knocked off the $179.99 list price.

Check out this deal at Best Buy

The Corsair Vanguard 96 RGB mechanical gaming keyboard is a 96% keyboard that compacts the layout so it can fit a number pad, arrow keys, function keys, six G-keys (macro/elgato), an LCD screen, and even a rotary dial, all while keeping the overall dimensions of the keyboard around the standard size of a TKL (TenKeyLess) keyboard.

To achieve this compact form factor, some of the traditional key dimensions have changed, such as the zero key on the number pad and the removal of the right CTRL button. So a little muscle memory reprogramming may be needed to fully acclimatize to this keyboard.

Other features of the Corsair Vanguard 96 RGB include an 8000 Hz polling rate for super low-latency gameplay, pre-lubed Corsair MLX switches, a hot-swappable PCB (supports 3 & 5-pin switches), RGB lighting, four-layer sound-dampening foam and silicone, and Elgato Virtual Stream Deck integration.

Vanguard 96 RGB 96% Mechanical Gaming Keyboard: was $179.99 now $119.99
A compact and colorful gaming keyboard that squeezes in a full number pad, F-Keys, and G-Keys with Elgato Stream Deck integration. Place pictures or animated GIFs on the full-color LCD screen and easily control your volume with the rotary dial. Pre-lubed Corsair MLX switches offer a smooth gaming and typing experience with sound dampening to keep the key-clackiness to a minimum. View Deal

We haven't reviewed this particular model of the Corsair Vanguard, but we did cover the Corsair Vanguard Pro 96, which has the same layout and functionality as the Corsair Vanguard 96 RGB in today's deal, but uses Corsair's MGX magnetic switches instead of Corsair's MLX mechanical switches. So if you want a better idea of the keyboard in this deal, check out that review.

✇Tomshardware

Futuristic mosquito-zapping laser now available to buy, video shows device in action — tiny device shoots down bugs like a personal air defense system, but costs $1,000

We’ve seen many innovative projects crash and burn at the crowdfunding stage, but the Photon Matrix is one that has successfully made it to market. According to the company’s last Indiegogo update, it has started mass production of the anti-mosquito device and expects to ship the first devices later this month. You can also now purchase the Photon Matrix Infrared and Blue Laser Mosquito Air Defense directly from its website, so you don’t have to be an early supporter to get one.

The Photon Matrix has been a long time coming; it entered the crowdfunding stage last July. It promised to shoot down bugs within a six-meter radius across a 90-degree horizontal scanning plane. While it uses a laser beam to strike down mosquitoes, it uses LiDAR, mmWave radar, and an AI vision module to detect targets between 2mm and 20 mm in size moving at or below 3.3 feet per second (1 meter per second).

The manufacturer’s test videos suggest it's quite effective at shooting down these pesky bugs. Nevertheless, we want to see this product in the hands of independent reviewers and how it performs in the real world. If it works as intended, the Photon Matrix Laser Mosquito Air Defense unit could be a game changer for homes and hospitals, especially in places where mosquito-borne diseases remain a major threat to public health.

This gadget costs a pretty penny, though. The infrared laser version, designed for homes, costs $988, while the blue laser version, which is ideal for industrial use, costs $100 more at $1,088. There are also questions about the safety of using a laser device that can shoot down mosquitoes in close proximity to humans (especially human eyes), but the Photon Matrix has passed stringent certifications to ensure that it will not harm people, pets, and even birds that happen to fly across the device’s target range.

People have been thinking of ways to control mosquitoes for hundreds of years, especially since it was discovered that they are vectors of certain diseases that have killed millions. While chemical-based pesticides were somewhat helpful in keeping their numbers down, they also negatively affect human and animal health. This makes the mosquito air defense system an excellent alternative, as it protects only the area where it is deployed and doesn’t use noxious chemicals.

Another user has been building their own system using lasers, a DSLR, and an AI model to build their own mosquito zapper, although this is just a prototype and will likely take a few more years before it can compete against the Photon Matrix. We also saw an autonomous micro-drone that serves as a combat air patrol against mosquitoes with a range of 26 feet. While this might sound like a fun, novel solution, it will likely be noisy and quite disturbing, making the Photon Matrix a more practical solution for fixed deployments.

✇Tomshardware

Keychron launches ludicrous 100-key custom macro pad — 10 x 10 ‘keyboard’ uses ‘exclusive’ Keychron Apex switches and features per-key RGB control

Keychron, which is known for making some of the best mechanical keyboards, just announced the C100 8K macro pad, which is available on Amazon and the Keychron website for $64.99. This massive device features a 10-by-10 customizable keyboard, allowing you to set its functionality as needed (except for the four corner keys). It also uses exclusive pre-lubed Keychron Apex tactile switches, paired with transparent ASA keycaps, making it easier to see its per-key RGB lighting.

The C100 8K is not just any macro pad, though. It features hot-swappable switches, so you can easily replace the Keychron Apex switches with ones that you prefer. It also has an 8K polling rate, making it the perfect macro pad for high-stakes competitive matches. This makes it the perfect addition for those who need a macro pad for both gaming and productivity. The online Keychron QMK launcher also makes it easy to customize the keyboard without requiring you to install software directly on your PC.
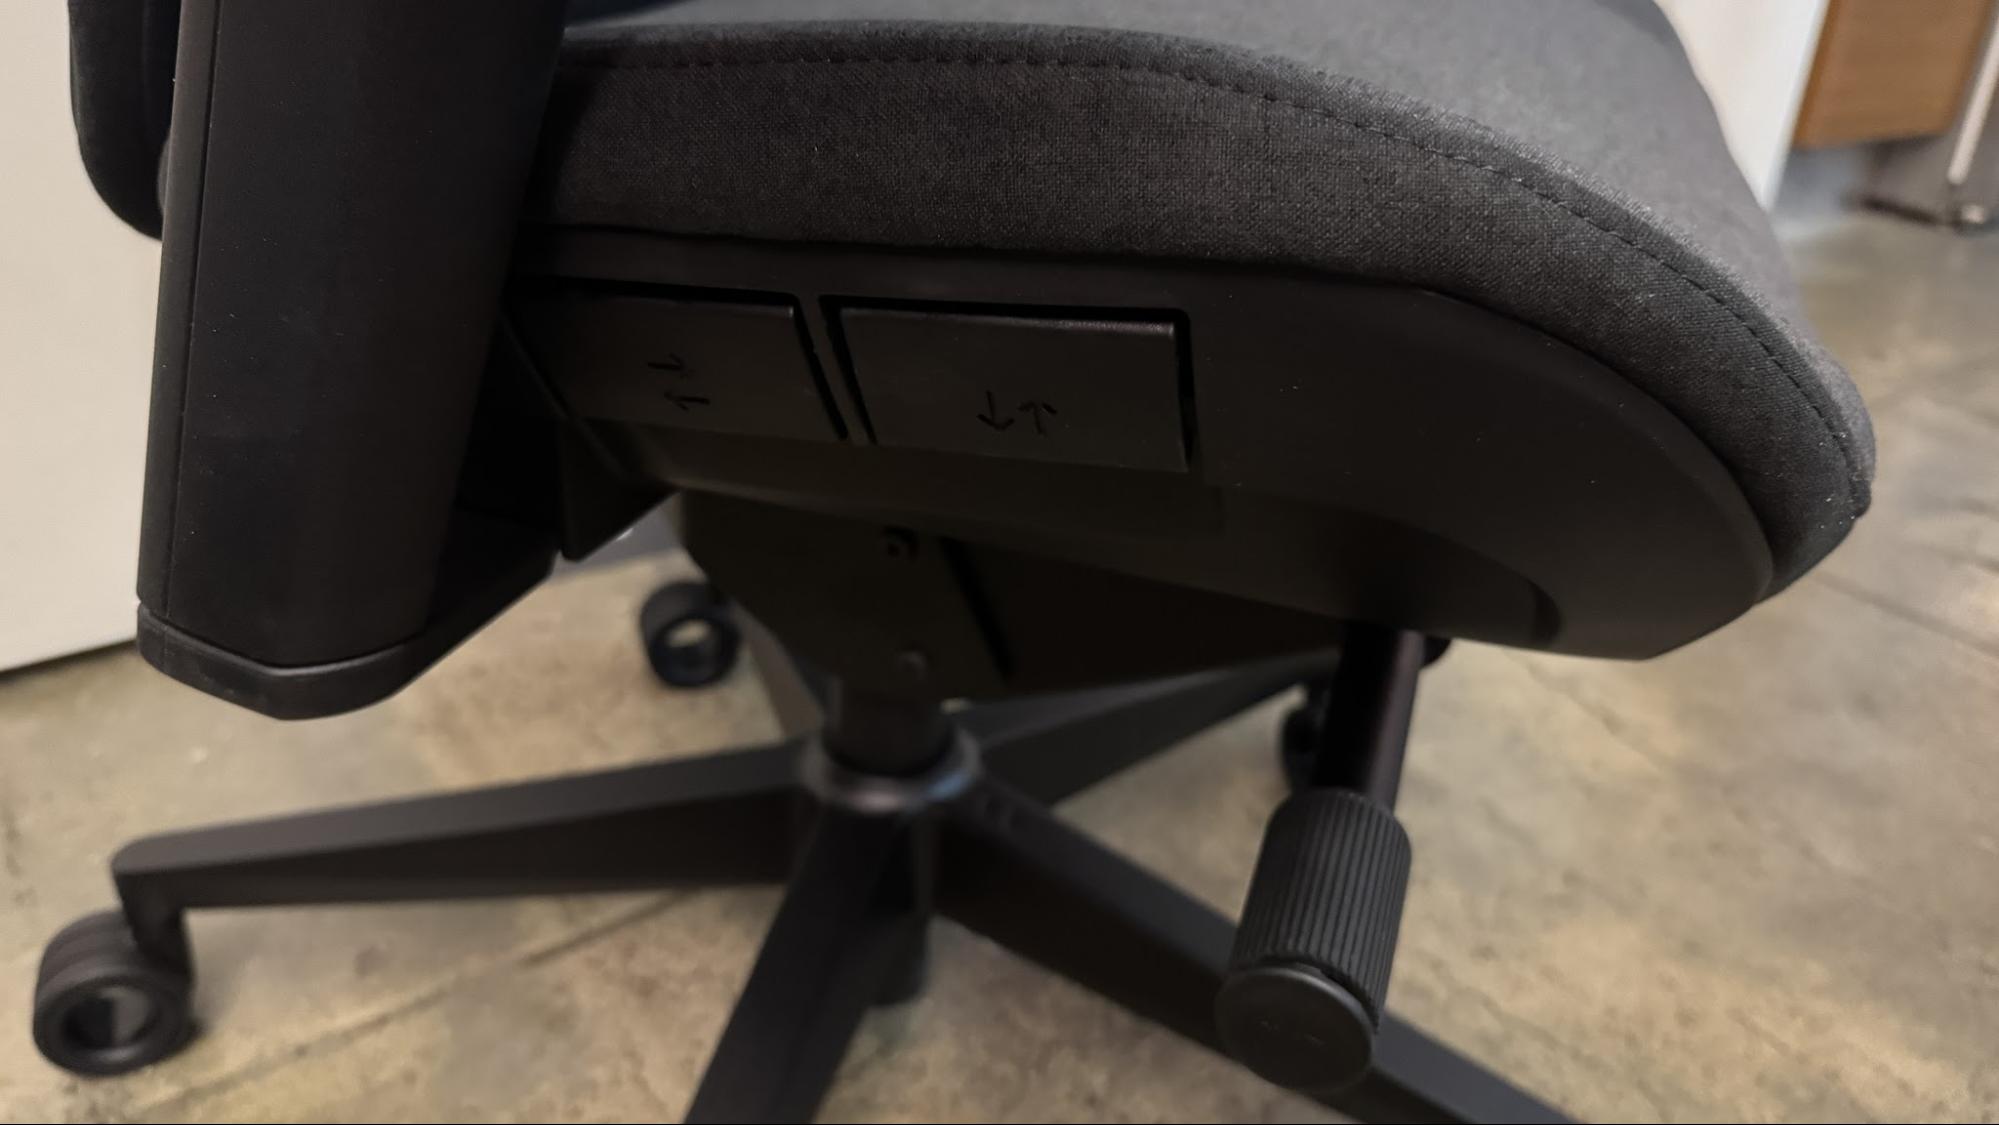
This macro pad is compatible with Windows, macOS, and Linux, meaning it will work with most major desktop operating systems. It’s the perfect addition for those who want to be more efficient and find that their MMORPG mouse still doesn’t offer enough buttons for their needs. Because Keychron is known for making some of the best wireless and budget mechanical keyboards, we have high expectations for the functionality and feel of the C100 8K. The only drawback that we can see is that it doesn’t come with a wireless option, so it might be annoying or even a no-go to those who want a wire-free desk.

100 keys might be overkill for most people, but these are actually crucial for those with specialized workloads. Aside from productivity enthusiasts and gamers who want to keep all complicated macros and commands at their fingertips, these are also useful for video editors who work on projects that have hundreds of layers, photo editors working on thousands of images, programmers who frequently input the same commands over and over again, and more. This is also great for sim enthusiasts who want to recreate all the buttons found in race cars, aircraft, trucks, and more, without spending more money on specialized panels. And if they have access to a 3D printer, they can even build their own specialized keycaps for the C100 8K macro pad, turning it from a generic macro pad into something that shows the actual buttons they use for their sims.

✇Tomshardware

This $57.99 8BitDo Ultimate 2 wireless controller is a brilliantly customizable option for PC gamers — fully customizable gamepad with Nintendo Switch compatibility includes dual triggers, TMR joysticks, and adjustable RGB lighting

There's a bargain on a gamepad for your PC or Nintendo Switch games console that you won't want to miss. This 8BitDo Ultimate 2 game controller is $57.99 right now, a 17% discount that nets you a flagship pad with precision TMR joysticks and an integrated charging dock.

Check out this deal at Amazon

There are a couple of variants of this game controller on sale, but specs-wise, they're pretty identical, with just a few differences in color and button design. Right now, this version is the cheapest, and it'll work great with any Windows PC out of the box. It's wireless, with 2.4GHz (available with the supplied dongle) and Bluetooth connectivity, but you can hook it up to your machine using USB if you prefer.

While Windows-compatible, this variant of the 8BitDo Ultimate 2 is also a Nintendo Switch controller at heart. It features built-in vibration and, for Switch users, motion control functionality that you can use in-game. Nintendo Switch 2 compatibility is offered, too, although that requires a quick firmware update to get things running smoothly.
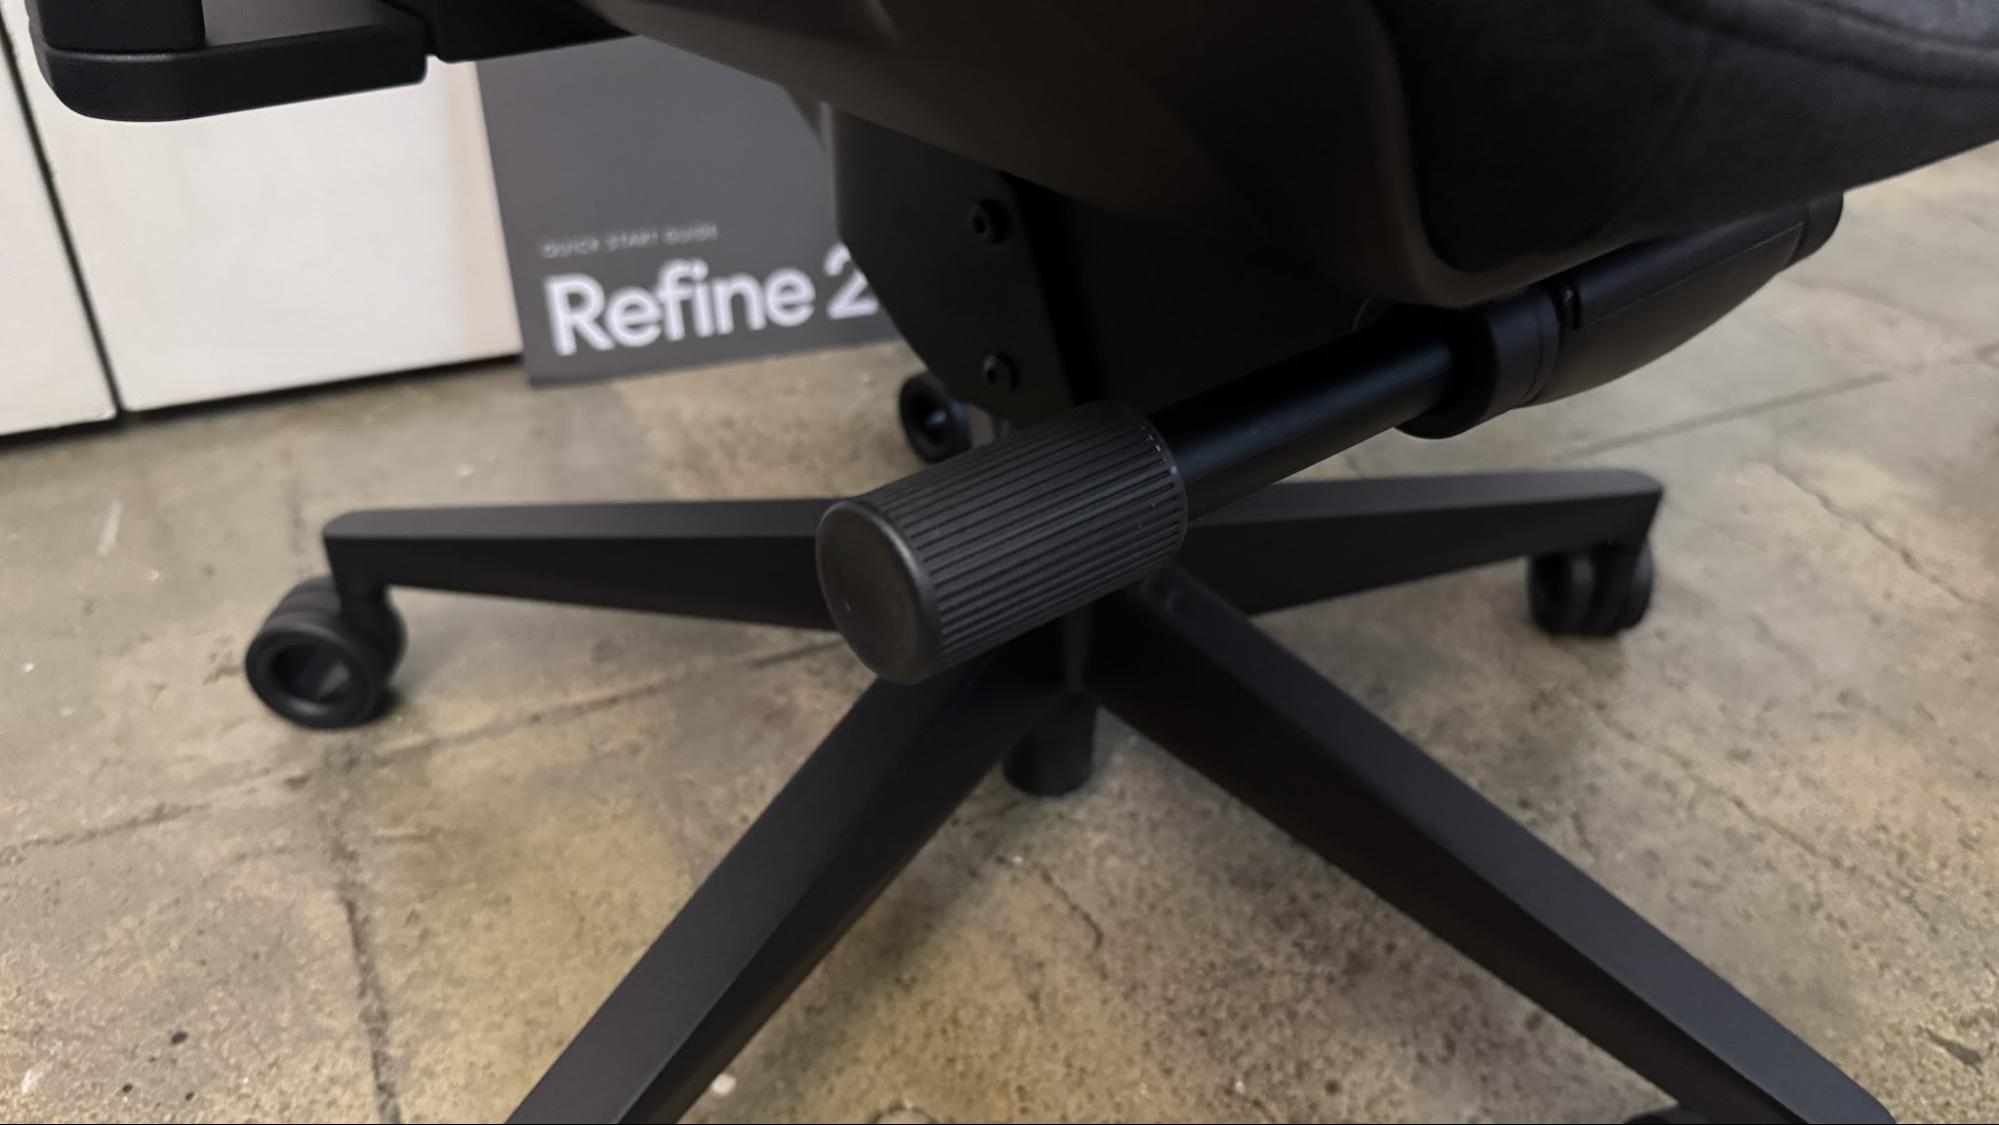
Ultimate 2 Bluetooth Controller for PC and Nintendo Switch: was $69.99 now $57.99
This 8BitDo Ultimate 2 wireless controller works with Windows PCs, laptops, and Nintendo Switch game consoles, with Switch 2 functionality requiring a quick firmware update. It has both linear Hall Effect and non-linear tactical triggers, which you can switch between, along with ultra-sensitive TMR joysticks, as well as a charging dock.View Deal
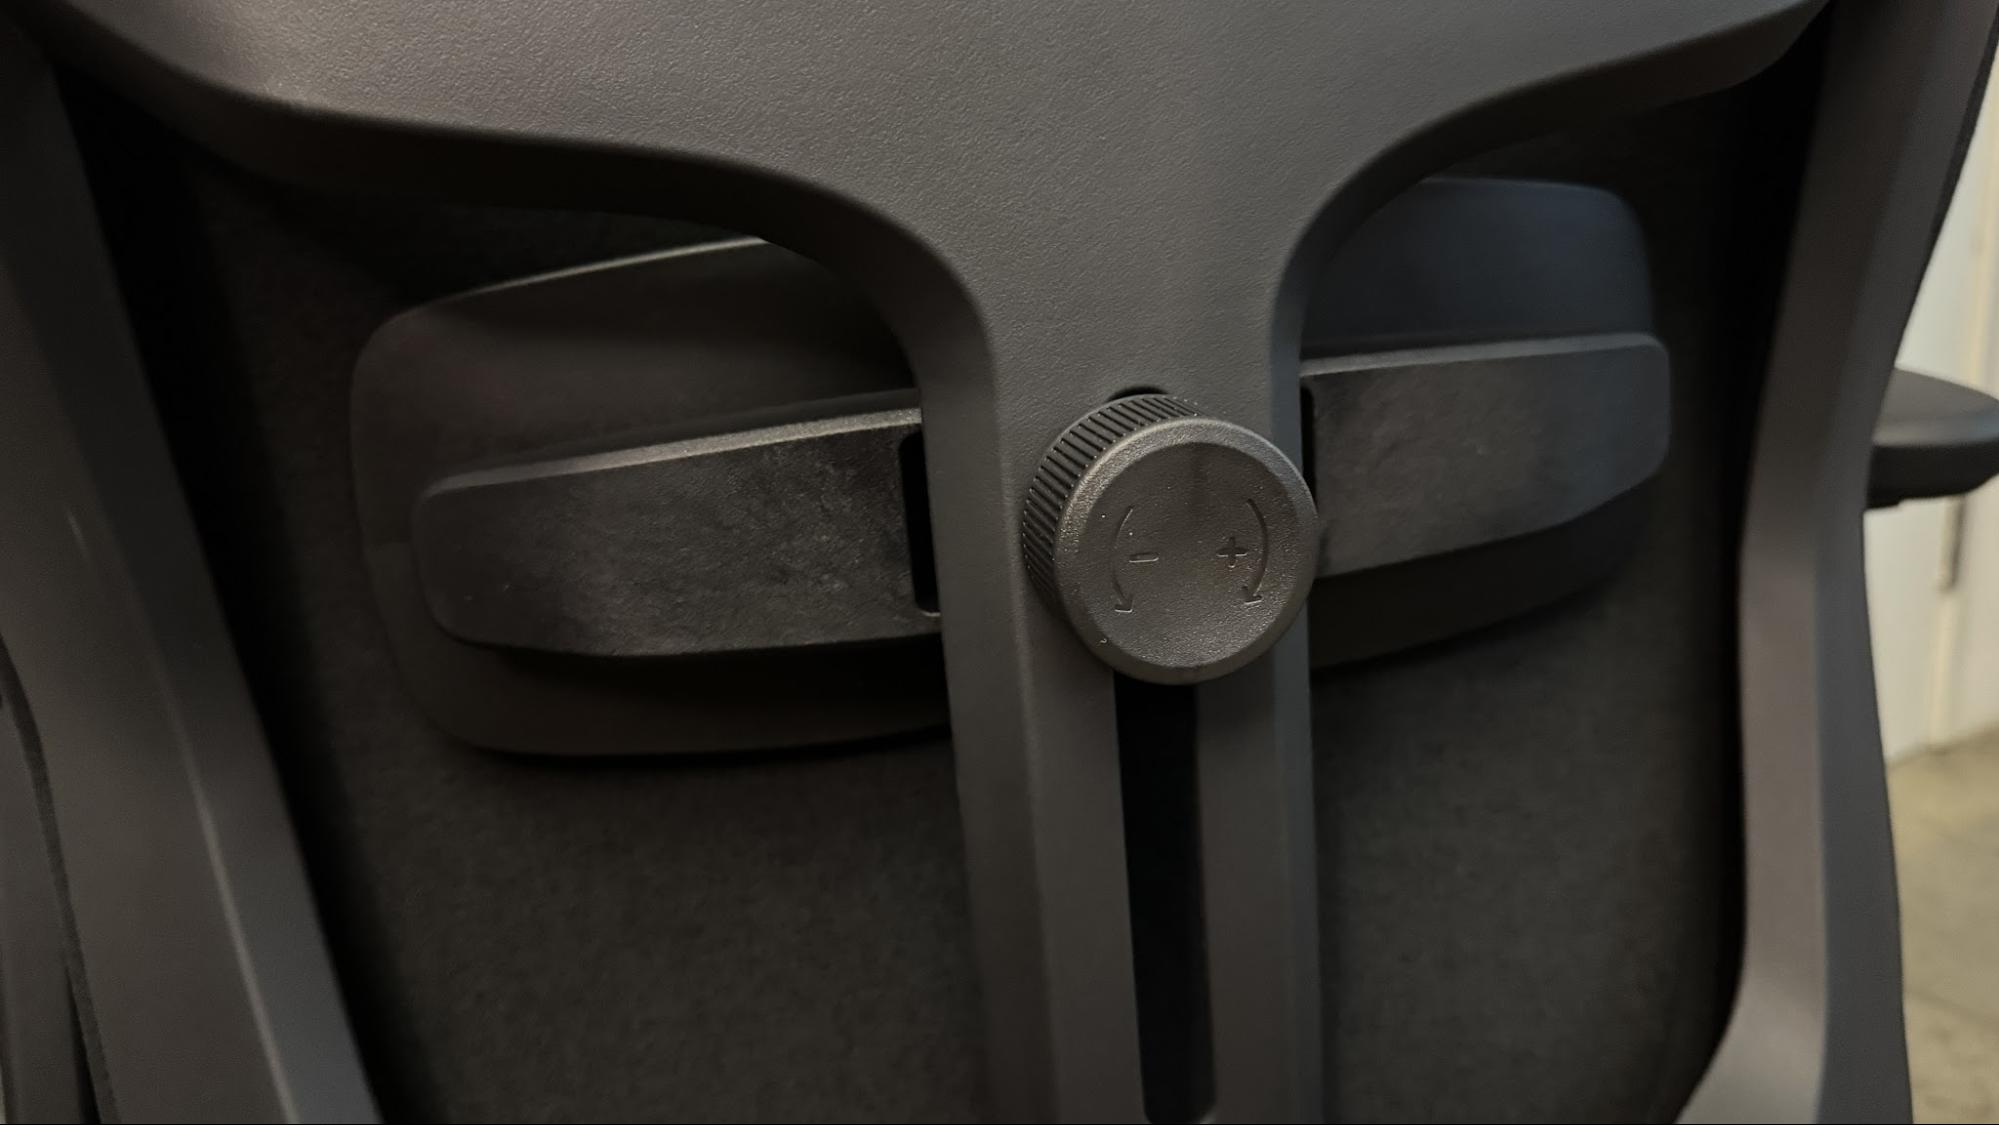
The 8BitDo Ultimate 2 features linear Hall Effect triggers, along with non-linear tactile triggers, with quick-switch sliders to let you choose between the two, depending on which you prefer. It's also the first 8BitDo controller to use TMR joysticks with higher sensitivity and greater precision.

This 8BitDo controller is fully customizable, too, thanks to its Ultimate V2 software, which lets you remap buttons, adjust stick and trigger precision, adjust vibration settings, and set up your preferred RGB lighting. You can also assign macros with long presses to certain keys.

A wireless controller means charging, but you don't need to swap out the batteries, as it comes with a charging dock. This looks good, works as a practical stand, and has a light to keep you updated on the charging process.

The $57.99 sale price for this 8BitDo Ultimate 2 game controller isn't the lowest we've seen, but it's still a good price with a decent discount for a gamepad that you can use across your devices. While it's rated for PC and Nintendo Switch, it'll work with your laptop for mobile gaming, and there's no reason why you couldn't use it with another handheld (with some setup) like the Steam Deck, too.

✇Tomshardware

Commodore re-releases TAC-2 joystick after 40 years for just $49 — says retro-controller is tougher than ever and now comes in five colorways

Commodore has brought back the “Totally Accurate Controller” joystick, better known by C64 and Amiga aficionados from the 80s as the TAC-2. In an email to Tom’s Hardware, a Commodore exec explained that used TAC-2s are becoming rare. “Secondhand units in decent shape go for $100 or more,” it was noted, so the decision was made to remake these controllers that have been out of production for more than 40 years. Commodore has sprinkled some worthwhile new and improved features on the TAC-2, too, pricing the new model at $49.99.

In addition to the observed shortage/skyrocketing pricing of used TAC-2 units on marketplaces like eBay, Commodore surveyed its fans before deciding to remake the TAC-2. Apparently, it was one of the top two suggestions from fans. The other one was “something called an ‘Amiga,’ whatever that is,” teased Commodore in its official press release. Amiga talks are ongoing, so a revamped 16-bit home computer isn’t ready yet.

The original TAC-2 controller was released in 1983 by a firm called Suncom and earned a reputation for durability, backed by manufacturer claims that units had been tested for 3 million moves without failure. It also earned a reputation for accuracy, and fire buttons on its left and right front corners made the TAC-2 a great choice for both right-handed and sinistral folk.

After securing exclusive trademark rights, Commodore has set out to not just remake but meaningfully enhance the TAC-2 for 2026. Starting from the outside, there’s the chicken-lips logo integration… That’s not all though, as Commodore has also decided to reissue the TAC-2 in five colorways. These include three options that mirror the C64 Ultimate, providing BASIC Beige, Starlight, and Founders (gold) color options. It has added LEDs in the clicky fire buttons of these models, too, which is new. Two further color options are C= White (like the C64C) and Knight Black, and “for purists,” these eschew the LEDs.

Commodore re-releases TAC-2 joystick after 40 years
Commodore
Commodore re-releases TAC-2 joystick after 40 years
Commodore
Commodore re-releases TAC-2 joystick after 40 years
Commodore
Commodore re-releases TAC-2 joystick after 40 years
Commodore
Commodore re-releases TAC-2 joystick after 40 years
Commodore

Beyond the cosmetics, it is good to hear Commodore has actually strengthened the assembly at the heart of this joystick. Apparently the original design used an automobile TR-418 tire valve assembly, but as these are “made with weaker, thinner copper today,” Commodore has fabricated its own steel shaft, boasting “we think ours is even stronger.”

Just like the original, the TAC-2 connects using a 9-pin controller port so will work with your original retro gaming hardware, including the C64 Ultimate. Commodore reminds those eyeing this stick that USB adaptors are easily sourced via various outlets, so you can use joysticks like the TAC-2 with modern PCs and devices. This joystick measures 101 x 101 x 114mm, weighs about 300g, and the supplied cable is 2 meters in length.

You can purchase a new TAC-2 for $49.99, or $64 for a limited Founders Edition with gold PVD accents. Pre-orders are open, and shipping will commence on October 20, 2026.

✇Tomshardware

Razer Naga V3 Pro Review: My new 23-button mouse

If you know anything about me, you know I love a mouse with 19+ buttons. That's why I've been using Razer's Naga V2 Pro as my daily driver for the past three and a half years — and I have no regrets; it's on our list of best gaming mice for a reason. Thankfully, Razer must've heard my V2 Pro begging for its life, because there's a new multi-button MMO mouse in town with up to 23 programmable buttons: the Razer Naga V3 Pro.

The Naga V3 Pro is very similar to its predecessor at a glance — because Razer hasn't changed the mouse's form factor at all. It still comes with three swappable magnetic side plates (in 2-, 6- and 12-button layouts), but that's where the similarities end. The new Naga V3 Pro sports Razer's latest Focus Pro 50K gen-3 optical sensor, which has a maximum sensitivity of 50,000 DPI and a maximum speed of 930 IPS, and can handle up to 90 G's of force. It's not cheap, as the Naga lineup never has been, with an MSRP of $180 — pricier than most premium flagship gaming mice because it is, after all, all about versatility.
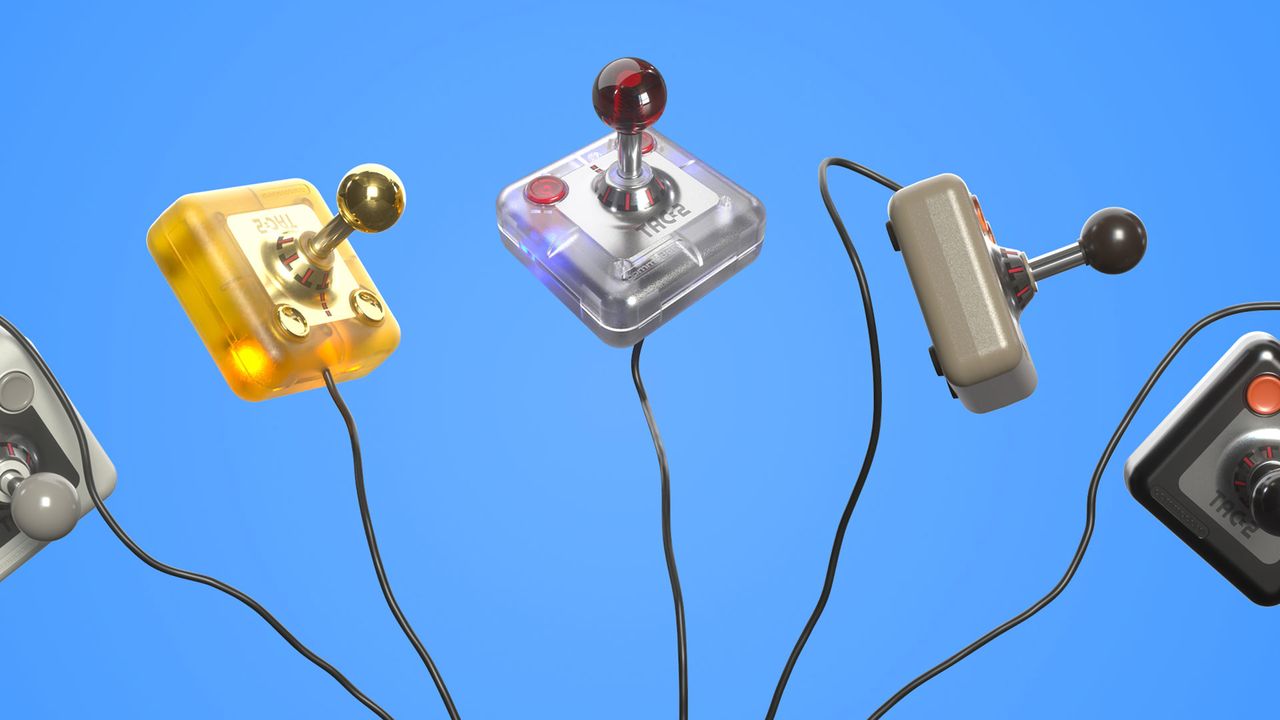
Design and Comfort

Like some of Razer's other new mice, the Naga V3 Pro has the exact same shape as its predecessor — it's a shorter, wider mouse than most flagship premium mice, measuring 4.7 x 2.97 x 1.72 inches (119.5 x 75.5 x 43.5mm). It's still a larger mouse overall, just a different shape. It has a right-handed ergonomic shape with a contoured thumb area, with interchangeable plates and a curved ring finger rest on the right side. It has a matte black plastic shell and features three RGB light zones in the scroll wheel, the logo on the palm rest, and on the side panel.

Razer Naga V3 Pro
Tom's Hardware
Razer Naga V3 Pro
Tom's Hardware
Razer Naga V3 Pro
Tom's Hardware
Razer Naga V3 Pro
Tom's Hardware

The mouse weighs slightly less than its predecessor: 3.9 ounces (112g) without the side plate or cable attached; the side plates weigh 20g (12-button), 17g (6-button), and 15g (2-button). The Naga V2 Pro weighed 134g regardless of the side plate. Its side plates — which are the same 12-button, 6-button, and 2-button layouts as the side plates from the Naga V2 Pro — now feature more durable double-shot molded keycaps, so they should last longer and the legends should remain crisp and readable throughout the mouse's lifetime (not that anyone is really looking at the legends on their mouse buttons).

Razer Naga V3 Pro

(Image credit: Tom's Hardware)

The mouse has three buttons the Naga V2 Pro doesn't have — in addition to its primary left/right buttons, tilt wheel, two buttons above the tilt wheel, and profile switch on the bottom. There are now two edge buttons on the left side of the left mouse button (set by default to scroll up and down through DPI steps) and the ring finger rest has also been turned into a button (set by default to activate Razer's HyperShift for multi-layer inputs). I didn't have any problems with accidentally pressing the ring finger rest button, but there is a locking switch that lets you quickly disable it (it actually stops it from clicking at all, which is nice) if you do have issues.

Razer Naga V3 Pro
Tom's Hardware
Razer Naga V3 Pro
Tom's Hardware
Razer Naga V3 Pro
Tom's Hardware

The Naga V3 Pro has a multi-mode tilt wheel with three distinct modes: tactile, free-spin, and precision tactile. The scroll modes can be toggled off, but they aren't fully configurable like the customizable scroll feature in the Naga V2 Pro. This seems fine, though — the customizable scroll feature in the Naga V2 Pro seemed like overkill to implement with very minor benefits, and I prefer just a few distinct modes to something that you can fully customize.

That said, I kind of wish the distinct modes had been slightly better implemented, as I found the free scroll to be especially over-sensitive — even just resting my finger next to the scroll wheel often caused it to activate. There's a setting in Synapse 4 that automatically switches over to free scroll mode when you're scrolling fast enough, but I didn't like this because there's an audible click every time it switches. The button directly next to the wheel is set to move through scroll modes by default, while the button above that is set to open up Razer's AI Prompt Master.

Razer Naga V3 Pro

(Image credit: Tom's Hardware)

On the bottom of the mouse, you'll find a power switch, a programmable profile switch button, and the ring finger rest lock, as well as PTFE mouse feet and a dummy mouse puck that can be swapped in with charging pucks from Razer accessories.

Razer Naga V3 Pro

(Image credit: Tom's Hardware)

In the box, the Naga V3 Pro comes with a 6-foot (1.8m) braided USB-C to USB-A cable, three interchangeable side plates, a USB-A dongle, and a USB-A to USB-C adapter. The cable is braided but it's fairly stiff — it's definitely not flexible or drag-free, like Razer's HyperFlux cables it usually bundles with its mice. You can use it as a mouse cable, but you probably won't want to.

Specs

Sensor Model

Razer Focus Pro 50K Gen-3

Max Sensitivity

50,000 DPI

Max Speed (IPS)

930 IPS

Max Acceleration

90 Gs

Polling Rates

Up to 8,000 Hz*

Programmable Buttons

Up to 23

LED Zones

3

Cable

6ft / 1.8m, detachable braided USB-C to USB-A

Connectivity

2.4GHz wireless, Bluetooth, wired (USB-C)

Measurements (L x W x H)

4.7 x 2.97 x 1.72 inches / 119.5 x 75.5 x 43.5 mm

Weight (excluding cable)

3.9oz / 112g without side plate; side plates weigh 20g (12-button) / 17g (6-button) / 15g (2-button)

MSRP / Price at Time of Review

$179.99

Release Date

Aug. 11, 2026

Performance

The Naga V3 Pro features Razer's latest Focus Pro 50K Gen-4 optical sensor, which has a maximum sensitivity of 50,000 DPI and a maximum speed of 930 IPS, and can handle up to 90 G's of force. These are kind of crazy specs for a mouse considering most people won't use a DPI above 3,200 or so — what you need to know is that it's a great sensor that tracks across a variety of surfaces with excellent accuracy. It's speedy, too, though this is not the kind of mouse most people will be moving around lightning fast and picking up, as it's more than twice the weight of ultra-lightweight mice such as Razer's DeathAdder V4 Pro.
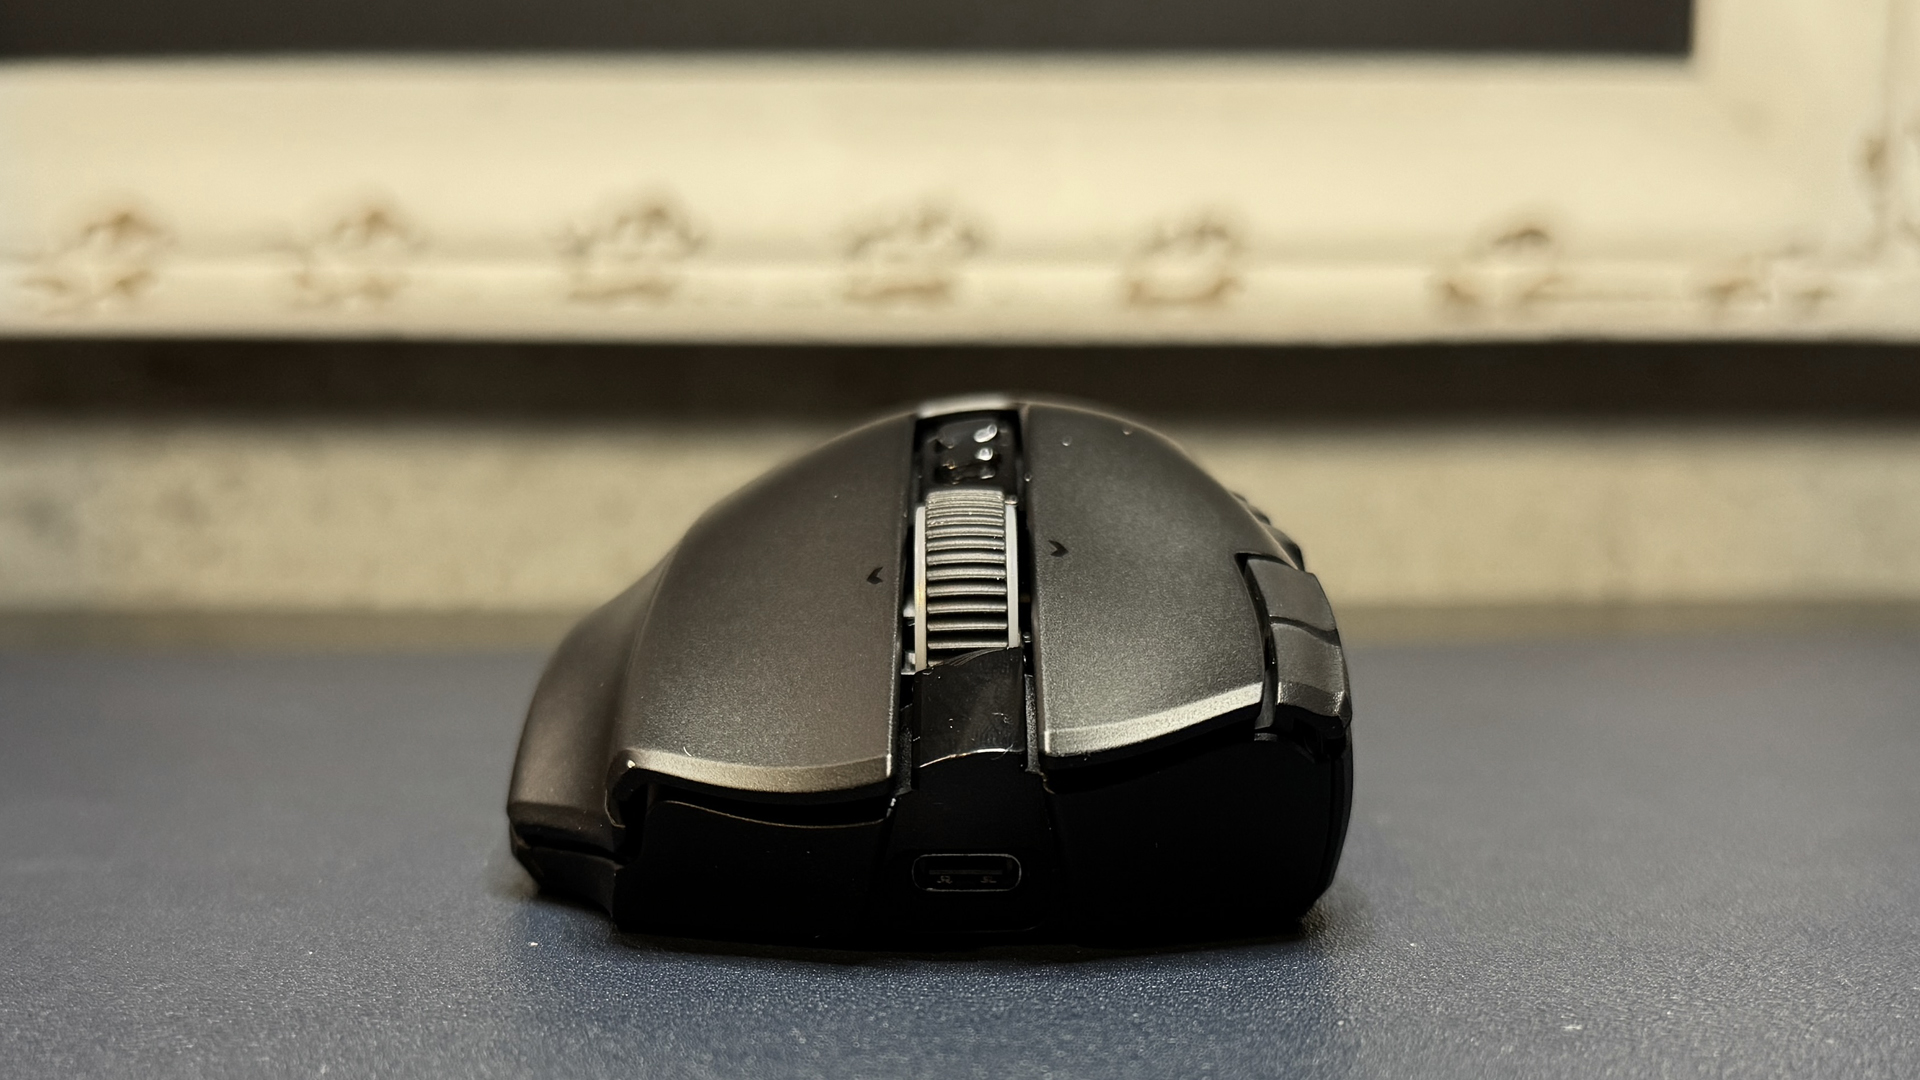
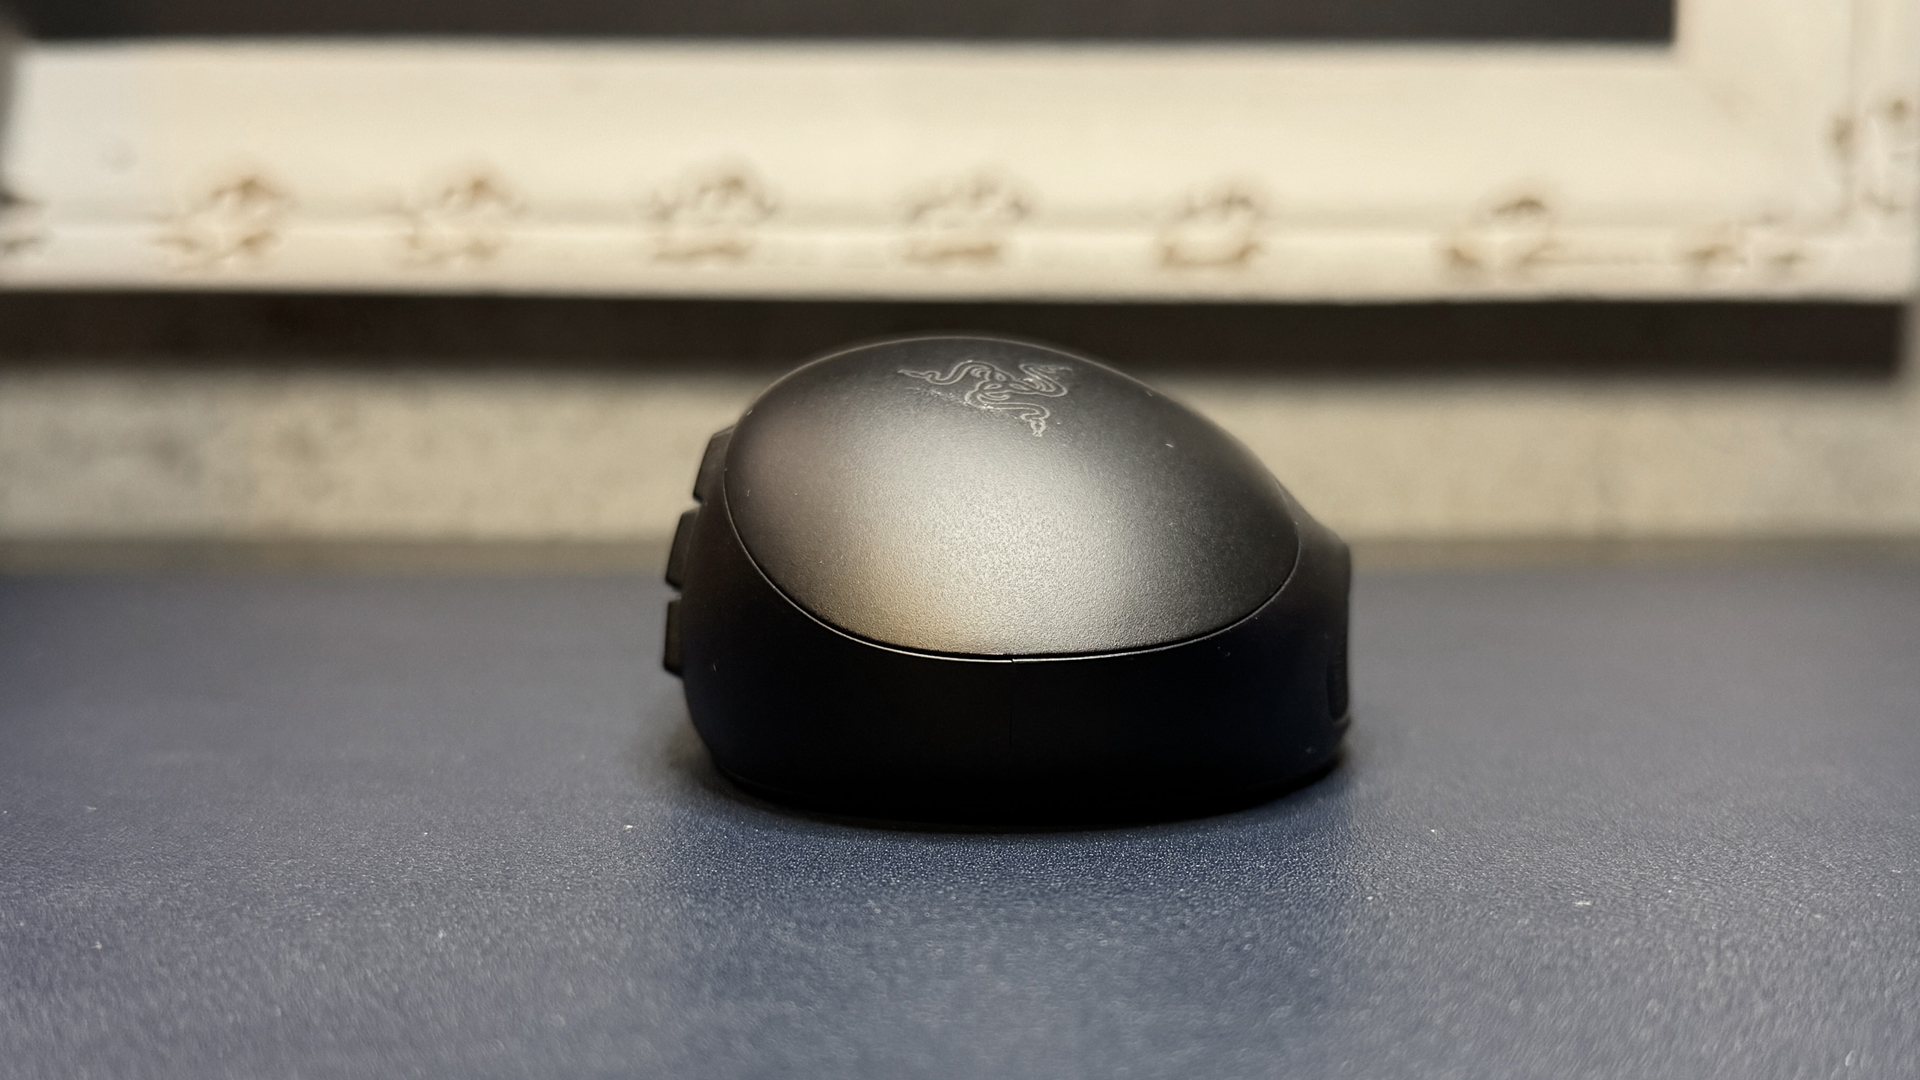
Razer Naga V3 Pro

(Image credit: Tom's Hardware)

The mouse also features Razer's Gen-4 optical mouse switches, which are rated for up to 100 million clicks and offer crisp, tactile feedback. The feedback does feel slightly crisper and more deliberate than the switches in the Naga V2 Pro, but it's not a very significant difference and you definitely can't tell unless you're using both side-by-side. Still, at 100 million clicks they should last as long as the mouse does.

These switches are only in the primary mouse buttons, not the side panel buttons — though the side panel buttons still felt fairly crisp and gave nice tactile feedback. The only buttons I didn't love on the Naga V3 Pro were the edge buttons on the left side of the left mouse button — they were a little too far to the left to be comfortable, and they had a very soft, mushy, lackluster click.

The Naga V3 Pro ships with a 1,000 Hz polling rate and a 1,000 Hz polling rate is the highest you're going to get unless you make a separate purchase. The mouse is capable of getting up to an 8,000 Hz polling rate, but you'll need to purchase either Razer's Mouse Dock Pro or its HyperPolling Wireless Dongle in order to achieve polling rates higher than 1,000 Hz.

Features and Software

The Naga V3 Pro is programmable via Razer Synapse 4, and you'll almost certainly want to do some customizing since the default settings have the side panel buttons programmed to numbers (except for the two-button side panel, which is MB4 / MB5). Luckily Synapse 4 didn't give me too much trouble with calibration or bringing my Naga V2 Pro settings over to the Naga V3 Pro.

Razer Naga V3 Pro
Tom's Hardware
Razer Naga V3 Pro
Tom's Hardware
Razer Naga V3 Pro
Tom's Hardware
Razer Naga V3 Pro
Tom's Hardware
Razer Naga V3 Pro
Tom's Hardware

Synapse 4 lets you remap buttons, customize the tilt wheel, and adjust settings such as DPI steps and polling rate. It features a built-in automatic mouse calibration tool that lets you match your current mouse's DPI (this worked flawlessly for me, but I was matching the Naga V3 Pro to the Naga V2 Pro), as well as some surface calibration settings you can play with. You can also customize the mouse's RGB lighting zones, of which there are three — tilt wheel, side panel, and palm rest logo.

Wireless Experience and Battery Life

The Naga V3 Pro has 3 forms of connectivity — 2.4GHz wireless, Bluetooth, and wired (via USB-C). Razer rates its battery life at up to 155 hours over its 2.4GHz wireless connection, which is pretty solid for a wireless mouse with so much going on — though this will of course vary depending on your polling rate and lighting settings. It's compatible with Razer's HyperFlux V2 Wireless charging mouse pad, however, which makes its battery life technically endless.

Bottom Line

The Naga V3 Pro is a solid update to the Naga V2 Pro, which I've been using for (literally) years. It looks and feels almost identical to the Naga V2 Pro, which I appreciate — the Naga V2 Pro is a very comfortable, if not particularly speed-optimized, gaming mouse — and it's got some nice upgrades in the sensor, switches, and buttons.

These days, the market is mostly dominated by stripped-down, ultra-lightweight eSports-oriented mice, and so it's nice to see that there's still a place for MMO-oriented mice with buttons in the double digits. The Naga V3 Pro isn't the only mouse with a 12-button side panel, but there isn't a ton of competition — we weren't wowed by SteelSeries' Aerox 9 Wireless, and Corsair's Scimitar Elite SE Wireless has an uncomfortably concave side panel (though it does move forward and backward, if that's something you're looking for). If you're looking for a mouse with a ton of buttons — not counting inputs that are duplicated via software — the Naga V3 Pro is now your best bet.

✇Tomshardware

Turtle Beach Command Series KB5 Review: A touchscreen and a numberpad in one keyboard?

We've seen a keyboard with a built-in macro pad, and a keyboard with a touchscreen and a separate, add-on numberpad, but what if you want a keyboard with a numberpad and a built-in macropad without having to spend an extra $100?

I guess that's why there's the Turtle Beach KB5 — a full-size, wired mechanical keyboard with low-profile switches, an 8,000 Hz polling rate, and a built-in 2.4-inch touchscreen that functions as a mini macro pad (with six buttons). It's got the built-in numberpad, unlike the Corsair Galleon 100 SD and the Turtle Beach KB7, as well as the touchscreen / macro pad, though its version is about half the size. Still, maybe that's all you really need. The KB5 is also significantly cheaper than both of those keyboards, which retail for $300 and $200, respectively.

The Turtle Beach KB5 is available now, in black, for $149.99.

Design and Construction of the KB5

The KB5 is a full-size low-profile wired mechanical gaming keyboard with extra macro keys, a volume roller, and a full-color 2.4-inch touchscreen in the upper-right corner (above the 10-key numberpad). It has a roomy layout and is slightly larger than the average full-size keyboard, measuring approximately 18.78 inches (477 mm) wide by 6.89 inches (175 mm) deep. It's 1.06 inches (27mm) thick at its thickest point, including the keycaps.

Turtle Beach KB5

(Image credit: Tom's Hardware)

The KB5 has a silver brushed-aluminum top plate with a coppery accent in the upper-left corner. It has a sturdy metal roller bar on the top toward the left side — though it's not really close enough to the left side to be in the corner, and I found it a bit awkward to have to reach over my function row to use the roller. I would have preferred it in a corner or even on the side, like the volume roller on the NZXT Function 2. It's a nicely-built roller, however — thick, metal, clickable, and with etched diagonal lines for grip.

Turtle Beach KB5
Tom's Hardware
Turtle Beach KB5
Tom's Hardware
Turtle Beach KB5
Tom's Hardware
Turtle Beach KB5
Tom's Hardware

The keyboard also has a row of five macro keys on the left side, as well as a 2.5-inch color touchscreen in the upper-right corner, above the 10-key numberpad. The touchscreen bumps up past the rest of the keyboard — the touchscreen side is just under 7 inches deep, while the other side is about 6.25 inches deep — so it doesn't cut into your keys. The KB5 has a full function row, a full 3x2 navigation cluster, arrow keys, and a full 10-key numberpad, along with the standard alphanumeric keys.

Turtle Beach KB5
Tom's Hardware
Turtle Beach KB5
Tom's Hardware

The KB5 features Turtle Beach's (formerly Roccat's) signature aesthetic — an open board with flat, shallow keycaps that leave the switch exposed, which makes for both easy cleaning and brighter, more visible RGB lighting. The keycaps are low-profile double-shot PBT, with shine-through legends; the board comes with four textured keycaps that you can use to replace the W/A/S/D keys (or, I guess, any four keys) for better recognition.

Turtle Beach KB5
Tom's Hardware
Turtle Beach KB5
Tom's Hardware
Turtle Beach KB5
Tom's Hardware

The bottom of the board is plastic, with six rubber anti-slip pads and two sets of plastic flip-out feet for angling the keyboard toward you. It's a fairly lightweight keyboard, weighing just under 2 pounds (1.96lbs / 887g), not including the wrist rest (which weighs an additional 7.5 ounces / 213g). This is about the same as the Logitech G515 Lightspeed, though the G515 is a TKL while the KB5 is full-size (plus a touchscreen and macro keys).

Turtle Beach KB5

(Image credit: Tom's Hardware)

In the box, the KB5 comes with a plastic wrist rest, a 5.9-foot (1.8m) USB-C to USB-A cable, four textured keycaps for replacing the W / A / S / D keys, and a keycap puller.

Specs

Size

Full-size

Number of keys

109

Switches

Titan Low-Profile (linear)

Backlighting

Yes

Onboard Storage

Yes

Dedicated Media Keys

Yes (volume roller, touchscreen)

Game Mode

Yes

Additional Ports

0

Connectivity

Wired (USB-C)

Cable

5.9ft / 1.8m USB-C to USB-A

Keycaps

ABS

Construction

Plastic chassis
Aluminum top plate

Software

Swarm II

Dimensions (LxWxH)

18.78 x 6.89 x 1.06 inches / 477 x 175 x 27 mm

Weight

1.94lbs / 880g

MSRP

$149.99

Release Date

May 2026

Typing and Gaming Experience on the KB5

The KB5 comes with Turtle Beach's Titan low-profile linear switches, which are rated for up to 50 million keypresses and have an actuation point of 1.2mm and a force of 42gf. These are traditional low-profile mechanical switches — not magnetic Hall Effect switches like you'll find on the KB7 (and KP7). They're linear, which means a smooth keypress with no audible or tactile bump, and they're pre-lubed so they're pretty smooth.

While I'm not a huge fan of linear switches, the KB5's are quick and stable, and you get a decent little 'thunk' when you bottom out on the keyboard's aluminum top plate. The typing experience is very similar to that of the KB7, which is to say that it's very pleasant for a mainstream gaming keyboard with low-profile linear switches.

The keyboard has flat, shallow keycaps made of double-shot PBT. They have a slightly matte texture and should resist shine better than ABS keycaps, but I'm not fully convinced that'll be the case (maybe they just feel cheaper because they're thinner, overall, than regular keycaps, though). The keycaps are wide, with slightly curved tops, and the keyboard is roomy — I didn't have any problem getting used to the layout for the most part, though the extra row of macro keys on the left did throw me off a few times (this happens whenever there's an extra row of macro keys).

Turtle Beach KB5
Tom's Hardware
Turtle Beach KB5
Tom's Hardware

The touchscreen is located above the numberpad, and is fairly responsive. It responds to both taps and swipes (you can swipe through "pages" of controls / buttons), and I found the 2 x 3 layout a little more intuitive to navigate than the KB7's much larger layout — though still not as intuitive as it would be with tactile buttons, like the Corsair Galleon 100 SD has. In addition to the six customizable "buttons" on the touchscreen, there's also some other info displayed at the top — your current profile (you can switch between profiles by tapping this) and some keyboard info (e.g. numlock, caps lock, scroll lock).

The KB5 is also a solid keyboard for gaming, thanks to its quick, responsive linear switches and 8K polling rate. While it doesn't have magnetic switches like its pricier sibling, it does implement Turtle Beach's ReacTap, which is a software solution similar to simultaneous opposing cardinal directions (SOCD).

Features and Software of the KB5

Like all Turtle Beach products, the KB5 ships with firmware from 2001 (or at least it feels like it) and requires at least 16 mandatory updates before it can be used with the brand's Swarm II software. I'm exaggerating, of course — but not much.

Turtle Beach KB5
Tom's Hardware
Turtle Beach KB5
Tom's Hardware

Once I managed to get the KB5 up to date on firmware (and Swarm II up to date on software), I was able to customize the touchscreen, keyboard, and lighting. Swarm II is kind of mandatory for this keyboard, as you can't really customize the touchscreen without it — and the touchscreen is a large part of the selling point here. There's not a ton you can do with the touchscreen that you can't do with regular keys, at the moment. There are options for keyboard / Windows / multimedia functions, opening apps and websites, and assigning macros. And there are a couple of "dynamic" options such as a timer setting and performance monitoring, but it's not a robust ecosystem like that of Elgato or Loupedeck. Still, it's probably enough to get you started, and the Swarm II app includes a handful of templates in case you're out of ideas.

Turtle Beach KB5
Tom's Hardware
Turtle Beach KB5
Tom's Hardware
Turtle Beach KB5
Tom's Hardware
Turtle Beach KB5
Tom's Hardware

Keymapping is pretty straightforward, and you can map keys to do most of what you can map the touchscreen to do (save for visual things, such as performance monitoring, obviously). You can record and save macros in the app and configure ReacTap. You can also customize the lighting from a handful of presets (or per-key, if you so desire). The keyboard can save up to five onboard profiles, which you can switch between by tapping the profile number in the upper-left corner of the touchscreen.

The Bottom Line

The KB5 is actually a pretty nice compromise, and I like it better than the pricier (and fancier) Turtle Beach KB7. I love having a built-in numberpad that doesn't cost an extra $100 to snap onto the side of the board, and the smaller touchscreen is actually more manageable to use quickly and without (really) looking. The KB5 may not have magnetic Hall Effect switches, but its low-profile linear switches feel and sound pretty good for a mainstream gaming keyboard. And at $150, it's basically half the price of the combined KB7 keyboard and KP7 numberpad.

Of course, if you're really dedicated to making your keyboard a streaming deck substitute, the Corsair Galleon 100 SD is the only real option. Not only does it have physical buttons, it also has knobs — and it's supported by Elgato's Stream Deck software, which is still the real differentiating factor for macropad and touchscreen devices these days.

❌